Purpose Of Ac Capacitor

If your air conditioner isn't running like it used to, or if it's humming but not starting, the culprit might be a failing AC capacitor. This small, but crucial component is often overlooked, but understanding its function can save you time and money on HVAC repairs. This guide will walk you through the purpose of an AC capacitor, how to identify potential problems, and when it's safe to attempt a replacement yourself.
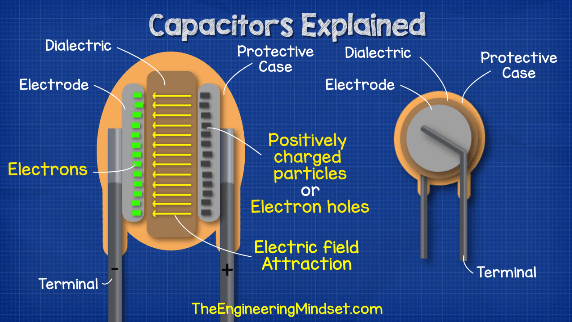
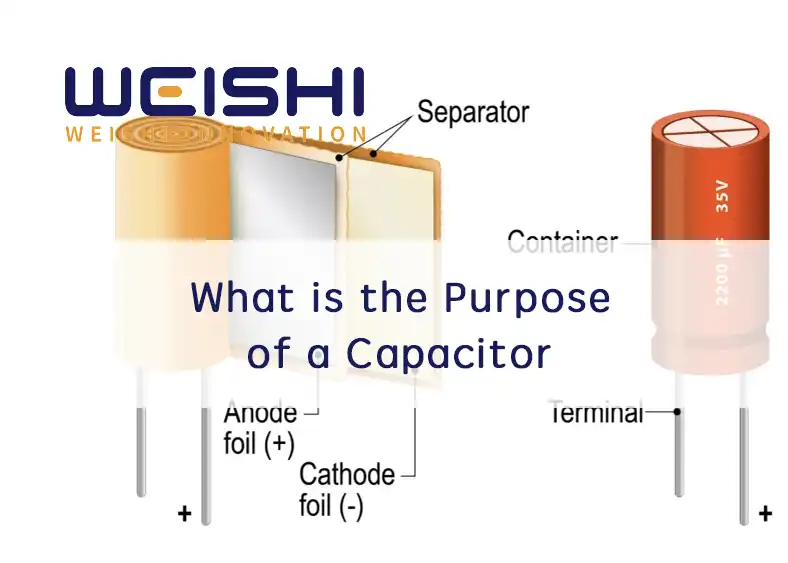
What is an AC Capacitor and What Does it Do?
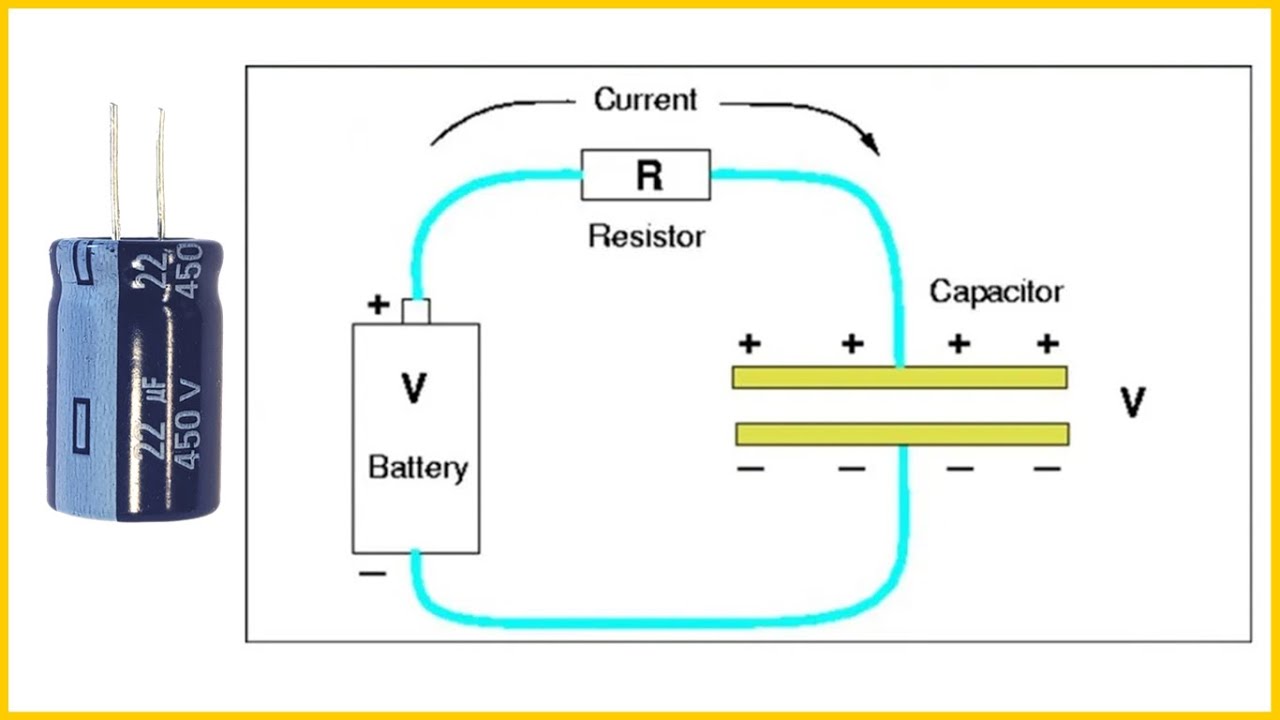
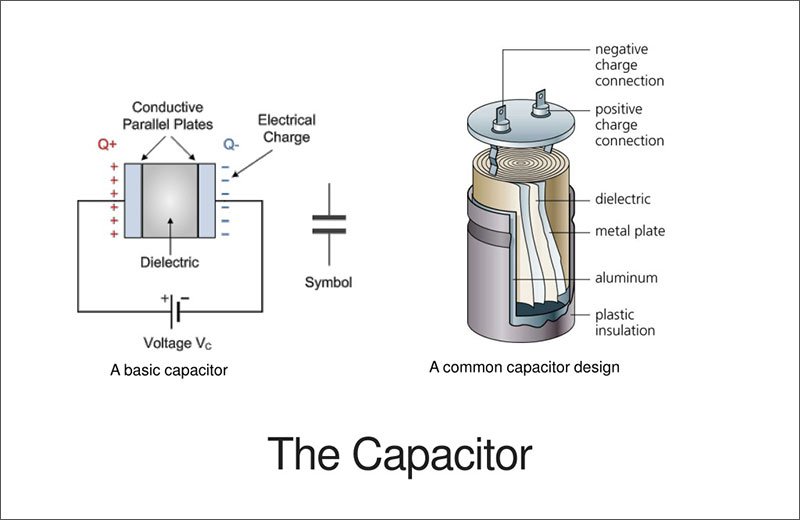
An AC capacitor is essentially a short-term energy storage device. Think of it like a small battery that gives your AC's motors the jolt they need to start. It stores an electrical charge and then releases it to provide the extra push needed to get the compressor and fan motors running.
Without a functioning capacitor, these motors may struggle to start, leading to:
- Humming noises: The motor is trying to start but doesn't have enough power.
- AC not turning on: The motor can't start at all.
- Inefficient cooling: If the compressor motor struggles to start, the AC system won't cool effectively, leading to higher energy bills.
- Motor burnout: Repeated attempts to start with a weak capacitor can damage the motor itself, leading to a much more expensive repair.
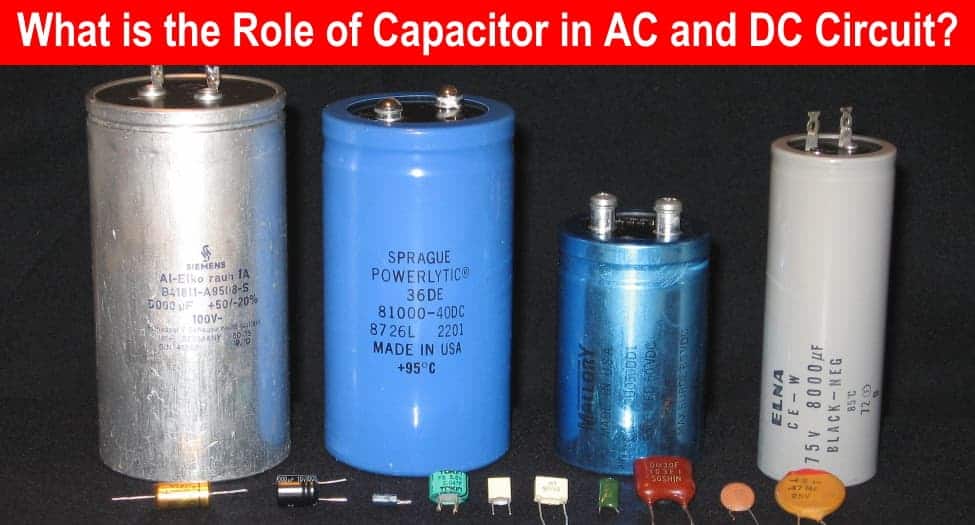
There are two main types of capacitors in most AC units:
- Start Capacitor: This type provides a high-energy burst to start the compressor motor. It's only used briefly during startup and then disengaged. Start capacitors tend to be larger and have a shorter lifespan.
- Run Capacitor: This type provides continuous energy to keep the compressor and fan motors running smoothly. It's smaller than the start capacitor and designed for continuous operation.
Many modern AC units use a single dual run capacitor that handles both the compressor and fan motor. This simplifies the system and reduces the number of components.
How to Identify a Faulty AC Capacitor
Before attempting any repairs, always disconnect the power to your AC unit at the breaker box! Safety is paramount when working with electricity.
Here's how to diagnose a potentially bad capacitor:
Visual Inspection
A visual inspection can often reveal obvious signs of capacitor failure:
- Bulging or Swelling: A capacitor with a bulging top or sides is almost certainly bad. This is a clear indication of internal damage.
- Leaking: Look for any signs of oil leaking from the capacitor.
- Rust or Corrosion: Check the terminals and the body of the capacitor for rust or corrosion, which can indicate damage or degradation.
- Physical Damage: Inspect for any cracks or other physical damage to the capacitor casing.
Testing with a Multimeter
If the visual inspection doesn't reveal any obvious problems, you can test the capacitor with a multimeter that has a capacitance function. This requires some electrical knowledge and careful attention to safety.
Tools Needed:
- Multimeter with capacitance function
- Insulated screwdriver
- Safety glasses
- Work gloves
Steps:
- Disconnect Power: Turn off the power to the AC unit at the breaker. Double-check that the power is off!
- Discharge the Capacitor: Use an insulated screwdriver to carefully short across the capacitor terminals. This discharges any stored energy. Be careful, as there may be a spark.
- Disconnect Wires: Carefully disconnect the wires from the capacitor terminals. Label each wire so you can reconnect them correctly later.
- Set Multimeter: Set your multimeter to the capacitance setting (usually marked with "µF" or "nF").
- Test the Capacitor: Connect the multimeter leads to the capacitor terminals.
- Compare Readings: Compare the reading on the multimeter to the rated capacitance printed on the capacitor label. A capacitor that reads significantly lower than its rated capacitance (e.g., 20% or more) is likely failing and needs replacement.
Important Note: Capacitors can still hold a charge even after the power is disconnected. Always discharge the capacitor before handling it.
Replacing an AC Capacitor: A DIY Guide (with Warnings!)
Replacing an AC capacitor is a relatively straightforward repair, but only if you are comfortable working with electricity and understand the risks involved. If you are unsure about any step, it's best to call a qualified HVAC technician. Incorrect wiring can damage your AC unit or create a safety hazard.
Before you start:
- Take Pictures: Before disconnecting any wires, take clear pictures of the capacitor and its wiring connections. This will serve as a valuable reference when you're reconnecting the new capacitor.
- Record the Information: Write down the capacitor's specifications, including the microfarad (µF) rating and voltage. You'll need this information to purchase the correct replacement.
Parts Needed:
- Replacement capacitor (with the same µF and voltage rating as the original)
- Wire strippers
- Wire connectors (if needed)
Steps:
- Disconnect Power: Turn off the power to the AC unit at the breaker. Double-check that the power is off!
- Discharge the Capacitor: Use an insulated screwdriver to carefully short across the capacitor terminals.
- Disconnect Wires: Carefully disconnect the wires from the old capacitor, one at a time, and label them if necessary.
- Remove Old Capacitor: Loosen any screws or clips holding the capacitor in place and remove it.
- Install New Capacitor: Place the new capacitor in the same location as the old one and secure it.
- Reconnect Wires: Carefully reconnect the wires to the new capacitor terminals, matching the wiring configuration from the pictures you took earlier. Double-check your wiring!
- Restore Power: Turn the power back on at the breaker.
- Test the AC: Turn on your AC unit and observe its performance. It should start smoothly and cool efficiently.
Common Mistakes to Avoid:
- Using the Wrong Capacitor: The replacement capacitor must have the same µF and voltage rating as the original. Using the wrong capacitor can damage your AC unit.
- Incorrect Wiring: Incorrect wiring can damage the compressor or fan motor. Double-check your wiring against the pictures you took.
- Forgetting to Discharge the Capacitor: Failure to discharge the capacitor can result in a dangerous electric shock.
- Not Turning off the Power: Never work on electrical components with the power on.
When to Call a Professional
While replacing an AC capacitor can be a DIY project for some, there are situations where it's best to call a qualified HVAC technician:
- You're not comfortable working with electricity.
- You're unsure about any step of the process.
- You suspect other issues with your AC unit. If the capacitor replacement doesn't solve the problem, there may be other underlying issues, such as a faulty compressor or refrigerant leak.
- Your AC unit is still under warranty. DIY repairs may void the warranty.
- The capacitor is difficult to access or located in a hazardous area.
- You find signs of burnt wiring or other electrical damage.
A professional HVAC technician can diagnose the problem accurately, ensure the repair is done safely and correctly, and prevent further damage to your AC system.
Cost of AC Capacitor Replacement
The cost of replacing an AC capacitor can vary depending on several factors:
- Type of Capacitor: Start capacitors are generally more expensive than run capacitors. Dual run capacitors are also more expensive.
- Brand and Quality: Higher-quality capacitors may cost more but offer better performance and longer lifespan.
- Labor Costs: If you hire a professional, labor costs will vary depending on your location and the technician's hourly rate.
- Service Call Fee: Many HVAC companies charge a service call fee to diagnose the problem.
DIY Cost: If you replace the capacitor yourself, you'll only need to pay for the part. A capacitor typically costs between $20 and $100.
Professional Cost: If you hire a professional, the total cost can range from $150 to $400, including the service call fee, the cost of the capacitor, and labor costs.
Saving Money: Getting multiple quotes from different HVAC companies can help you find the best price. Also, consider purchasing a high-quality capacitor that will last longer and reduce the need for future replacements.
Preventative Maintenance
Regular maintenance can help extend the lifespan of your AC capacitor and prevent costly repairs. Here are some tips:
- Clean the AC Unit: Regularly clean the outdoor unit to remove debris that can restrict airflow and cause the system to work harder.
- Change the Air Filter: A dirty air filter restricts airflow and can put stress on the AC system, including the capacitor. Change your air filter every 1-3 months, depending on usage.
- Schedule Annual Maintenance: Have your AC unit professionally inspected and serviced annually. A technician can identify potential problems early and prevent them from becoming major issues.
By understanding the purpose of your AC capacitor and taking proactive steps to maintain your system, you can keep your AC running smoothly and efficiently for years to come.