Radiant Heat Manifold With Zone Valves

Imagine stepping onto your bathroom floor on a chilly morning, expecting the comforting warmth of radiant heat, only to be greeted by a cold, unforgiving tile. A malfunctioning radiant heat manifold with zone valves can be frustrating, but don't despair! Many issues can be diagnosed and even resolved with a little knowledge and a systematic approach. This guide will walk you through troubleshooting your system, empowering you to tackle basic problems safely.
Understanding Your Radiant Heat Manifold
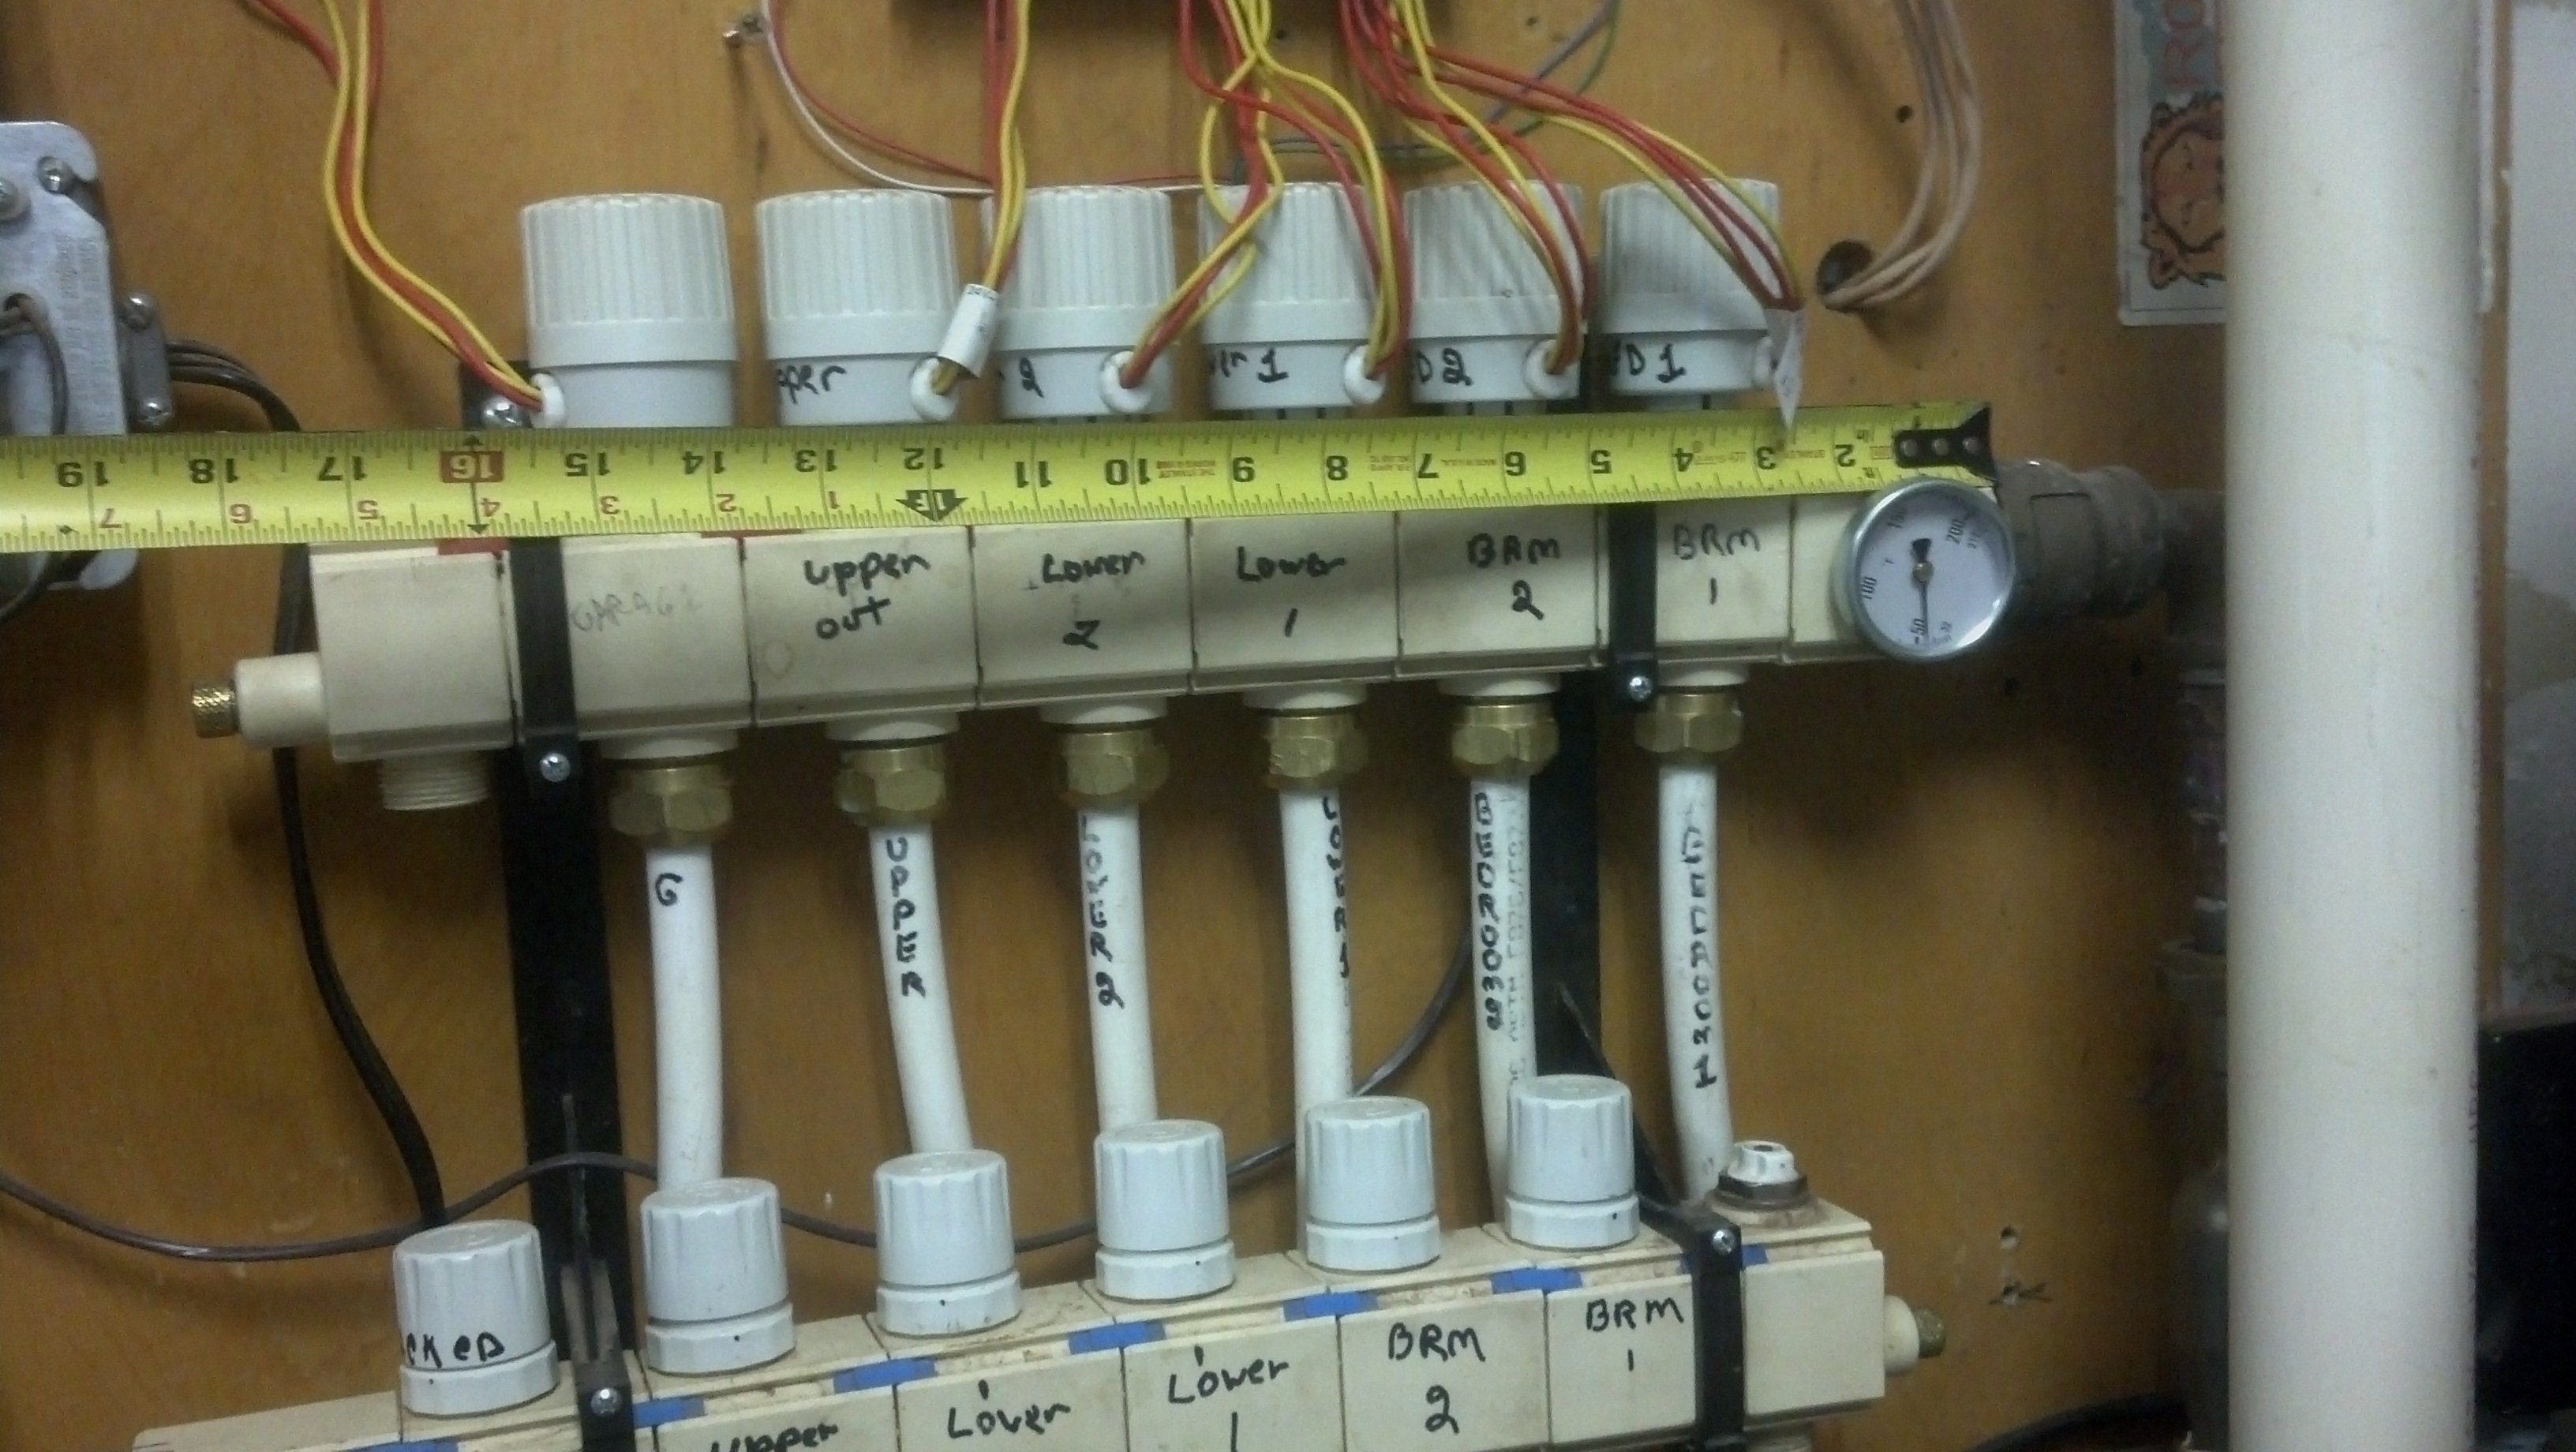
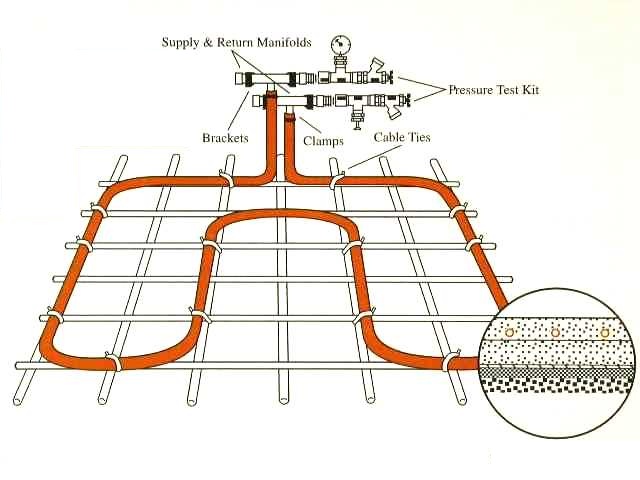
Before diving into troubleshooting, it's crucial to understand the basics of your radiant heat system. The radiant heat manifold is the central hub, distributing heated water to different zones in your home (e.g., living room, bedroom, bathroom). Each zone is controlled by a zone valve, which opens or closes based on the thermostat setting for that zone. When a zone calls for heat, the thermostat signals the zone valve to open, allowing hot water to flow through the corresponding loops of tubing embedded in your floor (or walls/ceiling). Conversely, when the desired temperature is reached, the valve closes, stopping the flow of hot water.
Common Problems
Here are some common symptoms indicating a problem with your radiant heat manifold or zone valves:
- One or more zones not heating: This is perhaps the most frequent complaint.
- Uneven heating: Some areas of a zone might be warm, while others remain cold.
- No heat at all: The entire radiant heating system is inactive.
- Loud noises: Banging, gurgling, or whistling sounds coming from the manifold.
- Leaking: Water leaks around the manifold or zone valves.
Safety First!
Before you start any troubleshooting, prioritize your safety:
- Turn off the power: Locate the circuit breaker for your radiant heating system and switch it off. This is essential when working with electrical components.
- Let the system cool down: Give the system time to cool down before touching any hot pipes or components.
- Wear appropriate safety gear: Use gloves to protect your hands and safety glasses to protect your eyes.
- Know your limits: If you're uncomfortable with any step or if the problem seems complex, do not hesitate to call a qualified HVAC technician. Working with electricity, gas, and pressurized water can be dangerous if not done correctly.
Troubleshooting Steps
Follow these steps in a logical order to diagnose the problem. Start with the simplest solutions and progress to more complex checks.
1. Check the Thermostat
The thermostat is the brain of the system. A faulty thermostat can prevent the zone valves from opening, even if the rest of the system is working correctly.
- Verify the settings: Make sure the thermostat is set to "heat" mode and the desired temperature is higher than the current room temperature.
- Check the batteries: If your thermostat is battery-powered, replace the batteries. Low batteries can cause erratic behavior.
- Test the thermostat: Briefly increase the thermostat setting significantly (e.g., by 5-10 degrees). Listen for a click from the zone valve. This click indicates that the thermostat is sending a signal. If you don't hear a click, the thermostat might be faulty and need to be replaced. Consider calling an HVAC professional for thermostat replacement, especially if it's a hard-wired unit.
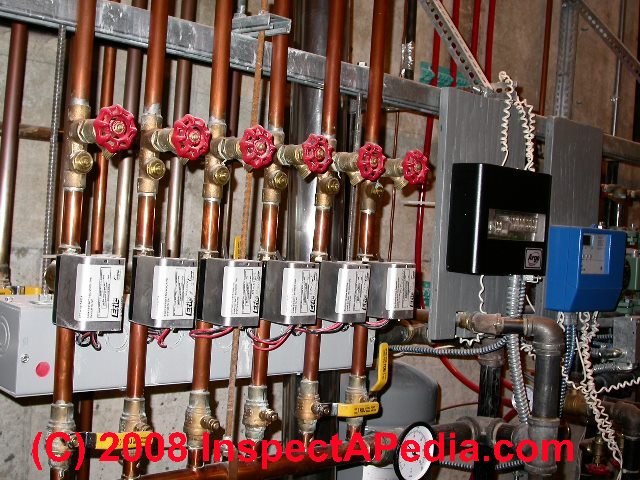
2. Inspect the Zone Valves
The zone valves control the flow of hot water to each zone. If a valve is stuck closed, the corresponding zone will not receive heat.
- Visual inspection: Check each zone valve for any signs of damage, such as cracks, leaks, or corrosion.
- Manual operation (if applicable): Some zone valves have a manual override lever or switch. If present, try manually opening the valve. If the zone heats up when the valve is manually opened, the valve actuator (the motor that opens and closes the valve) is likely faulty. Replacing a zone valve actuator is often a DIY-friendly task, but always disconnect power first. Consult the valve's documentation for specific instructions.
- Check for power: Using a multimeter (only if you are comfortable and familiar with electrical testing), check if the zone valve is receiving power when the thermostat calls for heat. If you are not comfortable using a multimeter, skip this step and call a professional. If the valve is not receiving power, trace the wiring back to the thermostat or control panel to identify any breaks or loose connections.
3. Examine the Manifold
The manifold itself can sometimes be the source of the problem.
- Check the pressure: Ensure the system pressure is within the recommended range (usually indicated on the pressure gauge). Low pressure can prevent proper circulation. If the pressure is low, you may need to add water to the system using the fill valve. Consult your system's manual or a professional for instructions on how to properly fill the system.
- Bleed the air: Air trapped in the system can impede circulation and cause uneven heating. Most manifolds have air vents. Open the air vents to release any trapped air. Be prepared for water to come out, so have a bucket and towels ready. Close the vents once only water comes out.
- Look for leaks: Carefully inspect the manifold for any signs of leaks. Even small leaks can reduce system pressure and efficiency. Tighten any loose fittings. For persistent leaks, it's best to call a plumber or HVAC technician.
- Check the circulator pump: The circulator pump is responsible for circulating the hot water throughout the system. Make sure the pump is running. You should be able to feel a slight vibration when it's operating. If the pump is not running, check its power supply and consider having it professionally inspected. Replacing a circulator pump can be a DIY project, but requires some plumbing and electrical knowledge. If you are not comfortable, call a professional.
4. Verify the Boiler (or Heat Source)
The boiler (or other heat source, such as a heat pump) is responsible for heating the water. If the boiler is not functioning correctly, the entire radiant heating system will be affected.
- Check the boiler's power supply: Ensure the boiler is receiving power.
- Verify the boiler's settings: Make sure the boiler is set to the correct temperature.
- Look for error codes: Many modern boilers have error codes that can help diagnose problems. Consult your boiler's manual for a list of error codes and their meanings.
- Check the gas supply (if applicable): If you have a gas boiler, make sure the gas supply is turned on.
Important: Working with gas appliances can be extremely dangerous. If you suspect a problem with your gas boiler, immediately contact a qualified HVAC technician or your gas company.
5. Inspect the Tubing
While less common, problems within the radiant tubing itself can occur.
- Look for cold spots: Use an infrared thermometer to scan the floor (or walls/ceiling) for cold spots, which might indicate a blockage in the tubing.
- Check for kinks: Inspect the visible portions of the tubing for any kinks or bends that could be restricting water flow.
- Professional inspection: If you suspect a blockage or leak within the tubing, it's best to call a professional. Locating and repairing these issues can be challenging and often requires specialized equipment.
DIY Fixes vs. Calling a Professional
Here's a summary of tasks you can typically handle yourself:
- Replacing thermostat batteries.
- Checking and adjusting thermostat settings.
- Manually operating zone valves (if applicable).
- Replacing a faulty zone valve actuator.
- Bleeding air from the system.
- Checking and adjusting system pressure (with proper knowledge and precautions).
Here are situations that definitely require a professional:
- Working with gas appliances.
- Electrical repairs beyond simple fuse replacement (and even then, proceed with caution).
- Repairing leaks in the manifold or tubing.
- Diagnosing and repairing complex boiler issues.
- Replacing a circulator pump (unless you have significant plumbing and electrical experience).
- Dealing with refrigerant in heat pump systems.
- Any task you feel uncomfortable or unsure about.
Preventive Maintenance
To keep your radiant heat system running smoothly, consider these preventive measures:
- Annual inspection: Schedule an annual inspection with a qualified HVAC technician to catch potential problems early.
- Regular bleeding: Periodically bleed air from the system to maintain optimal circulation.
- Monitor system pressure: Keep an eye on the system pressure and add water as needed.
- Clean the area around the manifold: Keep the area around the manifold clean and free of obstructions.
By following these troubleshooting steps and preventive maintenance tips, you can keep your radiant heat system working efficiently and enjoy warm, comfortable floors (and more!) for years to come. Remember, safety is paramount. When in doubt, always consult a qualified professional.