Replacing Pressure Release Valve On Hot Water Heater

One of the most common frustrations for homeowners is discovering a leaky hot water heater. It's not only annoying but can also lead to water damage and higher utility bills. While a major leak usually signals a serious problem needing immediate professional attention, a small, persistent leak, especially from the pressure relief valve (PRV), might be something you can troubleshoot and potentially fix yourself. This article will guide you through diagnosing a leaky PRV and safely replacing it, while also helping you recognize when it's time to call in a professional.
Diagnosing a Leaky Pressure Relief Valve
Before you jump to replacing the PRV, it's crucial to determine if that's actually the source of the problem and what's causing the leak. Here's a step-by-step diagnostic process:
Step 1: Observation - No Tools Required
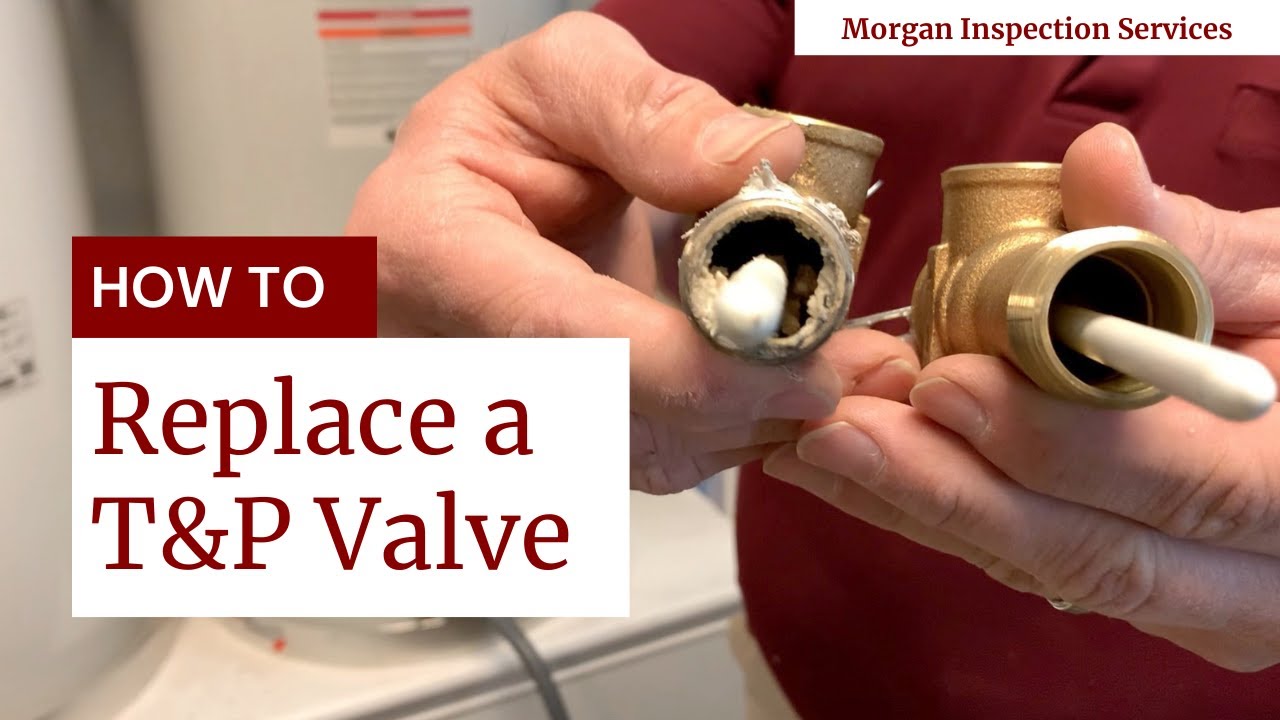
Begin by simply observing the hot water heater. Look closely at the PRV, typically a brass or copper valve located near the top of the tank, often with a discharge pipe running down the side.
- Is the leak constant, intermittent, or only happening when the heater is running? A constant leak suggests a problem with the valve itself or excessive pressure. An intermittent leak might indicate overheating.
- Is the leak a slow drip or a steady stream? A small drip might be acceptable in some very rare cases due to thermal expansion (more on that later), but any continuous flow is a red flag.
- Is there corrosion around the valve? Corrosion can weaken the valve and contribute to leaks.
- Check the discharge pipe. Is the water coming directly from the valve, or is it originating elsewhere and running down the pipe?
Carefully note these observations. They will be helpful in pinpointing the problem and deciding on the next course of action.
Step 2: Check the Temperature and Pressure Gauge - No Tools Required
Most hot water heaters have a temperature and pressure (T&P) gauge located near the PRV. The gauge tells you the internal temperature and pressure of the tank.
- What is the temperature reading? The normal range is typically between 120°F and 140°F (49°C and 60°C). If the temperature is significantly higher, the thermostat may be malfunctioning, causing the water to overheat and triggering the PRV.
- What is the pressure reading? The normal range is usually below 75 PSI (pounds per square inch). If the pressure is consistently higher than this, it could be due to several factors, which we'll address later.
If the temperature or pressure is abnormally high, do not attempt to replace the PRV until you address the underlying cause. Continuing to operate the heater with excessive temperature or pressure is dangerous.
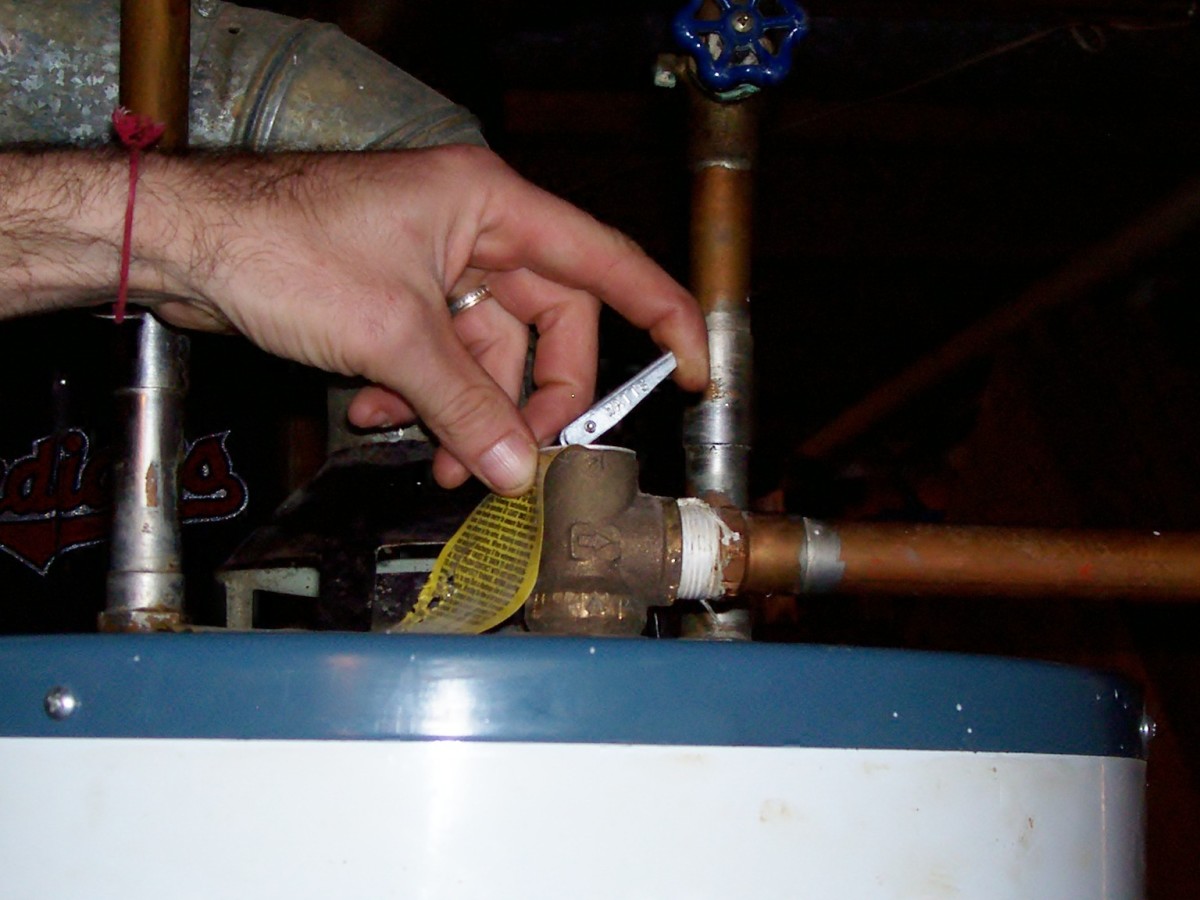
Step 3: Test the Pressure Relief Valve - Requires Basic Equipment (Gloves, Bucket)
This step is important to determine if the valve is simply stuck or faulty. Wear gloves to protect your hands from hot water.
- Place a bucket under the discharge pipe to catch any water.
- Carefully lift the test lever on the PRV. This will manually release some water from the tank. Be prepared for hot water!
- Observe the valve's behavior.
- If the valve releases a good amount of water and then seals tightly when you release the lever, it might just have been stuck. Monitor it for a few days to see if the leaking stops.
- If the valve continues to leak after releasing the lever, it's likely faulty and needs to be replaced.
- If no water comes out when you lift the lever, the valve could be completely blocked, which is also a dangerous situation.
Important Safety Note: If the valve doesn't release water when you lift the lever, and the pressure gauge indicates high pressure, immediately turn off the power and water supply to the heater and call a professional. Do not attempt to force the valve open.
Step 4: Check for Thermal Expansion - Requires Basic Understanding
Sometimes, a leaky PRV isn't caused by a faulty valve or excessive pressure, but by thermal expansion. When water heats up, it expands. In a closed system (where the water supply has a check valve or pressure reducing valve), the expanding water has nowhere to go, causing the pressure to rise. This can trigger the PRV to release small amounts of water, especially after the heater has been running for a while.
To determine if thermal expansion is the issue:
- Check for a Pressure Reducing Valve (PRV) or check valve on your main water supply line. These devices prevent backflow of water into the municipal supply.
- If you have either of these, you likely need an expansion tank installed on your cold water line, near the water heater. An expansion tank provides a space for the expanding water to go, preventing pressure build-up.
Installing an expansion tank is generally a job for a plumber.
Replacing the Pressure Relief Valve - DIY Action
If you've determined that the PRV is faulty and the temperature and pressure readings are within the normal range, you can proceed with replacing it. Safety is paramount. If you are not comfortable with any of these steps, call a qualified plumber.
Tools and Materials Needed:
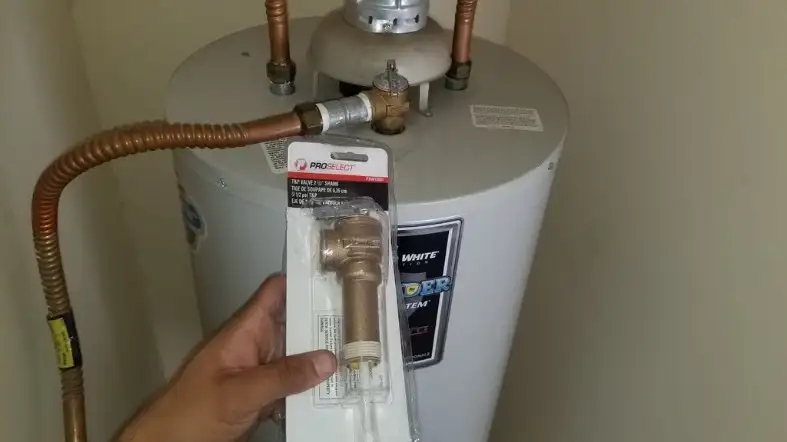
- New Pressure Relief Valve: Purchase a replacement PRV with the same pressure and temperature rating as the old one. This is crucial! The rating is typically stamped on the valve itself.
- Pipe Wrench or Adjustable Wrench: For removing the old valve and installing the new one.
- Pipe Thread Sealant (Teflon Tape or Pipe Dope): To create a watertight seal on the threads.
- Bucket: To catch any remaining water in the tank.
- Screwdriver: For removing any retaining clips.
- Gloves: To protect your hands.
- Safety Glasses: To protect your eyes.
- Rag or Towel: To wipe up spills.
Step-by-Step Replacement:
- Turn off the power to the water heater. For electric heaters, turn off the breaker in your electrical panel. For gas heaters, turn the gas control valve to the "off" position.
- Turn off the cold water supply to the water heater. This is usually a valve located on the cold water inlet pipe, near the top of the tank.
- Drain some water from the tank. Attach a hose to the drain valve at the bottom of the tank and run the hose to a drain or outside. Drain enough water so that the water level is below the PRV opening. This will minimize the amount of water that comes out when you remove the old valve. Be careful, the water may still be hot!
- Remove the old PRV.
- Carefully unscrew the old PRV using a pipe wrench or adjustable wrench. Turn it counterclockwise to loosen it.
- Be prepared for some water to spill out. Have a bucket and rags handy.
- If the old valve is stuck, try using penetrating oil to loosen the threads. Let it sit for a few minutes before trying again. If it's still stubborn, don't force it – call a plumber. You don't want to damage the tank.
- Prepare the new PRV.
- Clean the threads on the new PRV with a wire brush.
- Apply pipe thread sealant (Teflon tape or pipe dope) to the threads. Wrap Teflon tape clockwise around the threads, overlapping each layer, or apply pipe dope evenly. This ensures a watertight seal.
- Install the new PRV.
- Carefully screw the new PRV into the opening by hand, turning it clockwise.
- Tighten the valve with a pipe wrench or adjustable wrench. Do not overtighten! You want it snug, but not so tight that you damage the threads. Overtightening can also damage the tank itself.
- Make sure the discharge pipe is properly connected to the new PRV, directing water safely away from the heater.
- Turn on the cold water supply to the water heater.
- Check for leaks.
- Carefully inspect the connection between the PRV and the tank for any leaks. If you see any leaks, tighten the valve slightly. If it still leaks, remove the valve, reapply the pipe thread sealant, and reinstall it.
- Turn the power back on to the water heater. For electric heaters, turn the breaker back on. For gas heaters, turn the gas control valve back to the "on" position and relight the pilot light if necessary (follow the manufacturer's instructions).
- Monitor the PRV for a few days. Make sure it's not leaking and that the temperature and pressure readings on the gauge are within the normal range.
When to Call a Professional
While replacing a PRV is a manageable DIY task for some, there are situations where it's best to call a qualified plumber:
- You're not comfortable working with plumbing or electricity/gas. Safety should always be your top priority.
- The old PRV is severely corroded or stuck. Forcing it could damage the tank.
- You suspect a more serious underlying problem, such as a faulty thermostat, excessive water pressure, or a damaged water heater tank. These issues require professional diagnosis and repair.
- You are unsure about the correct replacement PRV to purchase. Using the wrong valve can be dangerous.
- You are not able to properly seal the new PRV and it continues to leak after multiple attempts. A professional has the tools and expertise to ensure a leak-free connection.
- If your water heater is still under warranty. DIY repairs might void the warranty.
Remember, a small water leak can quickly turn into a major problem. Addressing it promptly, whether through DIY or professional help, will save you time, money, and potential headaches in the long run. Don't hesitate to err on the side of caution and contact a qualified plumber if you're unsure about any aspect of the repair.