Replacing The Thermocouple On A Hot Water Heater
:max_bytes(150000):strip_icc()/replacing-water-heater-thermocouple-flame-sensor-1824918-05-6d1e35fb0ecc46c3a10200f4f166a9c6.jpg)
A properly functioning hot water heater is a cornerstone of modern comfort. When hot water dwindles or disappears, the issue often stems from a seemingly small component: the thermocouple. This article provides a comprehensive guide to replacing a thermocouple, catering to homeowners, HVAC technicians, and facility managers alike.
Understanding the Thermocouple
At its core, a thermocouple is a safety device within a gas-fired hot water heater. It's a simple yet crucial sensor designed to ensure gas flows only when a pilot light is actively burning. Think of it as a vigilant gatekeeper. When the pilot light ignites, the thermocouple generates a tiny electrical current. This current, measured in millivolts, signals the gas valve to remain open, allowing gas to flow to the main burner and heat the water. If the pilot light extinguishes for any reason – a draft, a gas interruption – the thermocouple cools, the current ceases, and the gas valve shuts off, preventing a potentially dangerous gas leak. This fail-safe mechanism makes the thermocouple a vital component for safety.
How a Thermocouple Works: A Deeper Dive
The thermocouple works based on the Seebeck effect. This thermoelectric effect dictates that when two dissimilar metal wires are joined at both ends, and one of the junctions is heated, a voltage difference will be produced across the open ends. In a hot water heater, the thermocouple is positioned with its hot junction near the pilot flame. The heat generates a small electrical current that energizes the gas valve's electromagnet, holding it open. A healthy thermocouple should produce a consistent millivolt reading. A weak or failing thermocouple will produce a lower voltage, eventually leading to the gas valve closing, even with a lit pilot. This results in the pilot light going out and no hot water.
Diagnosing a Faulty Thermocouple
Before replacing the thermocouple, confirm it's actually the problem. Several symptoms point to a failing thermocouple, but other issues can mimic these signs. A typical indication is a pilot light that lights initially but then goes out shortly after releasing the pilot button. This suggests the thermocouple isn't generating enough current to keep the gas valve open. Another telltale sign is the inability to light the pilot at all, even after repeated attempts. However, before jumping to a thermocouple replacement, consider these potential culprits:
- Dirty Pilot Orifice: A clogged or dirty pilot orifice can restrict gas flow to the pilot light, causing it to be weak and unable to properly heat the thermocouple.
- Faulty Gas Valve: The gas valve itself could be malfunctioning, preventing gas from reaching the pilot light, even with a functional thermocouple.
- Drafts: Strong drafts can blow out the pilot light, preventing the thermocouple from heating up.
Troubleshooting Tip: Try cleaning the pilot orifice with a thin wire or specialized pilot cleaning tool. Also, ensure there are no drafts near the water heater. If these steps don't resolve the issue, testing the thermocouple's output voltage is the next step.
Testing the Thermocouple
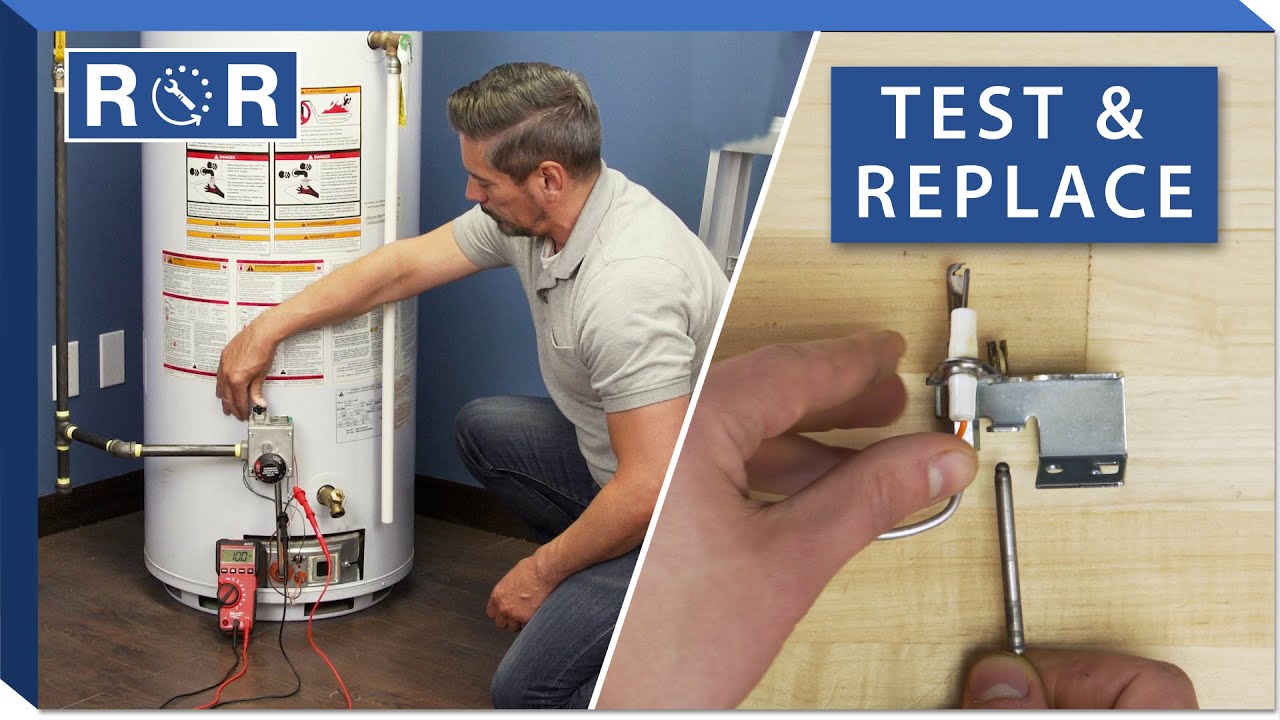
A multimeter is your essential tool for testing the thermocouple. Set the multimeter to measure millivolts (mV DC). Disconnect the thermocouple wire from the gas valve. Connect the multimeter's positive lead to the thermocouple's copper tip and the negative lead to the thermocouple's metal body. Light the pilot light and hold the pilot button down. A healthy thermocouple should produce between 25 and 30 mV initially, and it should maintain at least 10-15 mV while the pilot is lit. If the reading is significantly lower, the thermocouple is likely faulty and needs replacing.
Replacing the Thermocouple: A Step-by-Step Guide
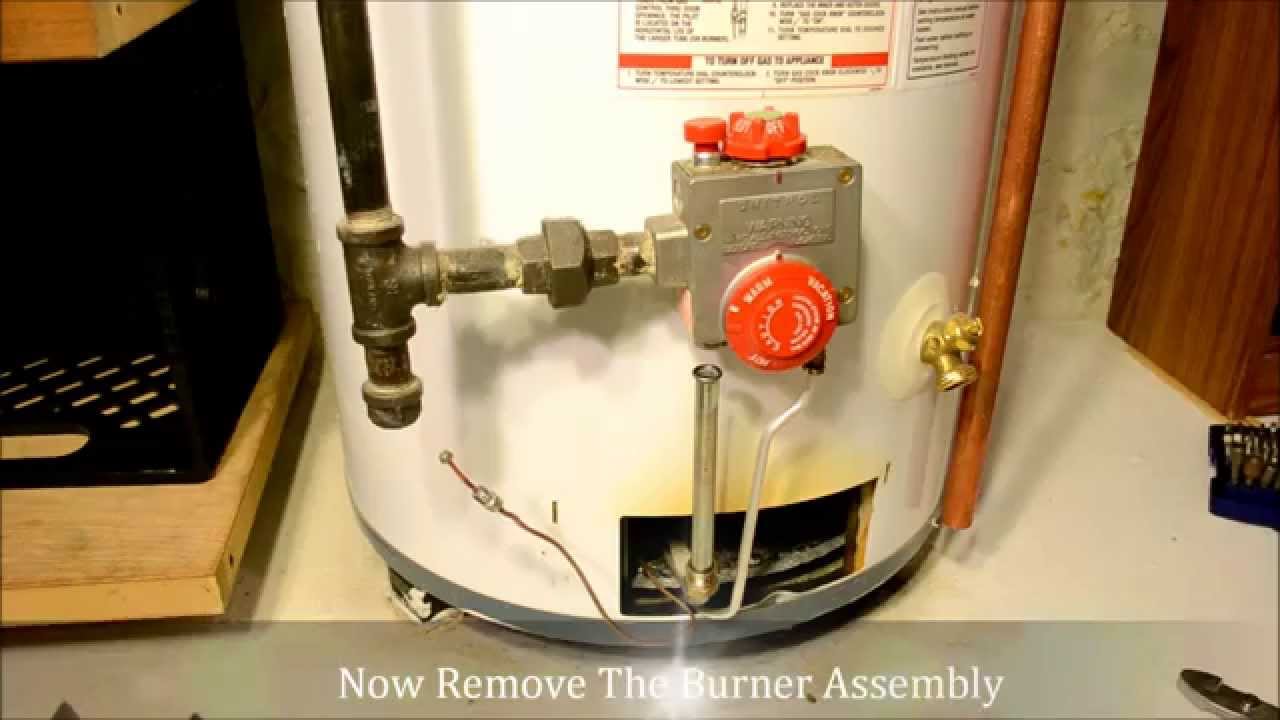
Safety First! Before beginning any work on your hot water heater, turn off the gas supply to the unit. This is usually a valve located on the gas line leading to the water heater. Also, turn off the water supply to the tank. Let the unit cool down completely before proceeding. Have a bucket and some old towels nearby to catch any residual water.
- Gather Your Tools: You'll need a new thermocouple (ensure it's the correct length and type for your water heater model), an adjustable wrench, a pipe wrench (optional), a screwdriver (usually flathead), and possibly penetrating oil.
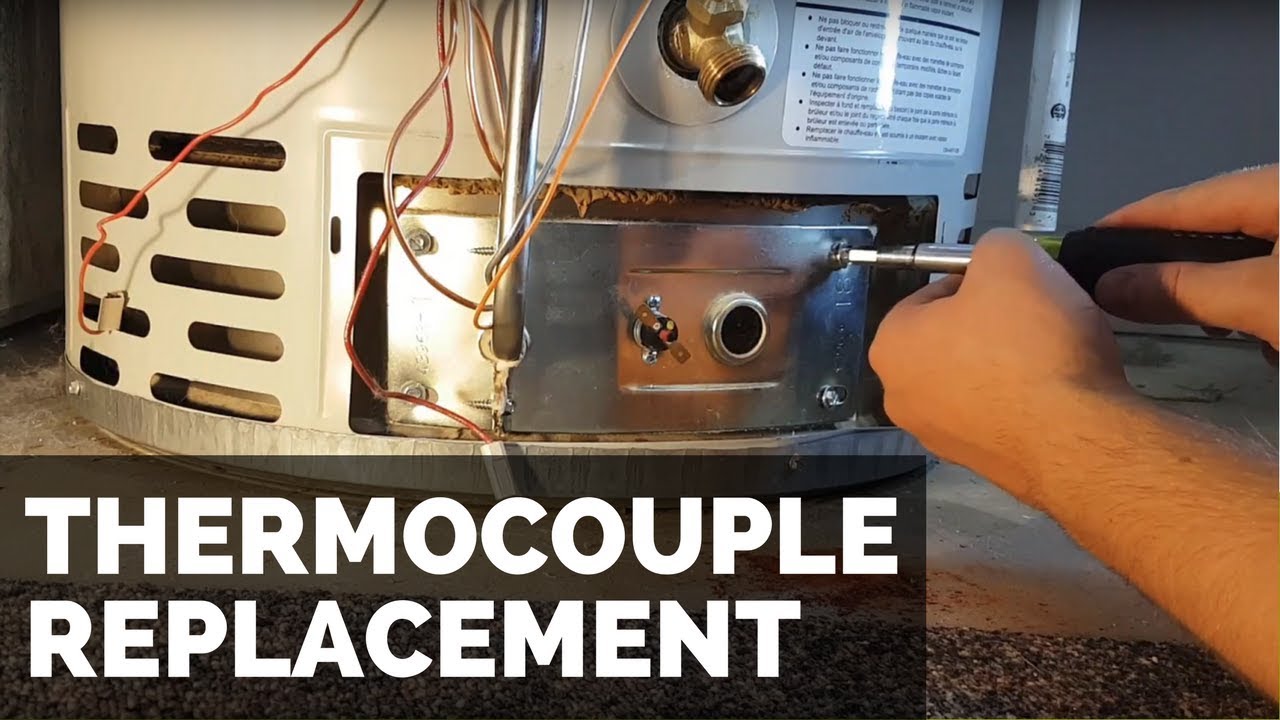
- Remove the Old Thermocouple: Locate the thermocouple connection at the gas valve. It's typically a small nut that secures the thermocouple wire. Use an adjustable wrench to loosen and disconnect the nut. Apply penetrating oil if it's stuck. Carefully detach the thermocouple from its bracket near the pilot light assembly. It may be held in place by clips or screws.
- Install the New Thermocouple: Insert the new thermocouple into the bracket near the pilot light, ensuring it's positioned correctly within the pilot flame. The tip of the thermocouple should be directly in the flame. Connect the thermocouple wire to the gas valve, tightening the nut securely with your adjustable wrench. Avoid overtightening, as this can damage the threads.
- Test the New Thermocouple: Turn the gas supply back on. Light the pilot light following the manufacturer's instructions. Hold the pilot button down for the recommended time (usually 30-60 seconds). Release the button. If the pilot light stays lit, the new thermocouple is functioning correctly. If the pilot light goes out, double-check all connections and ensure the thermocouple is properly positioned in the flame.
- Reassemble and Monitor: Replace any access panels or covers you removed. Monitor the hot water heater for a few days to ensure it's operating correctly.
Important Considerations: When purchasing a new thermocouple, refer to your water heater's model number to ensure you obtain the correct replacement. Thermocouples come in various lengths and thread sizes. Using the wrong thermocouple can lead to improper operation or even safety hazards.
Cost and Lifespan
Replacing a thermocouple is a relatively inexpensive repair. The cost of a new thermocouple typically ranges from $10 to $30. If you choose to hire a professional HVAC technician, labor costs can add another $50 to $150 to the total cost. The lifespan of a thermocouple varies depending on usage and environmental factors, but they generally last for several years. However, they are susceptible to corrosion and degradation over time, especially in areas with poor water quality. Regular inspection of your hot water heater can help identify potential issues before they become major problems.
Preventative Maintenance for Extended Lifespan
Extending the lifespan of your hot water heater, including the thermocouple, involves simple preventative maintenance. Regularly flush the tank to remove sediment buildup, which can contribute to corrosion. Inspect the anode rod periodically and replace it when it becomes depleted. A functioning anode rod sacrifices itself to protect the tank from corrosion. Ensure proper ventilation around the water heater to prevent moisture buildup, which can accelerate corrosion of metal components. Consider a water softener if you have hard water, as hard water can shorten the lifespan of your water heater and its components. Finally, schedule annual inspections with a qualified HVAC technician. They can identify potential problems early on and perform necessary maintenance to keep your hot water heater running efficiently and safely.
When to Call a Professional
While replacing a thermocouple is a relatively straightforward task for experienced homeowners or HVAC technicians, there are situations where calling a professional is recommended. If you are uncomfortable working with gas lines, or if you suspect a more complex issue with your hot water heater, it's best to seek professional assistance. A qualified HVAC technician can accurately diagnose the problem, perform the necessary repairs safely and efficiently, and ensure your hot water heater is operating optimally. Additionally, if you notice any signs of a gas leak, such as a sulfurous odor, evacuate the premises immediately and call your local gas company or emergency services.
Replacing a thermocouple is a common repair that can restore hot water and ensure the safe operation of your water heater. By understanding the function of the thermocouple, properly diagnosing the issue, and following the steps outlined in this guide, you can confidently tackle this repair yourself or make an informed decision about when to call a professional. Remember, safety is paramount when working with gas appliances. If in doubt, always consult with a qualified HVAC technician.
:max_bytes(150000):strip_icc()/replacing-water-heater-thermocouple-flame-sensor-1824918-06-ce04bc96a0cb4fcd8e16b7ab32afe434.jpg)
:max_bytes(150000):strip_icc()/replacing-water-heater-thermocouple-flame-sensor-1824918-01-5fa3905d42384c7abb3812897af7c9c1.jpg)


:max_bytes(150000):strip_icc()/replacing-water-heater-thermocouple-flame-sensor-1824918-07-a0910096ac3a411e893d3db079675bc9.jpg)
:max_bytes(150000):strip_icc()/replacing-water-heater-thermocouple-flame-sensor-1824918-02-c867831fe43644f0ae9b04344e18f64f.jpg)