Shark Bite Fittings For Copper Pipe

Are you experiencing uneven heating or cooling in your home? Perhaps one room is always colder than the rest, or your HVAC system seems to be working overtime without achieving the desired temperature? These are common problems, and while many factors can contribute, a hidden issue lurking within your plumbing system, specifically involving SharkBite fittings on your copper pipes, could be the culprit. This article will guide you through troubleshooting potential problems with SharkBite fittings in your copper pipe system, helping you identify and potentially resolve the issue safely and effectively.
Understanding the Role of SharkBite Fittings
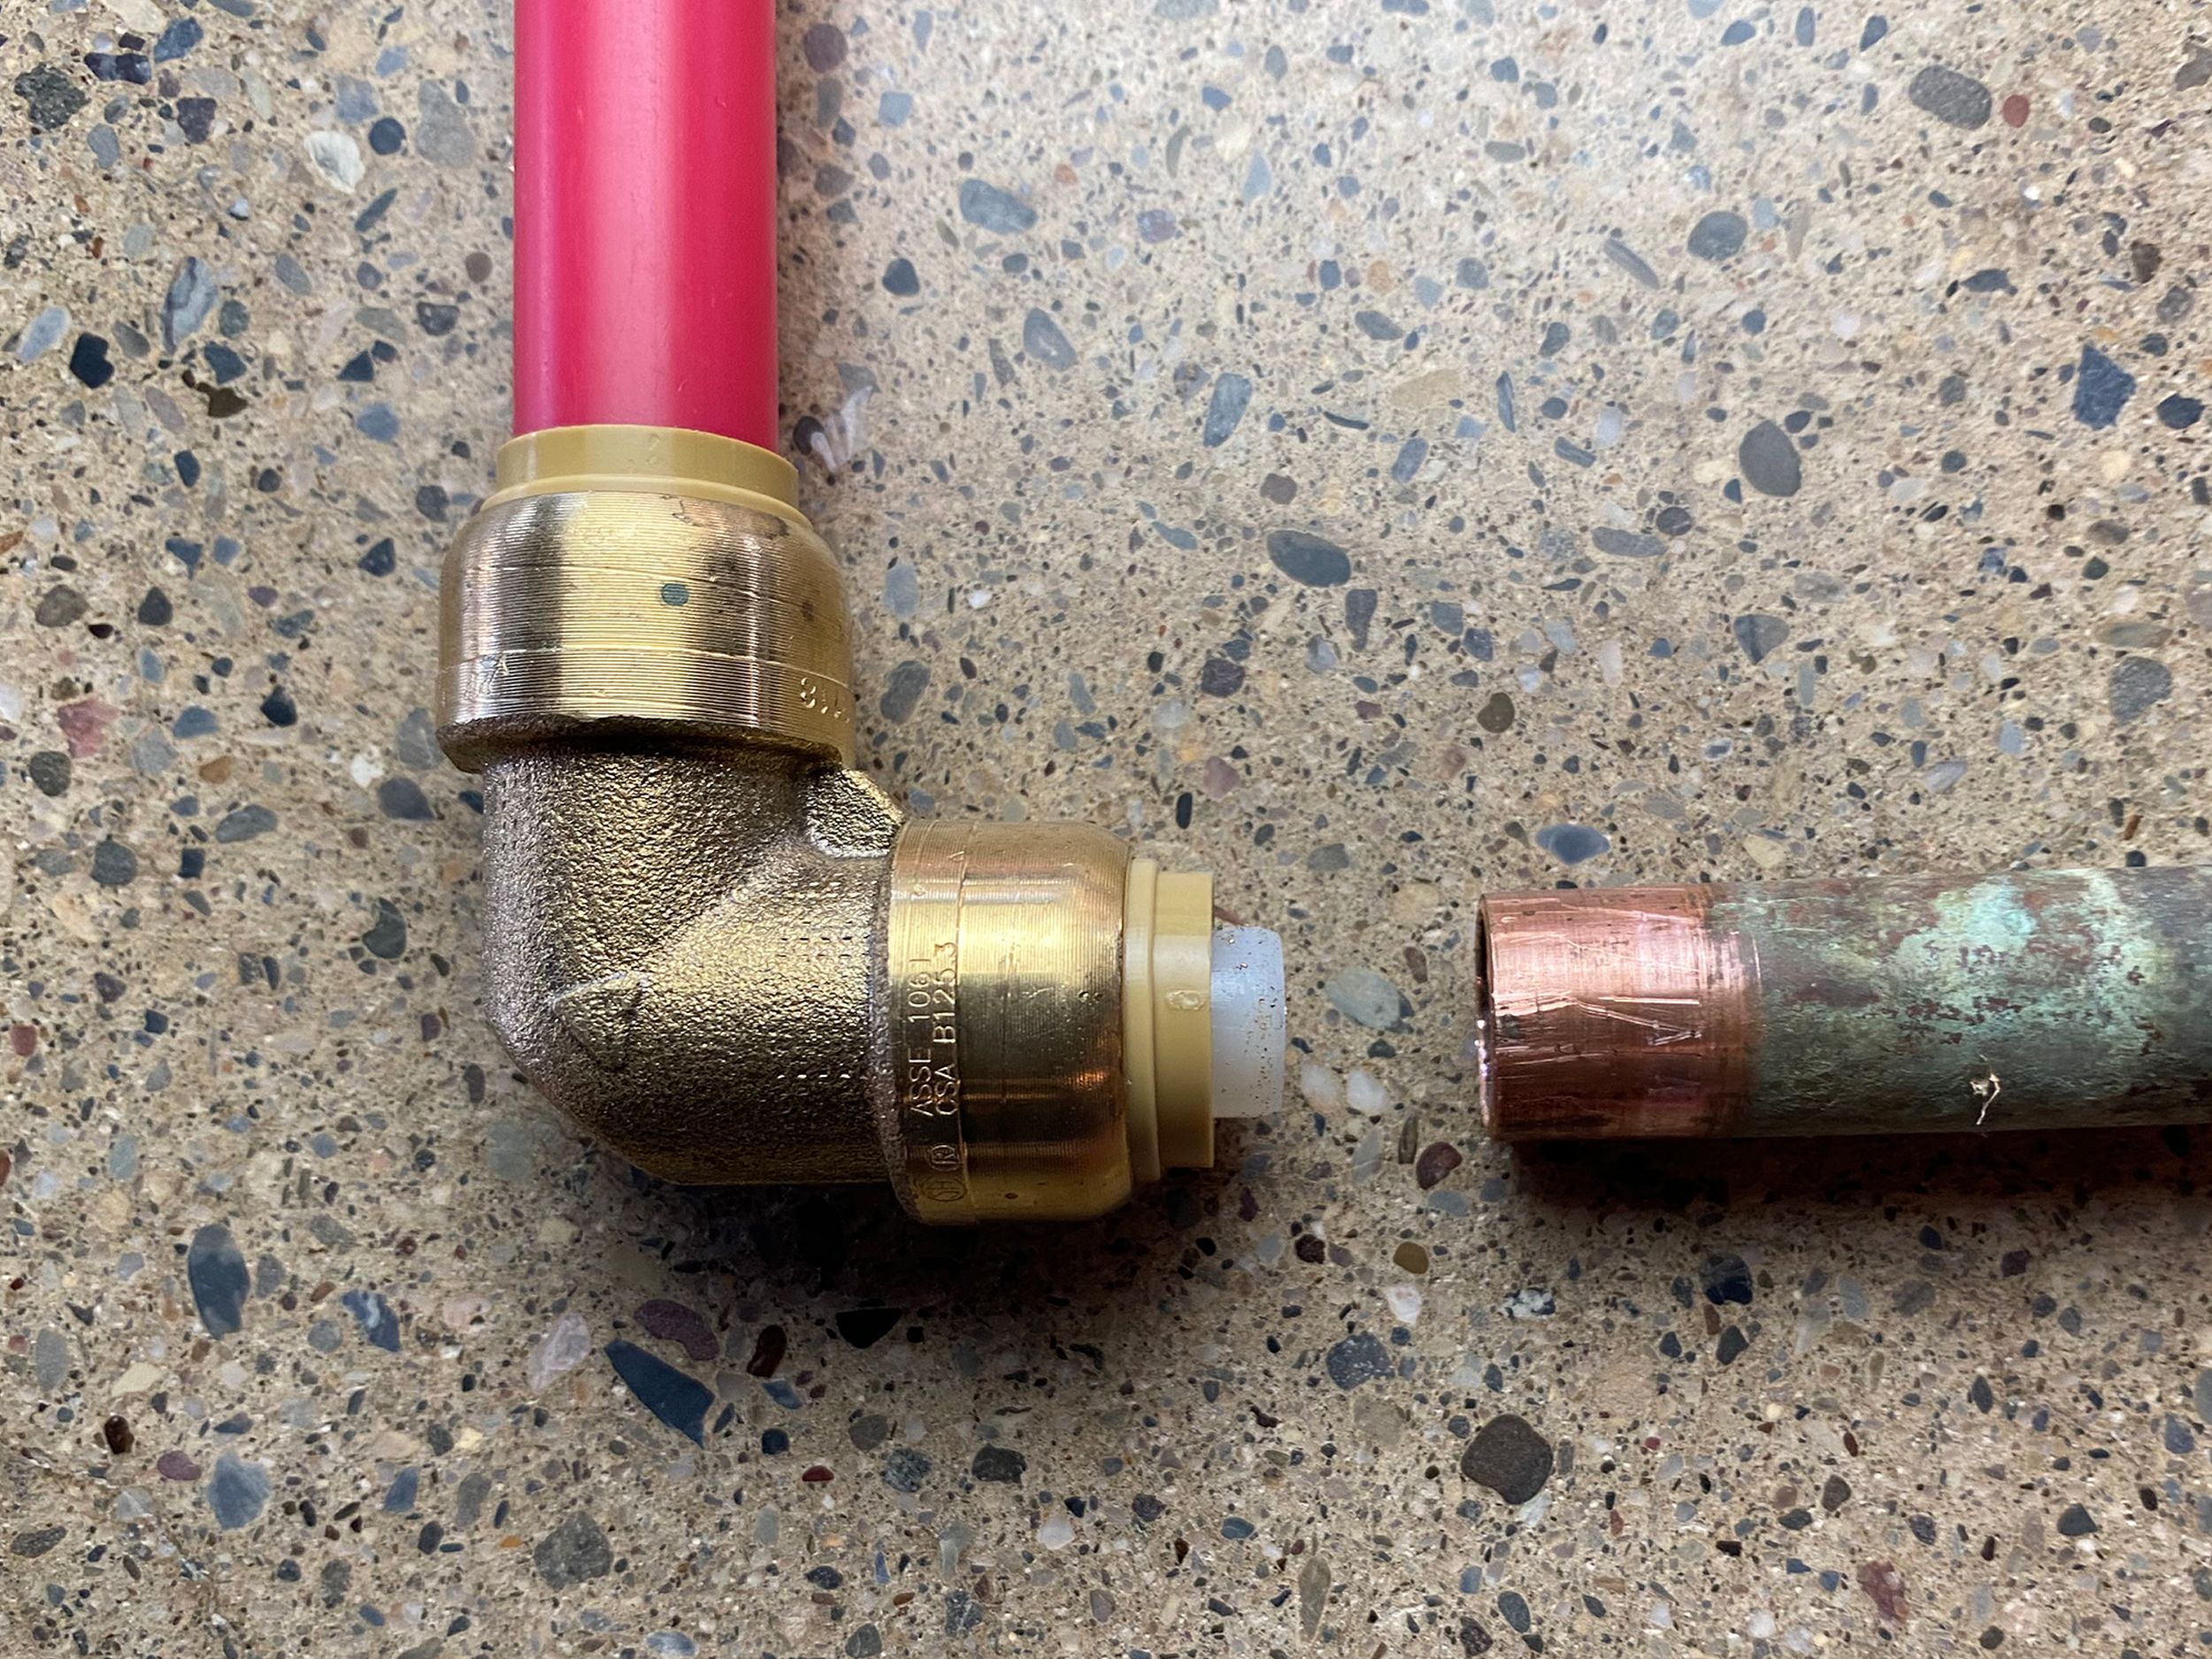
SharkBite fittings are designed to create a quick and easy, solder-free connection between copper pipes. They use a push-fit mechanism, making them popular for DIY plumbing projects and repairs. However, like any plumbing component, they can sometimes experience problems. Understanding how they work is crucial for effective troubleshooting.
Key components of a SharkBite fitting:
- Body: The main housing of the fitting.
- Grab Ring (Stainless Steel Teeth): These teeth grip the pipe when it's inserted, creating a secure mechanical connection.
- O-Ring: This provides a watertight seal.
- Release Collar: Used to disconnect the fitting.
When a copper pipe is pushed into a SharkBite fitting, the grab ring bites into the pipe's surface, and the O-ring compresses to create a seal. If either of these components fails or is compromised, it can lead to leaks or pressure drops, ultimately affecting your home's heating and cooling efficiency, especially if the pipes are connected to a radiant heating or cooling system.
Diagnosing the Problem: A Step-by-Step Approach
Before you begin, always shut off the water supply to the affected area. This is a crucial safety precaution.
Step 1: Visual Inspection (No Tools Required)
Start with a thorough visual inspection of all visible SharkBite fittings on your copper pipes. Look for:
- Visible Leaks: This is the most obvious sign of a problem. Check for water droplets, dampness, or mineral deposits (white or greenish stains) around the fitting. Even a small, slow leak can cause significant problems over time.
- Corrosion: Examine the fitting and the surrounding copper pipe for signs of corrosion, such as pitting, discoloration, or rust. Corrosion can weaken the fitting and the pipe, leading to leaks or failure.
- Misalignment: Ensure the fitting is properly aligned with the pipe. If the pipe is bent or stressed near the fitting, it could compromise the seal.
- Damage: Look for any physical damage to the fitting, such as cracks, dents, or breaks.
- Proper Insertion Depth: Most SharkBite fittings have a depth mark or a visual indicator to ensure the pipe is fully inserted. Check if the pipe is properly seated within the fitting. A gap might indicate incorrect installation or movement over time.
Pay close attention to fittings located in areas prone to temperature fluctuations or high humidity. These environments can accelerate corrosion and wear.
Step 2: Pressure Check (Requires Basic Equipment)
If you don't see any visible leaks, but still suspect a problem, a pressure check can help identify hidden leaks or pressure drops. You'll need a pressure gauge.
- Isolate the Section: Close valves to isolate the section of pipe containing the SharkBite fittings you suspect are problematic.
- Attach Pressure Gauge: Connect a pressure gauge to a fitting or valve within the isolated section.
- Pressurize the System: Carefully introduce water pressure into the isolated section. Use a hose connected to a tap, and monitor the pressure gauge closely. Do not exceed the recommended pressure for your plumbing system.
- Monitor for Pressure Drop: Observe the pressure gauge for any drop in pressure over a period of time (e.g., 15-30 minutes). A significant pressure drop indicates a leak within the isolated section.
Caution: Over-pressurizing the system can cause significant damage. Start slowly and monitor the pressure gauge carefully.
Step 3: Wiggle Test (No Tools Required, Use Caution)
This test is used with caution and only if you *do not* see a visible leak. Gently try to wiggle the pipe within the SharkBite fitting. There should be absolutely no movement. Any movement suggests a compromised grip and a potential leak.
Important: Do not force the pipe. Excessive force could damage the fitting or the pipe, causing a leak.
Step 4: Check for Proper Installation (No Tools Required, Review Installation Guide)
Even if the fitting appears to be in good condition, incorrect installation can lead to problems. Review the manufacturer's installation instructions for SharkBite fittings. Pay attention to the following:
- Pipe Preparation: The copper pipe must be clean, smooth, and free of burrs or damage before insertion. Any imperfections on the pipe surface can compromise the seal.
- Proper Insertion Depth: As mentioned earlier, ensure the pipe is fully inserted into the fitting.
- Deburring: The end of the copper pipe needs to be deburred to prevent damage to the internal O-ring.
- Pipe Material: Ensure you are using the correct type of copper pipe for the fitting. Some SharkBite fittings are not compatible with all types of copper.
Tip: Take pictures of existing installations before attempting any repairs. This will help you remember how everything was connected.
DIY Actions You Can Take (With Caution)
If you've identified a problem with a SharkBite fitting, there are a few DIY actions you can take, provided you feel comfortable and confident in your abilities. Safety is paramount. Always shut off the water supply before attempting any repairs.
Action 1: Re-seating the Pipe
If the pipe appears to be not fully seated, you can try to re-seat it. You'll need a SharkBite disconnect clip or tool. This is essential for safely removing the fitting without damaging the pipe.
- Shut off the water supply.
- Use the disconnect clip to release the fitting. Place the clip around the pipe and push it against the release collar of the fitting. This will disengage the grab ring.
- Pull the pipe out of the fitting. Inspect the pipe end for damage or debris. Clean the pipe thoroughly.
- Re-insert the pipe. Ensure the pipe is clean, smooth, and fully inserted into the fitting until it reaches the depth mark. You should feel the grab ring engage.
- Turn the water supply back on slowly and check for leaks.
Important: If you encounter resistance or the pipe doesn't seem to be seating properly, do not force it. Forcing the pipe can damage the fitting or the pipe, leading to a leak.
Action 2: Replacing the SharkBite Fitting
If the fitting is damaged or corroded, or if re-seating the pipe doesn't solve the problem, you may need to replace the fitting. Again, you'll need a SharkBite disconnect clip and a replacement fitting of the same size and type.
- Shut off the water supply.
- Use the disconnect clip to remove the old fitting.
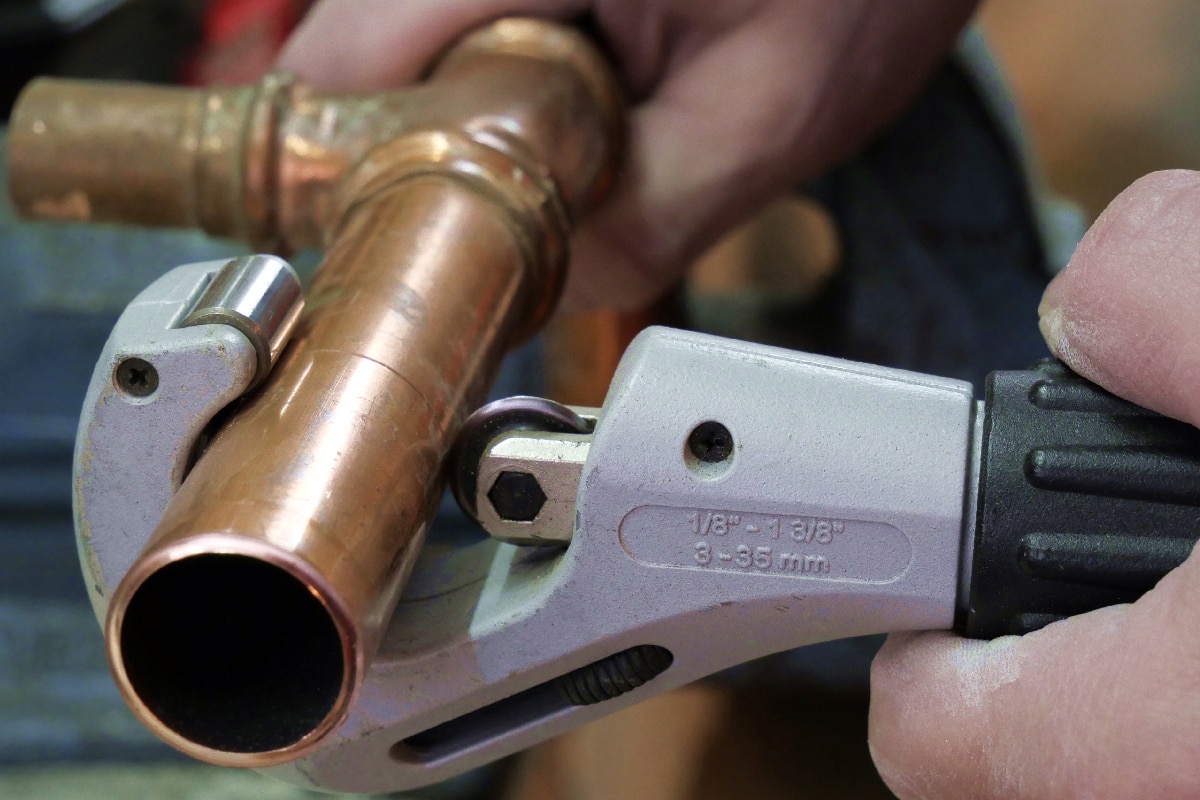
- Inspect the copper pipe. If the pipe is corroded or damaged near the fitting, you may need to cut back the pipe to a clean, undamaged section. Use a copper pipe cutter for a clean, square cut. Deburr the cut end of the pipe.
- Install the new fitting. Ensure the pipe is clean, smooth, and fully inserted into the new fitting until it reaches the depth mark.
- Turn the water supply back on slowly and check for leaks.
Note: When cutting copper pipe, always use a pipe cutter to ensure a clean, square cut. A hacksaw can leave burrs and uneven edges, which can compromise the seal.
Action 3: Adding Support to the Pipe
If the pipe is subject to vibration or movement, adding support can help prevent stress on the SharkBite fitting. Use pipe clamps or hangers to secure the pipe to a nearby structure. This will help stabilize the pipe and reduce the risk of leaks.
When to Call a Professional HVAC Technician
While some SharkBite fitting issues can be resolved with DIY repairs, there are certain situations where it's best to call a qualified HVAC technician or plumber. These include:
- Extensive Corrosion: If you find widespread corrosion on the copper pipes or fittings, it's a sign of a more significant problem that needs professional attention.
- Complex Plumbing Systems: If the SharkBite fittings are part of a complex plumbing system, such as a radiant heating system, it's best to leave the repairs to a professional. Radiant heating systems require specialized knowledge and expertise.
- Persistent Leaks: If you've tried re-seating or replacing the fitting and the leak persists, there may be an underlying problem that requires professional diagnosis.
- Lack of Confidence: If you're not comfortable or confident in your ability to perform the repairs safely and effectively, it's always best to call a professional.
- If you are unsure of the type or size of your system, or unsure if the SharkBite fittings you find are part of the system.
Important: Working with plumbing and heating systems can be dangerous. If you're not sure what you're doing, it's always best to err on the side of caution and call a professional.
Preventative Measures
Once you've resolved the issue with your SharkBite fittings, take steps to prevent future problems:
- Regular Inspections: Periodically inspect your plumbing system for leaks, corrosion, or other signs of damage.
- Proper Installation: Ensure all SharkBite fittings are installed correctly, following the manufacturer's instructions.
- Water Quality: If you have hard water or other water quality issues, consider installing a water softener or filter to protect your plumbing system.
- Support Pipes: Properly support your pipes to prevent stress on the fittings.
- Insulate Pipes: In areas prone to freezing, insulate your pipes to prevent them from bursting.
By following these troubleshooting steps and preventative measures, you can help ensure the reliable operation of your SharkBite fittings and maintain a comfortable and efficient heating and cooling system in your home. Remember, safety is always the top priority. When in doubt, consult a qualified professional.