Should You Cover Outdoor Air Conditioner Unit

Many homeowners grapple with the question of whether or not to cover their outdoor air conditioner unit during the off-season. The decision isn't always straightforward, and choosing the wrong approach can lead to unexpected problems down the line. This article will guide you through the pros and cons, help you diagnose potential issues related to covering (or not covering) your unit, and offer simple, safe DIY fixes, while also highlighting when it's time to call in the professionals.
The Question: Cover or Not to Cover?
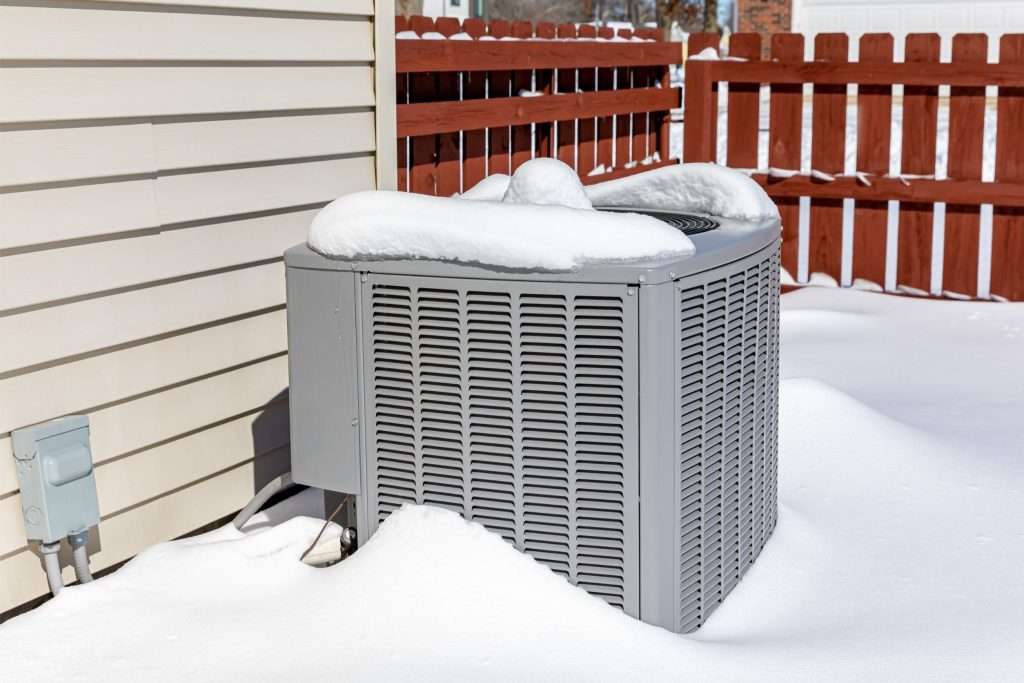
The debate centers around protecting your unit from the elements versus potentially trapping moisture and creating a breeding ground for problems. There's no universal "right" answer; the best approach depends on your local climate, the type of cover you use (if any), and how diligent you are with maintenance.
Common Problems Arising from Covering (or Not Covering)
Here's a breakdown of potential issues based on your choice:
* Problems from Covering (Especially with Improper Materials): * Rust and Corrosion: Trapped moisture can accelerate rust and corrosion on internal components. * Mold and Mildew Growth: A damp, dark environment is perfect for mold and mildew. * Rodent Infestation: Covers can inadvertently provide shelter for rodents, who may then chew on wires and other components. * Ice Buildup (in certain climates): If the cover prevents adequate airflow, melting snow can refreeze inside, causing damage. * Restricted Airflow (if left on during operation): This is a critical mistake, leading to overheating and compressor failure. * Problems from Not Covering: * Debris Accumulation: Leaves, twigs, and other debris can clog the fins and reduce efficiency. * Ice and Snow Damage: Heavy snow or ice can physically damage the unit, especially the fan blades. * UV Degradation: Prolonged exposure to sunlight can degrade plastic components over time. * Animal Nests: Birds and other small animals might build nests inside the unit.Troubleshooting: Identifying the Problem
The first step is to identify specific problems affecting your unit. Here's a breakdown of common symptoms and potential causes, regardless of whether you've been covering your unit or not.
Symptom 1: Reduced Cooling Efficiency
Description: Your AC unit is running, but your house isn't getting as cool as it used to, or it's taking longer to reach the desired temperature.
Possible Causes:
* Dirty Condenser Coils: This is the most common cause. Dust, pollen, and debris accumulate on the fins, reducing their ability to dissipate heat. * Blocked Airflow: Obstructions around the unit (bushes, fences, etc.) or a cover left on during operation can restrict airflow. * Damaged Fins: Bent or damaged fins reduce the surface area available for heat transfer. * Refrigerant Leak: A leak will reduce the amount of refrigerant in the system, impacting its cooling capacity. *This usually requires professional intervention.*DIY Diagnosis and Fixes:
1. Visual Inspection: Check the condenser coils for dirt and debris. Look for obstructions around the unit. Make sure the unit is turned OFF at the breaker before inspecting or cleaning. 2. Cleaning the Coils: Use a garden hose with a gentle spray nozzle to rinse the coils from the inside out. Avoid using a high-pressure washer, as this can damage the fins. You can also use a fin comb to straighten bent fins. 3. Clear Obstructions: Trim bushes or remove any objects blocking airflow around the unit. 4. Ensure Proper Airflow: If you use a cover, make absolutely sure it's removed before turning the AC on.When to Call a Professional:
* If cleaning the coils and clearing obstructions doesn't improve cooling efficiency. * If you suspect a refrigerant leak (look for oily residue around the connections). * If the fins are severely damaged.Symptom 2: Unusual Noises
Description: Your AC unit is making unusual noises, such as grinding, squealing, buzzing, or rattling.
Possible Causes:
* Debris in the Fan: Leaves, twigs, or other debris can get caught in the fan blades. * Loose Components: Vibration can cause screws and other components to loosen over time. * Failing Fan Motor: A worn-out fan motor can make a grinding or squealing noise. * Compressor Problems: A failing compressor can make a loud buzzing or rattling noise. *This requires immediate professional attention.*DIY Diagnosis and Fixes:
1. Visual Inspection: Carefully inspect the fan for debris. Again, ensure the unit is turned OFF at the breaker. 2. Remove Debris: Use a stick or your hand (while wearing gloves) to remove any debris from the fan. 3. Tighten Loose Screws: Check for loose screws on the fan housing and other components. 4. Lubricate the Fan Motor (if applicable): Some fan motors have oil ports. If yours does, lubricate it with a few drops of electric motor oil. *Consult your owner's manual for specific instructions.*When to Call a Professional:
* If the noise persists after removing debris and tightening screws. * If you suspect a failing fan motor or compressor. Do not attempt to repair these components yourself. * If the noise is a loud buzzing or rattling sound.Symptom 3: Rust and Corrosion
Description: You notice rust or corrosion on the exterior or interior components of the unit.
Possible Causes:
* Trapped Moisture (from improper covering): Covers that don't allow for adequate ventilation can trap moisture, accelerating rust and corrosion. * Salt Air (in coastal areas): Salt air is highly corrosive. * Acid Rain: Acid rain can also contribute to corrosion.DIY Diagnosis and Fixes:
1. Visual Inspection: Assess the extent of the rust and corrosion. 2. Surface Rust Removal: For minor surface rust, you can use a wire brush or sandpaper to remove the rust, followed by a coat of rust-inhibiting paint. Ensure the unit is OFF. 3. Proper Ventilation: If you use a cover, make sure it's breathable or remove it periodically to allow for ventilation. Consider not covering the unit at all, especially in humid climates.When to Call a Professional:
* If the rust is extensive and has compromised the structural integrity of the unit. * If the corrosion is affecting critical components, such as the refrigerant lines.Symptom 4: Rodent or Insect Infestation
Description: You find evidence of rodents (droppings, nests) or insects inside the unit.
Possible Causes:
* Shelter from the Elements (provided by covers): Covers can create a protected environment for rodents and insects. * Easy Access: Openings in the unit allow pests to enter.DIY Diagnosis and Fixes:
1. Visual Inspection: Look for signs of rodents or insects inside the unit. Turn the power OFF first! 2. Remove Nests and Debris: Carefully remove any nests or debris. Wear gloves and a mask to protect yourself from potential diseases. 3. Seal Entry Points: Seal any obvious entry points with wire mesh or caulk. 4. Consider Pest Control: If the infestation is severe, consider contacting a professional pest control company.When to Call a Professional:
* If the infestation is severe and you're unable to control it yourself. * If you suspect that rodents have damaged wiring or other components. Do not attempt to repair electrical damage yourself.Symptom 5: Icing
Description: Ice is forming on the outside of the unit, especially around the refrigerant lines.
Possible Causes:
* Restricted Airflow: A dirty air filter, blocked condenser coils, or a cover restricting airflow can cause icing. * Low Refrigerant: Low refrigerant levels can also cause icing. * Cold Weather Operation: Running the AC in very cold weather can cause icing. *Most AC units are not designed to operate below a certain temperature.*DIY Diagnosis and Fixes:
1. Check the Air Filter: Replace the air filter if it's dirty. 2. Clean the Coils: Clean the condenser coils as described above. 3. Ensure Proper Airflow: Remove any obstructions around the unit. 4. Turn Off the Unit: Allow the ice to melt completely. Do not try to chip away the ice.When to Call a Professional:
* If icing continues to occur after cleaning the coils, replacing the air filter, and ensuring proper airflow. * If you suspect low refrigerant levels. * If you are operating the AC in temperatures below its recommended operating range.DIY Fixes: Tools and Safety
Before attempting any DIY fixes, gather the necessary tools and prioritize safety.
* Tools: * Screwdrivers (Phillips and flathead) * Wrenches * Wire brush * Fin comb * Garden hose with a gentle spray nozzle * Vacuum cleaner with a brush attachment * Gloves * Safety glasses * Mask (for cleaning) * Electric motor oil (if applicable) * Rust-inhibiting paint (if applicable) * Wire mesh or caulk (for sealing entry points) * Safety Precautions: * Always turn off the power to the unit at the breaker before performing any maintenance. * Wear gloves and safety glasses to protect yourself from dirt, debris, and chemicals. * Avoid touching any electrical components while the power is on. * If you're unsure about any repair, call a professional.The Verdict: To Cover or Not To Cover?
Ultimately, the decision of whether or not to cover your outdoor AC unit is a personal one. However, considering the points above, here's some concluding guidance:
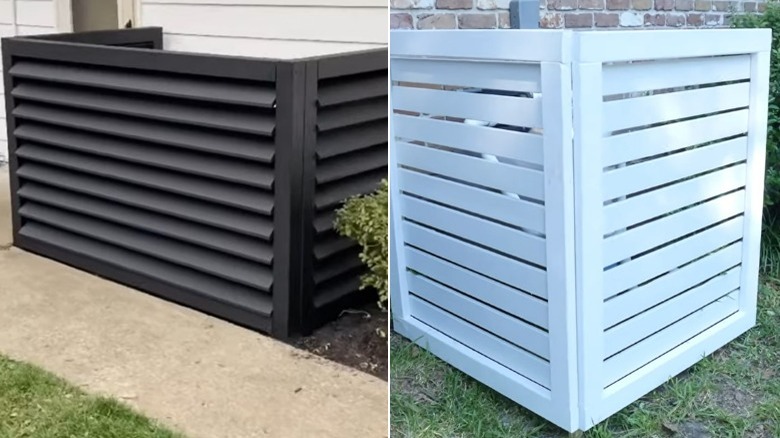
* In Mild Climates: Covering your unit may not be necessary. Regular cleaning and maintenance may be sufficient. * In Harsh Climates (Heavy Snow, Ice): A breathable cover might offer some protection from physical damage, but be vigilant about moisture buildup and rodent infestation. Consider a partial cover that protects the top of the unit while allowing for airflow. * Always: Remove any cover completely before operating the AC unit. * Prioritize Maintenance: Regular cleaning and inspection are more important than covering the unit.When to Call a Professional: A Recap
While this article provides guidance for simple DIY fixes, some problems require professional attention. Do not attempt to repair complex components such as the compressor, refrigerant lines, or electrical wiring. Call a qualified HVAC technician if:
* You suspect a refrigerant leak. * The compressor is making unusual noises. * The fan motor is failing. * There is extensive rust or corrosion. * You are unable to diagnose the problem yourself. * You are uncomfortable performing any of the DIY fixes.By following these guidelines, you can keep your outdoor air conditioner unit in good working order and avoid costly repairs. Remember, prevention is always better than cure, so regular maintenance is key!