Side Discharge Ac Unit
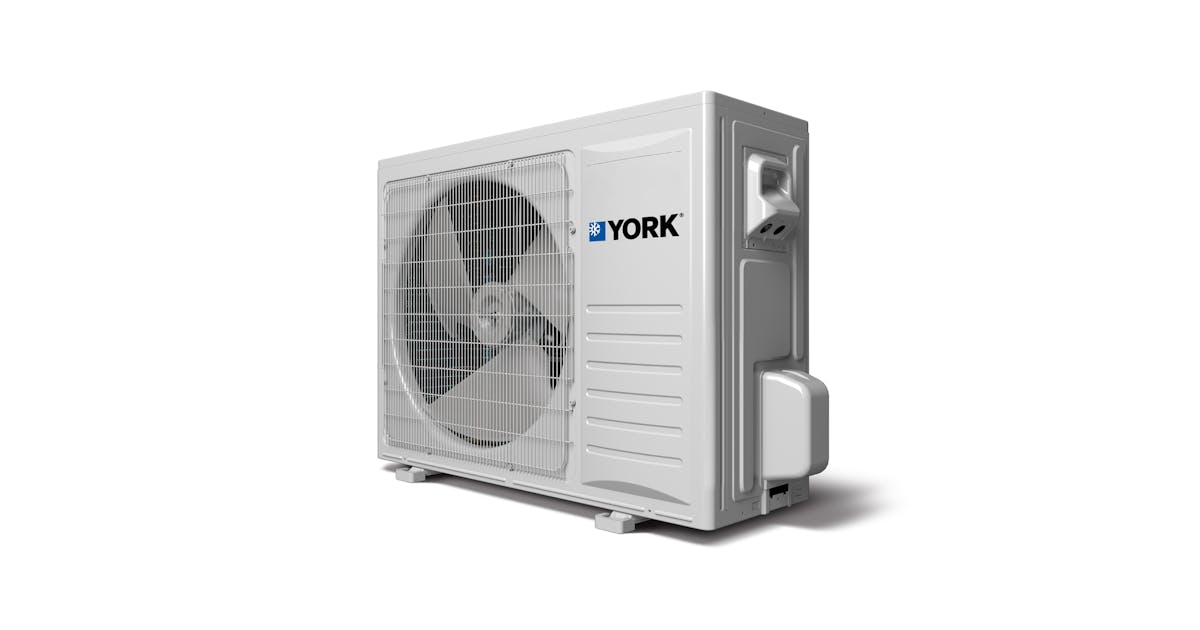
Air conditioning is crucial for comfortable living, especially during hot weather. Side discharge AC units, while efficient and space-saving, can sometimes encounter problems. One common issue homeowners face is reduced cooling efficiency or, even worse, a complete lack of cooling. Before calling a professional, there are several simple checks and DIY fixes you can attempt. This guide will walk you through the troubleshooting process step-by-step.
Identifying the Problem: Is it Really Your AC Unit?
Before diving into AC unit specifics, rule out other potential causes for the lack of cooling. Start with the basics:
- Check the thermostat: Ensure it's set to "cool" and the desired temperature is lower than the current room temperature. A common mistake is accidentally setting it to "heat" or "fan only."
- Inspect the circuit breaker: Locate the breaker that controls your AC unit in your electrical panel. Is it tripped? If so, reset it. If it trips again immediately, do not keep resetting it. This indicates a serious electrical problem that requires a qualified electrician.
- Examine the air filters: Dirty air filters restrict airflow, making your AC unit work harder and less efficiently. A clogged filter can even cause the unit to overheat and shut down. We'll cover filter cleaning in detail later.
- Assess the ductwork: While you likely won't be climbing into ductwork, check for any obvious signs of damage or disconnection near vents. Significant air leaks in ductwork can drastically reduce cooling efficiency.
If you've confirmed that the thermostat is properly set, the breaker isn't tripping excessively, and the ductwork appears intact, proceed with troubleshooting your side discharge AC unit itself.
Step-by-Step Troubleshooting for Side Discharge AC Units
1. Power Down for Safety
Safety first! Before inspecting any components of your AC unit, always disconnect the power. Locate the outdoor disconnect box near the unit. This is usually a gray metal box with a handle or a pull-out disconnect switch. Turn the handle to the "off" position or pull out the switch completely. If you don't have a disconnect box, turn off the breaker for the AC unit at the main electrical panel.
2. Inspect the Outdoor Unit
The outdoor unit houses the condenser coils, fan, and compressor. It's crucial to ensure proper airflow and cleanliness around this unit.
- Clear Debris: This is often the simplest and most effective fix. Over time, leaves, grass clippings, twigs, and other debris can accumulate around the unit, blocking airflow. Use a gloved hand to remove large debris. A garden hose with a gentle spray nozzle can be used to wash away finer particles. Never use a pressure washer, as this can damage the delicate fins on the condenser coils. Ensure a minimum of two feet of clearance around the entire unit.
- Straighten Bent Fins: The condenser coils are protected by thin aluminum fins. These fins can easily become bent or crushed, restricting airflow. You can gently straighten them using a fin comb. These combs are inexpensive and available at most hardware stores. Work carefully and slowly to avoid damaging the fins further. If a large section of fins is severely damaged, it's best to consult a professional.
- Check the Fan: Visually inspect the fan blades for any signs of damage or obstruction. Ensure the fan blades are free to spin. If the fan is not spinning even after power is restored (and the capacitor is good, see below), or if it's making unusual noises, the fan motor may be faulty and require replacement by a professional.
3. Clean the Condenser Coils
Dirty condenser coils are a common cause of reduced cooling efficiency. Over time, dust, dirt, and grime can accumulate on the coils, insulating them and preventing them from releasing heat effectively.
- Gentle Cleaning: After removing any loose debris, use a garden hose with a gentle spray nozzle to rinse the coils from the inside out. This helps to push dirt outwards rather than forcing it further into the coils. Avoid using high pressure, as this can damage the fins.
- Coil Cleaner (Optional): For heavily soiled coils, you can use a commercially available coil cleaner. Follow the manufacturer's instructions carefully. Typically, you'll spray the cleaner onto the coils, let it sit for a specified time, and then rinse it off thoroughly with water. Ensure the cleaner is specifically designed for AC condenser coils.
4. Check the Air Filter (Indoor Unit)
A clogged air filter restricts airflow, making your AC unit work harder and less efficiently. It can also lead to the evaporator coils freezing up. This is often overlooked, but it's a critical maintenance task.
- Locate the Filter: The air filter is usually located in the indoor unit, either behind a removable grille or in a slot near the blower motor. Consult your owner's manual for the exact location.
- Inspect the Filter: Remove the filter and hold it up to the light. If you can't see light through it, it's definitely time to clean or replace it.
- Clean or Replace: Disposable filters should be replaced. Washable filters can be cleaned with mild soap and water. Allow the filter to dry completely before reinstalling it. Never operate your AC unit without a filter in place.
- Regular Maintenance: Check and clean or replace your air filter every one to three months, or more frequently if you have pets or live in a dusty environment.
5. Check the Condensate Drain Line
Your AC unit produces condensation as it cools the air. This condensation needs to be drained away to prevent water damage and mold growth. A clogged condensate drain line can cause water to back up, potentially damaging your home and triggering a safety shut-off.
- Locate the Drain Line: The condensate drain line is usually a PVC pipe that exits the indoor unit and drains outside or into a floor drain.
- Check for Clogs: Look for any signs of blockage, such as standing water in the drain pan or moisture around the indoor unit.
- Clear the Clog: You can try clearing the clog using a wet/dry vacuum. Place the vacuum hose over the end of the drain line and try to suck out any debris. Alternatively, you can use a stiff wire or a plumber's snake to break up the clog. Be careful not to damage the drain line.
- Pour in Vinegar: As a preventative measure, pour a cup of white vinegar down the drain line every month to help prevent clogs from forming.
6. Listen for Unusual Noises
Pay close attention to the noises your AC unit is making. Unusual noises can indicate underlying problems.
- Grinding or Screeching: These noises could indicate a problem with the compressor or the fan motor. This requires professional attention.
- Rattling: Rattling noises could be caused by loose parts or debris inside the unit. Inspect the unit carefully for any loose screws or components.
- Humming: A humming noise could indicate a problem with the capacitor (see below) or the compressor.
7. Checking the Capacitor (Advanced - Proceed with Caution!)
The capacitor is a small, cylindrical component that provides the initial burst of energy needed to start the fan motor and compressor. A weak or faulty capacitor is a common cause of AC unit problems. Working with capacitors can be dangerous because they can store an electrical charge even when the power is off. If you are not comfortable working with electrical components, DO NOT attempt this step.
Before proceeding, ensure the power is completely disconnected to the AC unit. Use a multimeter to confirm there is no voltage present at the capacitor terminals. Even after disconnecting the power, capacitors can still hold a charge. It is highly recommended to discharge the capacitor using a resistor before touching it. This requires knowledge of electrical circuits and safety practices.
- Visual Inspection: Look for any signs of bulging, leaking, or corrosion on the capacitor. These are clear indications that the capacitor is faulty.
- Testing with a Multimeter (Requires Knowledge of Electrical Testing): Use a multimeter to measure the capacitance of the capacitor. Compare the measured value to the value printed on the capacitor. If the measured value is significantly lower (e.g., more than 10% lower), the capacitor is likely bad and needs to be replaced.
- Replacement: If you are comfortable replacing the capacitor, be sure to purchase a replacement with the same voltage and capacitance ratings. Always discharge the old capacitor before handling it. Connect the new capacitor exactly as the old one was connected. If you are unsure about any of these steps, consult a qualified HVAC technician.
When to Call a Professional
While many AC unit problems can be resolved with simple DIY fixes, there are certain situations where it's best to call a qualified HVAC technician. Here are some red flags:
- Refrigerant Leaks: Refrigerant leaks require specialized equipment and knowledge to repair. They are also harmful to the environment. If you suspect a refrigerant leak (e.g., hissing noises, oily residue on the coils), call a professional immediately.
- Compressor Problems: The compressor is the heart of your AC unit. If it's making unusual noises or not running at all, it's likely a serious problem that requires professional attention.
- Electrical Issues: If you're uncomfortable working with electrical components or if you suspect a major electrical problem, call a qualified electrician. Never attempt to repair electrical components yourself if you are not properly trained.
- Frozen Evaporator Coils: While a dirty air filter is a common cause of frozen evaporator coils, other factors, such as low refrigerant levels or a malfunctioning blower motor, can also be to blame. If the coils continue to freeze up even after cleaning or replacing the air filter, call a professional.
- Lack of Expertise: If you've tried the troubleshooting steps outlined above and your AC unit is still not working properly, it's time to call a professional. HVAC technicians have the training, experience, and equipment to diagnose and repair complex AC unit problems.
By following these troubleshooting steps, you can often diagnose and resolve simple AC unit problems yourself, saving you time and money. However, it's important to know when to call a professional to avoid further damage or potential safety hazards. Remember, safety should always be your top priority.