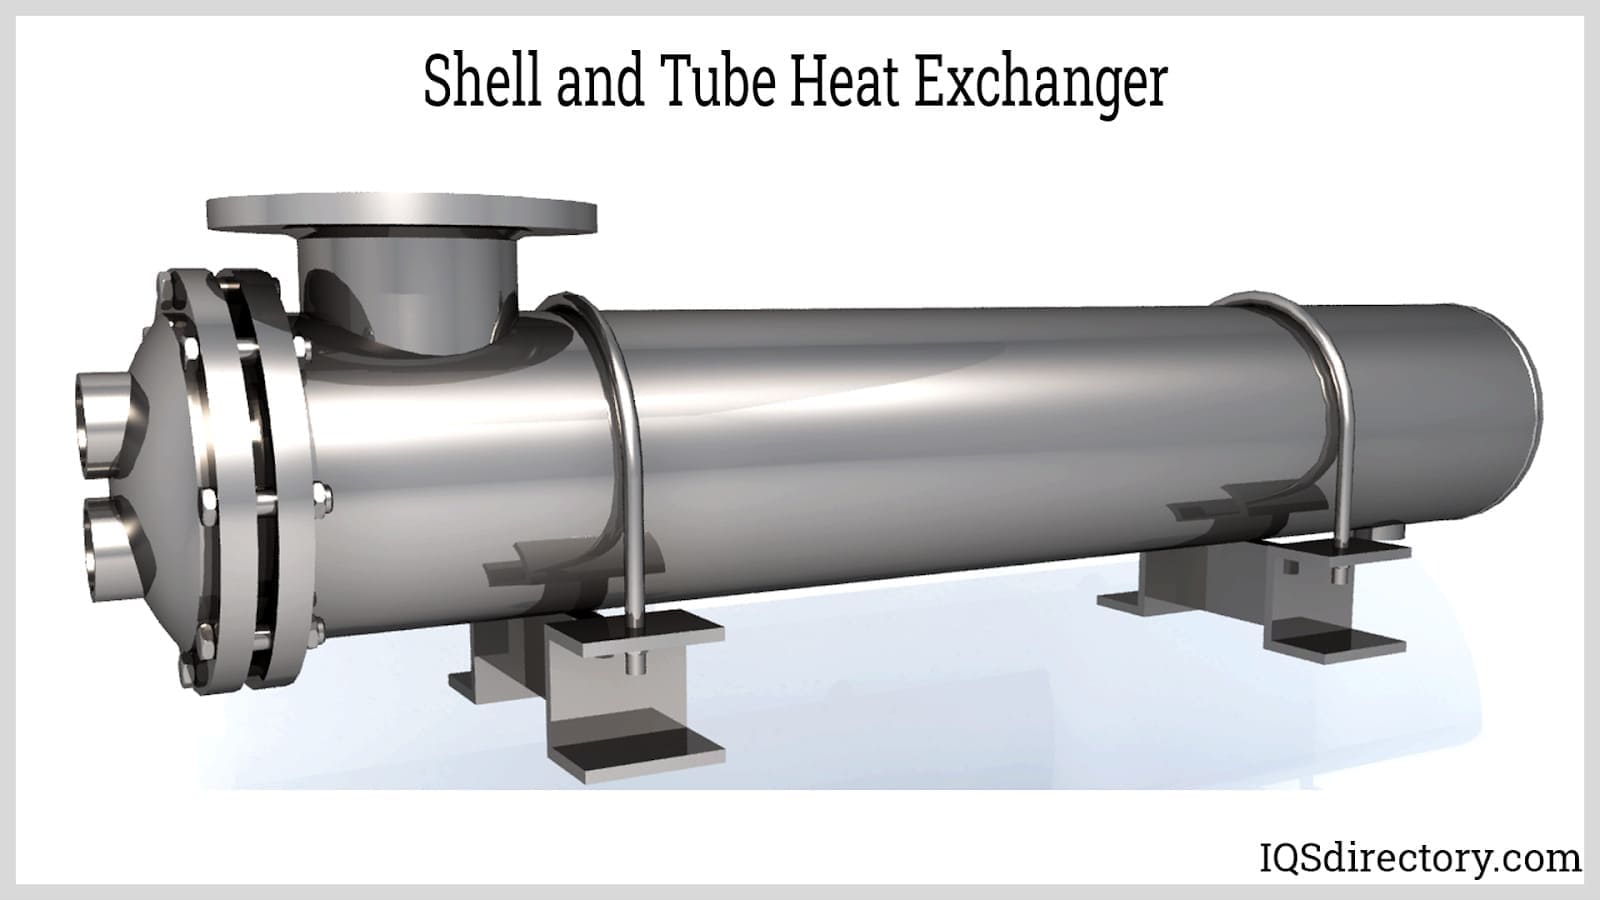
Steam Shell And Tube Heat Exchanger
Imagine waking up on a chilly morning, expecting a warm blast of air from your furnace, only to be greeted by a lukewarm breeze. Or perhaps, during the summer, your air conditioner struggles to keep your home cool, even though it's running constantly. These scenarios often point to an inefficient heating or cooling system. One critical, often overlooked component in many HVAC systems, especially larger ones, is the steam shell and tube heat exchanger. This article will guide you through troubleshooting common problems associated with these heat exchangers, empowering you to identify and potentially resolve issues before calling in a professional.
Understanding Steam Shell and Tube Heat Exchangers
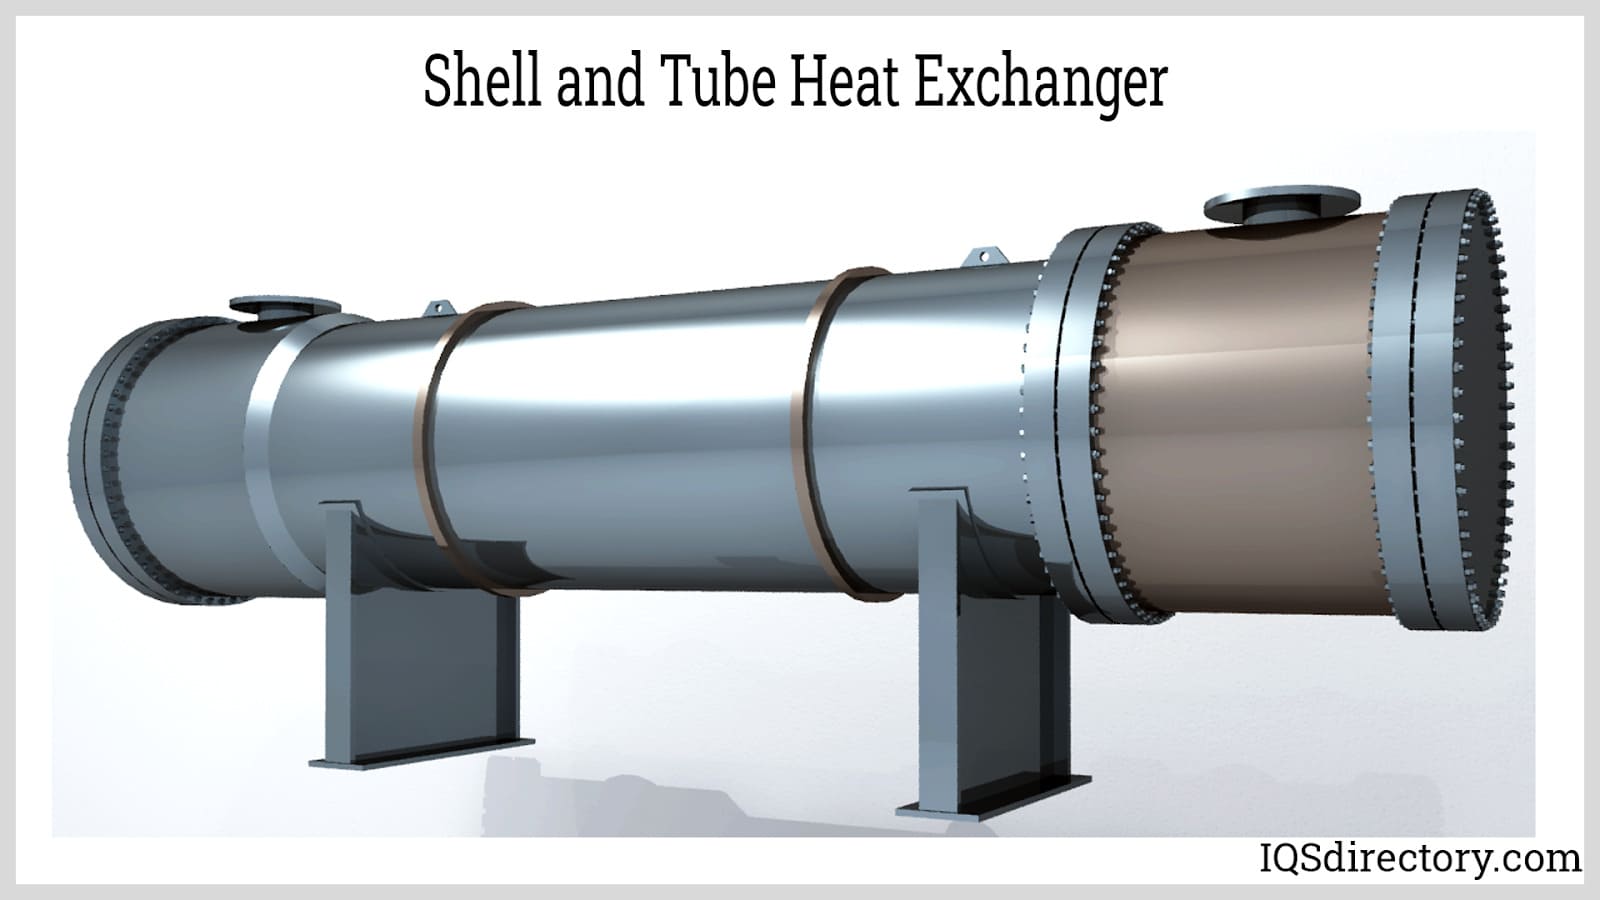
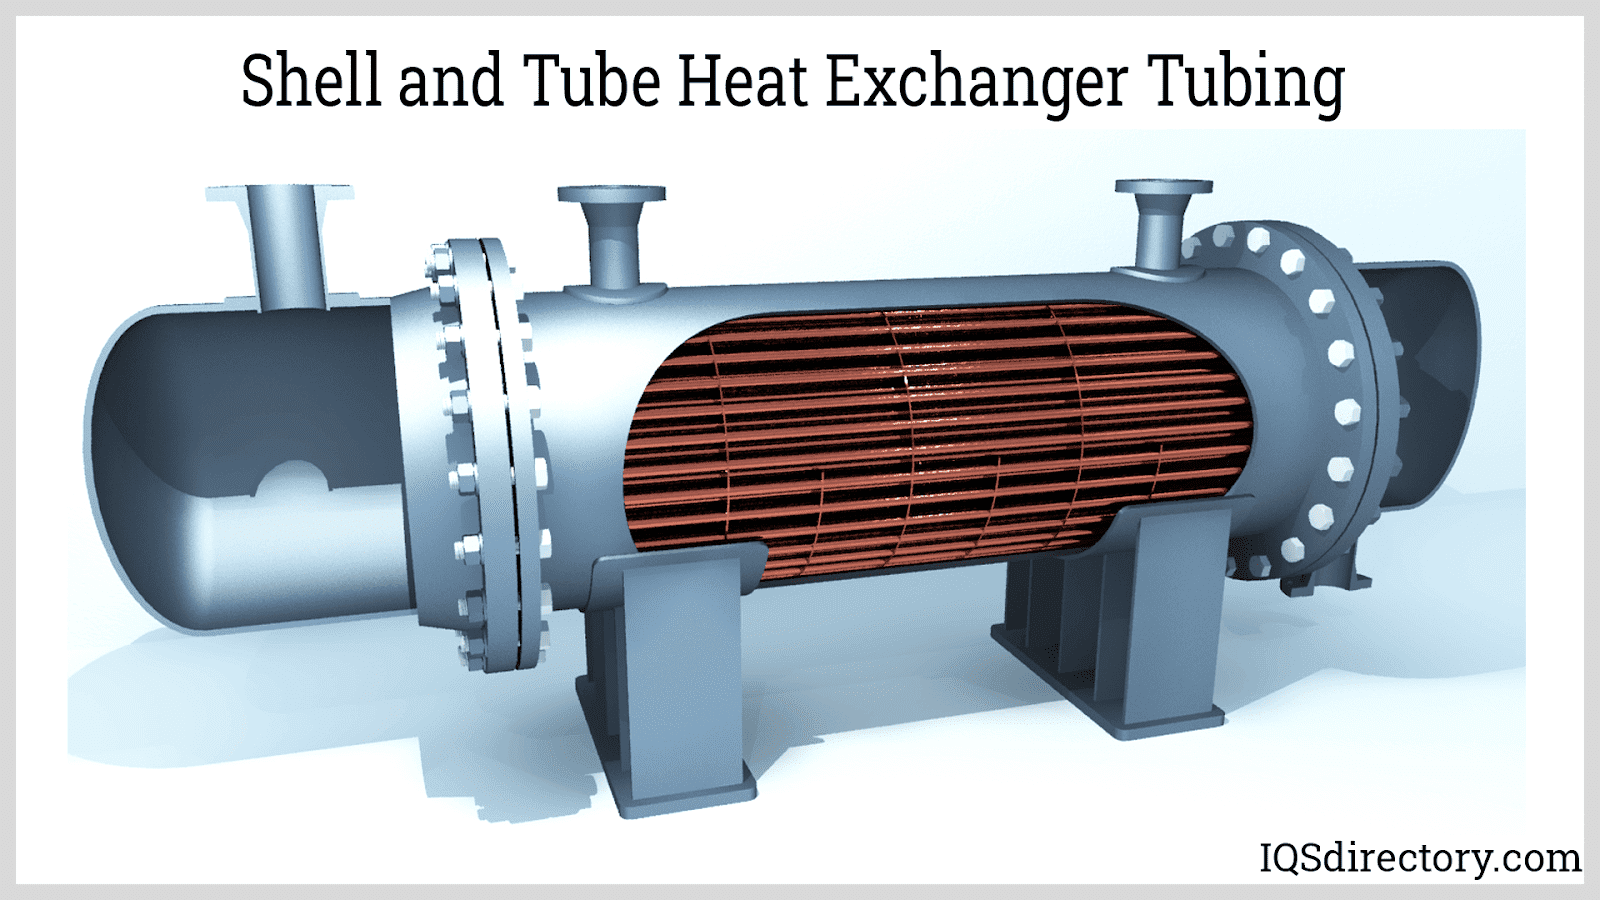
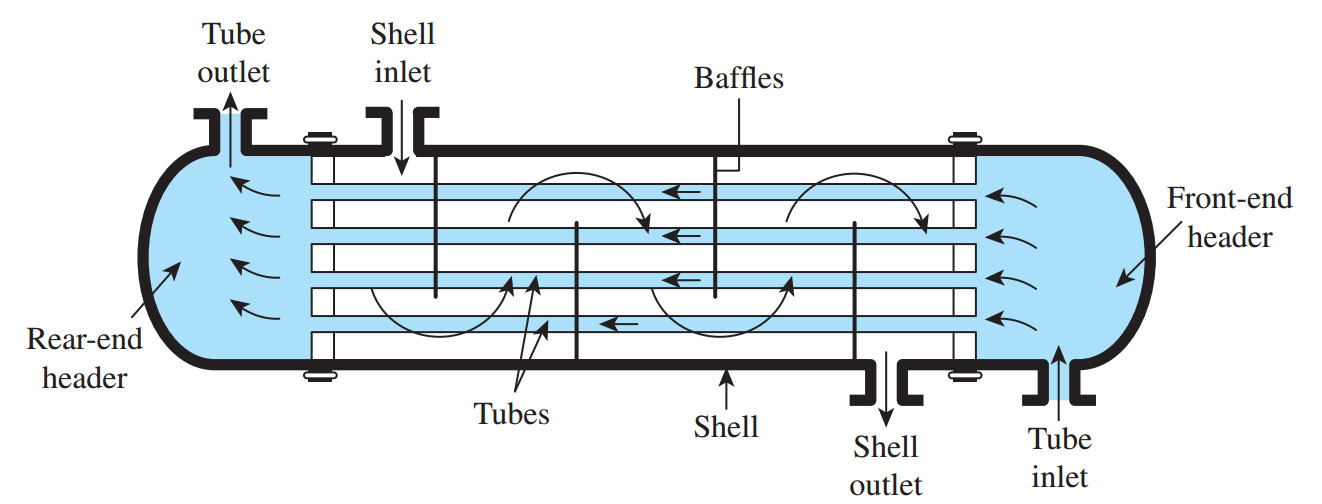
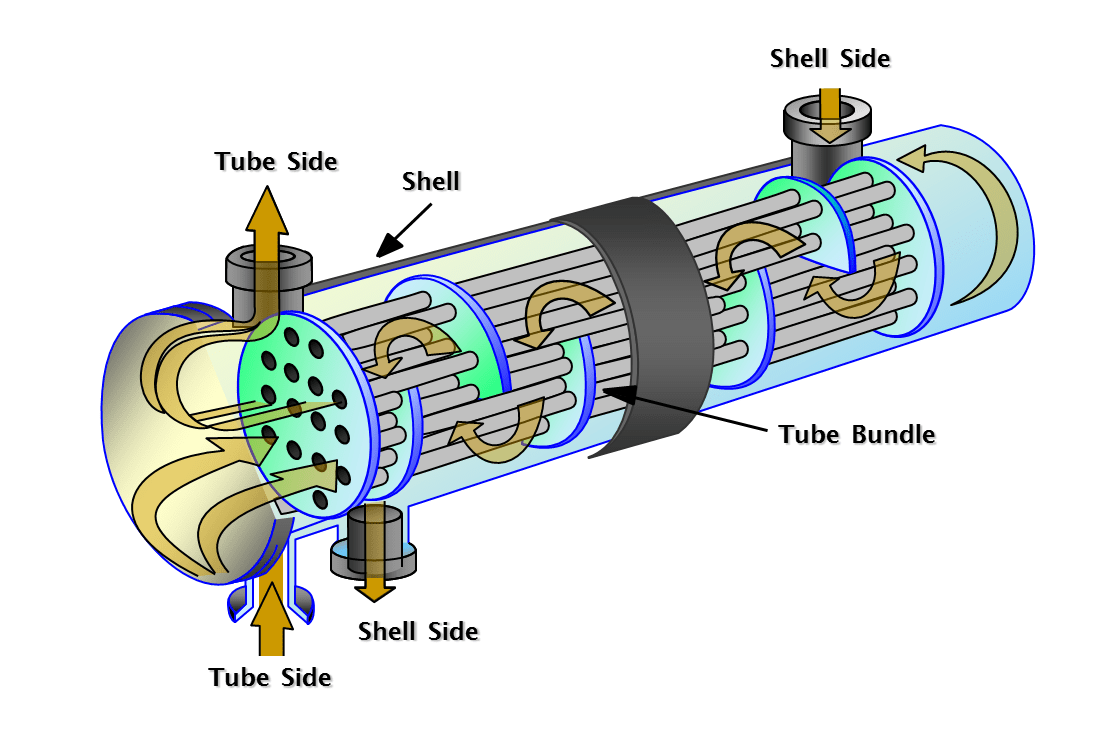
Before diving into troubleshooting, let's briefly understand what a steam shell and tube heat exchanger is and how it works. In simple terms, it's a device designed to transfer heat between two fluids – typically steam and water. Steam flows on one side (usually the shell), while water flows through a bundle of tubes. The steam condenses on the tubes, releasing its latent heat, which warms the water. This heated water can then be used for various purposes, such as providing domestic hot water or heating a building through a hydronic system. In cooling applications, chilled water can run through the tubes, cooling another fluid flowing through the shell.
Common Symptoms of a Faulty Heat Exchanger
Several telltale signs can indicate a problem with your steam shell and tube heat exchanger. Recognizing these symptoms early can save you time and money by preventing further damage and enabling timely repairs.
- Insufficient Heating or Cooling: This is the most common symptom. If the heat exchanger isn't transferring heat efficiently, you'll experience a noticeable drop in the temperature of the heated water or a decrease in cooling capacity.
- High Energy Bills: Reduced efficiency forces your boiler or chiller to work harder to compensate, resulting in significantly higher energy consumption.
- Unusual Noises: Banging, clanging, or whistling sounds coming from the heat exchanger area could indicate steam hammer, scale buildup, or other issues.
- Water Leaks: Leaks around the heat exchanger or its connections are a clear sign of a problem, potentially indicating corrosion or damaged seals.
- Visible Corrosion: Rust or corrosion on the heat exchanger's exterior can weaken the structure and eventually lead to failure.
- Pressure Fluctuations: Unstable steam or water pressure can indicate blockages or other internal problems.
Troubleshooting Steps: A Methodical Approach
Now, let's get down to the nitty-gritty of troubleshooting. Follow these steps systematically to diagnose the problem. Remember, safety is paramount. Always turn off the power to the boiler or chiller before attempting any inspections or repairs.
Step 1: Preliminary Checks (No Tools Required)
These initial checks require no tools and can often reveal obvious issues.
- Visual Inspection: Carefully examine the exterior of the heat exchanger for any signs of leaks, corrosion, or damage. Pay close attention to the connections, welds, and shell. Note any discoloration or unusual deposits.
- Listen for Unusual Noises: As mentioned earlier, unusual noises can indicate problems. Listen for banging, whistling, or hissing sounds emanating from the heat exchanger or its vicinity. Try to pinpoint the source of the noise.
- Check System Pressure: Observe the pressure gauges on the steam and water lines. Are the pressures within the normal operating range? Significant deviations could indicate a problem. Refer to your system's documentation for the correct pressure readings.
- Examine Condensate Return: If you have a condensate return system, check the temperature of the returning condensate. Is it excessively hot or cold? An unusually hot condensate return could suggest steam bypassing the heat exchanger.
- Feel for Temperature Differences: Carefully (and with caution!) feel the pipes entering and exiting the heat exchanger. Is there a noticeable temperature difference between the inlet and outlet? If the difference is minimal, the heat exchanger might not be transferring heat effectively. Warning: Be extremely careful when touching pipes carrying steam or hot water. They can cause severe burns.
Step 2: Checking for Blockages (Basic Tools May Be Required)
Blockages can significantly reduce the efficiency of a heat exchanger. These checks might require some basic tools.
- Inspect Strainers and Filters: Locate and inspect the strainers and filters on both the steam and water lines leading to the heat exchanger. Clogged strainers can restrict flow and reduce heat transfer. Clean or replace them as needed. You'll likely need a wrench to open the strainer housing.
- Check for Air in the System: Air trapped in the system can impede heat transfer. Bleed valves are usually located at high points in the piping system. Carefully open the bleed valves to release any trapped air. Be prepared for water to spray out. Have a bucket and rags handy.
- Examine Vent Valves: Inspect the vent valves on the steam side. These valves are designed to release non-condensable gases, such as air, that can accumulate in the heat exchanger. Ensure they are functioning correctly and not blocked.
- Check for Scale Buildup: Scale buildup inside the tubes can significantly reduce heat transfer. While visually inspecting the inside of the tubes requires dismantling the heat exchanger (which is best left to professionals), you can sometimes infer scale buildup based on other symptoms, such as reduced efficiency and increased pressure drop.
Step 3: Assessing Steam Traps (Basic Tools May Be Required)
Steam traps are crucial for removing condensate from the steam side of the heat exchanger. A malfunctioning steam trap can lead to waterlogging and reduced efficiency.
- Listen to the Steam Trap: Use a screwdriver as a stethoscope to listen to the steam trap. Place the tip of the screwdriver on the trap body and your ear on the handle. A properly functioning steam trap should cycle intermittently, releasing condensate in short bursts. A continuous hissing sound indicates a blown trap, while silence suggests a blocked trap.
- Check the Temperature of the Condensate Line: The condensate line downstream of the steam trap should be cooler than the steam line. If it's excessively hot, it could indicate steam blowing through the trap.
- Inspect the Steam Trap Visually: Look for signs of leaks or corrosion around the steam trap.
- Test the Steam Trap: Some steam traps have a test valve that allows you to discharge condensate. Open the test valve and observe the discharge. A continuous stream of steam indicates a faulty trap.
Step 4: Inspecting Control Valves (Requires Understanding of Control Systems)
Control valves regulate the flow of steam or water to the heat exchanger, maintaining the desired temperature. This step requires some understanding of HVAC control systems.
- Verify Valve Operation: Ensure that the control valves are opening and closing correctly in response to temperature changes. You can usually observe the valve stem moving as the temperature setpoint is adjusted.
- Check for Valve Sticking: A sticking valve can impede flow and reduce heat transfer. Try manually operating the valve to see if it moves freely.
- Inspect the Valve Actuator: The valve actuator is the device that controls the valve. Check for any signs of damage or malfunction.
- Calibrate the Control System: Ensure that the temperature sensors and control system are properly calibrated. Incorrect calibration can lead to inaccurate temperature readings and inefficient operation.
DIY Actions: What You Can Safely Do
Based on your troubleshooting, you might be able to perform some simple DIY actions.
- Clean Strainers and Filters: This is a relatively straightforward task that can significantly improve flow and efficiency. Simply remove the strainer or filter, clean it thoroughly with a brush and water, and reinstall it.
- Bleed Air from the System: Releasing trapped air can restore proper heat transfer. Carefully open bleed valves at high points in the system until all air is purged.
- Replace a Faulty Steam Trap: Replacing a steam trap is a more involved task, but it can be done by a reasonably handy homeowner. Be sure to purchase the correct replacement trap and follow the manufacturer's instructions carefully. Always isolate the steam line and relieve pressure before removing the old trap.
When to Call a Professional
While some issues can be addressed with DIY repairs, certain problems are best left to qualified HVAC professionals. It's crucial to recognize when the situation is beyond your expertise or poses a safety risk.
- Internal Leaks: If you suspect a leak inside the heat exchanger shell or tube bundle, call a professional immediately. Repairing internal leaks often requires specialized equipment and expertise.
- Corrosion: Extensive corrosion can weaken the structure of the heat exchanger and potentially lead to catastrophic failure. A professional can assess the extent of the corrosion and recommend appropriate repairs or replacement.
- Scale Removal: Removing scale buildup inside the tubes often requires chemical cleaning or mechanical descaling, which is best performed by a professional.
- Welding or Fabrication: Any repairs involving welding or fabrication should be performed by a certified welder with experience working on pressure vessels.
- Uncertainty: If you're unsure about the cause of the problem or how to fix it safely, it's always best to err on the side of caution and call a professional.
Safety Precautions
Safety is paramount when working with steam and hot water systems. Always take the following precautions:
- Turn off the power to the boiler or chiller before starting any work.
- Allow the system to cool down before attempting any inspections or repairs.
- Wear appropriate personal protective equipment (PPE), such as safety glasses, gloves, and long sleeves.
- Be careful when handling hot pipes or surfaces.
- Relieve pressure in the system before opening any valves or connections.
- Follow all manufacturer's instructions and safety guidelines.
Preventive Maintenance
The best way to avoid problems with your steam shell and tube heat exchanger is to implement a regular preventive maintenance program. This includes:
- Regularly inspecting the heat exchanger for leaks, corrosion, and damage.
- Cleaning strainers and filters on a routine basis.
- Monitoring system pressure and temperature.
- Testing steam traps periodically.
- Treating the water to prevent scale buildup and corrosion.
- Having a qualified HVAC technician perform a thorough inspection and maintenance service at least once a year.
By following these troubleshooting steps, implementing preventive maintenance practices, and knowing when to call a professional, you can keep your steam shell and tube heat exchanger operating efficiently and reliably for years to come. Remember, a well-maintained system translates to lower energy bills and a more comfortable home.