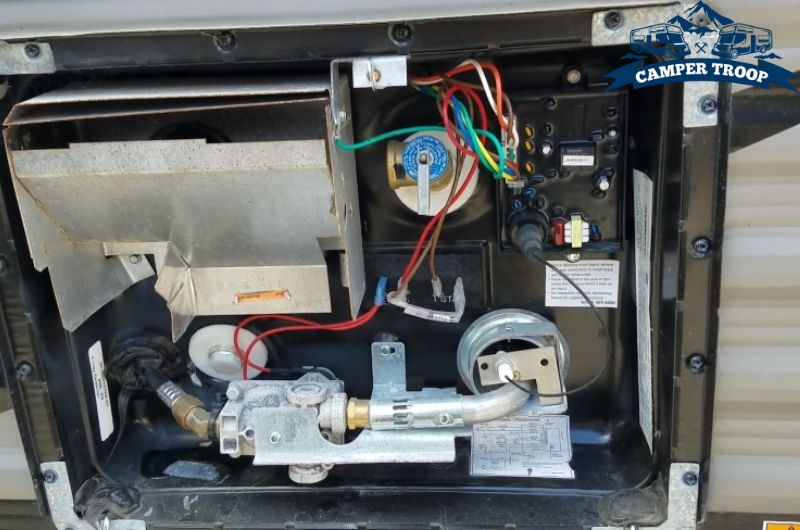
Suburban Rv Water Heater Electric Not Working

One of the most frustrating problems an RV owner can face is a water heater that refuses to heat on electric power. You flip the switch, expect a cascade of hot water for a relaxing shower, and...nothing. Cold water greets you. This article provides a step-by-step guide to diagnosing and fixing common issues that prevent your Suburban RV water heater from working on electric, saving you time and money. Safety is paramount, so follow these instructions carefully.
Before You Begin: Safety First!
Before you touch anything, understand that you're dealing with electricity and potentially scalding water. Ignoring safety can lead to serious injury or damage. Observe these precautions:
- Turn off the Water Heater Breaker: Locate the breaker in your RV's electrical panel labeled "Water Heater" or similar and switch it to the OFF position. This is absolutely critical.
- Unplug from Shore Power: Disconnect your RV from shore power or turn off the generator to ensure no electrical current is flowing to the RV.
- Let the Water Cool: If the water heater has been recently used on propane, allow sufficient time for the water to cool down to prevent burns.
Step 1: Confirming the Problem
It sounds obvious, but let's confirm the issue isn't something simple. Perform these quick checks:
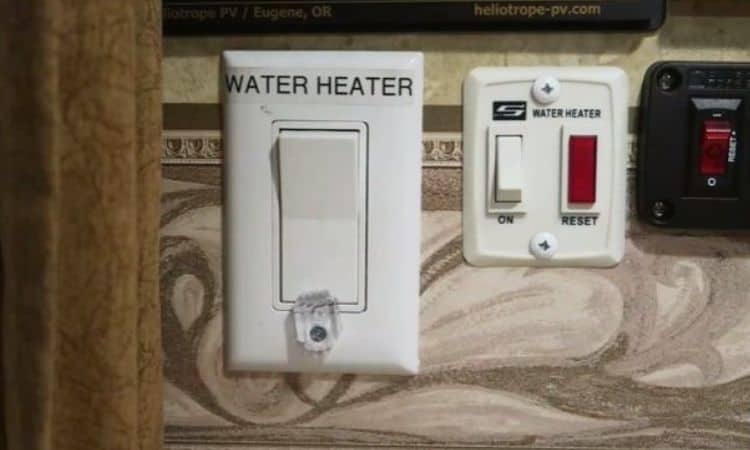
- Check the On/Off Switch: Make sure the electric heating element switch inside the RV is in the "ON" position. These are often small rocker switches located near other control panels.
- Verify Shore Power: Confirm your RV is properly connected to a reliable power source (shore power or generator) and that the power source is functioning correctly. Use a multimeter to verify the voltage at the outlet.
- Check the Breaker: Even if you think you turned off the right breaker, double-check the water heater breaker in your RV's electrical panel hasn't tripped. If it has, reset it. If it trips again immediately, there's a significant electrical issue requiring professional attention.
If these simple checks don't resolve the issue, proceed to the next step.
Step 2: Inspecting the Heating Element
The heating element is the heart of your electric water heater. A burned-out element is a very common cause of failure.
- Locate the Heating Element: This is usually accessible from the outside of the RV, behind a small access panel. You'll likely need a screwdriver to remove the panel.
- Disconnect the Wires: With the power OFF (double-check this!), carefully disconnect the two wires connected to the heating element. Use insulated pliers.
- Test for Continuity: Use a multimeter set to the "Ohms" setting (resistance). Place one probe on each of the element's terminals.
- Good Element: You should get a reading, typically between 10 and 15 ohms. The exact value will vary depending on the wattage of your element.
- Bad Element: If the multimeter reads "OL" (Over Limit) or infinity, the element is open and needs replacement. If it reads 0 ohms, the element is shorted. In either case, replacement is necessary.
Replacing the Heating Element:
- Drain the Water Heater: Completely drain the water heater tank. This is essential to avoid a flood. Locate the drain plug (usually a plastic plug at the bottom of the tank on the exterior) and remove it. Use Teflon tape on the threads when you reinstall it. Open a hot water faucet inside the RV to allow air to enter the tank and speed up the draining process.
- Remove the Old Element: Use a socket wrench to remove the old heating element. Be prepared for some residual water to spill out.
- Install the New Element: Apply Teflon tape to the threads of the new heating element. Install it carefully, ensuring it's properly seated and tightened.
- Reconnect the Wires: Reconnect the wires to the heating element terminals. Make sure the connections are secure.
- Refill the Water Heater: Close the drain plug and open the hot water faucet inside the RV. Turn on the water pump and allow the tank to fill completely, purging any air from the system. You'll know it's full when water flows steadily from the hot water faucet.
- Test the New Element: Turn the water heater breaker back ON and test the electric heating function. If the water heats up, congratulations, you've fixed the problem!
Important Note: When replacing the heating element, use the correct wattage replacement. Using the wrong wattage can damage your water heater or cause electrical problems.
Step 3: Checking the High-Temperature Limit Switch and ECO
The high-temperature limit switch and ECO (Energy Cut Off) are safety devices designed to prevent the water heater from overheating. If the water temperature gets too high, the ECO will trip, cutting off power to the heating element.
- Locate the ECO: The ECO is usually located near the heating element, often a small, rectangular box with two wires connected to it. It often has a small red button.
- Reset the ECO: With the power OFF, press the red reset button firmly. Sometimes, it takes a little pressure to reset.
- Test for Continuity: Use a multimeter set to the "Continuity" setting. Place one probe on each of the ECO's terminals.
- Good ECO: The multimeter should beep or display a near-zero resistance reading, indicating continuity.
- Bad ECO: If the multimeter doesn't beep or displays "OL," the ECO is open and needs replacement.
Replacing the ECO:
- Disconnect the Wires: With the power OFF, carefully disconnect the wires connected to the ECO.
- Remove the Old ECO: The ECO is usually held in place by a clip or screw. Remove it carefully.
- Install the New ECO: Install the new ECO in the same location and secure it with the clip or screw.
- Reconnect the Wires: Reconnect the wires to the ECO terminals. Make sure the connections are secure.
- Test the Water Heater: Turn the water heater breaker back ON and test the electric heating function.
Step 4: Inspecting the Wiring
Loose or corroded wiring can prevent the heating element from receiving power.
- Visually Inspect the Wiring: Carefully inspect all wiring connected to the water heater, the heating element, and the ECO. Look for any signs of damage, corrosion, or loose connections.
- Tighten Connections: Tighten any loose connections using a screwdriver.
- Clean Corroded Connections: If you find corroded connections, clean them with a wire brush or electrical contact cleaner.
Important Note: If you find severely damaged or frayed wiring, it's best to replace the entire wire section. Ensure you use the correct gauge wire for the application.
Step 5: Checking the Relay (if applicable)
Some RV water heaters use a relay to control the power to the heating element. If the relay fails, the heating element won't receive power.
- Locate the Relay: The relay is usually located in the control panel area or near the water heater. Consult your RV's wiring diagram for the exact location.
- Test the Relay: This step requires a bit more electrical knowledge. Using a multimeter, check the voltage at the relay's coil when the electric heating element switch is turned ON. You should see 12V DC. If you don't, the problem could be with the switch or the wiring leading to the relay.
- Check the Relay Output: With the electric heating element switch turned ON and the relay coil energized, check the voltage at the relay's output terminals. You should see 120V AC (or 240V AC, depending on your RV's electrical system). If you don't, the relay is likely faulty and needs replacement.
Replacing the Relay:
- Disconnect the Wires: With the power OFF, carefully disconnect the wires connected to the relay.
- Remove the Old Relay: The relay is usually plugged into a socket or held in place by screws. Remove it carefully.
- Install the New Relay: Install the new relay in the same location and secure it.
- Reconnect the Wires: Reconnect the wires to the relay terminals. Make sure the connections are secure.
- Test the Water Heater: Turn the water heater breaker back ON and test the electric heating function.
When to Call a Professional
While many water heater problems can be resolved with DIY troubleshooting, some issues require the expertise of a qualified RV technician or electrician. Call a professional if:
- You are uncomfortable working with electricity. Safety is paramount, and if you're unsure about any step, it's best to leave it to the professionals.
- The breaker trips repeatedly after resetting it. This indicates a significant electrical problem that could be dangerous.
- You suspect a short circuit or damaged wiring within the water heater itself. Tampering with internal wiring can be hazardous.
- You've replaced the heating element, ECO, and checked the wiring, and the water heater still doesn't work. There may be a more complex problem that requires specialized diagnostic equipment.
- You suspect a problem with the RV's electrical system beyond the water heater itself. This could include issues with the inverter, converter, or wiring throughout the RV.
Preventative Maintenance
To prolong the life of your RV water heater and prevent future problems, consider these preventative maintenance tips:
- Drain and Flush the Tank Regularly: Drain and flush the water heater tank at least twice a year to remove sediment buildup. This can improve heating efficiency and prevent corrosion.
- Inspect the Anode Rod: The anode rod is a sacrificial metal rod that protects the tank from corrosion. Inspect it annually and replace it when it's significantly corroded.
- Winterize Properly: When winterizing your RV, completely drain the water heater tank to prevent freezing and damage.
- Clean Connections: Periodically clean electrical connections to prevent corrosion.
By following these steps, you can confidently diagnose and fix many common issues with your Suburban RV water heater's electric heating system. Remember to prioritize safety and don't hesitate to call a professional when needed. Happy travels!