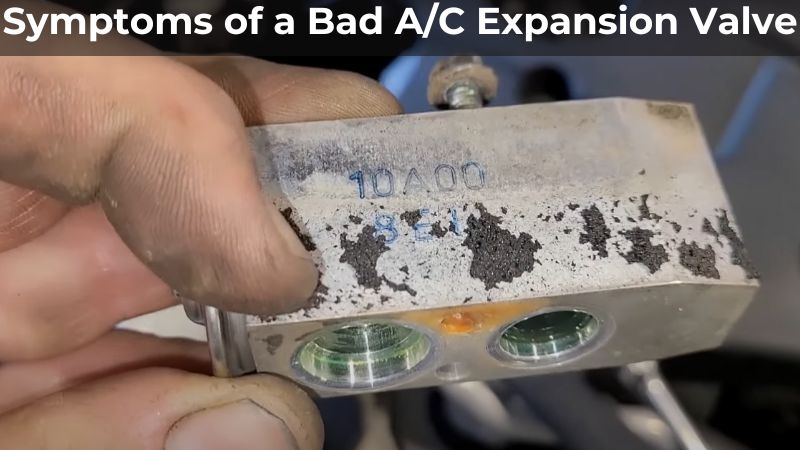
Symptoms Of Bad Thermal Expansion Valve
Is your home's air conditioning or heat pump system struggling to keep you comfortable? Are you noticing inconsistent temperatures in different rooms, or is the system running constantly without effectively cooling or heating? One potential culprit behind these frustrating issues could be a malfunctioning thermal expansion valve (TXV).
The TXV is a critical component in your HVAC system, responsible for regulating the flow of refrigerant into the evaporator coil. When it fails, it can lead to a range of problems affecting your system's performance and efficiency. This article will guide you through a methodical troubleshooting process to help you identify the symptoms of a bad TXV and take appropriate action. We'll cover what you can check yourself and when it's time to call in the pros.
Understanding the Thermal Expansion Valve
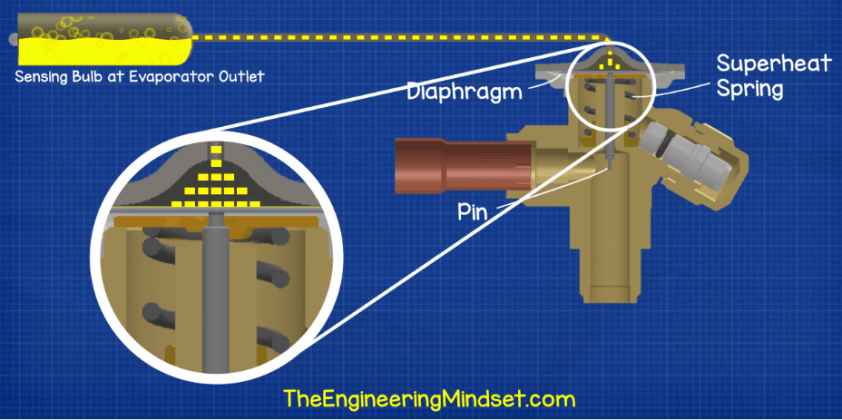
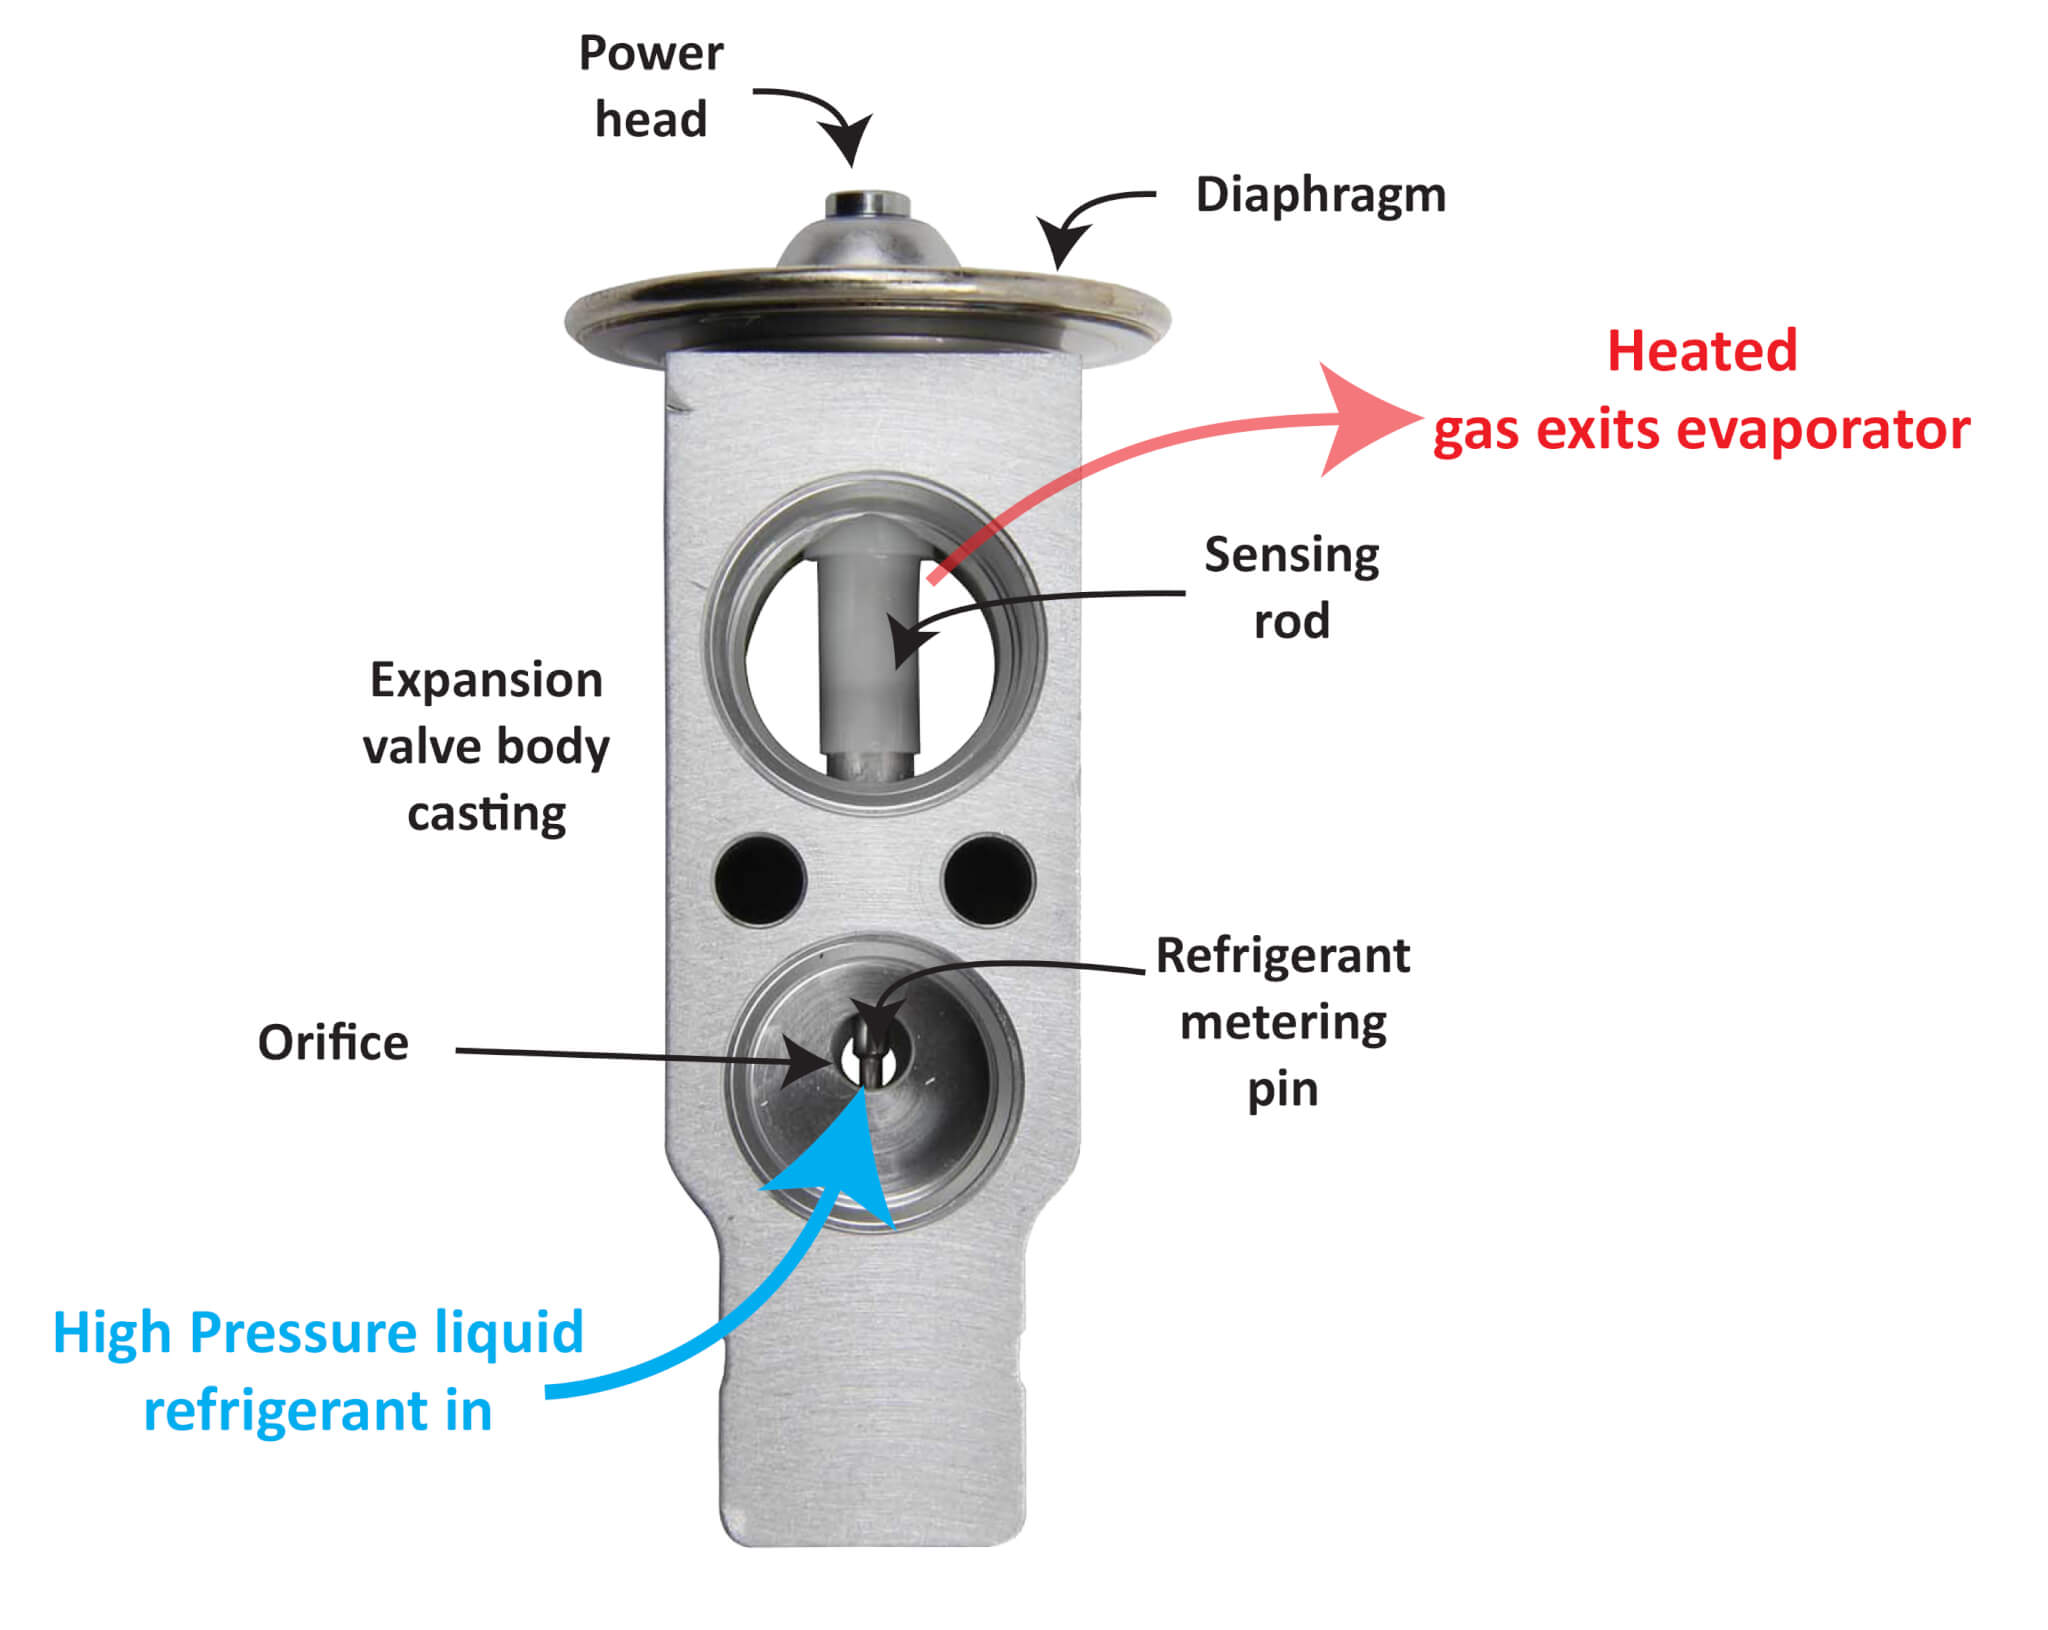
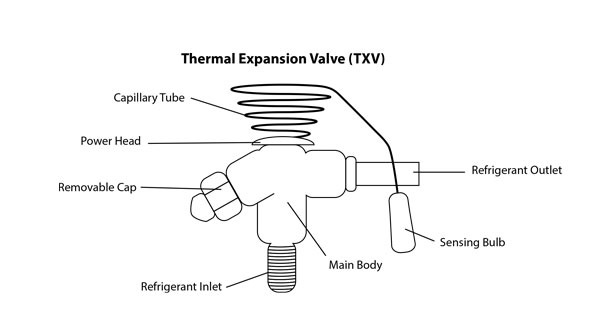
Before we dive into troubleshooting, let's briefly understand what a TXV does. The TXV's primary job is to maintain a consistent superheat in the evaporator coil. Superheat is the amount the refrigerant is heated above its boiling point. By controlling the refrigerant flow, the TXV ensures that the refrigerant is fully vaporized before it reaches the compressor, preventing damage and maximizing efficiency.
Essentially, the TXV acts like a sophisticated valve that automatically adjusts based on the cooling load and the temperature of the refrigerant exiting the evaporator coil. A properly functioning TXV is essential for optimal HVAC performance.
Symptoms of a Bad Thermal Expansion Valve
A malfunctioning TXV can manifest in several ways. Here are some common symptoms to watch out for:
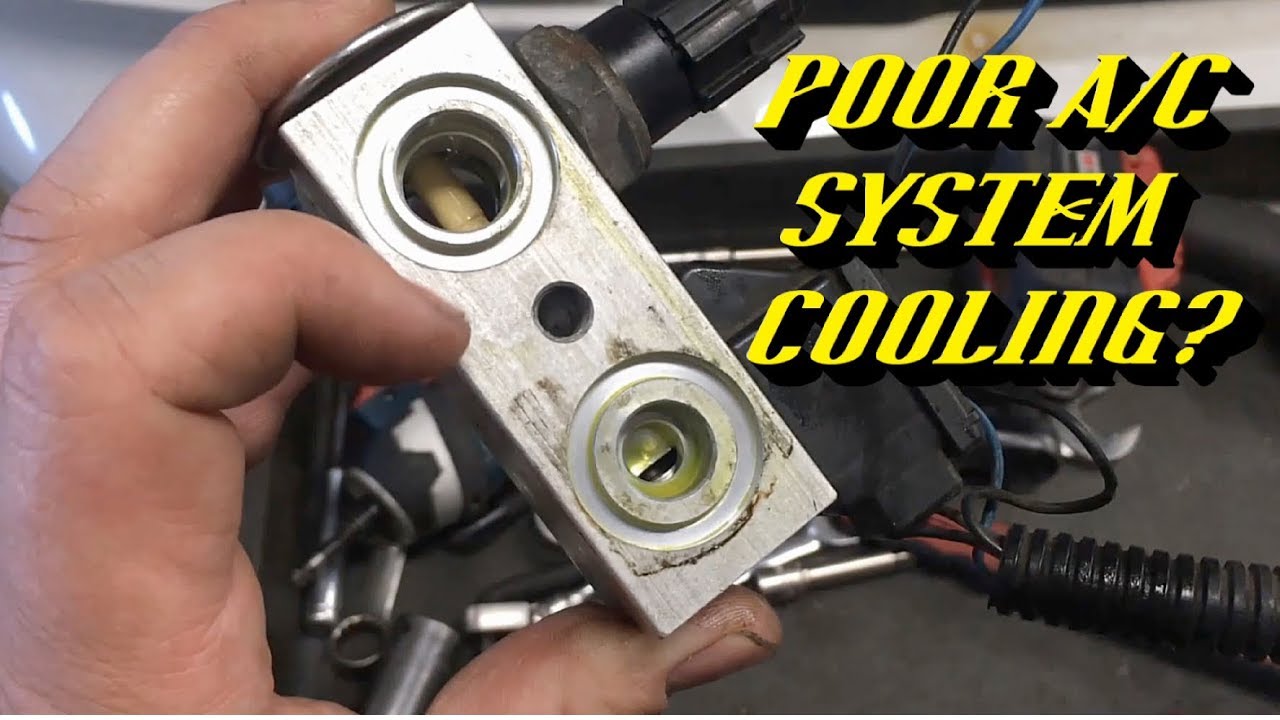
1. Insufficient Cooling or Heating
This is the most common and noticeable symptom. The system may run constantly, but the air coming from the vents is not as cold (or hot) as it should be. You might notice rooms taking a long time to cool down (or heat up), or the desired temperature simply isn't being reached.
2. Icing on the Evaporator Coil
If the TXV is stuck in a partially closed position, it can restrict refrigerant flow, causing the evaporator coil to become excessively cold. This can lead to ice formation on the coil, further hindering its ability to absorb heat and cool the air. You may see ice on the indoor unit or notice a musty smell.
3. High or Low Superheat
As mentioned earlier, the TXV controls superheat. A faulty TXV can result in either excessively high or low superheat. This requires professional measurement with specialized tools, but it's a key indicator for HVAC technicians.
4. System Short Cycling
Short cycling refers to the system turning on and off frequently in short intervals. This can happen if the TXV is malfunctioning and causing pressure imbalances in the system. Short cycling is inefficient and can put unnecessary wear and tear on the compressor.
5. High or Low Suction Pressure
The suction pressure, measured at the low-pressure side of the system, can be affected by a bad TXV. A stuck-closed TXV can cause low suction pressure, while a stuck-open TXV can cause high suction pressure. Again, this requires professional measurement.
6. Compressor Issues
In severe cases, a malfunctioning TXV can lead to compressor problems. If the TXV allows liquid refrigerant to enter the compressor, it can cause liquid slugging, which can severely damage or destroy the compressor. Listen for unusual noises from the outdoor unit, such as banging or rattling.
Troubleshooting Steps: What You Can Check (and What You Can't)
Now, let's get into the troubleshooting process. We'll start with the simple checks you can perform yourself and then discuss the issues that require professional attention.
Step 1: Basic Visual Inspection (No Tools Required)
- Check the air filter: A dirty air filter restricts airflow and can cause icing on the evaporator coil, mimicking the symptoms of a bad TXV. Replace the filter if it's dirty.
- Inspect the indoor unit: Look for signs of ice on the evaporator coil. If you see ice, turn off the system and allow it to thaw completely. Then, investigate the cause of the icing (dirty filter, restricted airflow, etc.).
- Check the outdoor unit: Ensure the outdoor unit is free of debris, such as leaves, branches, and grass clippings. Clear any obstructions to ensure proper airflow.
- Listen for unusual noises: Pay attention to any strange sounds coming from both the indoor and outdoor units. Unusual noises, such as banging, rattling, or hissing, can indicate a problem.
Step 2: Temperature Checks (No Tools Required)
While not definitive, these checks can provide clues.
- Air vent temperature: Use a thermometer to measure the temperature of the air coming from the supply vents when the system is running. Compare it to the return air temperature. A significant difference is expected. Note any vents that are significantly warmer or cooler than others.
- Feel the refrigerant lines: Caution: Be careful not to burn yourself. The larger refrigerant line (suction line) should feel cool to the touch when the system is running. The smaller line (liquid line) should feel warm. If either line feels significantly different than expected, it could indicate a problem with refrigerant flow.
Step 3: Identifying Icing (No Tools Required)
Icing is a key symptom, and you should check for this carefully.
- Look for ice build-up: Carefully inspect the evaporator coil inside the indoor unit. You may need to remove an access panel to see the coil. If you see ice, note the extent of the icing. Is it just a small area, or is the entire coil covered?
- Listen for hissing sounds: If the coil is iced up, you might hear a hissing sound as the refrigerant tries to flow through the restricted area.
Step 4: Using Basic Tools (Requires Multimeter and possibly a Manifold Gauge Set - Proceed with Caution!)
Warning: Working with HVAC systems involves electricity and refrigerant, which can be dangerous. If you are not comfortable working with electrical components or refrigerant, DO NOT attempt these steps. Contact a qualified HVAC technician.
These steps require more advanced knowledge and tools and are generally best left to professionals, but for the sake of thoroughness, here's what *can* be done with basic equipment:
- Check the Thermostat: Use a multimeter to test the thermostat wires connected to the unit's control board to confirm it's calling for heating or cooling. Sometimes a simple thermostat malfunction can mimic TXV issues.
- Refrigerant Pressure Check (Extremely Cautious Approach): Connect a manifold gauge set to the service ports on the outdoor unit. This will allow you to read the high and low-side pressures of the refrigerant. Compare these pressures to the manufacturer's specifications for your system. Significant deviations from the specified pressures can indicate a problem with the TXV or other components. *Note:* This step requires careful handling of refrigerant and adherence to safety procedures. Releasing refrigerant into the atmosphere is illegal and harmful to the environment.
When to Call a Professional HVAC Technician
While the previous steps can help you identify potential problems, diagnosing and repairing a malfunctioning TXV often requires specialized tools, knowledge, and expertise. Here's when you should call a professional:
- You are not comfortable working with electricity or refrigerant: As mentioned earlier, HVAC systems involve potentially dangerous components. If you are not confident in your abilities, it's best to leave the work to a professional.
- You suspect a refrigerant leak: Refrigerant leaks can be harmful to the environment and can indicate a serious problem with your system. A professional can locate and repair the leak properly.
- You need to measure superheat and subcooling: These measurements require specialized equipment and knowledge and are essential for accurately diagnosing TXV problems.
- You suspect the compressor is damaged: Compressor repairs are complex and expensive. A professional can properly diagnose the problem and recommend the best course of action.
- You are unsure about the diagnosis: If you've tried the troubleshooting steps and are still unsure what's causing the problem, it's best to consult a professional.
Professional TXV Diagnostics and Repair
A qualified HVAC technician will perform a comprehensive diagnostic assessment of your system, including:
- Measuring superheat and subcooling: This will help determine if the TXV is functioning correctly and regulating refrigerant flow properly.
- Checking refrigerant pressures: This will help identify any pressure imbalances in the system.
- Inspecting the TXV: The technician will visually inspect the TXV for signs of damage or malfunction.
- Testing the TXV's operation: The technician may use specialized tools to test the TXV's response to changes in temperature and pressure.
If the TXV is found to be faulty, the technician will replace it with a new one. This involves recovering the refrigerant, replacing the TXV, evacuating the system, and recharging it with the correct amount of refrigerant. These procedures require specialized equipment and training.
Preventive Maintenance
While TXV failures can sometimes be unavoidable, you can take steps to minimize the risk and extend the life of your HVAC system:
- Regularly replace the air filter: A clean air filter ensures proper airflow and prevents icing on the evaporator coil.
- Schedule annual maintenance: A professional HVAC technician can inspect your system, clean the coils, and identify potential problems before they become serious.
- Keep the outdoor unit clean: Clear any debris from around the outdoor unit to ensure proper airflow.
Conclusion
A malfunctioning thermal expansion valve can cause a variety of problems with your HVAC system, leading to discomfort and increased energy bills. By understanding the symptoms of a bad TXV and following the troubleshooting steps outlined in this article, you can take the first steps toward identifying the problem. Remember to prioritize safety and call a qualified HVAC technician when necessary. With proper diagnosis and repair, you can restore your system to optimal performance and enjoy a comfortable home.
By taking a proactive approach to HVAC maintenance and being aware of potential issues, you can keep your system running efficiently and reliably for years to come.