To Change From Psig To Psia You Must
One of the most common headaches for homeowners is an air conditioner that's blowing warm air, or a furnace struggling to heat the house. This isn't just uncomfortable; it can lead to higher energy bills and potential damage to your HVAC system if left unchecked. Many factors can cause this, but one critical aspect HVAC technicians often consider is pressure, and understanding the difference between psig and psia can be crucial, even if you're just trying to understand what your technician is talking about.
Understanding the Basics: Pressure in HVAC
Before we dive into troubleshooting, let's clarify some terms. HVAC systems rely on refrigerant, a chemical that absorbs and releases heat as it cycles through the system. The pressure of this refrigerant is vital for proper operation. We measure pressure in pounds per square inch (psi), but there are two key types to know:
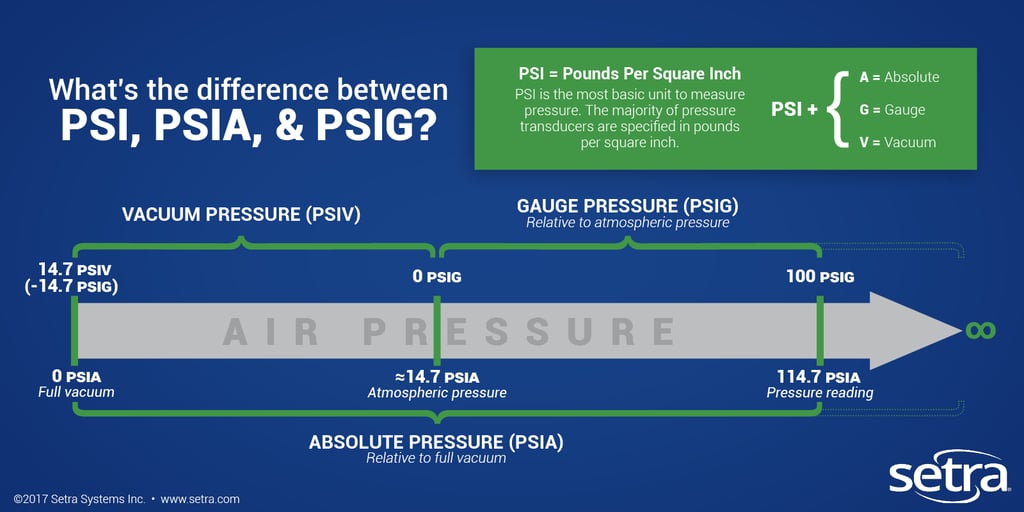
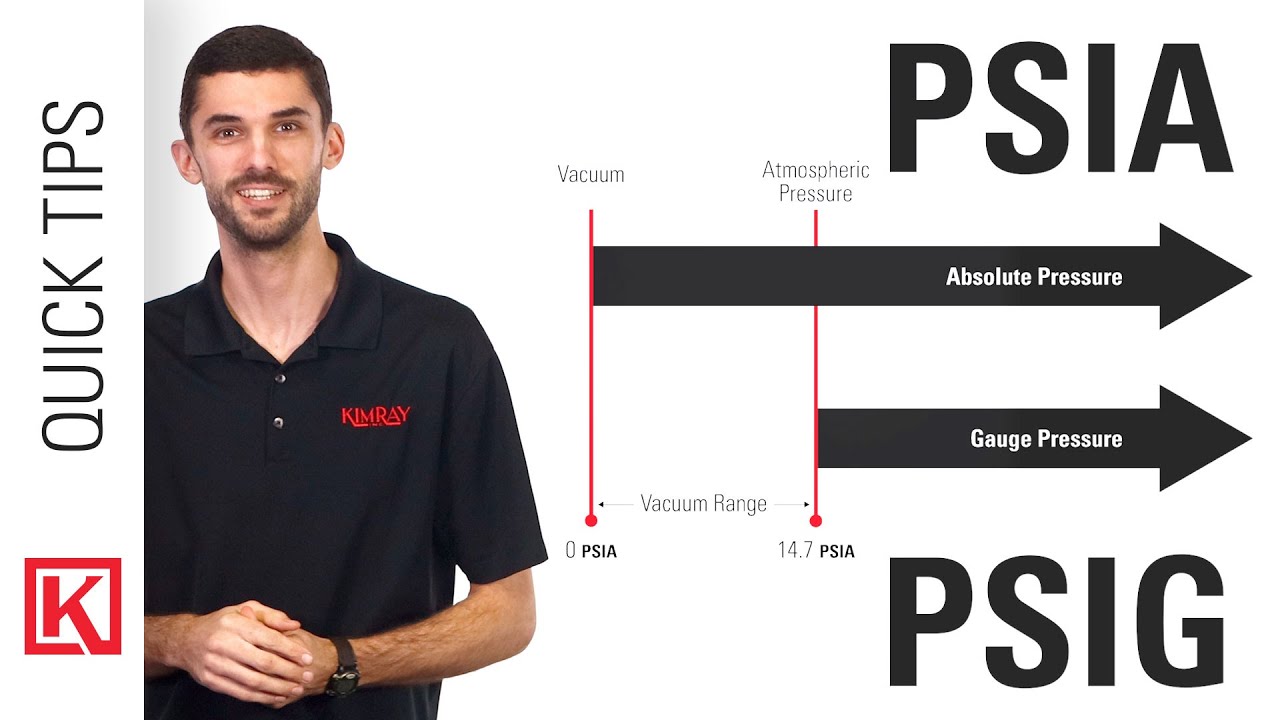
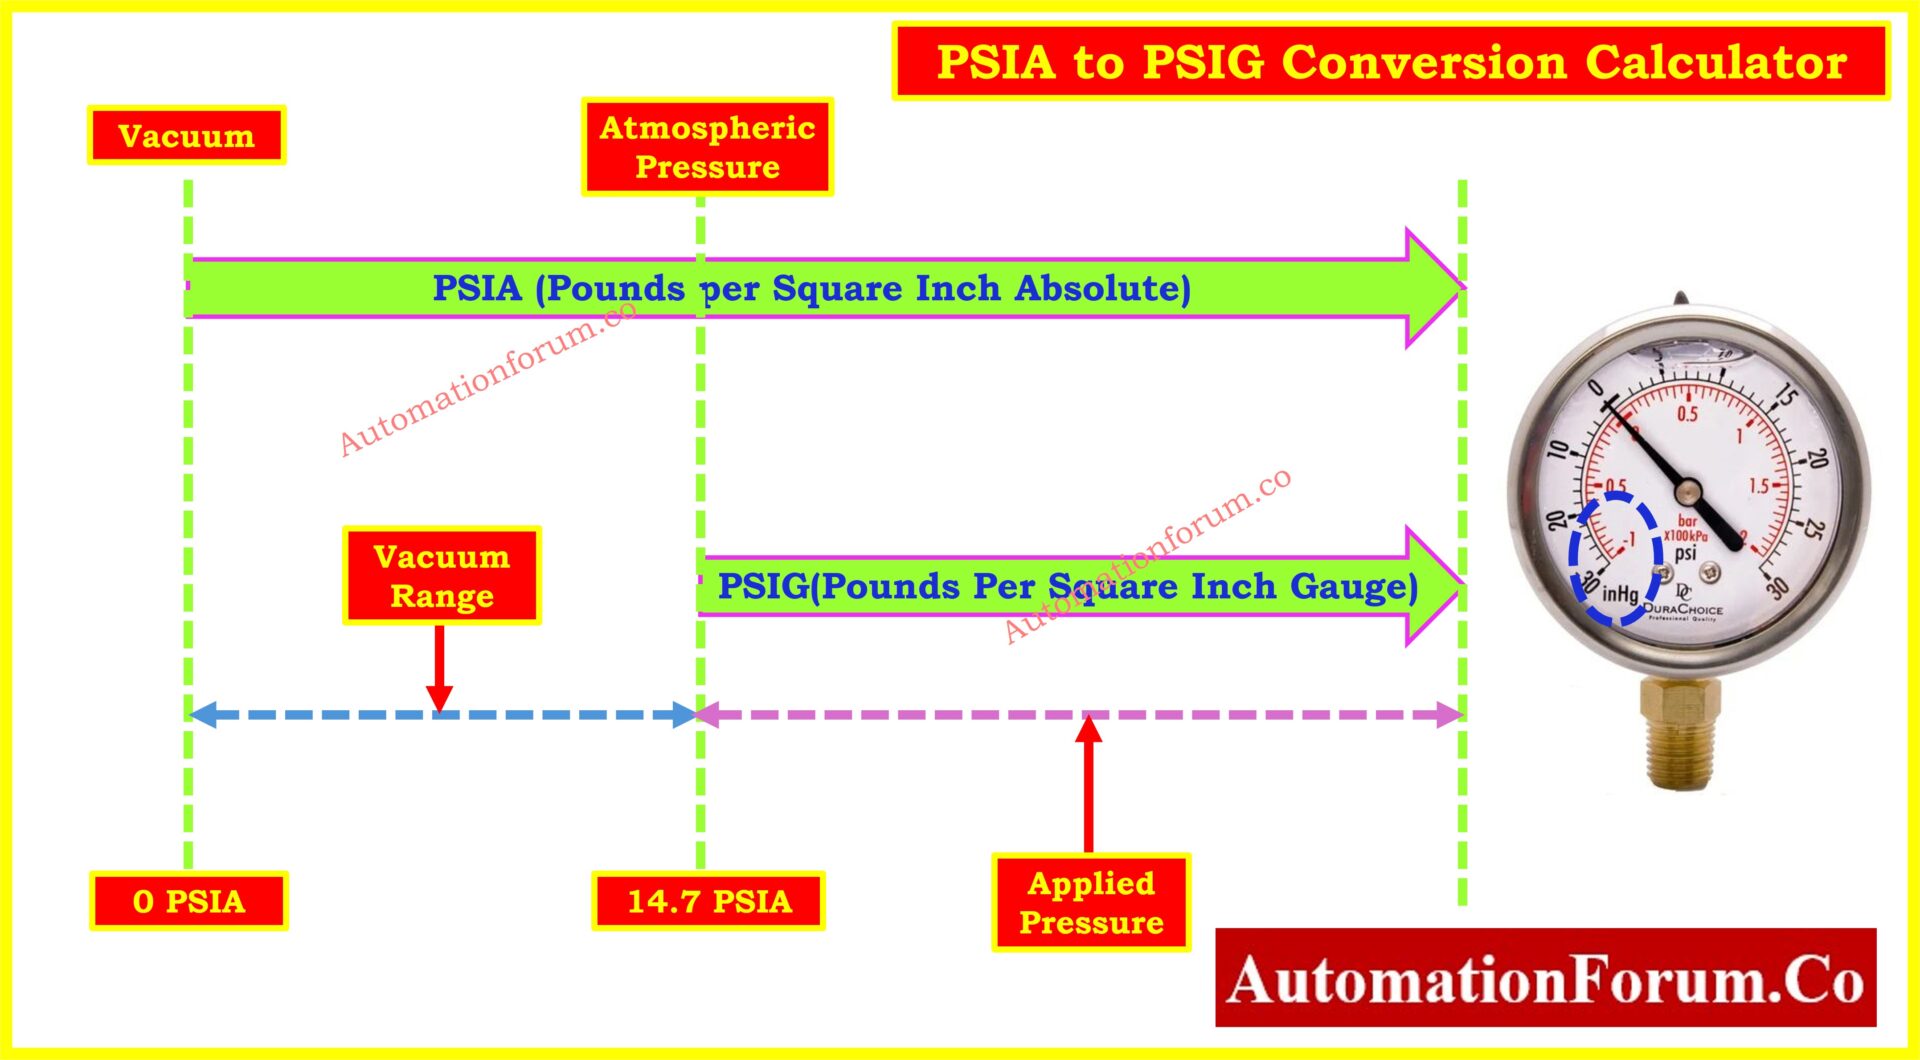
- Psig (Pounds per Square Inch Gauge): This is pressure *relative to atmospheric pressure*. A gauge reading of 0 psig means the pressure inside the system is the same as the pressure outside (atmospheric pressure).
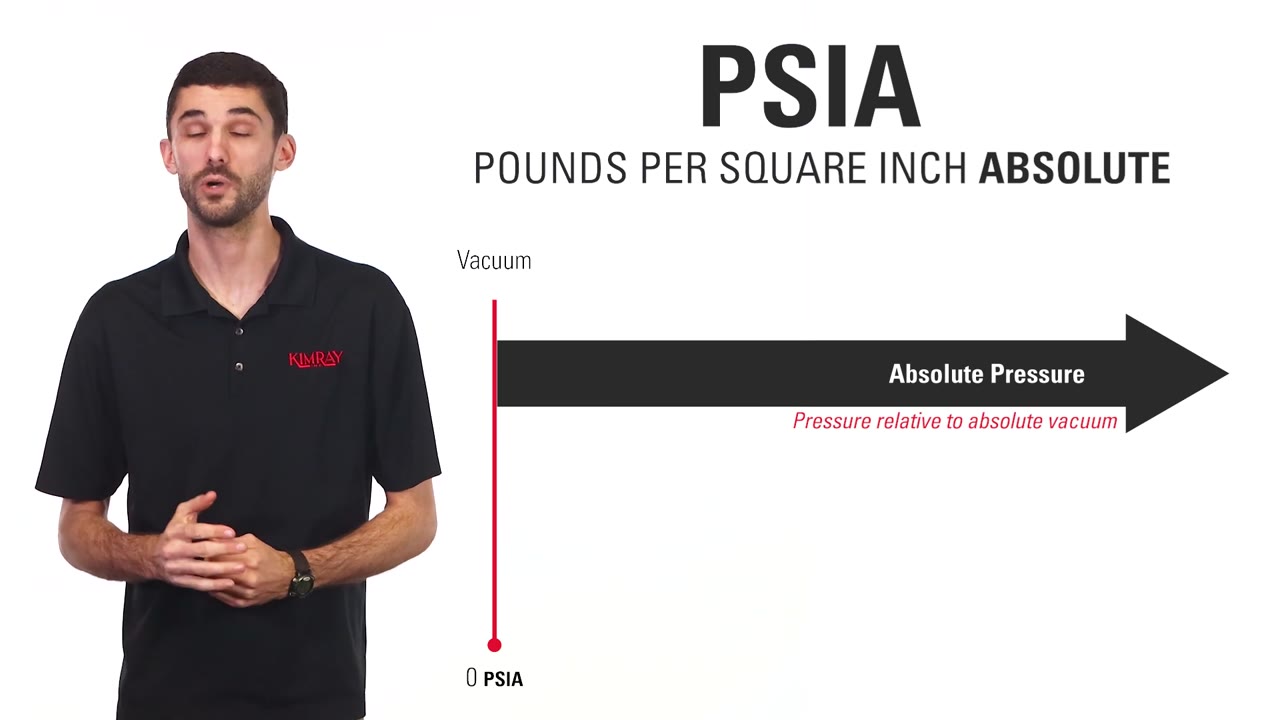
- Psia (Pounds per Square Inch Absolute): This is pressure *relative to a perfect vacuum*. It includes atmospheric pressure. At sea level, atmospheric pressure is approximately 14.7 psi.
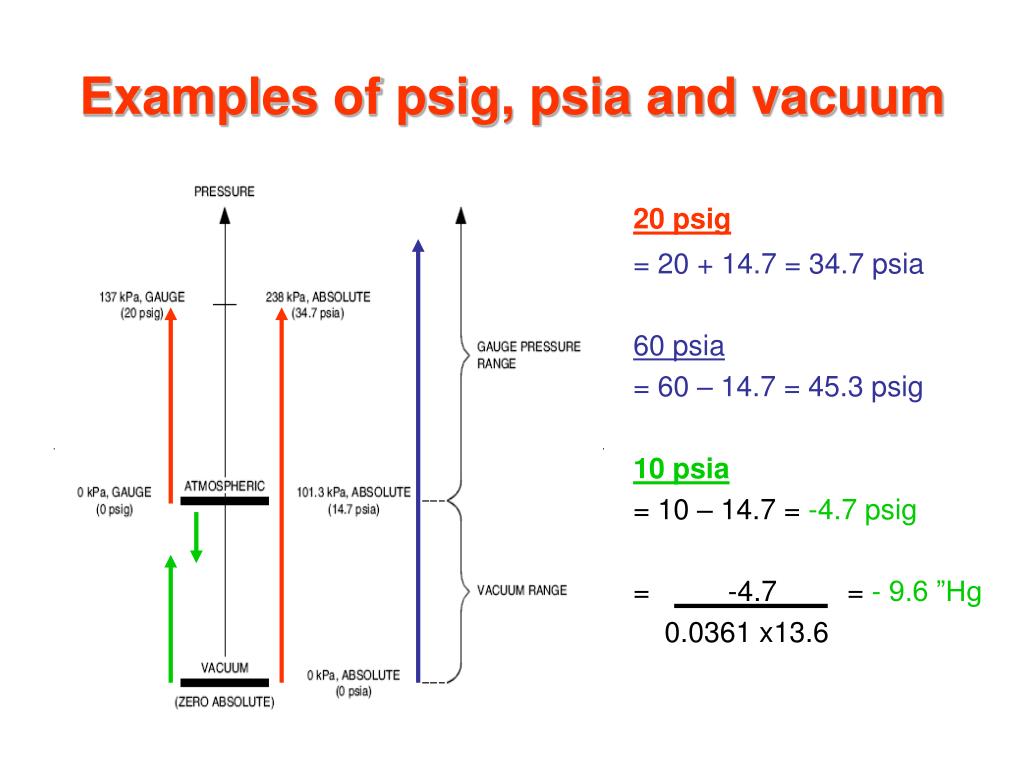
To change from psig to psia, you must add atmospheric pressure to the psig reading. Generally, we use 14.7 psi as the value for atmospheric pressure. So, if a gauge reads 100 psig, the psia would be 114.7 psia.
While homeowners don't typically need to convert between psig and psia during troubleshooting, understanding the distinction helps interpret diagnostic information from a technician and appreciate the principles behind HVAC operation. It becomes more relevant if you're looking at detailed system performance data or doing advanced calculations, which are best left to professionals.
Troubleshooting: Warm Air From Your AC
Let's focus on the common issue of warm air coming from your air conditioner. Here's a methodical approach you can take:
Step 1: Initial Checks (No Tools Required)
- Thermostat Setting: This might sound obvious, but ensure your thermostat is set to "Cool" and the desired temperature is *lower* than the current room temperature. Verify the batteries are fresh if it's a digital thermostat.
- Air Filter: A dirty air filter restricts airflow, reducing your AC's efficiency and potentially causing it to blow warm air. Locate your air filter (usually in the return air vent or near the indoor unit) and check its condition. A clogged filter will be visibly dirty.
- Outdoor Unit: Go outside to where your AC unit is. Check for any obvious obstructions around the outdoor unit (condenser). Make sure plants, leaves, or debris aren't blocking airflow. Important: Never stick your hands inside the unit.
- Registers and Vents: Ensure all supply registers (vents) are open and unobstructed by furniture or rugs.
DIY Action: If the thermostat setting is incorrect, adjust it. If the air filter is dirty, replace it with a new one of the correct size and type. Clear any obstructions around the outdoor unit and vents.
Step 2: Further Investigation (Basic Equipment Needed)
For the next steps, you'll need some basic tools, or the willingness to purchase them:
- Multimeter: This is used to check electrical continuity.
- Fin Comb: Used to straighten bent fins on the outdoor unit.
Safety First: *Always turn off the power to your AC unit at the breaker box before performing any electrical checks.*
- Outdoor Unit Inspection (Power Off): Carefully inspect the outdoor unit's condenser fins (the metal fins surrounding the unit). If they're bent, use a fin comb to gently straighten them. This improves airflow.
- Check the Contactor: The contactor is an electrical switch inside the outdoor unit that controls power to the compressor and fan. After turning off the power at the breaker, carefully open the access panel to the outdoor unit (consult your unit's manual for location and instructions). Look for the contactor (it's usually a black rectangular box with wires connected to it). Check for any signs of burning, corrosion, or damage. Caution: Do not touch any wires or components unless you are certain the power is off.
- Capacitor Check (Requires Caution): Capacitors store electrical energy and help start the compressor and fan motors. They can be dangerous even when the power is off. Only proceed if you are comfortable working with electrical components and understand the risks. Capacitors can retain a charge even after the power is disconnected. You will need to discharge the capacitor before testing it, typically with an insulated screwdriver. Look for signs of bulging, leaking, or corrosion on the capacitor. Use a multimeter to test the capacitance (microfarads, µF) and compare it to the rating printed on the capacitor. If you are unsure how to do this safely, call a professional.
DIY Action: Straighten bent condenser fins. If the contactor shows signs of burning or is visibly damaged, *do not attempt to repair it yourself*. Call a professional. If the capacitor is bulging or leaking, or if the capacitance is significantly off, *do not attempt to replace it yourself unless you are experienced with electrical work*. Call a professional.
Step 3: Refrigerant Issues (Professional Only)
If the above steps haven't resolved the issue, the problem likely involves the refrigerant. Refrigerant leaks and recharging the system are tasks for qualified HVAC technicians.
- Refrigerant Leaks: A common cause of warm air is a refrigerant leak. If your AC is low on refrigerant, it won't cool effectively. You cannot detect refrigerant leaks yourself without specialized equipment.
- Refrigerant Pressure: Technicians use gauges to measure the refrigerant pressure (both high and low sides). This data, along with temperature readings, helps them diagnose system problems. As mentioned earlier, they might need to understand the relationship between psig and psia for detailed diagnostics.
- Compressor Issues: The compressor is the heart of the AC system, and if it's failing, it won't pump refrigerant properly. Diagnosing compressor problems requires specialized knowledge and equipment.
Important: It is illegal and environmentally irresponsible to release refrigerant into the atmosphere. Only licensed technicians can handle refrigerant.
Troubleshooting: Furnace Blowing Cold Air
Now let's shift our focus to a furnace blowing cold air:
Step 1: Initial Checks (No Tools Required)
- Thermostat Setting: Ensure your thermostat is set to "Heat" and the desired temperature is *higher* than the current room temperature. Verify the batteries are fresh.
- Air Filter: Just like with AC, a dirty air filter restricts airflow in your furnace, causing it to overheat and potentially shut down.
- Gas Supply (If Applicable): If you have a gas furnace, ensure the gas valve is open. Check other gas appliances (like your stove) to confirm you have gas service.
- Pilot Light (If Applicable): Some older furnaces have a pilot light. Make sure it's lit. Consult your furnace's manual for instructions on how to relight it if necessary.
DIY Action: Adjust the thermostat setting, replace the air filter, and ensure the gas supply is on (if applicable). Relight the pilot light if necessary (following the manufacturer's instructions).
Step 2: Further Investigation (Basic Equipment Needed)
- Flame Sensor (If Applicable): In modern gas furnaces, a flame sensor detects the presence of a flame and allows the gas valve to stay open. A dirty or faulty flame sensor can cause the furnace to shut down shortly after starting. After turning off the power to the furnace at the breaker, locate the flame sensor (it's typically a metal rod near the burner). Carefully remove it and clean it with fine steel wool or sandpaper.
- Blower Motor: Sometimes the blower motor may not be running properly. This can cause overheating and shutdown.
Safety First: *Always turn off the power to your furnace at the breaker box before performing any checks.*
DIY Action: Clean the flame sensor. If this doesn't resolve the issue, consider replacing the flame sensor (they are relatively inexpensive). If you are uncomfortable working on gas appliances, call a professional.
Step 3: More Complex Issues (Professional Only)
The following issues require professional expertise:
- Gas Valve Problems: A faulty gas valve can prevent the furnace from igniting or cause it to shut down prematurely.
- Ignition System Problems: Modern furnaces use electronic ignition systems instead of pilot lights. These systems can fail, preventing the furnace from starting.
- Heat Exchanger Problems: The heat exchanger is a critical component that separates the combustion gases from the air circulating through your home. A cracked heat exchanger can leak dangerous carbon monoxide into your home. This is a serious safety hazard. If you suspect a cracked heat exchanger (signs include soot buildup, rust, or a burning smell), *shut off the furnace immediately and call a professional*.
- Control Board Issues: The control board is the brain of the furnace, and it can fail due to electrical problems or age. Diagnosing and repairing control board issues requires specialized knowledge and equipment.
When to Call a Professional
While some HVAC troubleshooting can be done safely by homeowners, it's essential to recognize when a problem is beyond your capabilities. Call a qualified HVAC technician if:
- You are uncomfortable working with electrical components or gas appliances.
- You suspect a refrigerant leak or need to recharge your AC system.
- You suspect a gas leak or carbon monoxide leak from your furnace.
- You are unable to diagnose the problem after performing the basic troubleshooting steps.
- You encounter any situation that feels unsafe or beyond your skill level.
By understanding the basics of HVAC systems, knowing how to perform simple troubleshooting steps, and recognizing when to call a professional, you can keep your home comfortable and safe year-round.