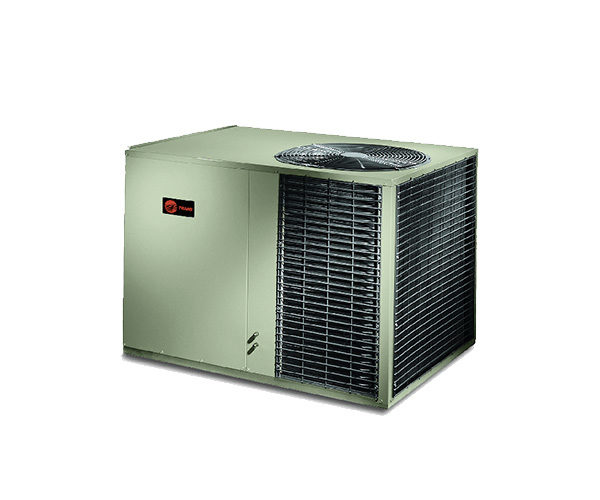
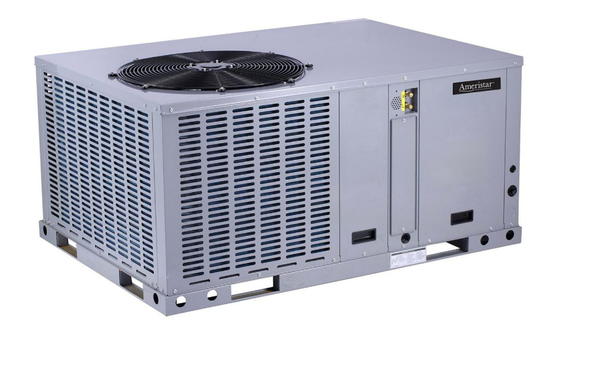
Trane 2.5 Ton Package Unit

A common household appliance failure is a refrigerator that stops cooling. While a malfunctioning refrigerator can cause food spoilage and inconvenience, a Trane 2.5 Ton Package Unit malfunction can lead to discomfort and potential health issues due to extreme temperatures. This guide provides a step-by-step approach to troubleshooting common issues with your Trane 2.5 Ton Package Unit, helping you identify and potentially resolve simple problems before calling a professional.
Safety First!
Before attempting any troubleshooting, prioritize your safety:
- Turn off the power: Locate the breaker that controls your package unit and switch it to the "OFF" position. This is crucial to prevent electrical shock.
- Wait a few minutes: Allow the unit to sit idle for a few minutes after powering it down.
- Wear appropriate safety gear: Eye protection and gloves are recommended, especially when dealing with dust or debris.
- If in doubt, call a professional: Never attempt a repair you're uncomfortable with. Electricity and refrigerant are dangerous, and improper handling can be hazardous to your health and the equipment.
Troubleshooting: Unit Not Turning On
If your Trane unit isn't powering on at all, follow these steps:
1. Check the Power Supply
This is the most basic, yet often overlooked, step.
- Circuit Breaker: Verify the circuit breaker for the unit hasn't tripped. Reset it by switching it fully to the "OFF" position, then back to "ON". If it trips again immediately, do not keep resetting it; there is likely a short circuit, and you should call a qualified HVAC technician.
- Disconnect Switch: Many package units have an external disconnect switch near the unit itself. Ensure it's in the "ON" position.
- Voltage: If you're comfortable and know how to use a multimeter safely, you can check the voltage at the disconnect switch to ensure the unit is receiving power. Warning: Working with electricity can be dangerous. If you are not qualified, do not attempt this step.
- Power Cord: Check for any visible damage to the power cord (if applicable) leading to the unit.
2. Thermostat Settings
A simple thermostat setting can often be the culprit.
- Thermostat Mode: Ensure the thermostat is set to "COOL" (for cooling) or "HEAT" (for heating) and not "OFF" or "FAN ONLY".
- Temperature Setting: Verify the set temperature is lower than the current room temperature (for cooling) or higher (for heating).
- Battery Check: If your thermostat is battery-powered, replace the batteries. Low batteries can cause erratic behavior.
- Thermostat Wiring: (If comfortable and after turning off power to the thermostat) Inspect the wiring connections at the thermostat. Loose or corroded wires can disrupt communication with the unit. Tighten any loose connections, but do not attempt to rewire the thermostat if you are not familiar with electrical work. Call a professional.
3. Condensate Drain Line
A clogged condensate drain can trigger a safety switch, preventing the unit from running.
- Locate the Drain Line: The condensate drain line is usually a PVC pipe running from the unit.
- Check for Clogs: Look for any visible obstructions or algae buildup at the end of the drain line.
- Clear the Drain Line: You can try to clear the drain line with a wet/dry vacuum or a stiff wire. Be careful not to damage the pipe. Alternatively, you can use a mixture of hot water and vinegar to flush the drain line.
- Condensate Pump (if applicable): If your unit has a condensate pump, ensure it's working properly and that the pump's reservoir isn't full.
Troubleshooting: Unit is Running, But Not Cooling/Heating Effectively
If the unit is running but not providing sufficient cooling or heating, consider these factors:
1. Air Filter
A dirty air filter is a common cause of reduced airflow and poor performance.
- Locate the Air Filter: The air filter is usually located inside the unit itself, or in a return air vent.
- Inspect the Filter: If the filter is dirty or clogged, replace it with a new one of the correct size and type.
- Filter Type: Use the recommended filter type for your Trane unit. Upgrading to a higher MERV rating filter can improve air quality but may also reduce airflow.
2. Outdoor Unit Obstructions
Anything blocking the outdoor unit can impede its ability to transfer heat.
- Clear Debris: Remove any leaves, grass clippings, or other debris that may be blocking the outdoor unit's fins.
- Vegetation: Ensure that bushes and shrubs are trimmed back at least 2-3 feet from the unit to allow for proper airflow.
3. Ductwork Leaks
Leaky ductwork can result in significant energy loss.
- Inspect Visible Ductwork: Look for any obvious gaps or tears in the ductwork, especially at joints and seams.
- Seal Leaks: Seal any visible leaks with duct tape or, preferably, mastic sealant.
- Professional Duct Sealing: For extensive ductwork leaks, consider hiring a professional to perform duct sealing.
4. Refrigerant Leaks
Low refrigerant can significantly reduce the unit's cooling capacity. This should be checked and handled by a qualified professional.
- Signs of a Leak: Ice buildup on the copper lines or a hissing sound coming from the unit can indicate a refrigerant leak.
- Do Not Attempt to Add Refrigerant: Handling refrigerant requires specialized equipment and training. Contact a qualified HVAC technician to diagnose and repair any refrigerant leaks.
Troubleshooting: Noisy Operation
Unusual noises can indicate various problems within the unit.
1. Fan Blades
Inspect the fan blades for damage or obstructions.
- Inspect for Damage: Check for bent, broken, or loose fan blades.
- Remove Obstructions: Remove any debris that may be caught in the fan blades.
- Tighten Loose Blades: If a fan blade is loose, try to tighten it. If it's severely damaged, it will need to be replaced by a professional.
2. Motor Bearings
Worn motor bearings can cause a squealing or grinding noise. This repair is best left to a professional.
- Lubrication (if applicable): Some older motors have oil ports for lubrication. If your motor has oil ports, add a few drops of electric motor oil. Do not over-lubricate.
- Professional Replacement: If lubrication doesn't resolve the noise, the motor bearings may need to be replaced by a qualified technician.
3. Compressor Noise
A noisy compressor can indicate serious problems. This requires professional attention.
- Grinding or Rattling: Unusual noises coming from the compressor are often a sign of internal damage. Turn off the unit and contact a qualified HVAC technician immediately.
When to Call a Professional
While these troubleshooting steps can help you identify and resolve simple problems, certain repairs require the expertise of a qualified HVAC technician. Here are some situations where professional help is necessary:
- Refrigerant Leaks: Handling refrigerant requires specialized equipment and training.
- Electrical Problems: Diagnosing and repairing electrical issues within the unit can be dangerous.
- Compressor Problems: Compressor repairs are complex and require specialized tools and knowledge.
- Motor Replacements: Replacing motors, especially the blower motor or condenser fan motor, often requires specialized tools and expertise.
- Complex Component Failures: Any repairs involving the circuit board, reversing valve, or other complex components should be left to a professional.
- If you are uncomfortable with any step: If you feel unsure or uncomfortable performing any of the troubleshooting steps, it's always best to err on the side of caution and call a qualified HVAC technician.
By following these troubleshooting steps, you can potentially diagnose and resolve common issues with your Trane 2.5 Ton Package Unit, saving you time and money. Remember to always prioritize safety and call a professional when necessary.