Troubleshoot Electric Baseboard Heater

Is your electric baseboard heater leaving you out in the cold? A malfunctioning baseboard heater can be a frustrating problem, especially during the colder months. Fortunately, many issues can be resolved with a little troubleshooting. This guide will walk you through some common problems, simple fixes, and when it's time to call in a professional.
Understanding Electric Baseboard Heaters
Before diving into troubleshooting, it's important to understand how these heaters work. Electric baseboard heaters are simple devices. They contain a heating element that heats up when electricity passes through it. This heat then radiates outward, warming the air. A thermostat controls the flow of electricity, turning the heater on and off to maintain a set temperature.
Safety First!
Electricity can be dangerous. Always disconnect power to the heater at the circuit breaker before performing any inspection or repairs. Double-check with a non-contact voltage tester to ensure the power is off. If you are uncomfortable working with electricity, contact a qualified electrician.
Step-by-Step Troubleshooting Guide
Follow these steps to diagnose and potentially fix your electric baseboard heater.
1. Check the Power Supply
The most common culprit for a heater not working is a lack of power. Start with these basic checks:
- Circuit Breaker: Go to your electrical panel and check the circuit breaker for the heater. If the breaker is tripped (in the 'off' or middle position), reset it by flipping it fully to the 'off' position and then back to the 'on' position. If the breaker trips again immediately, there is likely a short circuit, and you should call an electrician.
- Wall Switch (if applicable): Some heaters are wired to a wall switch. Ensure the switch is in the 'on' position.
- Voltage Tester: Using a non-contact voltage tester, check for voltage at the heater's wiring connections (after disconnecting the power, of course!). No voltage indicates a problem upstream (circuit breaker, wiring, etc.). This is often beyond a DIY repair and necessitates a professional electrician.
2. Thermostat Issues
The thermostat controls the heater's on/off cycle. Malfunctions here are common. There are two main types of thermostats: mechanical and electronic.
Mechanical Thermostats
- Setting: Make sure the thermostat is set to a temperature higher than the current room temperature. A very common mistake is setting it too low.
- Dust and Debris: Over time, dust and debris can accumulate inside the thermostat, interfering with its operation. Carefully remove the thermostat cover (after disconnecting power!). Use a soft brush or vacuum cleaner to gently clean the interior. Avoid touching any internal components.
- Calibration: Mechanical thermostats can sometimes become miscalibrated. Compare the thermostat setting to the actual room temperature. If there is a significant discrepancy, you may need to replace the thermostat.
- Testing with a Multimeter (Advanced): If you are comfortable and familiar with using a multimeter, you can test the thermostat's continuity. With the power off and the thermostat removed from the wall, set the multimeter to the continuity setting. Place the probes on the thermostat's terminals. When the thermostat is set to a temperature higher than the room temperature, the multimeter should show continuity (a reading close to zero ohms). If there is no continuity, the thermostat is likely faulty and needs replacement. If you are not comfortable with a multimeter, skip this step and consider replacing the thermostat.
Electronic Thermostats
- Display and Settings: Ensure the display is working and that the thermostat is set to the correct mode (heat) and temperature. Check the batteries if applicable, and replace them if they are low.
- Reset: Try resetting the thermostat to its factory default settings. Refer to the thermostat's manual for instructions on how to do this.
- Lockout Features: Some electronic thermostats have lockout features that prevent unauthorized temperature adjustments. Ensure that the thermostat is not locked.
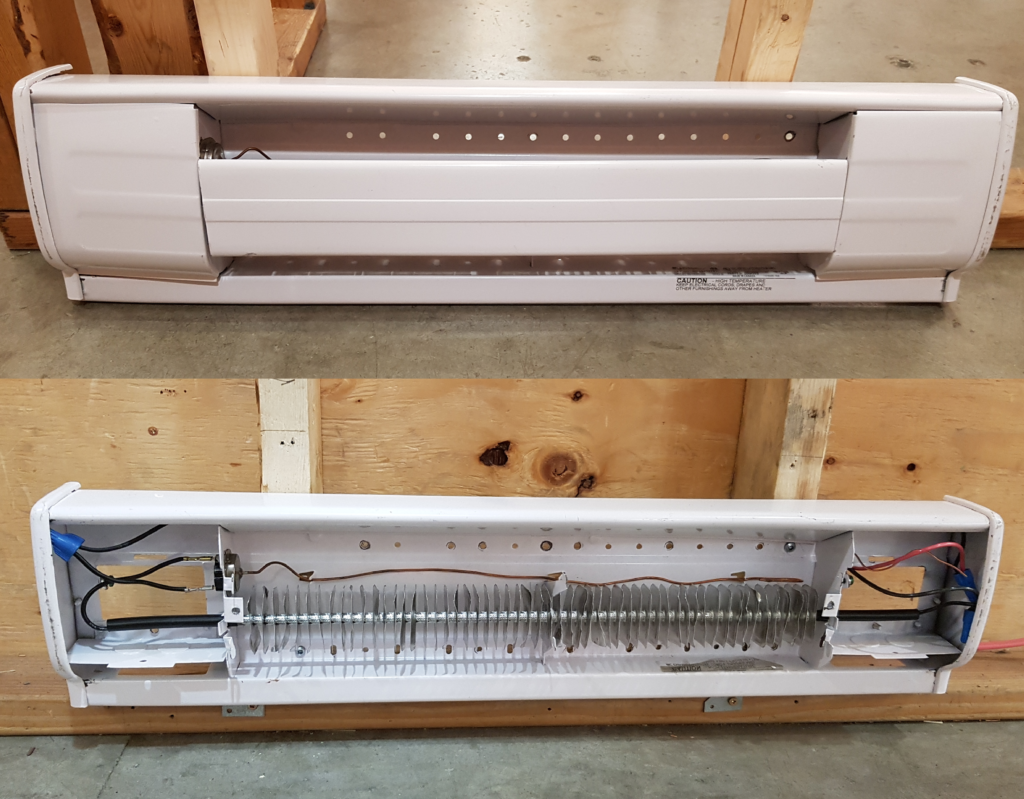
3. Inspect the Heater Element
The heating element is the core of the heater. While it's usually robust, it can sometimes fail.
- Visual Inspection (Power OFF): Carefully inspect the heating element for any signs of damage, such as breaks, cracks, or burn marks. If you see any damage, the element needs to be replaced, or potentially the entire heater if the element is not easily replaceable.
- Testing with a Multimeter (Advanced): To test the heating element, disconnect the power to the heater and locate the terminals where the element connects to the wiring. Set your multimeter to the ohms setting (resistance). Place the probes on the terminals of the heating element. You should get a reading. A reading of zero ohms (short circuit) or infinite ohms (open circuit) indicates a faulty heating element. If you are uncomfortable with a multimeter, skip this step and consider replacing the heater. Replacing the element can be tricky and sometimes not possible.
4. Clean the Heater
Dust and debris can accumulate inside the heater, reducing its efficiency and potentially causing a fire hazard. Always disconnect the power before cleaning.
- Vacuuming: Use a vacuum cleaner with a brush attachment to carefully remove dust and debris from the fins and other interior parts of the heater.
- Wiping: Use a damp cloth to wipe down the exterior of the heater.
- Avoid Water Inside: Be very careful not to get any water inside the heater, as this could cause a short circuit.
5. Check Wiring Connections
Loose or corroded wiring connections can cause the heater to malfunction. Always disconnect the power before checking wiring.
- Visual Inspection: Carefully inspect the wiring connections inside the heater for any signs of looseness, corrosion, or damage.
- Tighten Connections: If you find any loose connections, carefully tighten them with a screwdriver. Ensure the wires are securely attached to the terminals.
- Clean Corrosion: If you find any corrosion, use a wire brush or sandpaper to clean the terminals and wire ends.
6. Replacing the Thermostat (DIY with Caution)
If you've determined that the thermostat is faulty, you can replace it yourself, provided you are comfortable working with electricity. Always disconnect the power before replacing the thermostat.
- Purchase a Replacement: Buy a replacement thermostat that is compatible with your heater. Take the old thermostat with you to the store to ensure you get the correct replacement.
- Disconnect the Wires: Carefully disconnect the wires from the old thermostat. Label the wires with tape to ensure you reconnect them correctly to the new thermostat.
- Connect the Wires: Connect the wires to the new thermostat, matching the labels you made earlier.
- Reinstall the Thermostat: Reinstall the thermostat in the wall and secure it with screws.
- Restore Power: Restore power to the heater and test the new thermostat.
7. When to Call a Professional
Some problems are beyond the scope of DIY repair and require the expertise of a qualified electrician. Call a professional if:
- You are uncomfortable working with electricity.
- The circuit breaker trips repeatedly. This indicates a short circuit or other serious electrical problem.
- You suspect a problem with the wiring in your walls.
- You are unable to diagnose the problem.
- The heater is making strange noises or emitting a burning smell.
- You need to replace the heating element. While technically possible, this is generally a more complex repair that is best left to a professional.
- Your home uses gas baseboard heaters. These are substantially different and any issues with them should be handled only by qualified gas technicians.
Preventative Maintenance
Regular maintenance can help prevent problems with your electric baseboard heaters and extend their lifespan.
- Clean Regularly: Vacuum and wipe down the heaters regularly to remove dust and debris.
- Inspect Periodically: Periodically inspect the heaters for any signs of damage, loose connections, or corrosion.
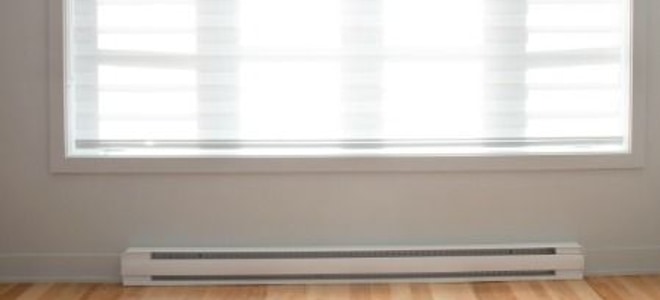
- Don't Block Heaters: Avoid blocking the heaters with furniture or curtains, as this can reduce their efficiency and create a fire hazard.
Final Thoughts
Troubleshooting electric baseboard heaters can be a straightforward process, especially if the problem is a simple one, like a tripped breaker or a misadjusted thermostat. By following this guide and taking proper safety precautions, you can often resolve common issues yourself. However, always remember to prioritize safety and never hesitate to call a qualified electrician when dealing with electrical problems that are beyond your comfort level or expertise.