Types Of Ac Units For Homes

Summer heat can be brutal, and a malfunctioning AC unit can quickly turn your comfortable home into an unbearable sweatbox. One of the most common problems homeowners face is an AC unit that's blowing warm air, or no air at all. Before you call a technician, let's explore some troubleshooting steps you can take to diagnose and possibly resolve the issue yourself. This guide will cover common AC unit types found in homes, including central ACs, window units, and ductless mini-splits.
Understanding Your AC Unit Type
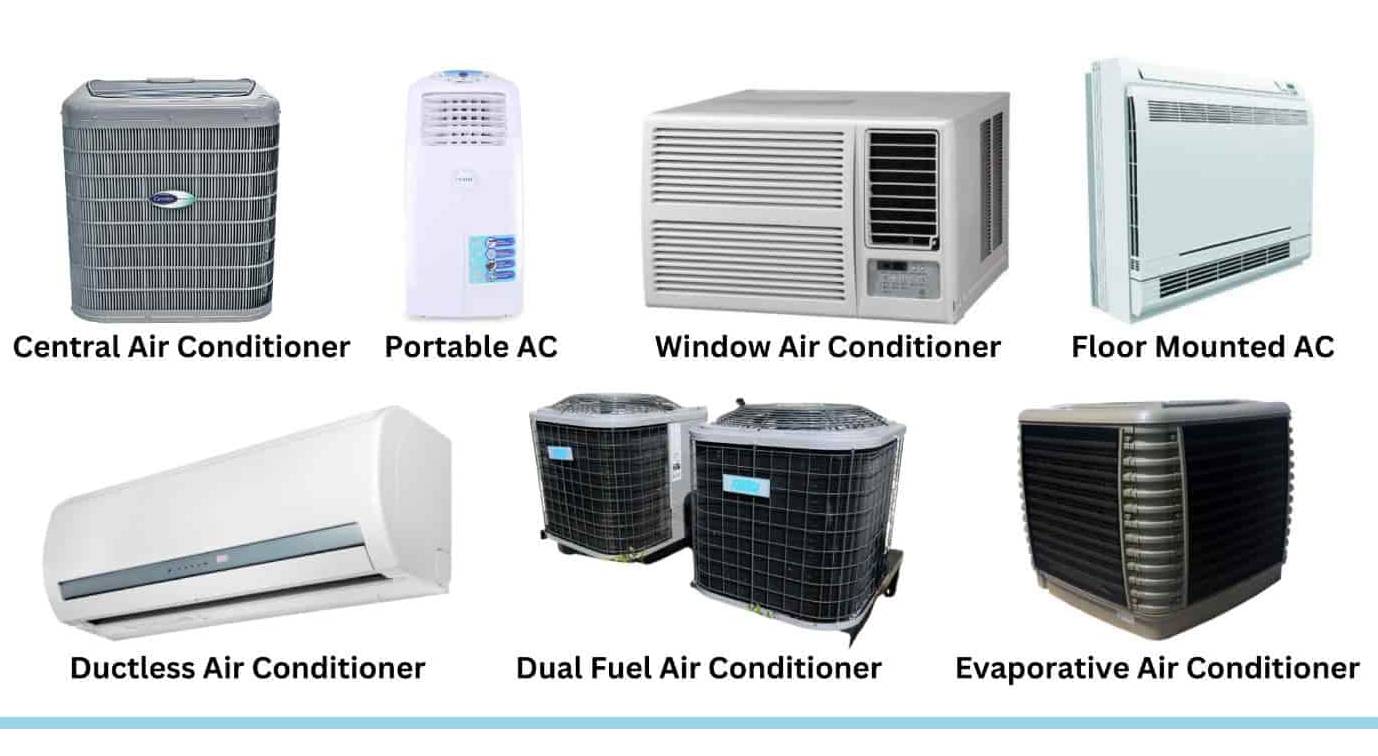
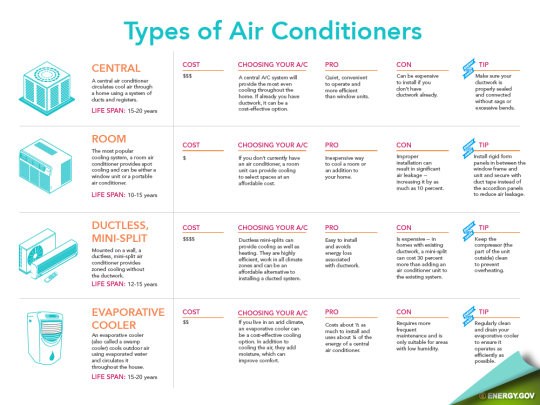
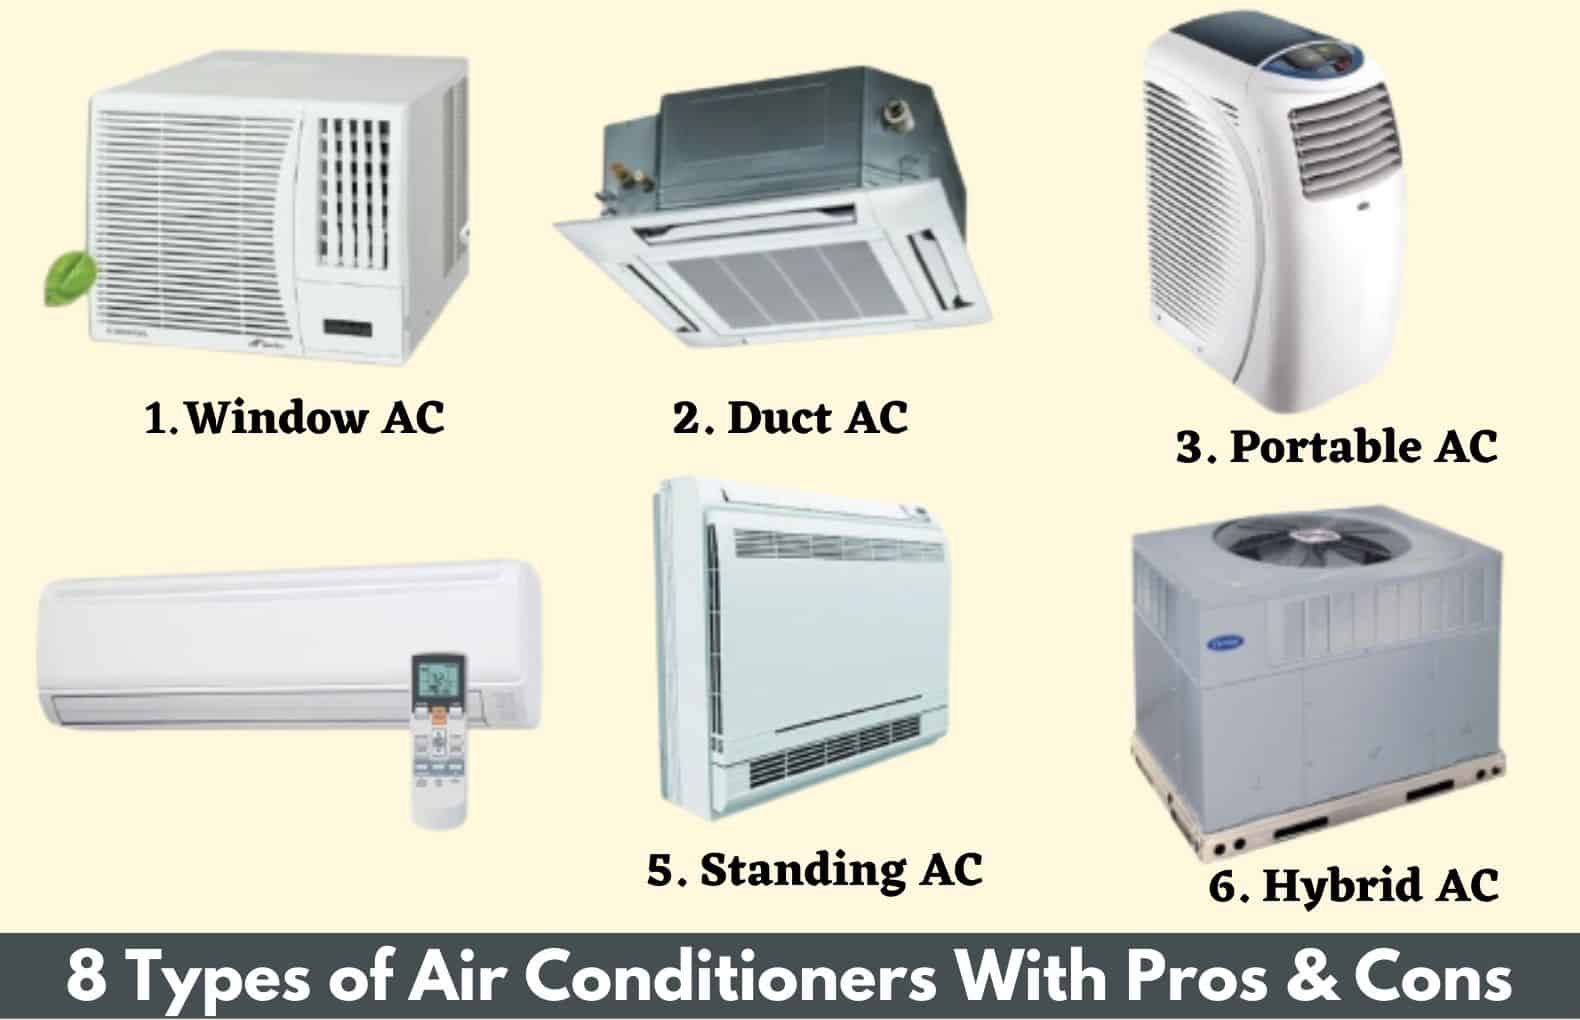
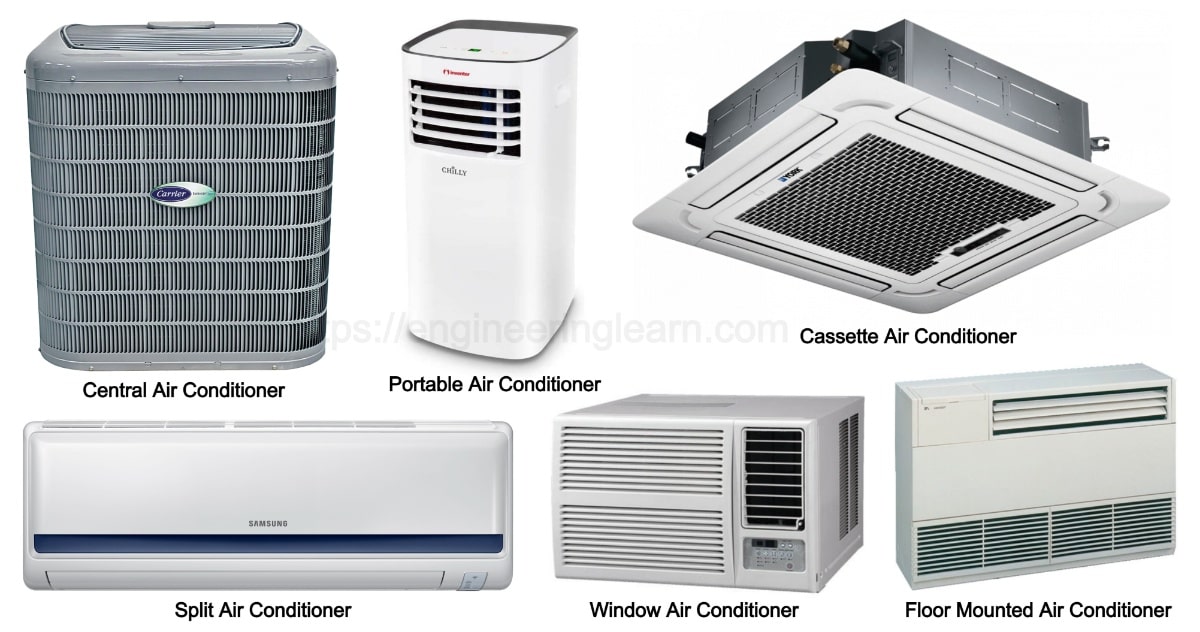
Knowing what type of AC unit you have is the first step in troubleshooting. Here's a quick overview:
* Central AC: This is the most common type, featuring an outdoor condenser unit and an indoor evaporator coil (usually part of your furnace or air handler). It cools the entire house through ductwork. * Window AC Units: Self-contained units installed in a window opening. They cool a single room. * Ductless Mini-Split Systems: These have an outdoor condenser and one or more indoor air handlers mounted on walls. They offer zone-specific cooling without the need for ductwork.Problem: AC Blowing Warm Air (or No Air)
This is frustrating, but don't panic! Let's go through a systematic approach to identify the culprit.
Step 1: Check the Thermostat
This might sound obvious, but it's the most frequent culprit. Ensure your thermostat is:
* Set to "Cool" mode: Double-check that it hasn't accidentally been switched to "Heat" or "Off." * Set to a temperature lower than the current room temperature: If the thermostat is set higher than the room temperature, the AC won't turn on. * Powered on and functioning correctly: Replace the batteries if needed. Ensure the batteries are inserted correctly.If the thermostat settings are correct, but the AC is still blowing warm air, move on to the next step.
Step 2: Inspect the Air Filter
A dirty air filter restricts airflow, which can cause the AC unit to work harder and less efficiently, eventually leading to warm air or even a frozen evaporator coil (we'll get to that later). Locate your air filter (usually near the indoor unit, in a wall or ceiling vent for central ACs, or within the front panel of window units and mini-splits) and:
* Visually inspect the filter: Is it clogged with dust and debris? * Replace the filter if it's dirty: Use the correct size and type of filter recommended by your AC manufacturer. Replacing your air filter regularly is key to keeping your AC unit running efficiently. Aim for every 1-3 months depending on usage and the type of filter.After replacing the air filter, wait about an hour and check if the AC is blowing cooler air. If not, proceed to the next step.
Step 3: Examine the Outdoor Condenser Unit (Central AC and Mini-Split)
The outdoor condenser unit is responsible for releasing heat. If it's blocked or malfunctioning, your AC won't cool properly. Before you start, turn off the power to the condenser unit at the breaker box to avoid electrical shock. Safety first!
* Clear debris around the unit: Remove any leaves, grass clippings, branches, or other obstructions that may be blocking airflow around the condenser coils. Maintain at least 2 feet of clearance around the unit. * Clean the condenser fins: Over time, the fins can accumulate dirt and dust, reducing efficiency. Use a garden hose with a gentle spray nozzle to carefully wash the fins from the inside out. Avoid using high pressure, as this can damage the fins. Be gentle and work in a circular motion. * Inspect the fan: Make sure the fan blades are not damaged or obstructed. If the fan isn't spinning freely, there may be an issue with the motor that requires professional attention. * Check for ice buildup: If you see ice on the refrigerant lines or the condenser unit itself, this could indicate a refrigerant leak or a frozen evaporator coil (more on this below).Once you've cleaned the condenser unit and ensured proper airflow, turn the power back on and wait an hour or two to see if the AC is cooling properly. If not, continue troubleshooting.
Step 4: Check for a Frozen Evaporator Coil (Central AC)
A frozen evaporator coil is a common cause of warm air blowing from your vents. This often happens due to restricted airflow (dirty air filter, blocked ducts), low refrigerant, or a malfunctioning blower motor. Here's how to check:
* Locate the evaporator coil: It's usually housed in the indoor unit, near your furnace or air handler. * Inspect for ice buildup: If the coil is covered in ice, it's frozen. * Turn off the AC: Switch off the AC at the thermostat and the breaker box. Do not attempt to chip away the ice! * Turn on the fan only: Set the thermostat to "Fan On" to circulate air over the coil and help it thaw. * Check the air filter again: Make sure it's clean. Replace if necessary. * Wait several hours (or overnight) for the coil to thaw completely: Once the ice is gone, turn the AC back on and monitor its performance.If the evaporator coil freezes up again soon after thawing, this indicates a more serious problem, such as a refrigerant leak, a malfunctioning blower motor, or restricted airflow within the ductwork. You'll need to call a professional to diagnose and repair the issue.
Step 5: Inspect Ductwork (Central AC)
Leaky or damaged ductwork can lead to significant air loss, reducing the efficiency of your AC system and causing warm air to blow from some vents. Here's what to look for:
* Visually inspect accessible ductwork: Check for obvious holes, tears, or disconnections. * Feel for air leaks: Run your hand along the seams and joints of the ductwork while the AC is running. If you feel air blowing out, you've found a leak. * Seal small leaks with duct tape or mastic sealant: For larger issues or hard-to-reach ductwork, consider hiring a professional ductwork repair service. Properly sealed ductwork can dramatically improve the efficiency of your central AC system.Step 6: Window AC Unit Specific Checks
If you're having issues with a window AC unit, here are some additional things to check:
* Ensure proper installation: The unit should be securely installed in the window with a tight seal to prevent air leaks. * Check the drainage hole: Make sure the drainage hole at the bottom of the unit is clear of debris. This allows condensation to drain properly. * Clean the coils: The coils on the back of the unit can accumulate dust and dirt. Use a vacuum cleaner with a brush attachment to gently clean them.Step 7: Ductless Mini-Split Specific Checks
For mini-split systems, consider these additional checks:
* Clean the filters: Mini-splits have filters that need regular cleaning, usually every few weeks. Refer to your owner's manual for instructions. * Check the outdoor unit: Ensure the outdoor unit is free of debris and that the fan is functioning properly. * Verify correct settings: Double-check that the unit is set to the correct mode (cool) and temperature, and that the remote control is working.When to Call a Professional
While many AC issues can be resolved with simple DIY troubleshooting, some problems require the expertise of a qualified HVAC technician. Here are some telltale signs that it's time to call in the pros:
* Refrigerant leaks: Refrigerant is essential for cooling, and leaks can be harmful to the environment. Signs include ice buildup, hissing noises, or a sweet, oily smell near the AC unit. Do not attempt to handle refrigerant yourself. * Electrical problems: If you suspect any electrical issues, such as a burning smell, sparking, or a tripped circuit breaker, immediately turn off the power to the AC unit and call a professional. * Compressor issues: The compressor is the heart of your AC unit, and if it fails, the entire system may need to be replaced. Signs of a failing compressor include loud noises, overheating, or a complete lack of cooling. * Blower motor problems: If the blower motor isn't working properly, it can cause the evaporator coil to freeze or prevent air from circulating through your home. * Persistent icing: If your evaporator coil freezes up repeatedly even after thawing and cleaning the air filter, there's likely an underlying issue that needs professional attention. * You're uncomfortable working with electricity or machinery: Your safety is paramount. If you're not comfortable performing any of these troubleshooting steps, don't hesitate to call a professional.Preventative Maintenance
The best way to avoid AC problems is to perform regular preventative maintenance. Here are some tips:
* Change your air filter regularly: As mentioned earlier, a clean air filter is essential for proper airflow and efficient operation. * Clean the outdoor condenser unit: Remove debris and wash the fins at least once a year. * Schedule annual professional maintenance: A qualified HVAC technician can inspect your AC system, clean the coils, check refrigerant levels, and identify potential problems before they become major issues. Investing in annual maintenance can extend the life of your AC unit and save you money on energy bills. * Keep vents clear: Ensure that furniture or drapes don't block vents, to allow for good airflow.By following these troubleshooting steps and preventative maintenance tips, you can keep your AC unit running smoothly and efficiently, ensuring a comfortable home environment all summer long. Remember, safety is always the top priority. When in doubt, call a professional.