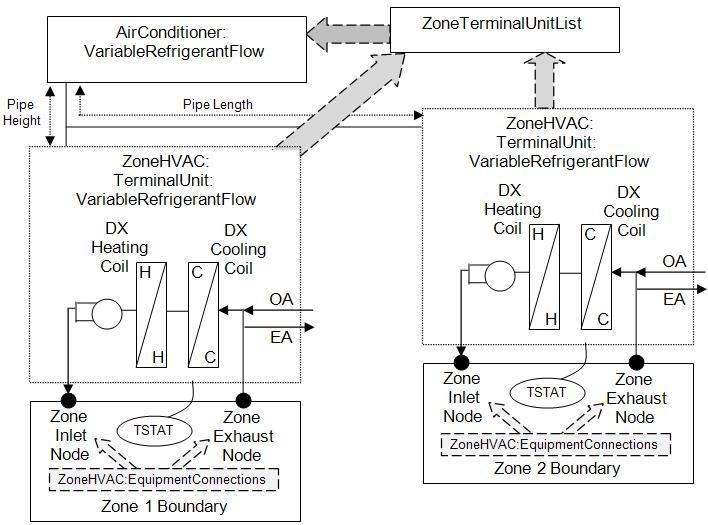
Variable Refrigerant Flow Heat Pump System
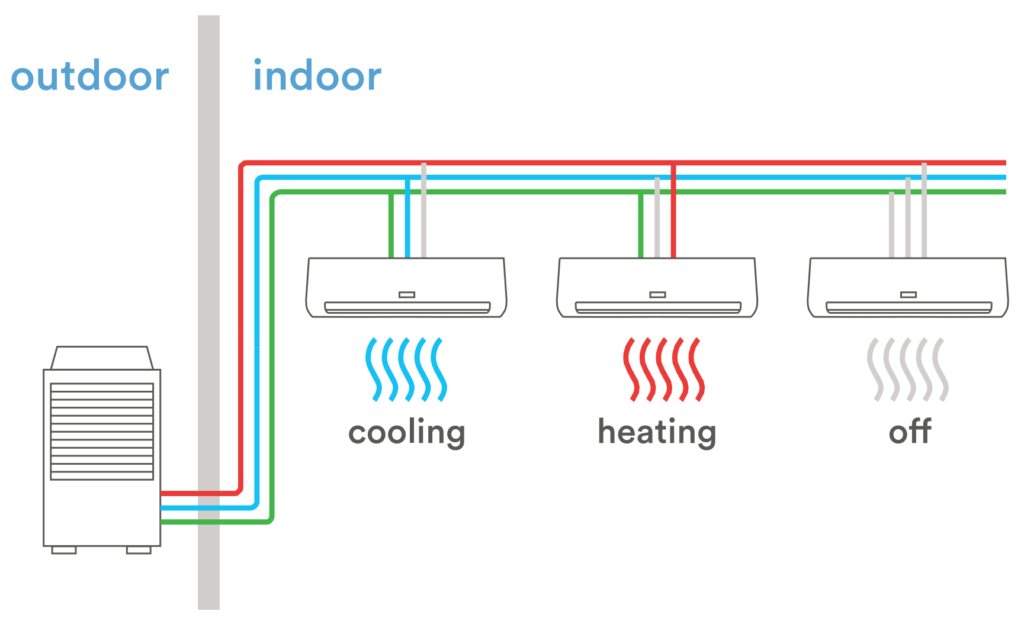
Variable Refrigerant Flow (VRF) heat pump systems offer exceptional comfort and energy efficiency, but like any complex technology, they can experience issues. A common problem homeowners encounter is inconsistent heating or cooling – some rooms are comfortable, while others are too hot or too cold. This article provides a step-by-step guide to help you troubleshoot this issue, identify potential causes, and perform simple, safe DIY fixes. We'll also clearly define when it's time to call a professional HVAC technician.
Understanding the Problem: Inconsistent Heating/Cooling
Before diving into troubleshooting, let's define the problem more precisely. Inconsistent heating or cooling with a VRF system means that the temperature varies significantly between different zones or rooms served by the system. You might notice:
- One room feels significantly warmer than another, even with the same thermostat setting.
- A room never reaches the set temperature, either struggling to heat up or cool down.
- Specific indoor units seem to be blowing lukewarm air when set to cool, or cool air when set to heat.
These symptoms can stem from several sources, ranging from simple user errors to complex system malfunctions.
Step-by-Step Troubleshooting Guide
Step 1: Check the Thermostats and Zone Settings
This is the first and easiest place to start. Incorrect thermostat settings are a surprisingly common cause of temperature inconsistencies.
- Verify Thermostat Settings: Ensure each thermostat is set to the correct mode (heat or cool) and temperature. Double-check that the desired temperature is actually achievable given the current outdoor conditions. For example, if it's freezing outside, expecting a room to heat up to 80°F might be unrealistic.
- Confirm Zone Control: VRF systems use zones, each controlled by a thermostat. Make sure the correct zone is active on the thermostat. Some thermostats allow you to manually override zones, which could lead to unintended temperature variations.
- Check for Scheduling Conflicts: If your thermostats are programmable, examine the schedules. A zone might be programmed to be off or at a drastically different temperature during specific times of day, causing discomfort.
- Replace Batteries (if applicable): Low batteries in a thermostat can cause erratic behavior. Try replacing them with fresh ones.
DIY Fix: Adjust thermostat settings, correct zone control, modify schedules, and replace batteries.
Step 2: Inspect Air Filters
Dirty air filters are a frequent culprit behind HVAC problems. A clogged filter restricts airflow, reducing the system's efficiency and potentially causing uneven heating or cooling.
- Locate Air Filters: Identify the location of the air filters for each indoor unit. They are typically located in the return air grilles or within the indoor unit itself. Refer to your system's manual if needed.
- Inspect the Filters: Remove the filters and examine them for dirt, dust, and debris. If the filter is visibly clogged, it needs cleaning or replacement.
- Clean or Replace: Disposable filters should be replaced. Washable filters can be cleaned with a vacuum cleaner or by rinsing them with water. Ensure the filter is completely dry before reinstalling it.
DIY Fix: Clean or replace dirty air filters. Aim to check and clean/replace your filters every 1-3 months, or more frequently if you have pets or live in a dusty environment.
Step 3: Check Airflow Obstructions
Restricted airflow can prevent warm or cool air from reaching certain areas, causing temperature imbalances.
- Inspect Supply and Return Vents: Ensure that supply and return vents in each room are not blocked by furniture, rugs, curtains, or other objects.
- Check for Closed or Partially Closed Vents: Verify that the vents are open and adjusted properly. Partially closed vents can reduce airflow to specific areas.
- Look for Ductwork Leaks (if accessible): While inspecting vents, visually check for any obvious damage or disconnections in the ductwork (if it's accessible in attics or crawl spaces). Leaks can cause significant air loss.
DIY Fix: Remove obstructions from vents, adjust vent positions, and (if you're comfortable) use duct tape to seal small, easily accessible ductwork leaks. For larger or more complex ductwork issues, consult a professional.
Step 4: Examine Indoor Unit Operation
Each indoor unit in a VRF system should be functioning correctly to maintain consistent temperatures.
- Observe the Fan Operation: Turn on the system and observe the fan speed and airflow from each indoor unit. Is the fan running smoothly? Is the airflow consistent with other units? A weak or noisy fan might indicate a problem.
- Listen for Unusual Noises: Pay attention to any unusual noises coming from the indoor units, such as rattling, hissing, or buzzing. These sounds could indicate a mechanical issue.
- Check the Cooling/Heating Performance: Feel the air coming from each unit when it's set to cool or heat. Does the air feel sufficiently cold or warm? Compare the air temperature between different units.
- Look for Ice Formation: Inspect the indoor units for ice formation, particularly on the coils. Ice can indicate a refrigerant leak or airflow problem.
DIY Fix: If you notice ice formation, try turning off the system and allowing the ice to melt completely. Then, clean the air filter and ensure proper airflow. If the icing persists, it's a sign of a more serious problem requiring professional attention.
Step 5: Assess Outdoor Unit Condition
The outdoor unit is the heart of the VRF system, and its condition can significantly impact overall performance.
- Check for Obstructions: Ensure the outdoor unit is free from obstructions such as plants, snow, or debris that could restrict airflow. Maintain at least 2-3 feet of clearance around the unit.
- Inspect the Fan: Visually inspect the outdoor unit's fan for damage or obstructions. Make sure the fan blades are clean and rotate freely.
- Listen for Unusual Noises: Pay attention to any unusual noises coming from the outdoor unit, such as grinding, hissing, or loud humming. These sounds could indicate a mechanical issue with the compressor or fan motor.
- Look for Refrigerant Leaks: Examine the copper lines connecting the outdoor and indoor units for signs of refrigerant leaks, such as oily residue or corrosion.
DIY Fix: Clear any obstructions around the outdoor unit and carefully remove any debris from the fan blades. Never attempt to repair refrigerant leaks yourself. This requires specialized equipment and training. If you suspect a refrigerant leak, immediately contact a qualified HVAC technician.
When to Call a Professional
While many simple issues can be resolved with DIY troubleshooting, certain problems require the expertise of a qualified HVAC technician. It's time to call a professional if:
- You suspect a refrigerant leak. Refrigerant is a hazardous substance, and leaks can be harmful to the environment and your health.
- You encounter electrical issues. Working with electrical components can be dangerous. Leave electrical repairs to a qualified electrician or HVAC technician.
- The compressor is malfunctioning. The compressor is a critical component of the VRF system, and repairs are complex and require specialized knowledge.
- The system continues to malfunction after performing the DIY troubleshooting steps. This indicates a more serious underlying problem that requires professional diagnosis and repair.
- You lack the necessary skills or confidence to perform the repairs yourself. It's always better to err on the side of caution and seek professional help if you're unsure about any aspect of the troubleshooting or repair process.
- Any unusual error codes are showing on the thermostat or control panel that you cannot clear yourself. These error codes are diagnostic messages that require someone with specific training on your system.
Remember, attempting to repair complex HVAC problems without the proper knowledge and tools can be dangerous and could potentially damage your system further.
Preventive Maintenance
Preventive maintenance is key to ensuring the long-term performance and reliability of your VRF system. Consider these tips:
- Regularly clean or replace air filters (every 1-3 months).
- Schedule annual professional maintenance. A qualified HVAC technician can inspect the system, clean the coils, check refrigerant levels, and identify potential problems before they become major issues.
- Keep the outdoor unit clear of obstructions.
- Monitor the system's performance and address any unusual noises or temperature inconsistencies promptly.
By following these troubleshooting steps and preventative maintenance tips, you can help ensure that your VRF heat pump system provides consistent comfort and energy efficiency for years to come. Don't hesitate to contact a qualified HVAC technician when needed.