Water Heater Inlet And Outlet Pipe Connection

Understanding your water heater is key to keeping your home comfortable and safe. A crucial part of that understanding lies in knowing about the inlet and outlet pipe connections. These connections are the lifelines of your water heater, bringing cold water in to be heated and sending hot water out to your faucets and appliances.
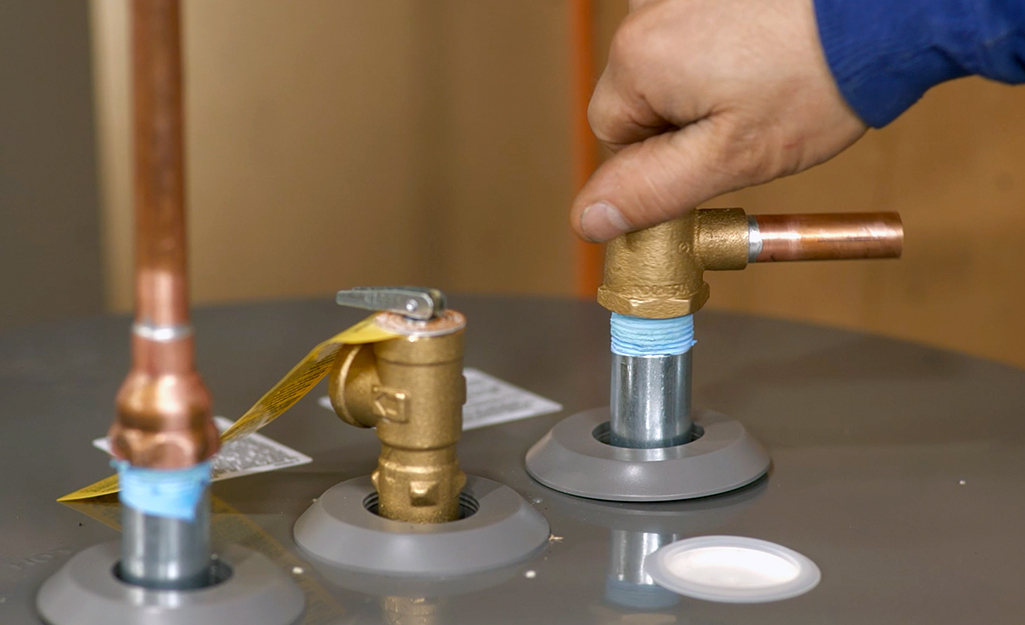
Identifying Inlet and Outlet Pipes
The first step is accurately identifying which pipe is the inlet and which is the outlet. This is usually straightforward:
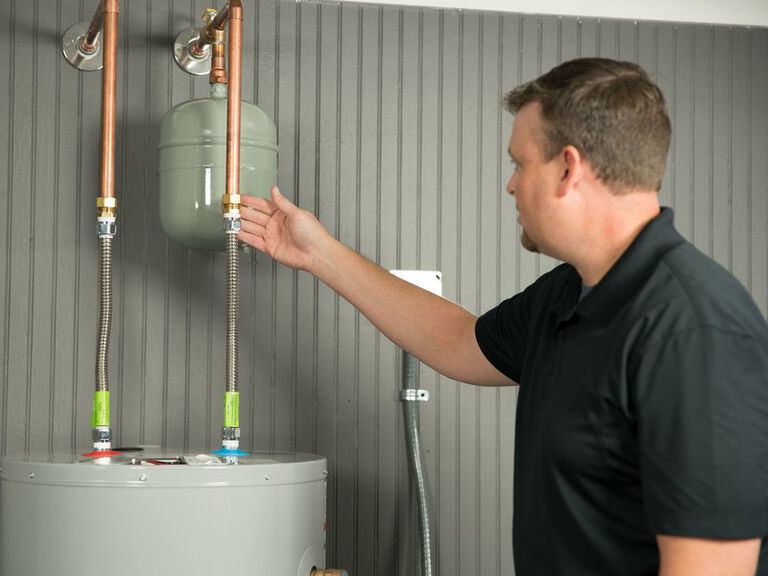
- Inlet Pipe (Cold Water): This pipe connects to the top of the water heater, typically on the right side. It’s usually marked with a blue ring or label to indicate it carries cold water into the tank.
- Outlet Pipe (Hot Water): This pipe also connects to the top of the water heater, generally on the left side. A red ring or label usually marks it as carrying hot water out to your home.
Pay close attention to the placement and color markings. Misidentification can lead to problems during maintenance or repairs.
Common Issues with Inlet and Outlet Pipes
Several issues can arise with your water heater's inlet and outlet pipes. Knowing these common problems can help you diagnose and address them:
Leaks
Leaks are the most frequent issue. They can occur at the pipe connections, from corrosion, or due to loose fittings. Look for:
- Water droplets or puddles near the connections.
- Rust or corrosion on the pipes or fittings.
- A slow, steady drip, even when no hot water is being used.
Corrosion
Over time, metal pipes can corrode, especially if you have hard water. Corrosion can weaken the pipes and lead to leaks or reduced water flow. Signs of corrosion include:
- Visible rust or scaling on the pipes.
- Discolored water (reddish or brown).
- Reduced water pressure.
Sediment Buildup
Sediment from your water supply can accumulate in the water heater tank and sometimes clog the inlet and outlet pipes, restricting water flow. Indications of sediment buildup include:
- Banging or rumbling noises from the water heater.
- Reduced hot water capacity.
- Cloudy or dirty hot water.
Loose or Damaged Fittings
Fittings can loosen over time due to vibrations or temperature changes. Damaged threads or cracked fittings can also cause leaks. Check for:
- Wobbly or unstable pipe connections.
- Visible cracks or damage to the fittings.
- Water leaking from around the fittings.
Troubleshooting and DIY Repairs
For minor issues, you might be able to perform some DIY troubleshooting and repairs. However, always prioritize safety and if you’re unsure, call a qualified HVAC professional.
Tightening Fittings
If you notice a leak at a fitting, try tightening it gently with a wrench. Be careful not to overtighten, as this can damage the fitting or pipe. If tightening doesn't stop the leak, you may need to replace the fitting.
Replacing Fittings
Replacing a fitting is a bit more involved but still manageable for some DIYers. Here’s a general outline:
- Turn off the water supply to the water heater at the main shut-off valve.
- Drain the water heater to below the level of the fitting you're replacing.
- Disconnect the old fitting using two wrenches – one to hold the pipe and one to loosen the fitting.
- Clean the threads on the pipe with a wire brush.
- Apply Teflon tape to the threads of the pipe.
- Install the new fitting, tightening it securely with two wrenches.
- Turn the water supply back on slowly and check for leaks.
Tools and Materials:
- Two pipe wrenches
- Adjustable wrench
- Teflon tape
- Wire brush
- Replacement fitting (matching the size and type of the old one)
- Bucket and hose for draining the water heater
Flushing Sediment
Flushing your water heater can remove sediment buildup and improve its efficiency. Here's a simplified process:
- Turn off the power or gas to the water heater.
- Turn off the cold water supply to the water heater.
- Attach a hose to the drain valve at the bottom of the tank.
- Run the hose to a safe drain location.
- Open the drain valve and let the water drain completely.
- Flush the tank by briefly opening the cold water supply to stir up sediment, then closing it and allowing the tank to drain again. Repeat this several times.
- Close the drain valve.
- Open the cold water supply and allow the tank to fill completely.
- Turn the power or gas back on.
Important Note: Be cautious when draining hot water. Allow the water to cool down before draining to avoid burns.
When to Call a Professional
While some water heater issues can be addressed with DIY repairs, others require the expertise of a qualified HVAC professional. Call a professional if:
- You are uncomfortable working with plumbing or gas lines.
- The leak is significant or cannot be stopped by tightening fittings.
- You suspect corrosion has weakened the pipes or tank.
- The water heater is old or nearing the end of its lifespan.
- You are experiencing problems with the gas valve or heating element.
- You are unsure about the cause of the problem.
Attempting complex repairs without the proper knowledge and tools can be dangerous and may void your water heater's warranty. Safety should always be your top priority.
Preventative Maintenance Tips
Regular maintenance can help prevent problems with your water heater's inlet and outlet pipes. Here are a few tips:
- Inspect the pipes and fittings regularly for leaks, corrosion, and damage.
- Flush the water heater annually to remove sediment buildup.
- Consider installing a water softener if you have hard water.
- Insulate the pipes to prevent heat loss and condensation.
- Have your water heater professionally inspected every few years.
Estimated Repair Costs
The cost of repairing or replacing water heater inlet and outlet pipes can vary depending on the severity of the problem, the type of pipes, and the labor rates in your area. Here's a general estimate:
- Replacing a fitting: $50 - $150 (DIY may cost less)
- Repairing a minor leak: $75 - $250
- Replacing a section of pipe: $150 - $400
- Replacing the entire water heater: $500 - $2000+ (including installation)
These are just estimates, and it's always best to get a quote from a qualified HVAC professional for an accurate assessment of the cost.
Pipe Materials
Different materials are used for inlet and outlet pipes. Knowing which type you have can help with repairs and maintenance.
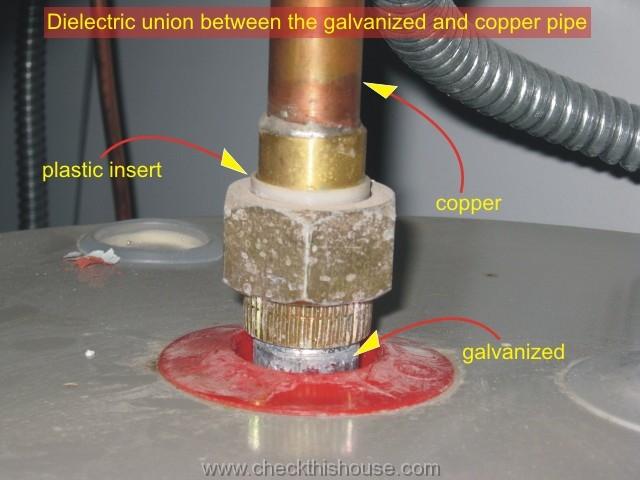
- Copper: Durable and corrosion-resistant, but can be more expensive.
- CPVC (Chlorinated Polyvinyl Chloride): Heat-resistant plastic suitable for hot water lines.
- PEX (Cross-linked Polyethylene): Flexible plastic that's easy to install and resistant to freezing.
- Galvanized Steel: Older material prone to corrosion and less common in modern installations.
When replacing pipes, choose a material that's compatible with your existing plumbing and local building codes.
Final Thoughts
Understanding the water heater inlet and outlet pipe connections is crucial for maintaining a functional and efficient water heating system. While some minor issues can be addressed with DIY repairs, it's important to know when to call a professional. Regular maintenance and prompt attention to problems can help extend the life of your water heater and prevent costly repairs. Remember, when in doubt, consult a qualified HVAC technician to ensure your safety and the proper functioning of your plumbing system.