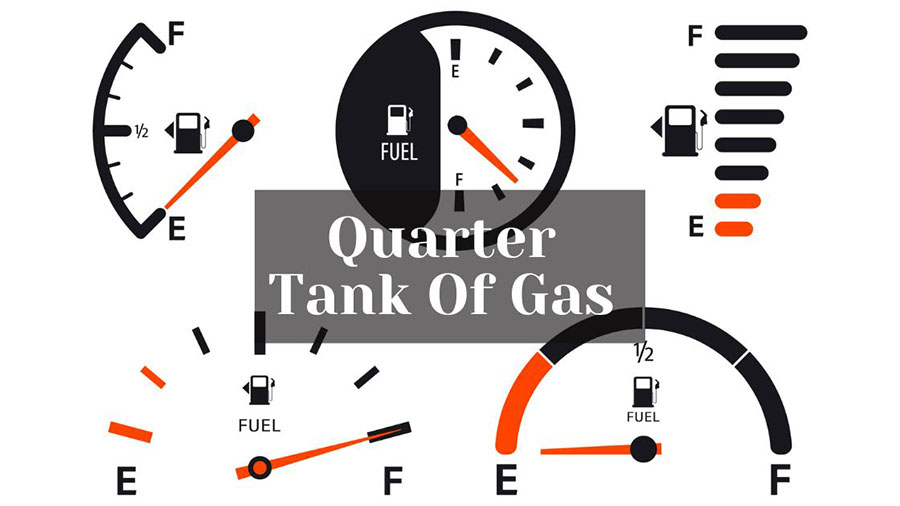
What Does 3/8 Of A Tank Of Gas Look Like
Let’s face it, a broken appliance can throw a wrench in your day. A common culprit in many households is the humble washing machine. If yours has decided to take an unscheduled vacation from its laundry duties, don't panic! Before calling in the professionals, let’s explore some basic troubleshooting steps you can safely take to diagnose and potentially fix the problem yourself. Remember, safety first! If you're uncomfortable with any step, or if you suspect a more complex issue, calling a qualified appliance repair technician is always the best option.
Washing Machine Woes: A Step-by-Step Troubleshooting Guide
We'll break down the troubleshooting process into logical steps, starting with the simplest and most common causes. Remember to unplug the washing machine before attempting any internal checks.
Step 1: Power Check
This might seem obvious, but it's surprising how often a simple power issue is the root cause. Start with these checks:
- Check the Outlet: Is the washing machine plugged in securely? Try plugging another appliance into the same outlet to see if it's working. If the outlet is dead, check the circuit breaker or fuse box.
- Circuit Breaker/Fuse Box: Locate the breaker or fuse that controls the washing machine's circuit. If it's tripped (breaker in the "off" or "middle" position) or the fuse is blown (visible break in the wire), reset the breaker or replace the fuse. If the breaker trips repeatedly or the fuse blows again immediately, stop and call an electrician. This indicates a more serious electrical problem.
- Power Cord: Inspect the power cord for any visible damage – cuts, frays, or exposed wires. Do not use the washing machine if the cord is damaged! Replace the cord (if you're comfortable doing so and the damage is minor) or call a repair technician.
When to Call a Pro: If the outlet isn't working after checking the breaker/fuse, or if the power cord is damaged, it’s time to call an electrician or appliance repair technician. Dealing with electrical issues can be dangerous.
Step 2: Water Supply Inspection
A washing machine needs water to do its job. Let's make sure it's getting the supply it needs:
- Water Supply Valves: Locate the hot and cold water supply valves (usually located behind the washing machine). Make sure both valves are fully open. Sometimes, these valves can be accidentally shut off or partially closed.
- Water Supply Hoses: Inspect the hoses connecting the water supply valves to the washing machine. Look for kinks, cracks, bulges, or leaks. Kinks can restrict water flow, and damaged hoses can leak, causing water damage. Replace any damaged hoses immediately. You can usually find replacement hoses at your local hardware store. Make sure to turn off the water supply valves before disconnecting any hoses.
- Inlet Screens: The water inlet valves on the back of the washing machine usually have small screens to filter out sediment. These screens can become clogged over time, restricting water flow. Turn off the water supply, disconnect the hoses, and carefully remove and clean the screens. Use a small brush or toothbrush to remove any debris.
When to Call a Pro: If you find significant corrosion on the water valves or connections, or if the hoses are severely damaged, it’s best to call a plumber or appliance repair technician. Improper hose connections can lead to leaks and water damage.
Step 3: Lid Switch/Door Lock Check
Most washing machines have a safety mechanism (lid switch for top loaders, door lock for front loaders) that prevents the machine from operating if the lid/door is not properly closed. This is a common cause of "no start" problems.
- Lid Switch (Top Loaders): Locate the lid switch (usually on the cabinet frame where the lid closes). Ensure the lid is making proper contact with the switch when closed. Sometimes, the switch can become misaligned or damaged. Try gently pressing down on the lid near the switch to see if it starts the machine. *Note: Some advanced troubleshooting may involve using a multimeter, which should only be done by experienced individuals.*
- Door Lock (Front Loaders): Ensure the door is fully closed and latched. Listen for a "click" sound indicating the door lock has engaged. If the door lock seems faulty, try unplugging the washing machine for a few minutes, then plugging it back in. This can sometimes reset the lock mechanism.
- Check for Obstructions: Make sure there isn't anything obstructing the lid or door from closing properly. A stray sock or a bulky item can prevent the safety mechanism from engaging.
When to Call a Pro: If the lid switch or door lock seems faulty and you're not comfortable testing or replacing it, call a qualified appliance repair technician. These components are often integral to the machine's safety system.
Step 4: Control Panel and Settings
Sometimes, the problem isn't a mechanical failure, but a simple setting issue.
- Cycle Selection: Double-check that you've selected the correct wash cycle and settings. Make sure the timer knob (if applicable) is properly set.
- Start/Pause Button: Ensure the start/pause button has been properly pressed. Some machines require a longer press to initiate the cycle.
- Child Lock: Some washing machines have a child lock feature that can prevent the machine from starting. Check your owner's manual to see if this feature is enabled and how to disable it.
- Error Codes: If your washing machine has a digital display, check for any error codes. Consult your owner's manual to decipher the meaning of the error code and the recommended course of action.
When to Call a Pro: If the control panel is unresponsive, displaying unusual error codes, or you suspect a problem with the electronic control board, it's best to call a professional. These components are complex and require specialized knowledge to diagnose and repair.
Step 5: Drainage Issues
If the washing machine fills with water but doesn't drain, the problem likely lies with the drain system.
- Drain Hose: Check the drain hose for kinks, clogs, or obstructions. Ensure the hose is properly connected to the drainpipe and that it's not inserted too far into the drainpipe (this can create a siphon effect and prevent proper draining).
- Drain Pump Filter: Most washing machines have a drain pump filter located at the front or bottom of the machine. This filter can become clogged with lint, debris, and small objects, preventing the machine from draining. *Before removing the filter, be prepared for some water to spill out. Have a towel and a shallow container ready.* Clean the filter thoroughly. Refer to your owner's manual for the location of the drain pump filter and instructions on how to remove and clean it.
- Drain Pump: If the filter is clean and the machine still doesn't drain, the drain pump itself may be faulty. Testing the drain pump requires some electrical knowledge and should only be attempted by experienced individuals.
When to Call a Pro: If the drain pump filter is difficult to access, or if you suspect a problem with the drain pump itself, it's best to call a qualified appliance repair technician. Replacing the drain pump can be a complex task.
Step 6: Agitation/Spinning Problems
If the washing machine fills and drains, but doesn't agitate (top loaders) or spin (front loaders), the problem may be related to the motor, belts, or other mechanical components.
- Overloading: Make sure you're not overloading the washing machine. Overloading can strain the motor and prevent it from agitating or spinning properly.
- Belt (Top Loaders): If your top-loading washing machine uses a belt to drive the agitator, inspect the belt for wear and tear. A worn or broken belt can prevent the agitator from moving. Replacing a belt is a relatively simple task, but you'll need to access the motor compartment.
- Motor Coupler (Top Loaders): Some top-loading washing machines use a motor coupler to connect the motor to the transmission. This coupler can wear out over time and prevent the agitator from spinning. Replacing the motor coupler is a slightly more involved task than replacing a belt, but it's still within the capabilities of many DIYers.
- Motor and Transmission: If the motor is making unusual noises or if the agitator/drum is not moving at all, the motor or transmission may be faulty.
When to Call a Pro: If you suspect a problem with the motor, transmission, or other complex mechanical components, it's best to call a qualified appliance repair technician. These repairs often require specialized tools and knowledge.
General Safety Tips
- Unplug the Appliance: Always unplug the washing machine from the power outlet before attempting any repairs or inspections.
- Turn Off Water Supply: Turn off the water supply to the washing machine before disconnecting any hoses or working on the water inlet valves.
- Refer to Owner's Manual: Consult your owner's manual for specific instructions and troubleshooting tips for your model of washing machine.
- Don't Force Anything: If something seems stuck or difficult to remove, don't force it. You could damage the appliance or injure yourself.
- Wear Safety Glasses: Wear safety glasses when working on the washing machine to protect your eyes from debris.
- Know Your Limits: If you're uncomfortable with any step, or if you suspect a more complex issue, don't hesitate to call a qualified appliance repair technician.
Empowering You to Fix It (Or Know When to Call for Help)
By following these steps, you can confidently troubleshoot common washing machine problems and potentially save yourself the cost of a service call. Remember to prioritize safety and know your limits. Sometimes, calling in the professionals is the smartest and safest course of action. The goal is to empower you to address basic issues and have a more informed conversation with a repair technician if a professional repair is needed.
And now, for something completely different – let's consider the original question: What Does 3/8 Of A Tank Of Gas Look Like? This is, of course, context-dependent. It depends entirely on the size of your gas tank. A 3/8 tank in a compact car will look very different than a 3/8 tank in a large SUV. Generally, look at your fuel gauge. If your gauge reads in halves, divide the space between empty and full. Picture that space in eight equal segments. Three of those segments will provide a reasonable approximation of 3/8 of a tank. However, most newer car gauges have much more sensitivity, with increments of 1/16th and 1/32nd to allow more accurate tracking. Ultimately, the only way to determine 3/8 of a tank exactly is to fill the tank, calculate the total capacity, multiply by 3/8, then carefully use the trip reset to track your fuel usage.