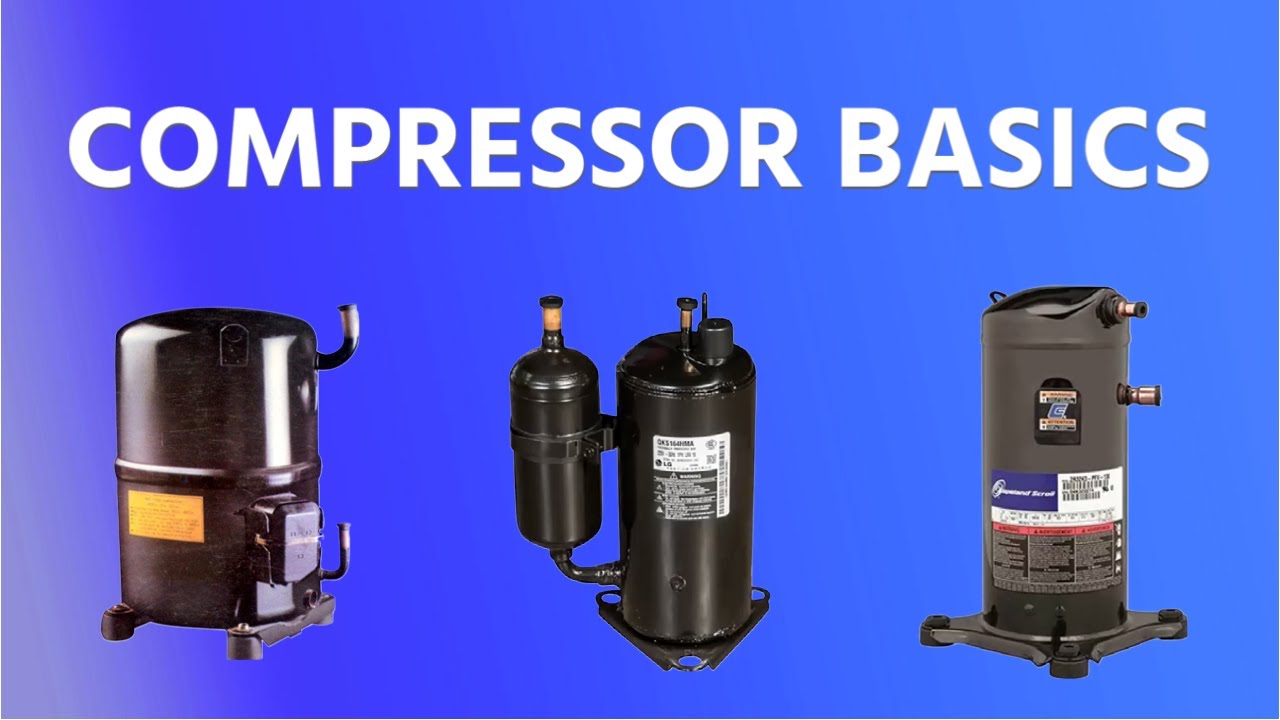
What Does A Compressor Do Hvac

Is your home feeling stuffy even with the AC running? Are your energy bills inexplicably high? The culprit might be a malfunctioning compressor, the heart of your HVAC system. Many homeowners face this issue, leading to discomfort and unexpected expenses. Before calling a professional, let's explore what a compressor does and how you can troubleshoot some common problems.
Understanding the Compressor's Role
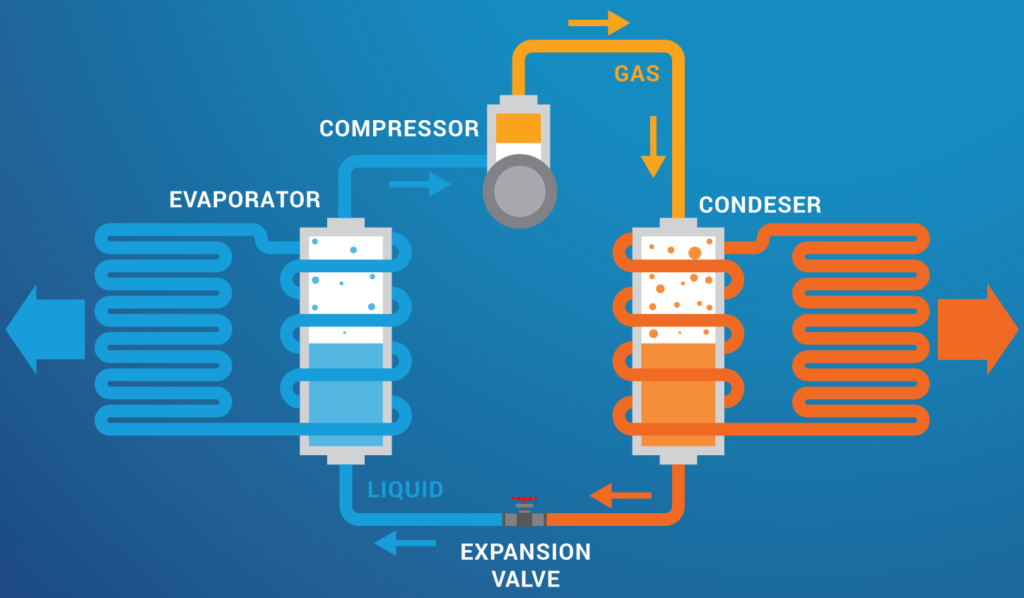
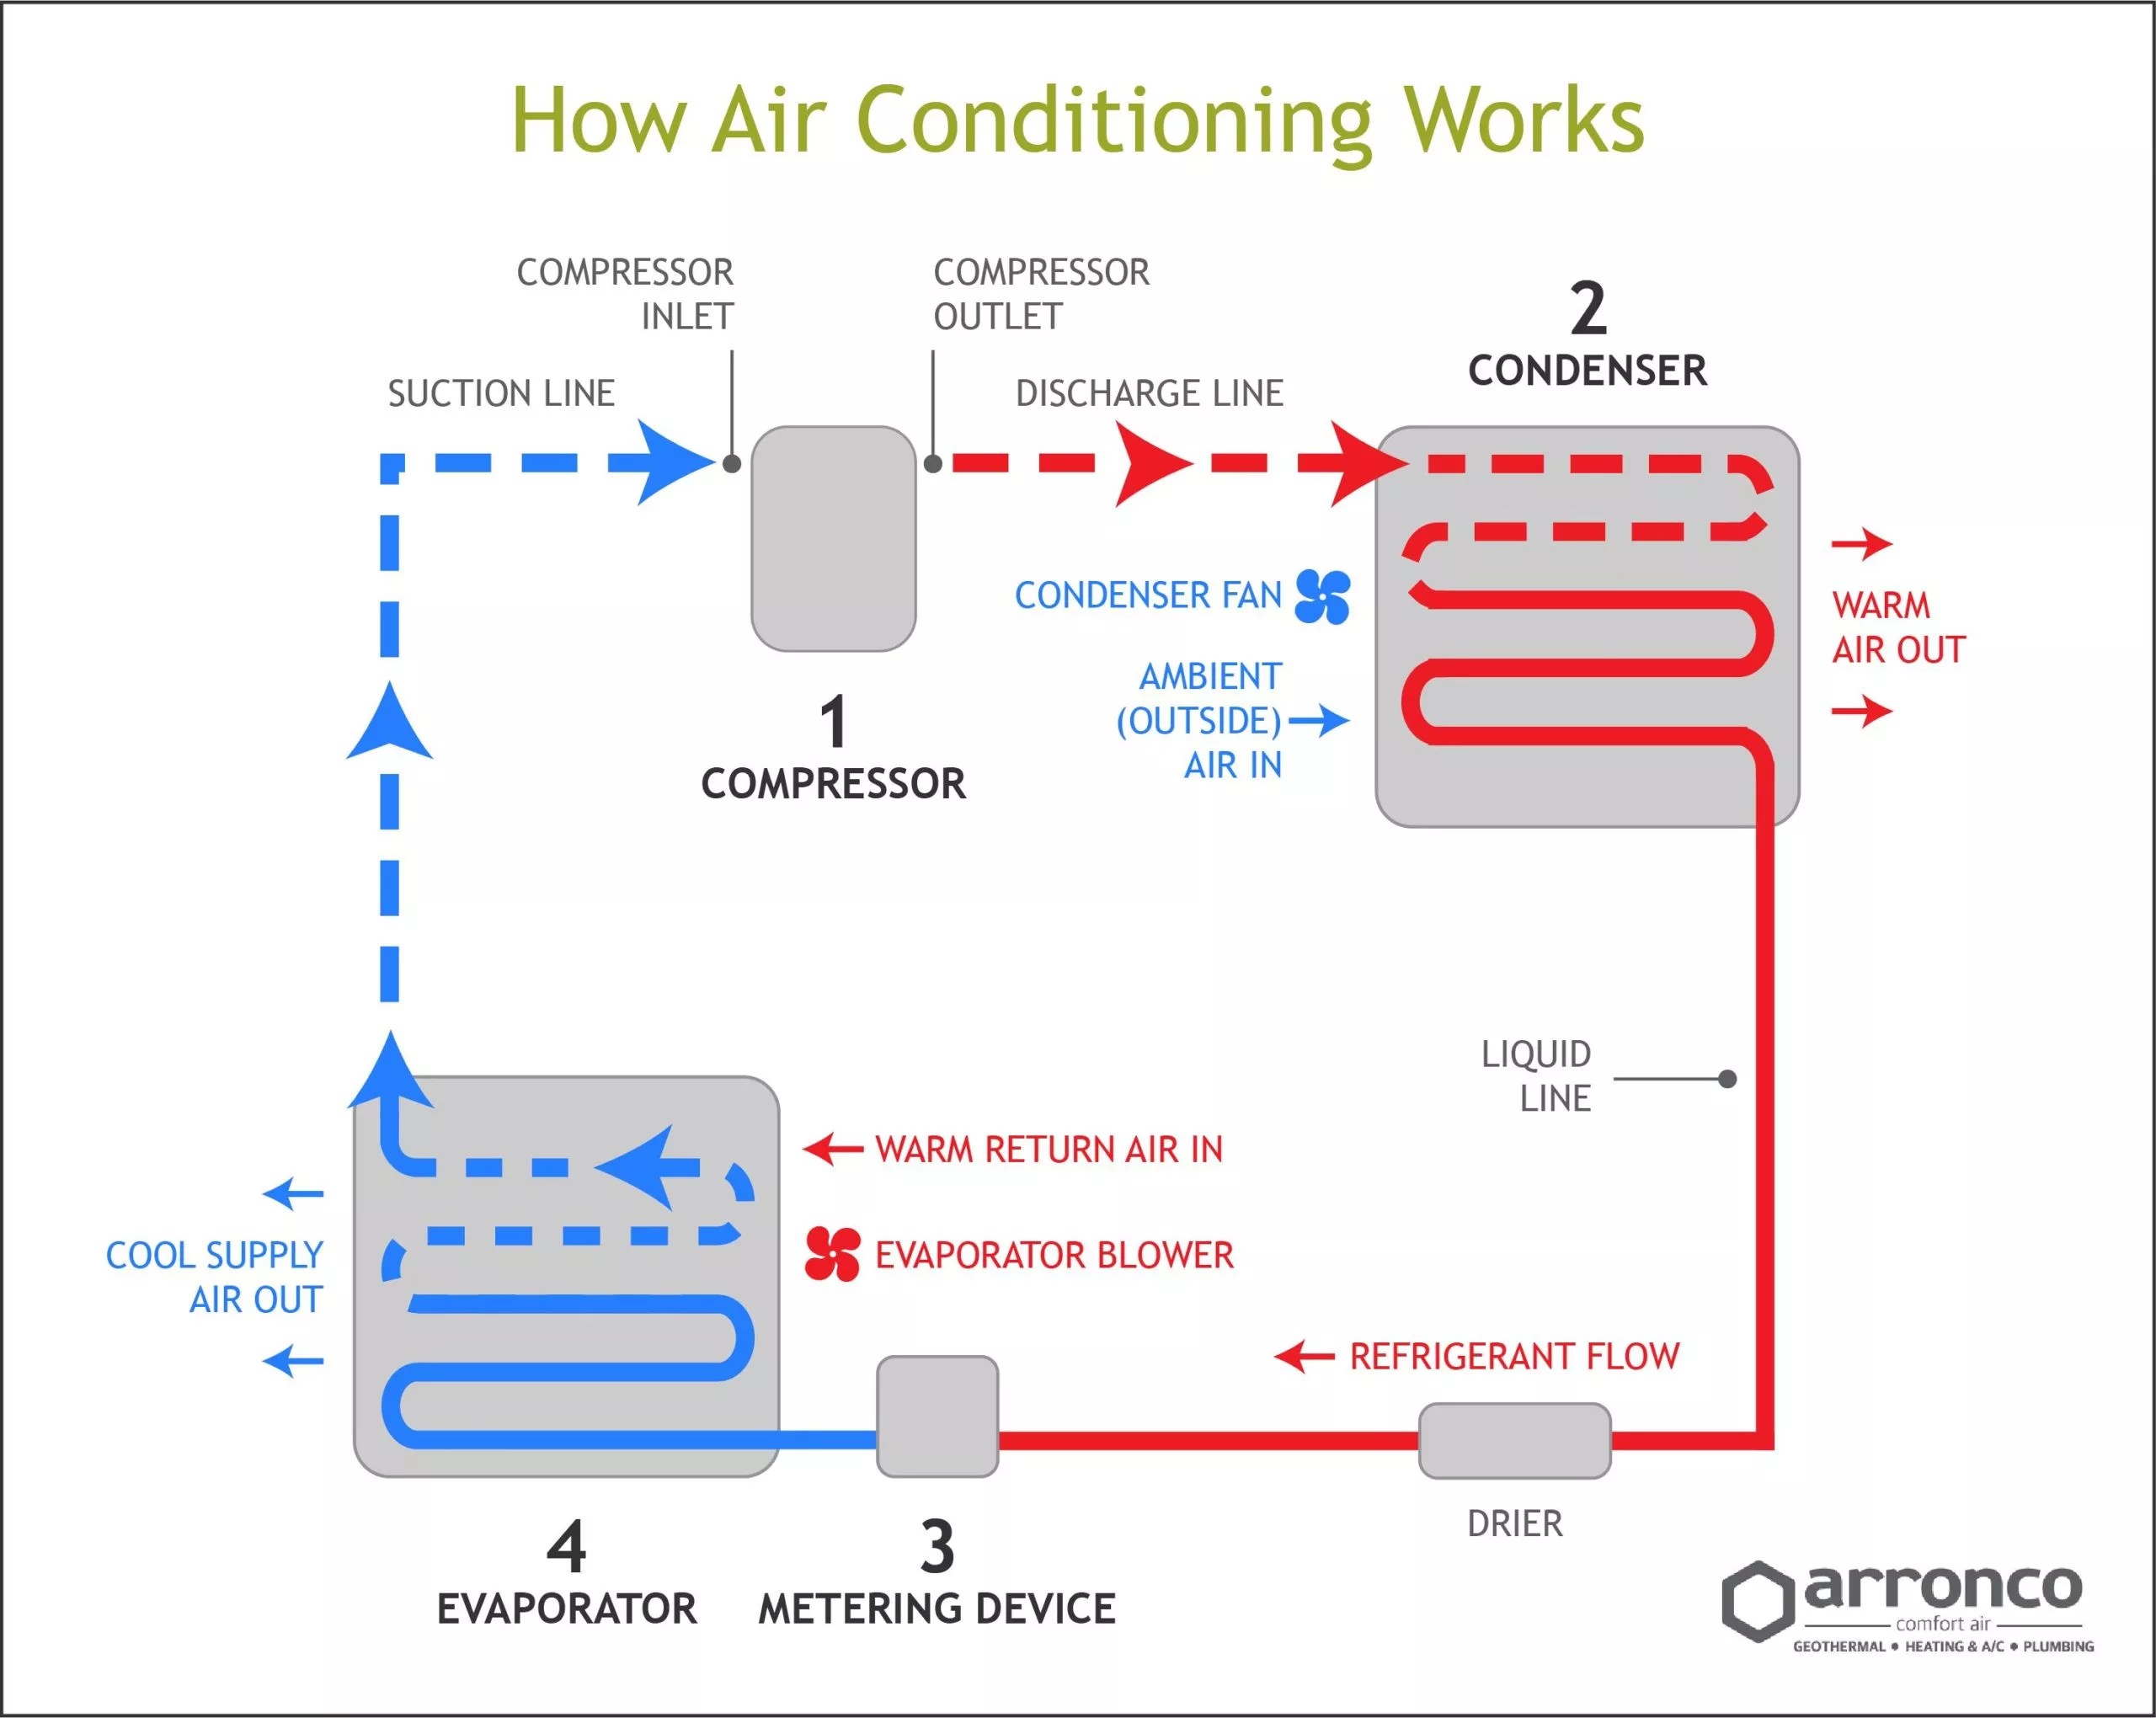
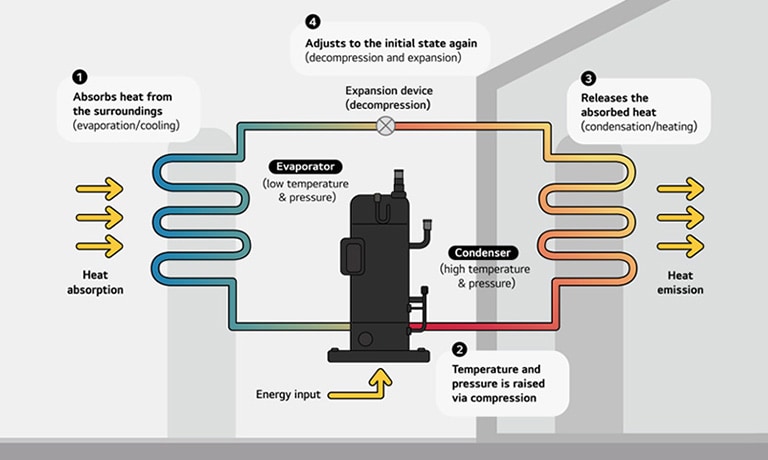
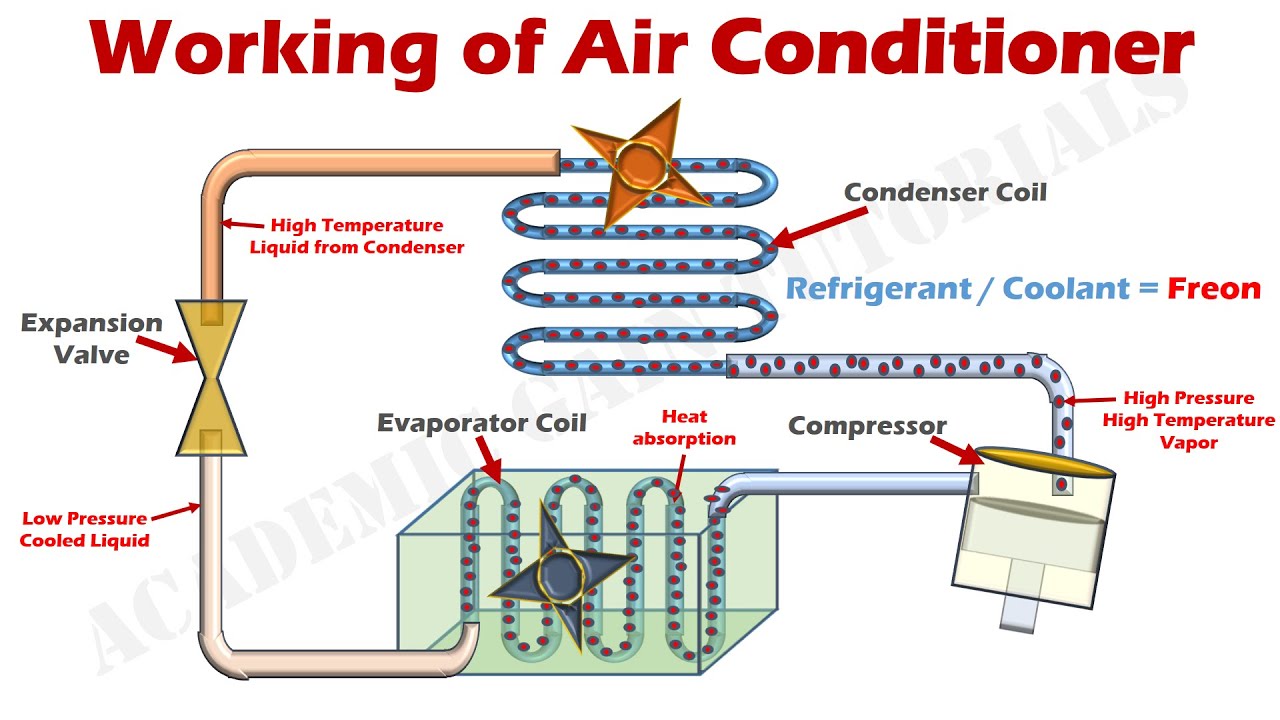
At its core, the compressor is responsible for circulating refrigerant throughout your HVAC system. Think of it as the pump that keeps the coolant flowing in your car's engine. Specifically, the compressor does two crucial things:
- Compresses the refrigerant gas: This increases its pressure and temperature.
- Circulates the refrigerant: It moves the high-pressure, high-temperature refrigerant to the condenser coil, where it releases heat.
Without a properly functioning compressor, the refrigerant can't effectively absorb heat from inside your home and release it outside. This results in poor cooling performance, increased energy consumption, and potentially, a complete system failure.
Common Problem: The AC Blows Warm Air
One of the most common signs of a compressor problem is warm air blowing from your vents. While there could be other causes, like a refrigerant leak or a faulty thermostat, a compressor issue is a prime suspect. Let's walk through a diagnostic process.
Step 1: Basic Checks - Is Everything Powered On?
Before diving into complex diagnostics, start with the basics. Sounds obvious, but overlooking these simple things is a common mistake!
- Thermostat Setting: Ensure your thermostat is set to "cool" and the temperature is lower than the current room temperature.
- Power Supply: Check the circuit breaker for your outdoor unit (where the compressor is located). Is it tripped? If so, reset it. If it trips again immediately, do not continue resetting it – this indicates a serious electrical problem requiring professional attention.
- Air Filter: A clogged air filter restricts airflow, which can strain the compressor. Replace your air filter with a clean one.
If these simple checks don't solve the problem, move on to the next step.
Step 2: Listen to the Outdoor Unit
Head outside to your outdoor unit (the condenser). Listen carefully. What do you hear?
- Humming Sound (but no fan): This *could* indicate a capacitor problem, which is often a relatively inexpensive fix. However, it could also indicate a more serious compressor issue.
- Clicking Sound (but no start): Again, this could be a capacitor, a relay, or a more significant compressor failure.
- Loud, Grinding, or Rattling Noises: These are bad signs and almost always indicate a serious compressor problem that requires professional attention. Turn off the unit immediately to prevent further damage.
- Silence: If the unit is completely silent, it could be a power issue, a control board problem, or a completely failed compressor.
Step 3: Check the Capacitor (Proceed with Extreme Caution!)
Warning: Capacitors store electricity and can deliver a dangerous shock even when the unit is turned off. Only attempt this step if you are comfortable working with electricity and understand the risks. If not, skip this step and call a professional.
Safety First:
- Turn off the power to the outdoor unit at the breaker box.
- Wait at least 5 minutes for the capacitor to discharge.
- Use a non-contact voltage tester to confirm that the capacitor is discharged. If it's not, do not touch it! Call a professional.
Locating the Capacitor: The capacitor is usually a cylindrical component located inside the outdoor unit's control panel. You may see one or two capacitors. They are typically labeled with their capacitance (in microfarads, µF) and voltage rating.
Visual Inspection: Look for the following:
- Bulging or Swollen Capacitor: This is a clear sign of a failed capacitor.
- Leaking Fluid: Any signs of fluid leakage indicate a faulty capacitor.
Testing the Capacitor (Requires a Multimeter): If the capacitor looks okay visually, you can test it with a multimeter that has a capacitance function.
- Set your multimeter to the capacitance setting (µF).
- Disconnect the wires from the capacitor terminals. Note their positions before disconnecting!
- Connect the multimeter probes to the capacitor terminals.
- Compare the reading on the multimeter to the capacitor's rated capacitance (printed on the capacitor).
Interpreting the Results: If the measured capacitance is significantly lower (e.g., more than 10% below the rated value), the capacitor is likely faulty and needs to be replaced.
Step 4: Simple DIY Fix – Replacing a Faulty Capacitor (If You're Comfortable)
Again, proceed with extreme caution! If you are not comfortable working with electricity, call a professional.
Required Tools:
- Screwdrivers (various sizes)
- Wire strippers/crimpers
- Needle-nose pliers
- Replacement capacitor (Must be the exact same capacitance and voltage rating as the original!)
- Non-contact voltage tester
- Safety glasses
- Work gloves
Steps:
- Turn off the power to the outdoor unit at the breaker box.
- Wait at least 5 minutes for the capacitor to discharge.
- Use a non-contact voltage tester to confirm that the capacitor is discharged.
- Take a picture of the wiring connections to the old capacitor before disconnecting anything. This is crucial for proper reassembly.
- Disconnect the wires from the old capacitor.
- Connect the wires to the new capacitor, matching the wiring configuration from the picture you took.
- Carefully place the new capacitor in its original position.
- Reassemble the control panel.
- Turn the power back on at the breaker box.
- Monitor the unit to see if it starts and runs properly.
If the unit starts and runs, congratulations! You've successfully replaced the capacitor. However, if the problem persists, or if you are uncomfortable with any of these steps, it's time to call a professional.
When to Call a Professional – Red Flags
While some compressor problems have simple DIY solutions, many require the expertise of a qualified HVAC technician. Here are some red flags that indicate you need to call a professional:
- Refrigerant Leaks: Refrigerant leaks are harmful to the environment and can be dangerous to handle. Only licensed professionals can legally handle refrigerant. If you suspect a leak (e.g., ice forming on the refrigerant lines, hissing sound), do not attempt to fix it yourself.
- Electrical Problems: If you suspect any electrical problems beyond a tripped breaker (e.g., burning smells, sparking wires), do not attempt to diagnose or repair them yourself. Electrical work is dangerous and requires specialized knowledge and equipment.
- Compressor Overheating: If the compressor is excessively hot to the touch, it could indicate a serious internal problem.
- Internal Compressor Failure: Loud, grinding, or rattling noises from the compressor indicate a likely internal failure, which typically requires replacing the entire compressor or even the entire outdoor unit.
- You're Unsure or Uncomfortable: If you're unsure about any step of the troubleshooting process or uncomfortable working with electricity, it's always best to err on the side of caution and call a professional.
- Persistent Problems: If you've tried the basic checks and DIY fixes, but the problem persists, it's likely a more complex issue that requires professional diagnosis and repair.
Professional Diagnosis and Repair
A qualified HVAC technician will perform a thorough diagnosis of your compressor problem, which may include:
- Checking Refrigerant Levels: Ensuring the system has the correct amount of refrigerant.
- Testing Compressor Windings: Using a multimeter to check the electrical windings inside the compressor for shorts or open circuits.
- Measuring Compressor Amperage: Checking if the compressor is drawing the correct amount of current.
- Inspecting for Leaks: Using specialized equipment to detect refrigerant leaks.
- Checking System Pressures: Analyzing the pressures in the refrigerant lines to identify potential problems.
Based on their diagnosis, the technician will recommend the appropriate repair, which may include:
- Repairing Refrigerant Leaks: Sealing any leaks and recharging the refrigerant.
- Replacing the Compressor: Replacing a failed compressor with a new one. This is a major repair and can be costly.
- Replacing the Outdoor Unit: In some cases, it may be more cost-effective to replace the entire outdoor unit rather than just the compressor.
- Addressing Electrical Issues: Repairing or replacing faulty wiring or components.
Prevention is Key
While compressor problems can be frustrating, you can take steps to prevent them from occurring in the first place:
- Regular Maintenance: Schedule regular maintenance for your HVAC system with a qualified technician. This includes cleaning the coils, checking refrigerant levels, and inspecting electrical components.
- Change Air Filters Regularly: Replace your air filters every 1-3 months, depending on usage and air quality.
- Keep the Outdoor Unit Clean: Remove any debris (e.g., leaves, grass clippings) from around the outdoor unit.
- Avoid Overworking the System: Don't set your thermostat too low, as this can put extra strain on the compressor.
By understanding the compressor's role, knowing how to troubleshoot common problems, and taking preventative measures, you can keep your HVAC system running efficiently and comfortably for years to come. Remember, when in doubt, always consult a qualified professional!