What Does A Dirty Hepa Filter Look Like

Is your home feeling stuffy despite your HVAC system running full blast? Are certain rooms noticeably warmer or cooler than others? You're not alone. Many homeowners experience uneven heating and cooling, and one of the most common culprits is a neglected air filter, especially a HEPA filter.
Understanding the Problem: Uneven Heating and Cooling
Uneven heating and cooling isn't just uncomfortable; it can also strain your HVAC system, leading to higher energy bills and potentially costly repairs down the line. Several factors contribute to this issue, including ductwork problems, insulation deficiencies, and issues with your HVAC unit itself. However, before jumping to complex diagnoses, it's always best to start with the simplest and most easily remedied cause: a dirty air filter.
Why HEPA Filters Matter
HEPA (High-Efficiency Particulate Air) filters are designed to trap a significant amount of airborne particles, including dust, pollen, pet dander, mold spores, and even some bacteria and viruses. This makes them ideal for people with allergies or respiratory issues. However, this high filtration efficiency comes with a tradeoff: HEPA filters can become clogged more quickly than standard filters, especially in homes with pets or high dust levels.
Diagnosing the Dirty Filter Issue: A Step-by-Step Approach
Let's walk through a methodical process to determine if a dirty HEPA filter is the root of your heating and cooling problems.
Step 1: The Visual Inspection (No Tools Required)
This is the most crucial and easiest step. Safety first! Turn off your HVAC system before proceeding. This prevents any dust or debris from being sucked further into the system while you're inspecting the filter.
- Locate your air filter: This is typically found near your furnace or air handler, often behind a removable panel or access door. Refer to your HVAC system's manual if you're unsure of its location.
- Remove the filter: Note the direction of airflow arrows printed on the filter frame. This is crucial for reinstalling the new filter correctly.
- Inspect the filter: This is where you'll visually assess the filter's condition. Here's what to look for:
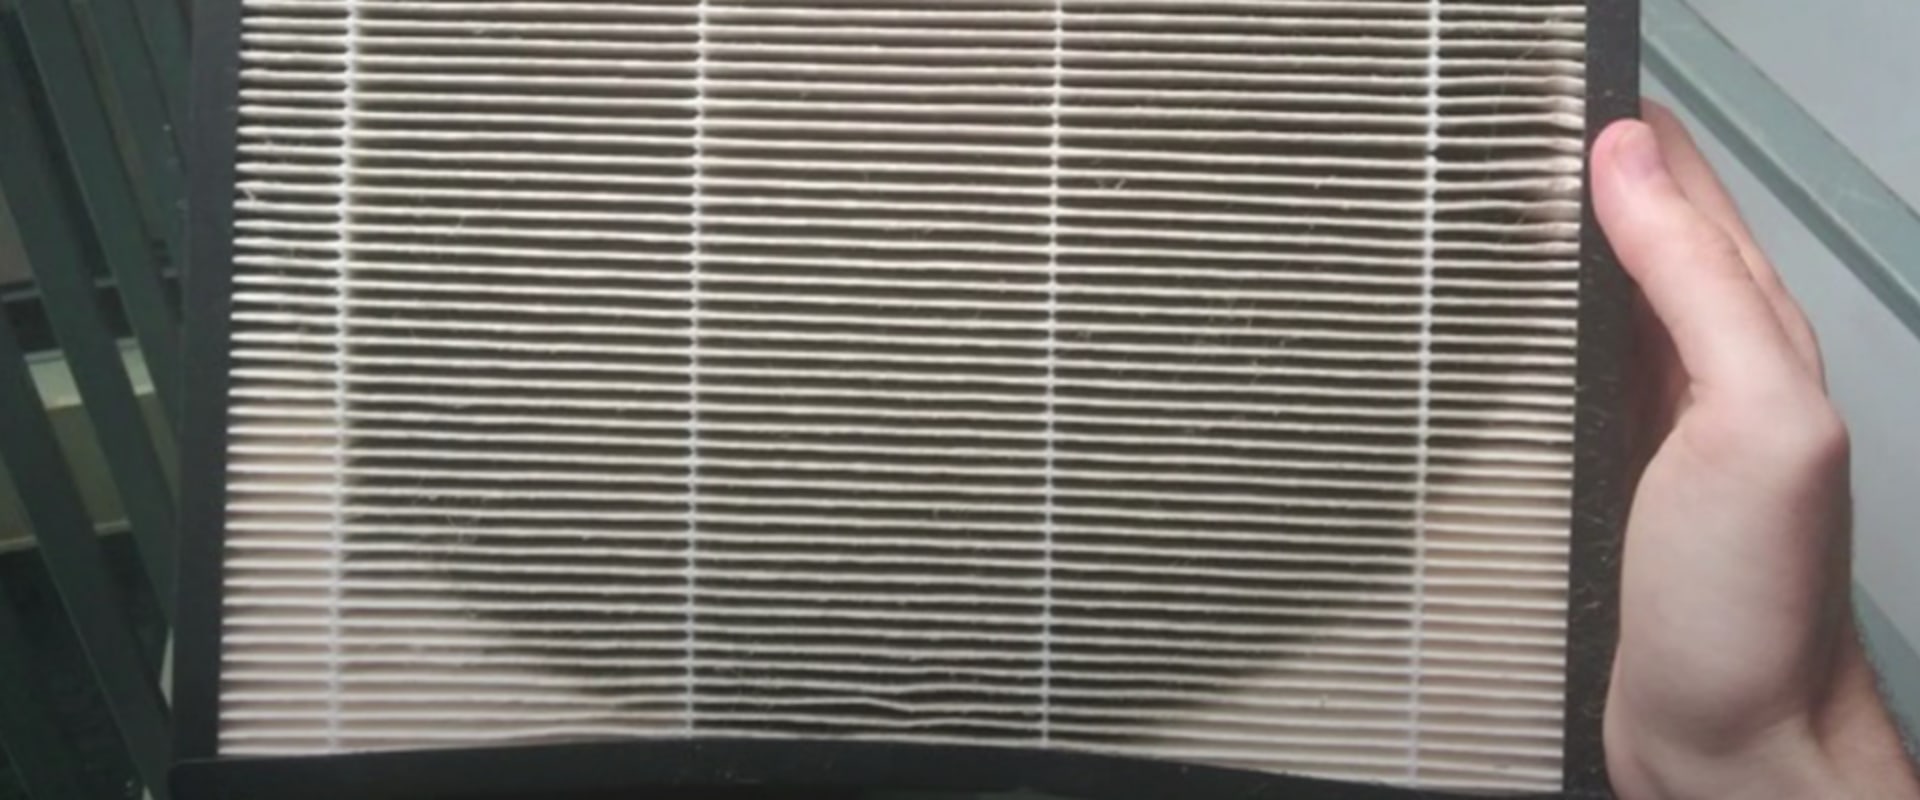
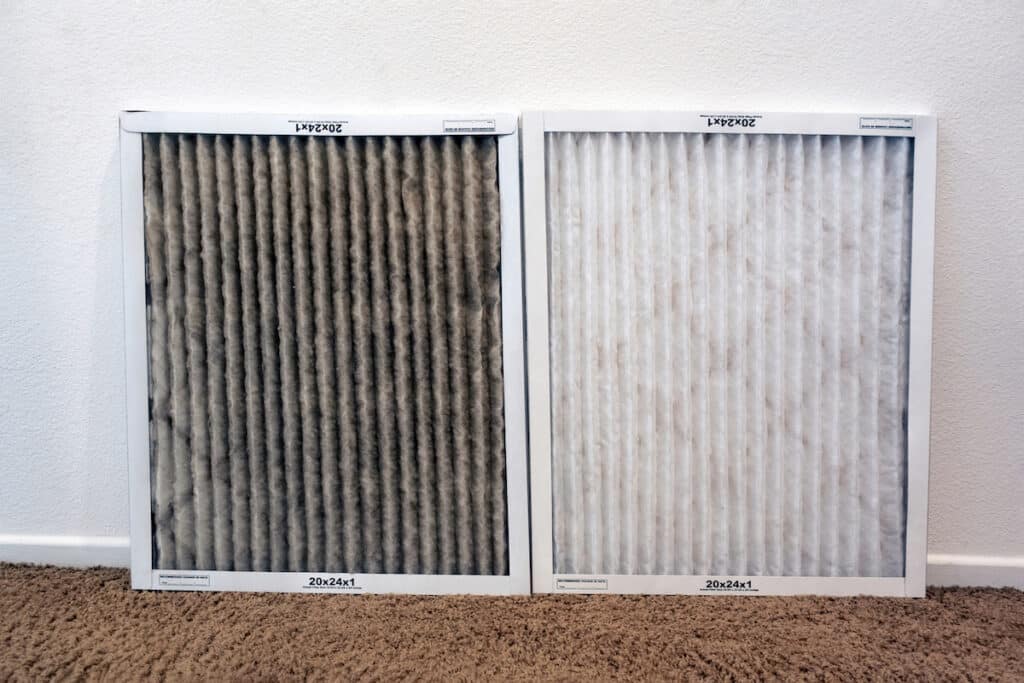
- Color: A clean HEPA filter is usually white or off-white. A dirty filter will be significantly darker, often gray or brown.
- Dust and Debris: Look for visible layers of dust, dirt, hair, pet dander, and other debris clinging to the filter surface. A light coating is normal, but a thick, matted layer is a clear indication of a dirty filter.
- Deformation: A severely clogged filter may be bent or deformed due to the pressure of the air trying to pass through it.
- Smell: A dirty filter can sometimes have a musty or dusty odor.
What Does a Dirty HEPA Filter Look Like?
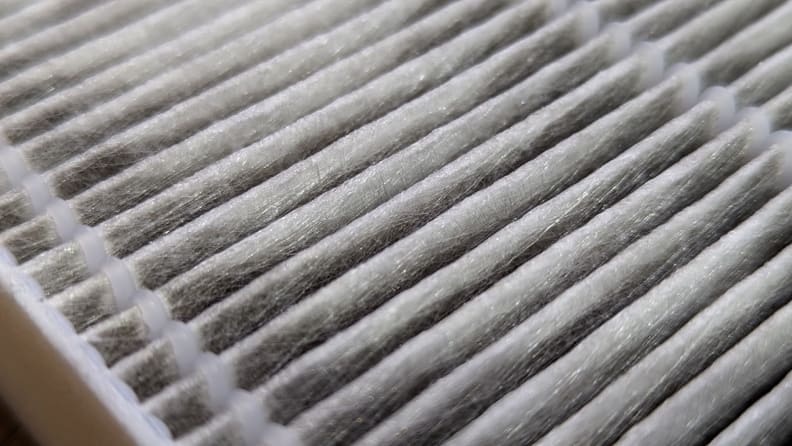
Imagine a pristine white piece of paper versus one that's been used as a dust collector for weeks. That's the difference between a clean and dirty HEPA filter. Specifically, a dirty HEPA filter might exhibit the following characteristics:
- Dark Gray or Brown Color: Instead of its original white or off-white hue, the filter will appear significantly darker due to the accumulated dust and debris.
- Visible Matted Layer of Dust: You'll see a noticeable coating of dust, hair, and other particles covering the filter's surface. This layer might be thick and matted, making it difficult to see the filter's original pleats.
- Accumulation of Pet Dander and Hair: If you have pets, you'll likely see a significant amount of pet dander and hair trapped in the filter.
- Presence of Mold or Mildew (in severe cases): In humid environments, a dirty filter can become a breeding ground for mold or mildew. Look for dark spots or discoloration and a musty odor. If you suspect mold, exercise caution and consider professional cleaning.
Step 2: The Airflow Test (No Tools Required)
If the visual inspection isn't conclusive (for example, if the filter is only slightly discolored), you can perform a simple airflow test.
- Hold the filter up to a light source: Can you easily see light through the filter material? If not, it's likely clogged.
- Compare airflow to a new filter (if available): If you have a spare new filter, hold it up to the light source alongside the old filter. The difference in light transmission will be obvious.
Step 3: Checking Vents and Registers (No Tools Required)
Even with a clean filter, restricted airflow from blocked vents can mimic the symptoms of a dirty filter. Check all supply and return vents in your home.
- Ensure vents are open: Make sure all vents are fully open and not partially closed.
- Remove obstructions: Clear any furniture, rugs, or curtains that might be blocking airflow to or from the vents.
Step 4: Thermostat Settings (No Tools Required)
Sometimes the issue isn't a dirty filter, but rather incorrect thermostat settings.
- Verify temperature settings: Ensure your thermostat is set to the desired temperature and is in the correct mode (heating or cooling).
- Check thermostat programming: Make sure your thermostat isn't programmed to automatically adjust the temperature at times when you need consistent heating or cooling.
DIY Actions: Simple Solutions You Can Take
If your diagnosis points to a dirty filter, here's what you can do:
Action 1: Replace the Air Filter (Essential)
- Purchase a replacement filter: Buy the correct size and type of HEPA filter for your HVAC system. Check your system's manual or the old filter for the specifications. Using the wrong size or type of filter can damage your system.
- Install the new filter: Carefully insert the new filter into the filter housing, making sure the airflow arrows on the filter frame point in the correct direction.
- Dispose of the old filter properly: Wrap the dirty filter in a plastic bag to prevent dust and debris from escaping, and dispose of it according to your local regulations.
Action 2: Clean Vents and Registers (Recommended)
- Vacuum vents and registers: Use a vacuum cleaner with a brush attachment to remove dust and debris from the surface of the vents and registers.
- Wash removable vent covers: Remove the vent covers and wash them with warm, soapy water. Rinse thoroughly and allow them to dry completely before reinstalling.
When to Call a Professional: Recognizing Complex Issues
If you've replaced the air filter and cleaned the vents, but you're still experiencing uneven heating and cooling, the problem might be more complex. Here are some signs that it's time to call a qualified HVAC technician:
- Strange Noises: Unusual noises coming from your furnace, air conditioner, or ductwork (e.g., banging, rattling, hissing) can indicate mechanical problems.
- Frequent Cycling: If your HVAC system is turning on and off frequently, it might be a sign of a malfunctioning component.
- Frozen Evaporator Coil: If you notice ice buildup on your air conditioner's evaporator coil, it's a serious issue that requires professional attention.
- Refrigerant Leaks: Refrigerant leaks are dangerous and can damage your HVAC system. If you suspect a refrigerant leak (e.g., a sweet, chemical smell), call a professional immediately.
- Ductwork Problems: If you suspect leaks or damage in your ductwork, it's best to have a professional inspect and repair it.
- You're Not Comfortable Working With Electricity: HVAC systems involve electrical components. If you're not comfortable working with electricity, leave the troubleshooting and repairs to a professional.
Working with HVAC systems can be dangerous. If you're not sure about something, it's always best to err on the side of caution and call a professional.
Preventative Maintenance: Keeping Your System Healthy
Regular maintenance is key to preventing uneven heating and cooling and extending the life of your HVAC system.
- Change your air filter regularly: Check your filter monthly and replace it every 1-3 months, or more frequently if you have pets or allergies.
- Schedule annual HVAC tune-ups: Have a qualified HVAC technician inspect and tune up your system at least once a year. This includes cleaning the system, checking for leaks, and ensuring all components are functioning properly.
- Keep your outdoor unit clean: Remove leaves, debris, and vegetation from around your outdoor unit to ensure proper airflow.
By following these simple steps, you can troubleshoot and address many common heating and cooling issues. Remember, a clean HEPA filter is crucial for maintaining a comfortable and healthy home environment. Don't hesitate to call a professional when needed – it's an investment in your comfort and the longevity of your HVAC system.