What Does A Heat Exchanger Look Like
Imagine waking up on a chilly morning, expecting a warm blast of air from your furnace, only to be greeted by a weak, lukewarm puff. Or worse, icy cold air! This common homeowner woe often points to a problem within your furnace system, and one of the prime suspects is the heat exchanger. But before you call a professional, let's explore what a heat exchanger looks like, understand potential issues, and identify some simple troubleshooting steps you can take yourself.
What Exactly *Is* a Heat Exchanger?
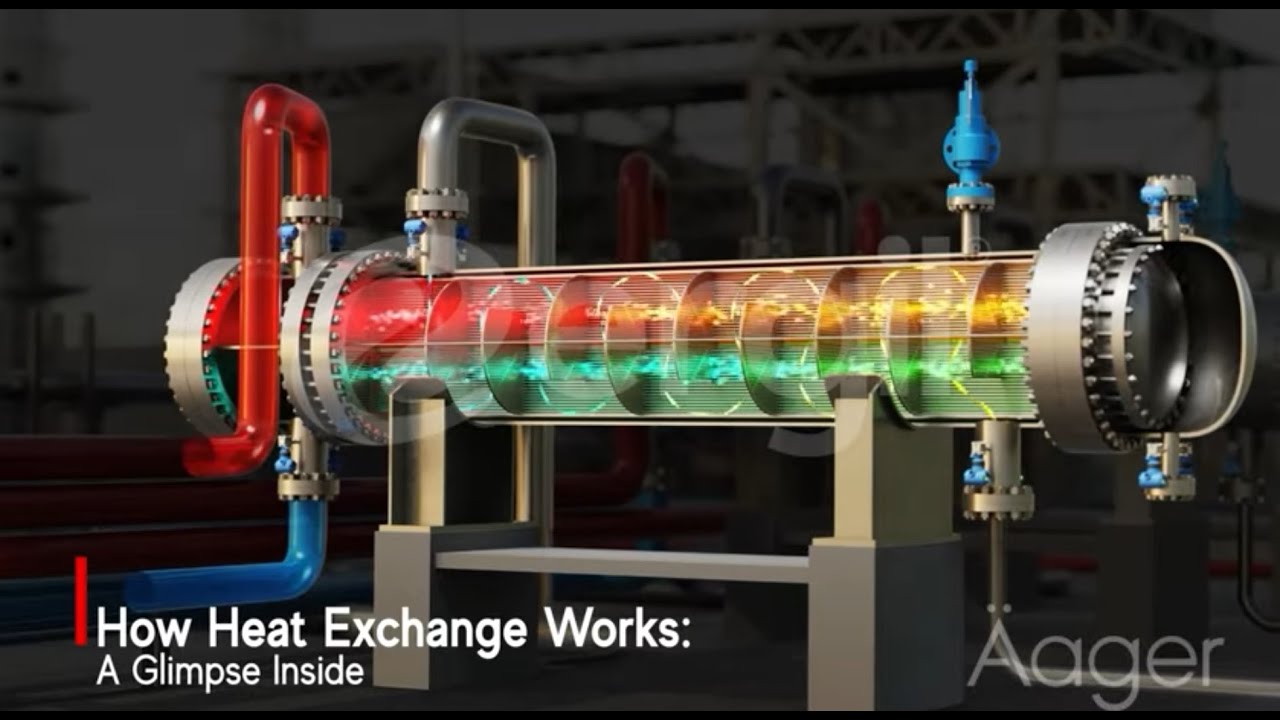
Think of your furnace's heat exchanger as the heart of its heating system. It's a crucial component responsible for safely transferring the heat generated from burning fuel (natural gas, propane, or oil) to the air that circulates through your home. Essentially, it's a metal structure, often made of steel or stainless steel, designed to withstand extreme temperatures. The combustion process happens *inside* the heat exchanger, while the blower fan pushes air *around* the outside of it. This indirect heating prevents dangerous combustion byproducts like carbon monoxide from entering your living space.
So, what does it look like? This is where things can vary. Heat exchangers can take different forms depending on the furnace's design and manufacturer. The most common types are:
- Clamshell or Drum Heat Exchangers: These are typically found in older furnaces. They resemble a rounded metal drum or clamshell shape, often with visible seams or welds.
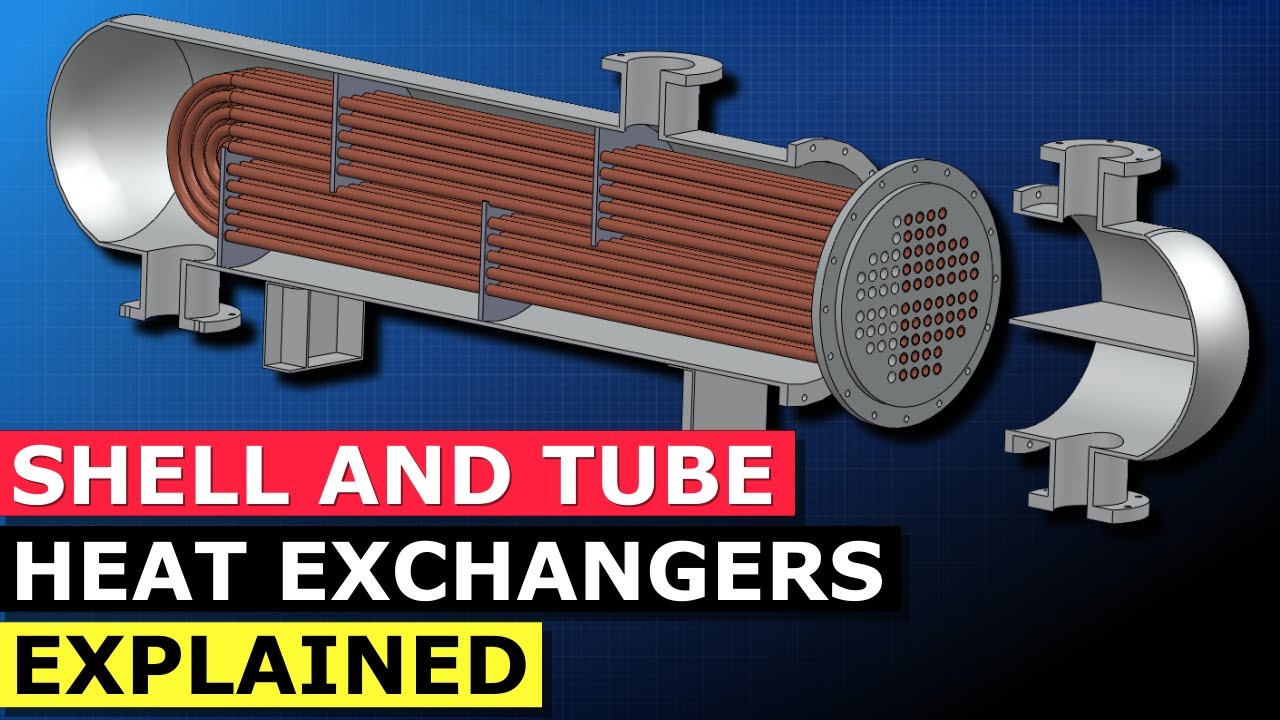
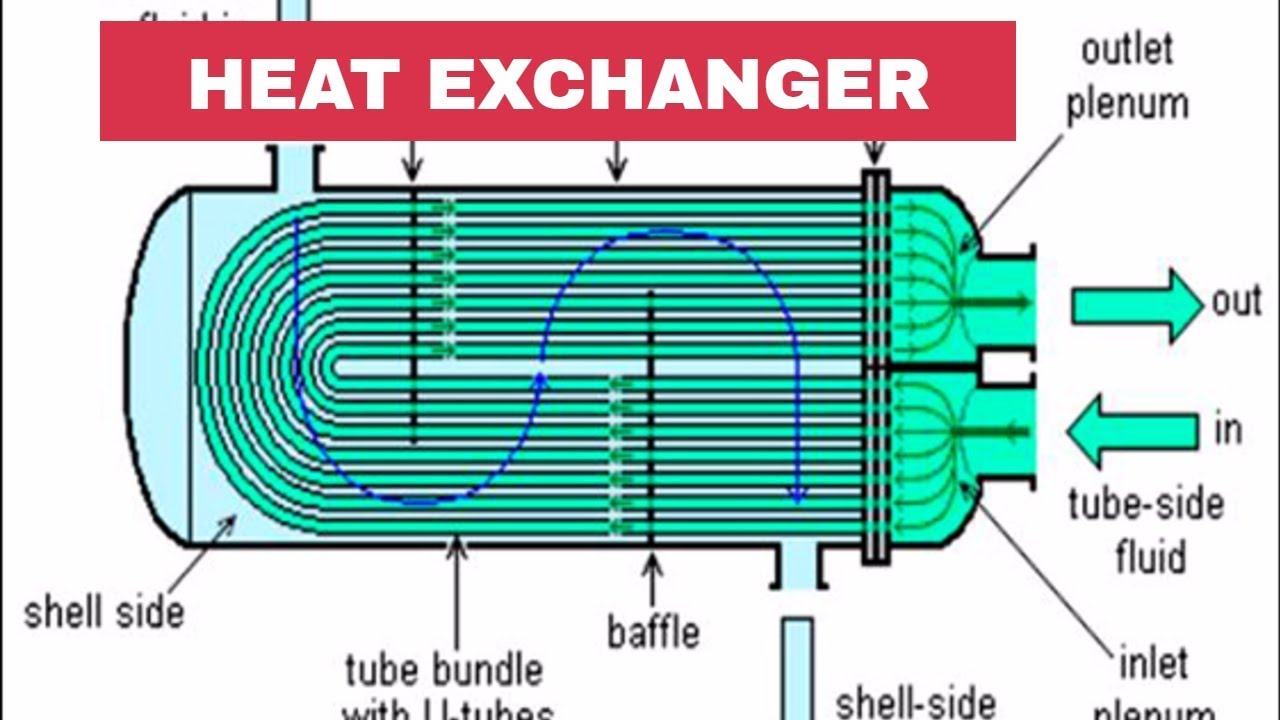
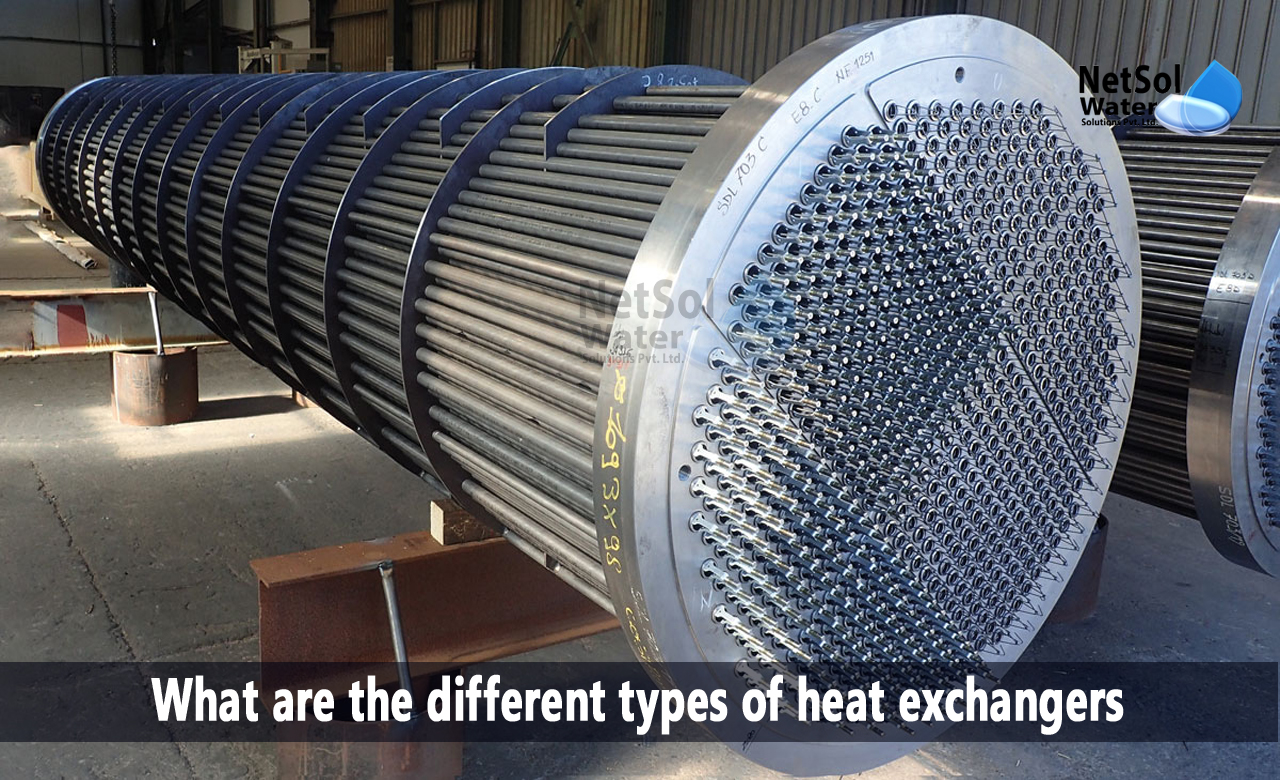
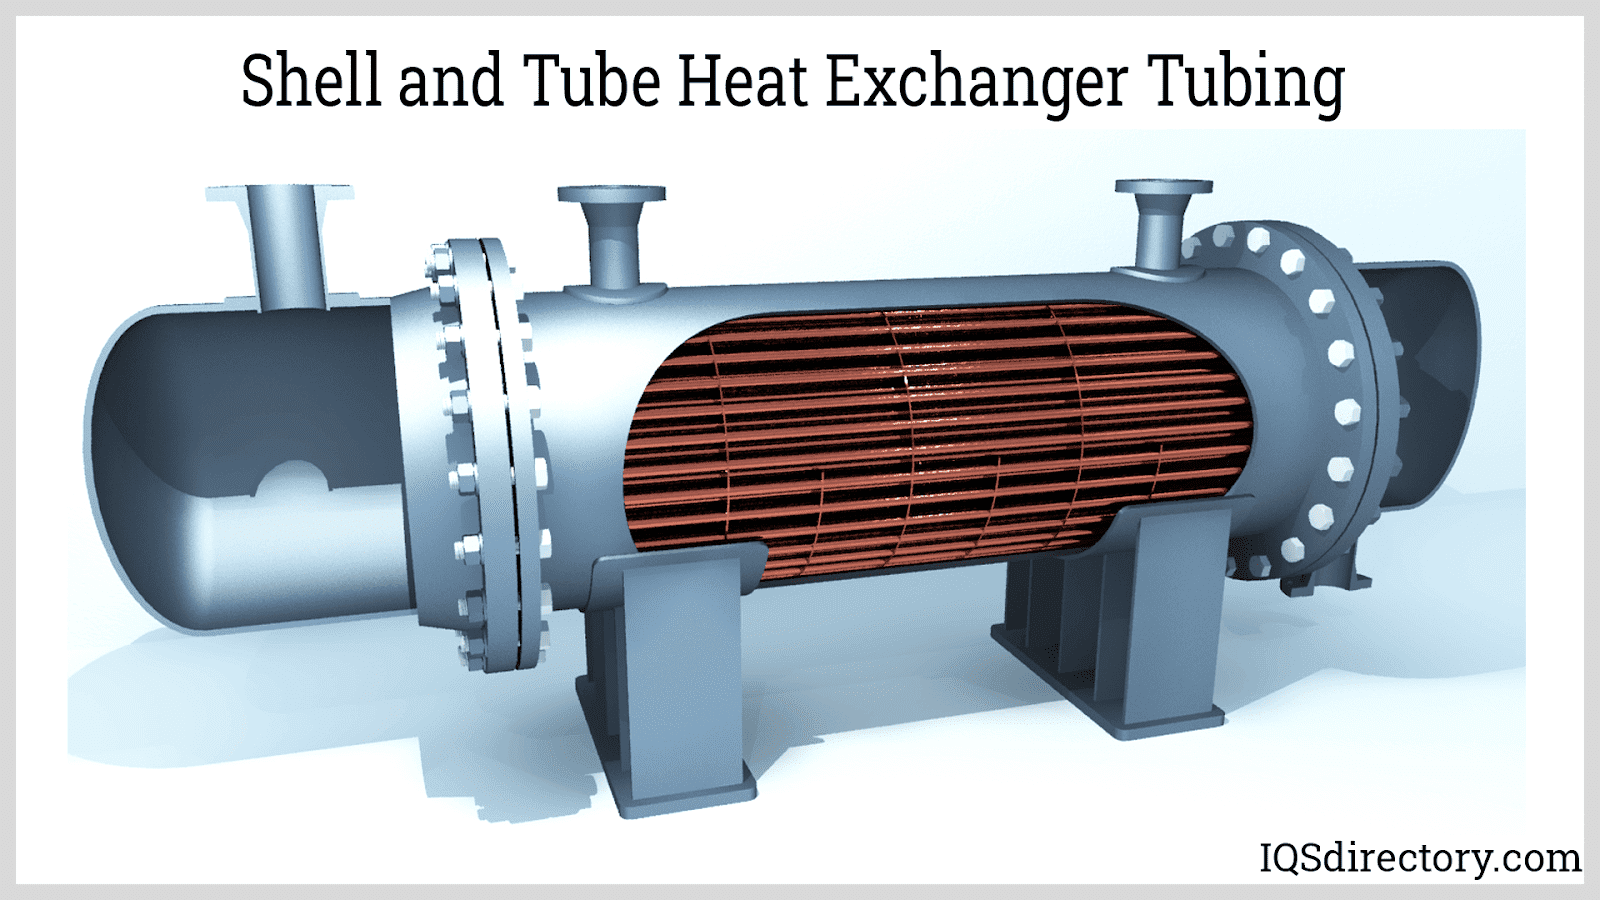
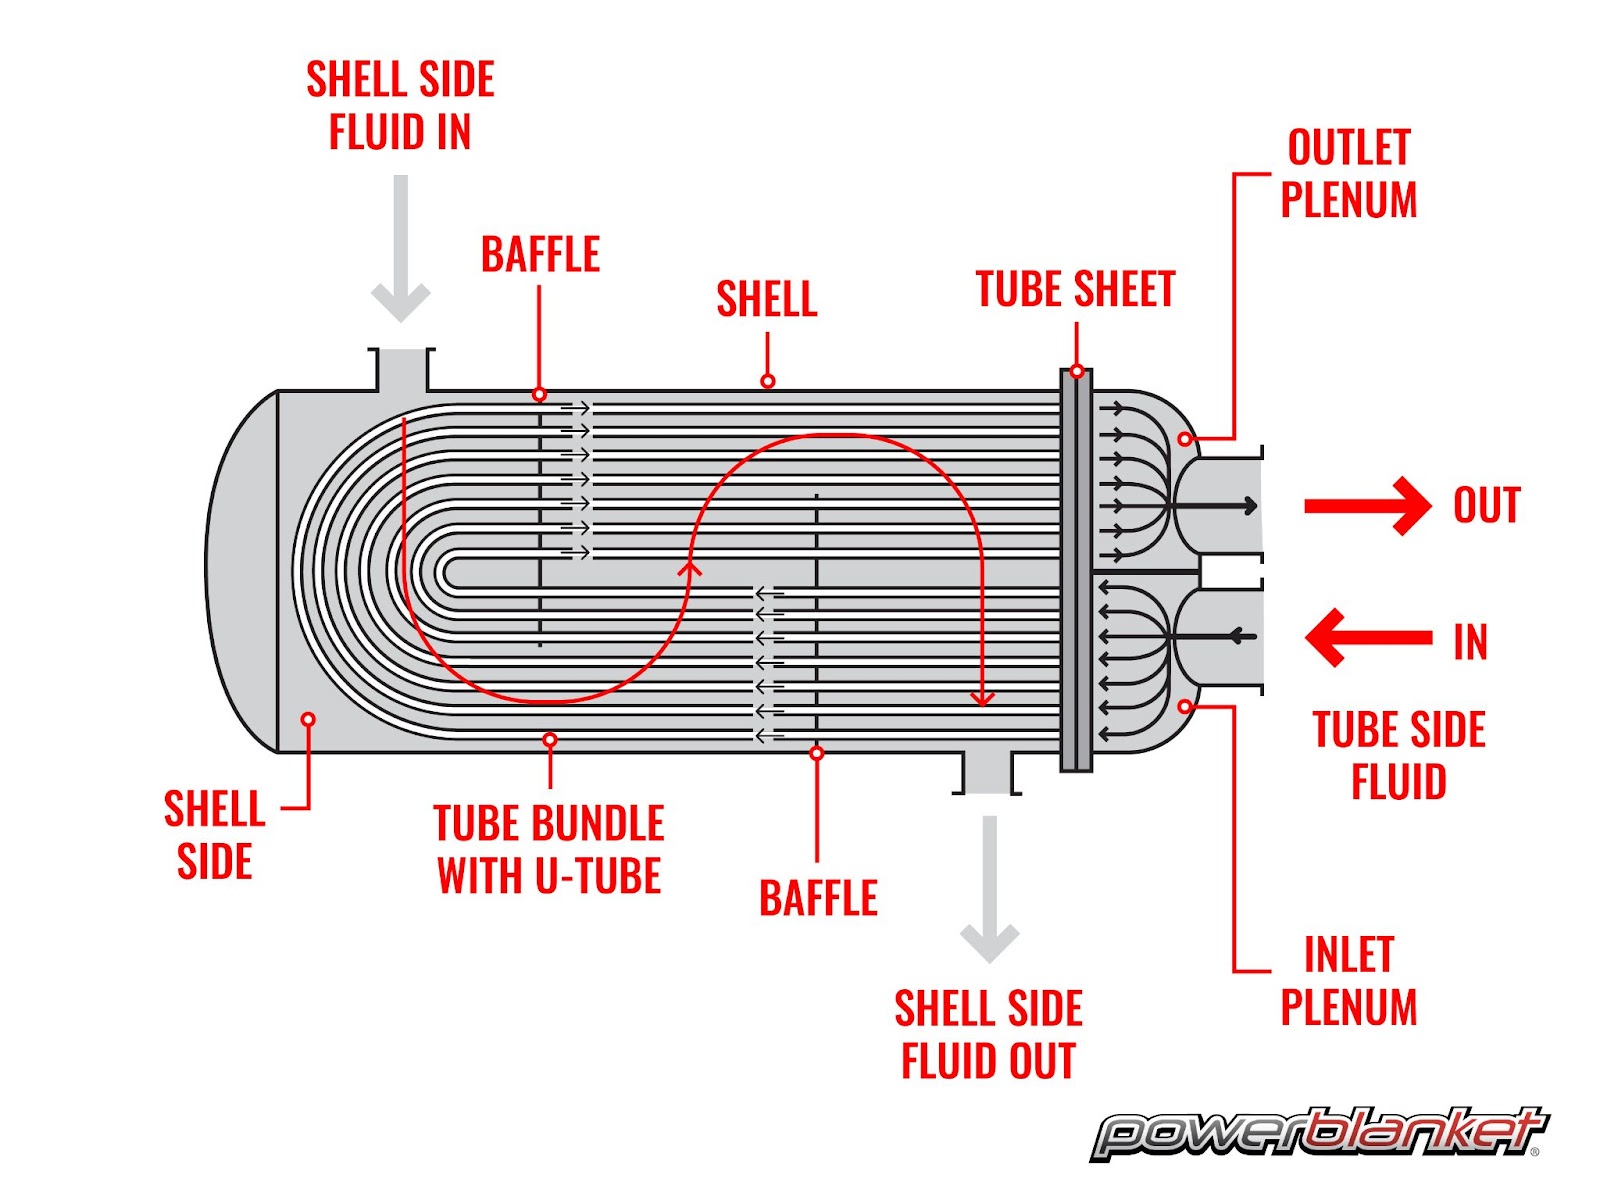
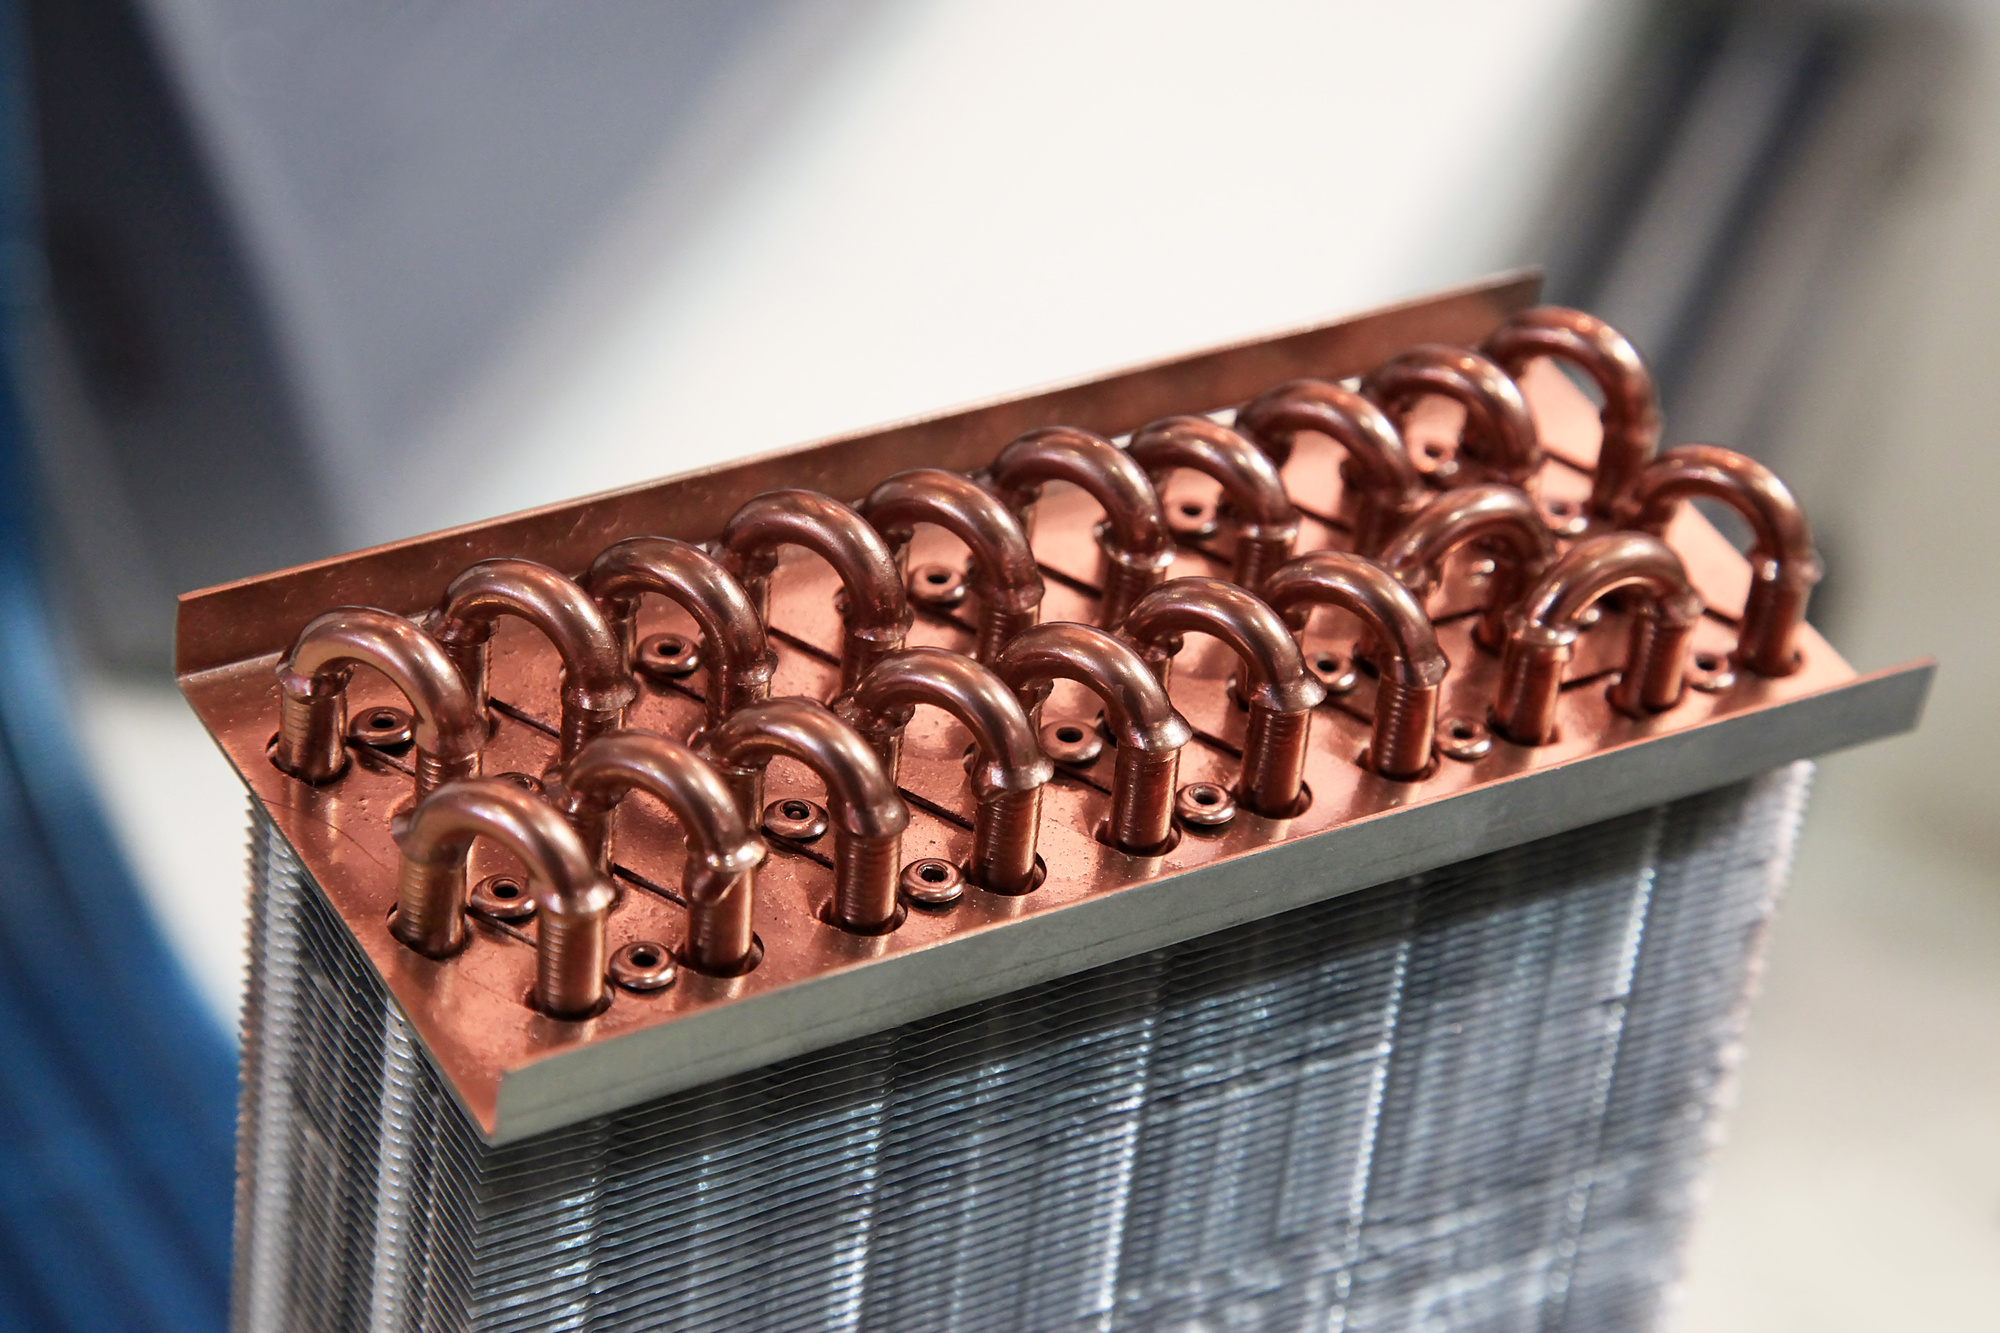
- Tubular Heat Exchangers: This design involves a series of tubes that the hot combustion gases pass through. These tubes are surrounded by the air that will be heated. You might see a rectangular assembly of interconnected metal tubes.
- Sectional Heat Exchangers: These are made up of multiple individual sections joined together. You might not easily identify the individual sections without removing the furnace's access panels.
The key takeaway is to visualize a sealed metal chamber or set of chambers designed to contain intense heat and safely transfer it to the surrounding air. The specific shape and configuration will depend on your furnace's model.
Common Problems with Heat Exchangers
The primary enemy of a heat exchanger is corrosion. The constant exposure to high temperatures, combustion byproducts, and moisture can lead to rust, cracks, and holes. These breaches can compromise the heat exchanger's integrity, allowing dangerous gases to leak into your home's air supply. Other problems include:
- Cracks and Holes: As mentioned, these are the most serious issues and require immediate attention. They can be caused by corrosion, metal fatigue, or overheating.
- Rust and Corrosion: Over time, rust can weaken the metal, eventually leading to cracks or holes.
- Overheating: A blocked or dirty air filter, a malfunctioning blower motor, or restricted airflow can cause the heat exchanger to overheat, accelerating wear and tear.
- Sooting: Improper combustion can lead to the buildup of soot on the heat exchanger surfaces, reducing its efficiency and potentially leading to overheating.
Troubleshooting: A Step-by-Step Guide
Important Safety First! Before you begin any troubleshooting, always turn off the power to your furnace at the breaker box. Also, turn off the gas supply valve located near the furnace. If you smell gas, leave the area immediately and call your gas company from a safe location.
Step 1: Visual Inspection (The Initial Check)
This is the first and easiest step. With the power off and gas valve closed, carefully remove the furnace's access panels. This will expose the internal components, including the heat exchanger (at least partially). Use a flashlight to thoroughly inspect the visible surfaces of the heat exchanger for any obvious signs of damage:
- Look for: Cracks, holes, rust, excessive soot buildup, or signs of warping or distortion.
- Note: You might not be able to see the entire heat exchanger. Some sections may be hidden behind other components.
If you see any visible cracks, holes, or significant rust, STOP! Do not attempt any further repairs. Call a qualified HVAC technician immediately.
Step 2: Check the Air Filter
A clogged air filter is a common culprit for many furnace problems, including overheating. A dirty filter restricts airflow, forcing the furnace to work harder and potentially causing the heat exchanger to overheat. Locate the air filter slot, usually near the blower motor, and remove the filter.
- Inspect the filter: If it's visibly dirty, clogged with dust, or matted, it's time to replace it.
- Replace the filter: Use a filter with the correct size and MERV rating recommended by your furnace manufacturer.
Step 3: Inspect the Blower Motor
The blower motor is responsible for circulating air through the furnace and across the heat exchanger. A malfunctioning blower motor can lead to inadequate airflow and overheating. With the power still off, locate the blower motor. (It's typically a large, round motor connected to a squirrel-cage fan.)
- Visual Inspection: Look for any signs of damage to the motor itself, such as broken wires, burnt components, or loose connections.
- Spin the Fan: Try to manually spin the blower fan. It should spin freely without any excessive resistance or squealing noises. If it's difficult to turn or makes unusual sounds, the blower motor may be failing.
If the blower motor appears damaged or isn't spinning freely, this is a job for a professional. Replacing a blower motor requires specialized knowledge and tools.
Step 4: Check for Blocked Vents and Registers
Restricting airflow from your vents and registers can also cause the furnace to work harder and potentially overheat. Ensure that all vents and registers in your home are open and unobstructed.
- Check each vent: Make sure that furniture, rugs, or other objects are not blocking the airflow.
- Inspect the ductwork: If possible, visually inspect the ductwork for any obvious blockages or damage. (This might require accessing the attic or crawl space.)
Step 5: Carbon Monoxide Detector Check
This is crucial. Even if you don't see any visible signs of damage to the heat exchanger, it's essential to have working carbon monoxide (CO) detectors in your home. Carbon monoxide is a colorless, odorless, and deadly gas that can leak from a cracked heat exchanger. Test your CO detectors to ensure they are functioning properly.
- If your CO detector sounds an alarm, evacuate your home immediately and call 911.
Step 6: The Soapy Water Test (Proceed with Caution!)
This test is for experienced DIYers only and should be performed with extreme caution. If you are not comfortable working with gas, do not attempt this test. This test aims to identify small leaks that may not be visible to the naked eye. NEVER perform this test with the furnace running!
- Mix a solution of soapy water: Use a mild dish soap and water mixture.
- Apply the soapy water: With the gas valve *closed* and the furnace *off*, carefully apply the soapy water solution to the seams and welds of the *visible* parts of the heat exchanger.
- Look for bubbles: If you see bubbles forming, it indicates a gas leak.
If you find any leaks using the soapy water test, DO NOT attempt to repair them yourself. Call a qualified HVAC technician immediately.
When to Call a Professional
While some simple troubleshooting steps can help identify potential problems, certain issues require the expertise of a qualified HVAC technician. Always call a professional if:
- You see any visible cracks, holes, or significant rust on the heat exchanger.
- Your carbon monoxide detector sounds an alarm.
- You smell gas near the furnace.
- The blower motor is damaged or not functioning correctly.
- You find gas leaks using the soapy water test.
- You are not comfortable working with gas or electrical components.
- You suspect a serious problem with the furnace that you cannot diagnose yourself.
A professional HVAC technician has the training, experience, and specialized equipment to safely and accurately diagnose and repair heat exchanger problems. They can perform a combustion analysis to check for carbon monoxide leaks, inspect the heat exchanger with a borescope (a small camera that can access hard-to-reach areas), and perform any necessary repairs or replacements.
Preventative Maintenance: The Best Defense
The best way to avoid heat exchanger problems is through regular preventative maintenance. Schedule annual furnace tune-ups with a qualified HVAC technician. During a tune-up, the technician will inspect the heat exchanger, clean the furnace, check the airflow, and make any necessary adjustments to ensure optimal performance and safety. Other things you can do:
- Change your air filter regularly: Aim to replace your filter every 1-3 months, depending on the type of filter and the air quality in your home.
- Keep vents and registers clear: Ensure that airflow is not restricted by furniture or other objects.
- Install carbon monoxide detectors: Place CO detectors on every level of your home and test them regularly.
By understanding what a heat exchanger looks like, knowing the common problems associated with it, and following these troubleshooting steps, you can take a proactive approach to maintaining your furnace and ensuring the safety and comfort of your home. Remember, when in doubt, always call a professional!