What Does A Heat Pump Look Like
One of the most frustrating experiences for a homeowner is a heating or cooling system that's simply not doing its job. Imagine waking up on a chilly morning only to find your house colder than the outside air, or sweating through a summer afternoon despite your thermostat being set to a comfortable temperature. Often, the culprit could be your heat pump. But first things first, what *does* a heat pump actually look like? Recognizing it is the first step to understanding and potentially resolving minor issues.
Identifying Your Heat Pump: A Visual Guide
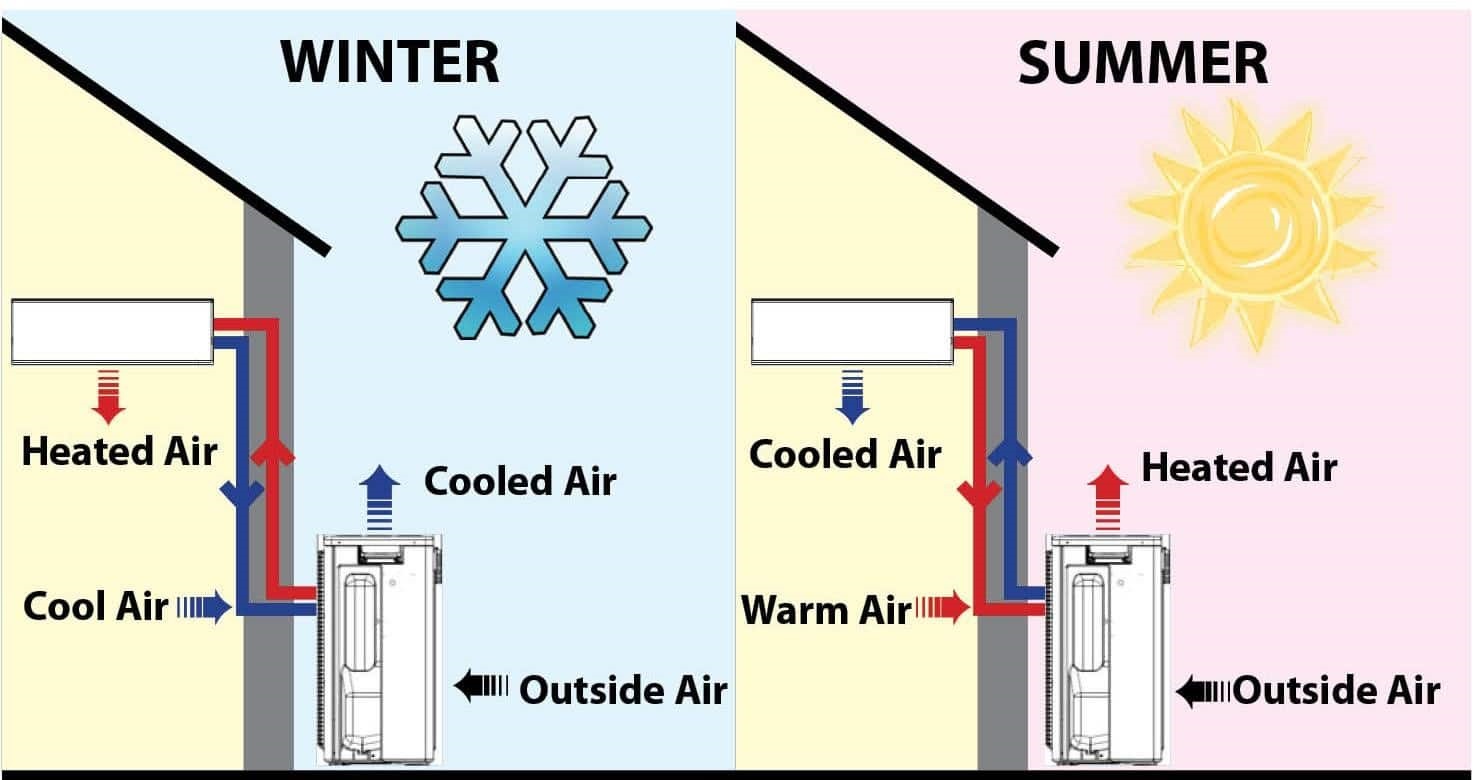
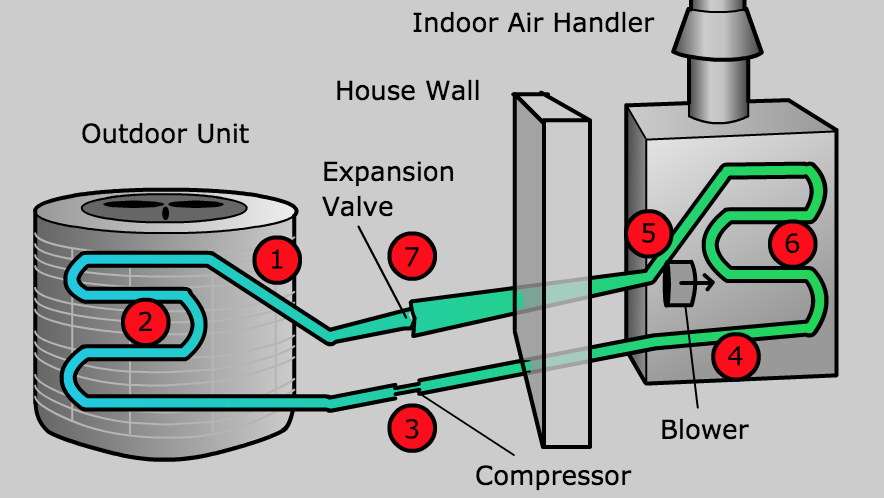
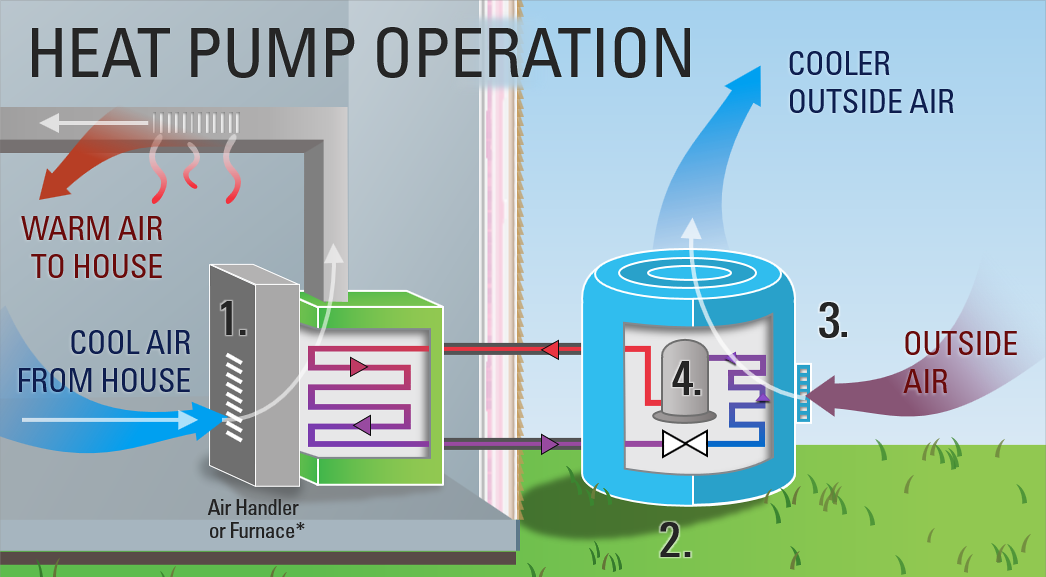
Heat pumps aren't always instantly recognizable. They share similarities with air conditioners, which can sometimes lead to confusion. Essentially, a heat pump is an air conditioner that can also run in reverse to provide heat. They are comprised of two main components: an outdoor unit and an indoor unit.
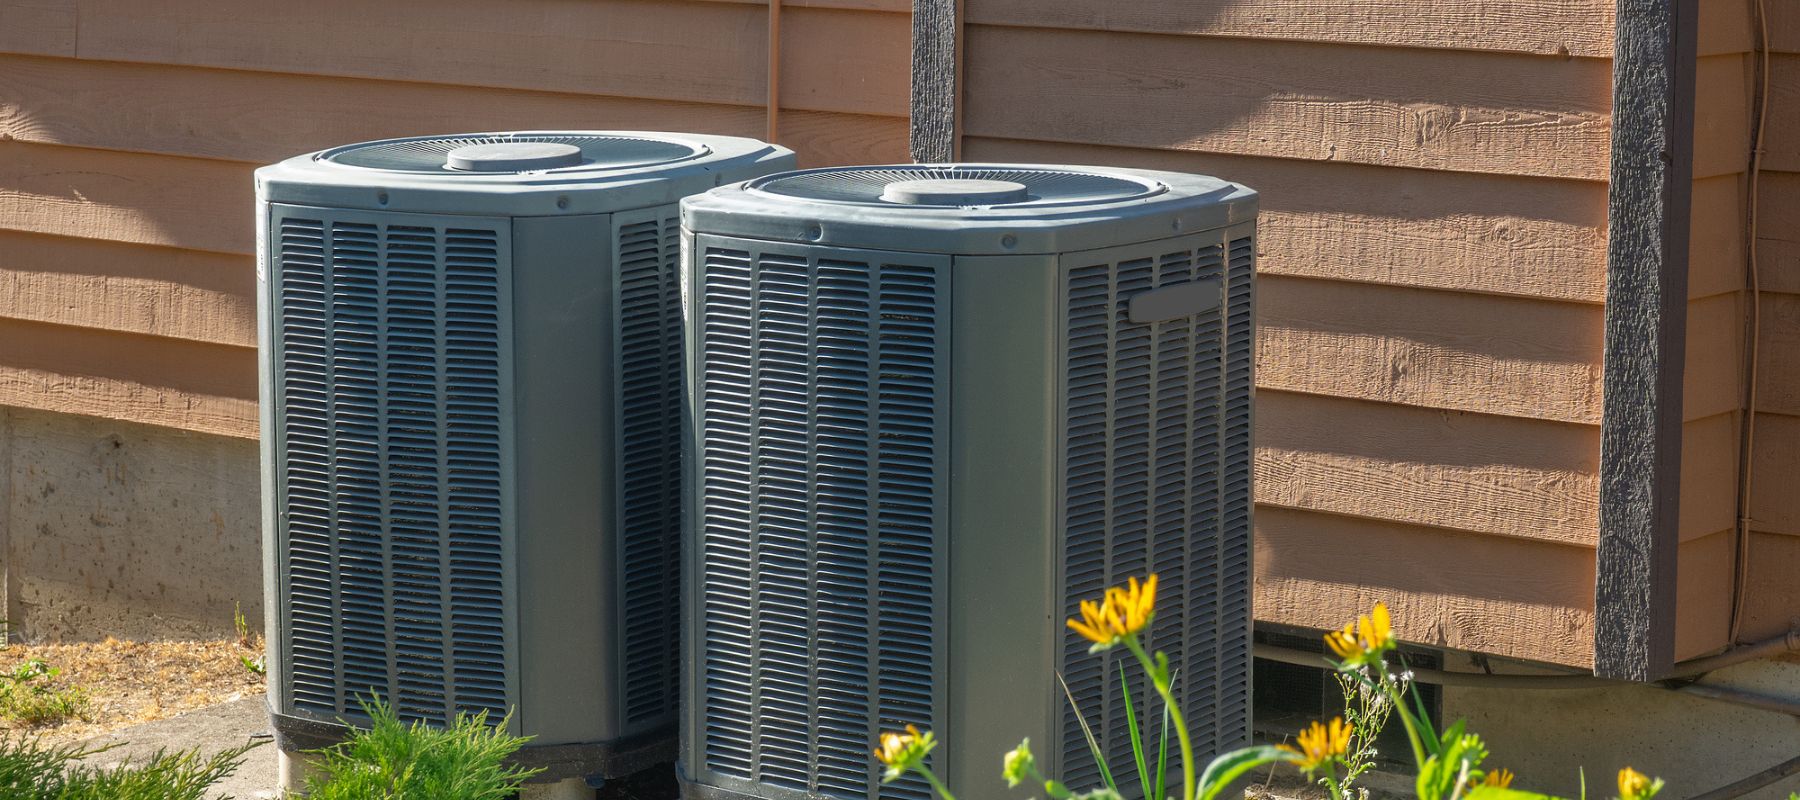
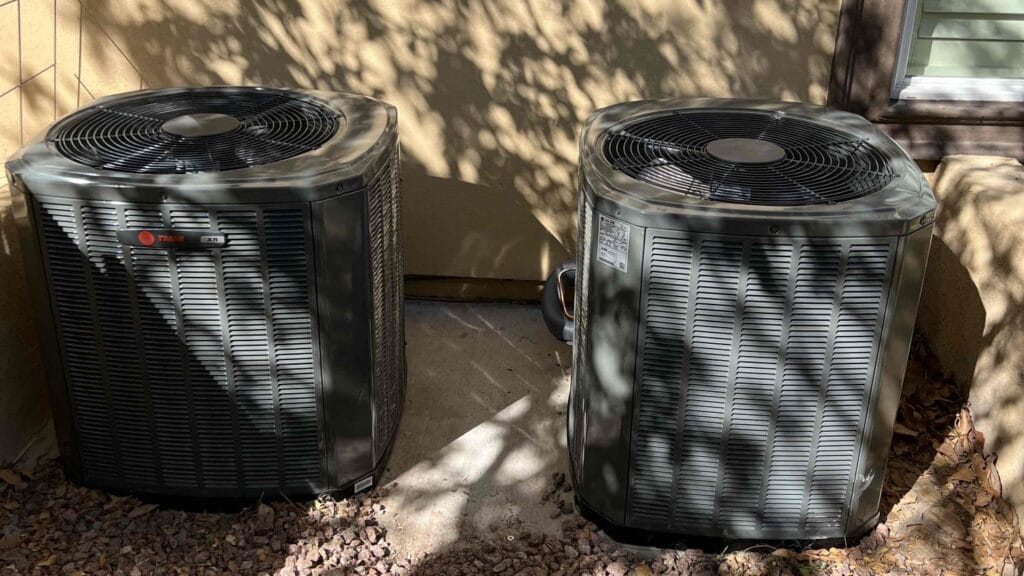
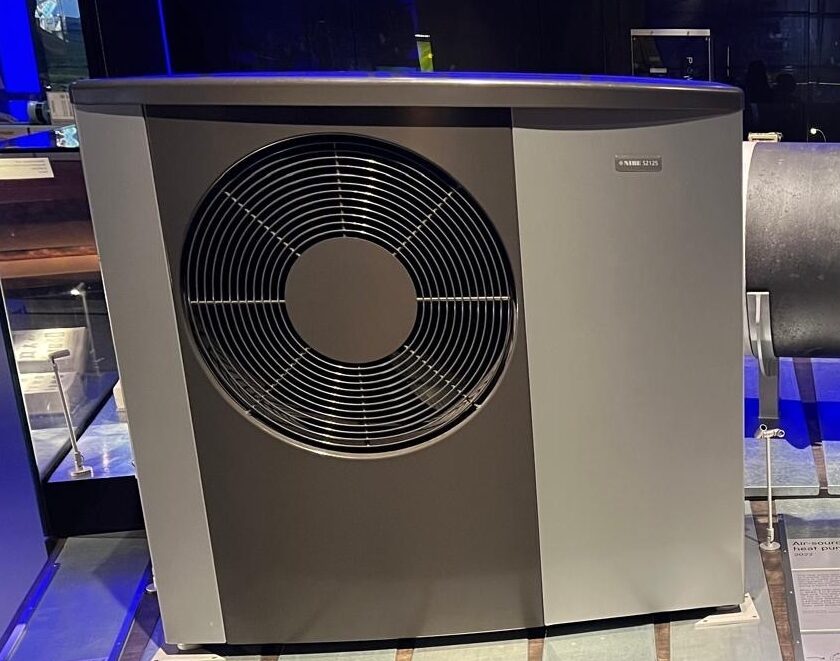
The Outdoor Unit
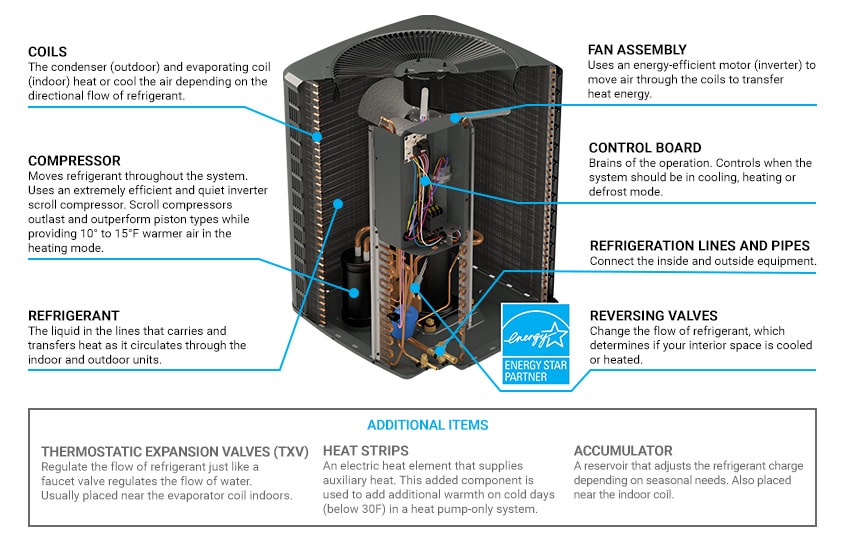
This is the part that most people associate with air conditioning and heat pumps. Typically, it's a large, metal box located outside your home, sitting on a concrete slab. Key features to look for include:
- A large fan: This fan is crucial for drawing air across the coils within the unit. You'll see a fan grill covering it for protection.
- Copper tubing: Look for copper pipes (often insulated) connecting the outdoor unit to your house. These are refrigerant lines.
- Refrigerant lines: They're usually covered with black insulation to maintain efficiency and prevent condensation.
- Service valves: These are brass fittings used by HVAC technicians to access the refrigerant system. *Do not tamper with these!*
- A model/serial number plate: This plate provides important information about your unit, like its age, efficiency rating, and refrigerant type.
Important Note: Appearance can vary between brands and models. Some heat pumps have a more streamlined, modern design than others. Older units may appear more boxy and utilitarian. The key identifiers are the presence of a fan, refrigerant lines, and a connection to an indoor unit.
The Indoor Unit
The indoor unit of a heat pump can take different forms, depending on the type of system you have. The most common types are:
- Air Handler: This is often located in your attic, basement, or a closet. It looks similar to a furnace, but instead of burning fuel, it uses electricity and a coil to heat or cool air. You'll see ductwork connected to the air handler, distributing air throughout your home.
- Furnace with a Heat Pump Coil: In some setups, the heat pump is paired with a furnace. The furnace acts as a backup heat source for extremely cold temperatures. In this case, you'll find the heat pump coil sitting on top of, or next to, the furnace.
- Ductless Mini-Split: These systems have individual indoor units mounted on walls in different rooms. Each unit has its own fan and vents. A small refrigerant line runs through the wall to connect it to the outdoor unit.
No matter the type of indoor unit, it's essential to have a clean air filter. Make sure to change the filter regularly (every 1-3 months) for the system to work properly.
Troubleshooting: When Your Heat Pump Isn't Performing
So, you've identified your heat pump, and you're experiencing issues. Let's walk through some common problems and troubleshooting steps.
Step 1: Initial Checks (No Tools Required)
Before you grab any tools, start with these simple checks:
- Thermostat Setting: This may seem obvious, but double-check that your thermostat is set to the correct mode (heat or cool) and temperature. Ensure the batteries are fresh if it's a battery-powered thermostat.
- Air Filter: A clogged air filter is the #1 cause of heat pump problems. A dirty filter restricts airflow, making the system work harder and less efficiently. Remove the filter and hold it up to the light. If you can't see much light through it, it's time for a change. Replace it with a new filter of the correct size and MERV rating (check your owner's manual).
- Outdoor Unit Obstructions: Inspect the outdoor unit for any obstructions blocking airflow. This could include leaves, snow, ice, branches, or even overgrown bushes. Clear away any debris to ensure proper airflow. Be careful not to damage the fins on the unit.
- Breaker Panel: Check your electrical breaker panel. Locate the breaker that controls your heat pump (it should be labeled). If the breaker is tripped (in the "off" position), flip it fully to the "off" position, then back to the "on" position.
- Outdoor Unit Icing: In heating mode, it's normal for some ice to form on the outdoor unit, especially in cold weather. However, if the ice buildup is excessive (covering the entire unit), it could indicate a problem with the defrost cycle.
Step 2: Further Diagnosis (Basic Tools May Be Needed)
If the initial checks didn't resolve the issue, you can try these steps, but proceed with caution. Basic tools like a screwdriver and multimeter (optional) might be needed.
- Inspect the Outdoor Unit's Fan: Ensure the fan blades are not physically damaged and can spin freely. Turn off the breaker before attempting to spin the fan manually. If the fan doesn't spin easily, or if you hear unusual noises, the fan motor may be failing.
- Check the Condensate Drain Line: During cooling mode, your heat pump produces condensation. This water needs to drain properly. Locate the condensate drain line (usually a PVC pipe near the indoor unit) and make sure it's not clogged. You can try clearing it with a wet/dry vacuum or a stiff wire. If clogged it will cause the unit to shut down.
- Voltage Check (If Comfortable and Have a Multimeter): *This step requires caution and knowledge of electrical safety.* If you're comfortable working with electricity, you can use a multimeter to check the voltage at the disconnect switch near the outdoor unit. The voltage should match the unit's rating (usually 220V or 240V). If the voltage is significantly lower or zero, there may be an electrical issue. If you are not comfortable with this step, it is best to call a professional.
Step 3: Evaluating the Results
After performing these checks, assess the situation. Did any of the actions resolve the problem? If so, great! If not, it's time to consider professional help.
When to Call a Professional HVAC Technician
There are several situations where DIY troubleshooting is not recommended and a professional HVAC technician is required:
- Refrigerant Leaks: If you suspect a refrigerant leak (e.g., hissing sound, oily residue on the refrigerant lines, significantly reduced cooling or heating), do not attempt to fix it yourself. Refrigerant is a hazardous substance, and handling it requires specialized equipment and training.
- Electrical Issues: If you encounter any significant electrical problems (e.g., burning smell, sparking wires, low voltage), do not attempt to fix them yourself. Electrical work can be dangerous and should only be performed by a qualified electrician or HVAC technician.
- Compressor Problems: The compressor is the heart of the heat pump. If you suspect a compressor issue (e.g., loud banging noises, unit not turning on), it's best to call a professional. Compressor repairs are complex and expensive.
- Defrost Cycle Problems: If your heat pump is icing up excessively and the defrost cycle doesn't seem to be working, it could indicate a faulty defrost sensor, timer, or control board. These issues require specialized knowledge and equipment.
- You've Tried Everything Else: If you've exhausted all the DIY troubleshooting steps and your heat pump is still not working correctly, it's time to call a professional. They have the expertise and tools to diagnose and repair more complex problems.
Preventative Maintenance: Keeping Your Heat Pump Healthy
The best way to avoid heat pump problems is to perform regular preventative maintenance. Here are some tips:
- Change Air Filters Regularly: As mentioned earlier, this is the most important maintenance task. Aim to change your filter every 1-3 months, depending on the type of filter and the air quality in your home.
- Clean the Outdoor Unit: Periodically clean the outdoor unit to remove dirt, debris, and leaves. You can use a garden hose to gently rinse the fins, but avoid using a pressure washer, as it can damage them.
- Schedule Annual Professional Maintenance: Have a qualified HVAC technician inspect and service your heat pump at least once a year. They can check the refrigerant levels, clean the coils, lubricate moving parts, and identify any potential problems before they become major issues.
By understanding what a heat pump looks like, and by following these troubleshooting steps and preventative maintenance tips, you can keep your system running efficiently and comfortably for years to come. Remember to prioritize safety and call a professional when needed. Your comfort and well-being are worth it!