What Does A Schrader Valve Look Like

Ever wondered why your tire pressure seems to be constantly dropping, or why your air conditioning system isn't cooling as efficiently as it used to? A sneaky culprit might be a faulty Schrader valve. Many homeowners face this issue without even realizing it, often attributing it to larger, more complex problems. But before you call a professional, let's investigate and see if it's something you can tackle yourself. We'll break down what a Schrader valve is, how to identify it, and how to perform some basic troubleshooting. Remember, safety is paramount, so always proceed with caution and know your limits.
Identifying the Culprit: What Does a Schrader Valve Look Like?
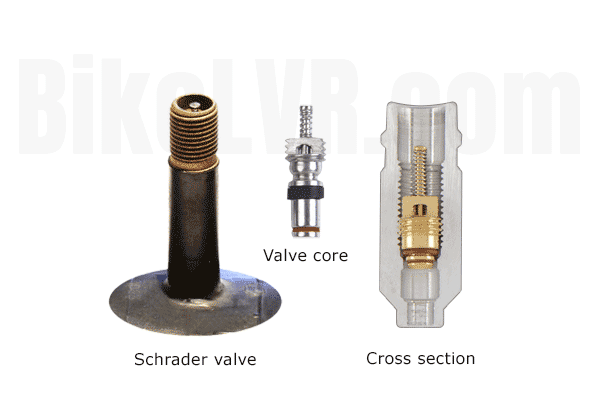
The first step is accurately identifying the Schrader valve. It's a small, self-closing valve typically used in tires, air conditioning systems, refrigeration systems, and even some fuel systems. Think of it as a tiny guardian, preventing leaks and maintaining pressure.
Visual Characteristics
A Schrader valve usually consists of the following:
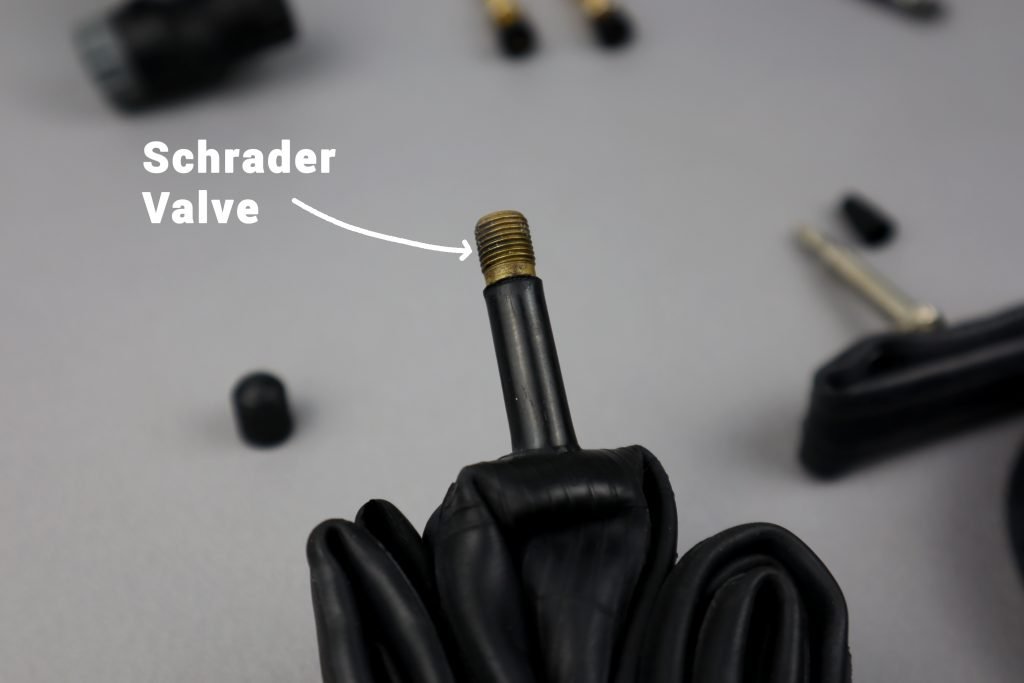
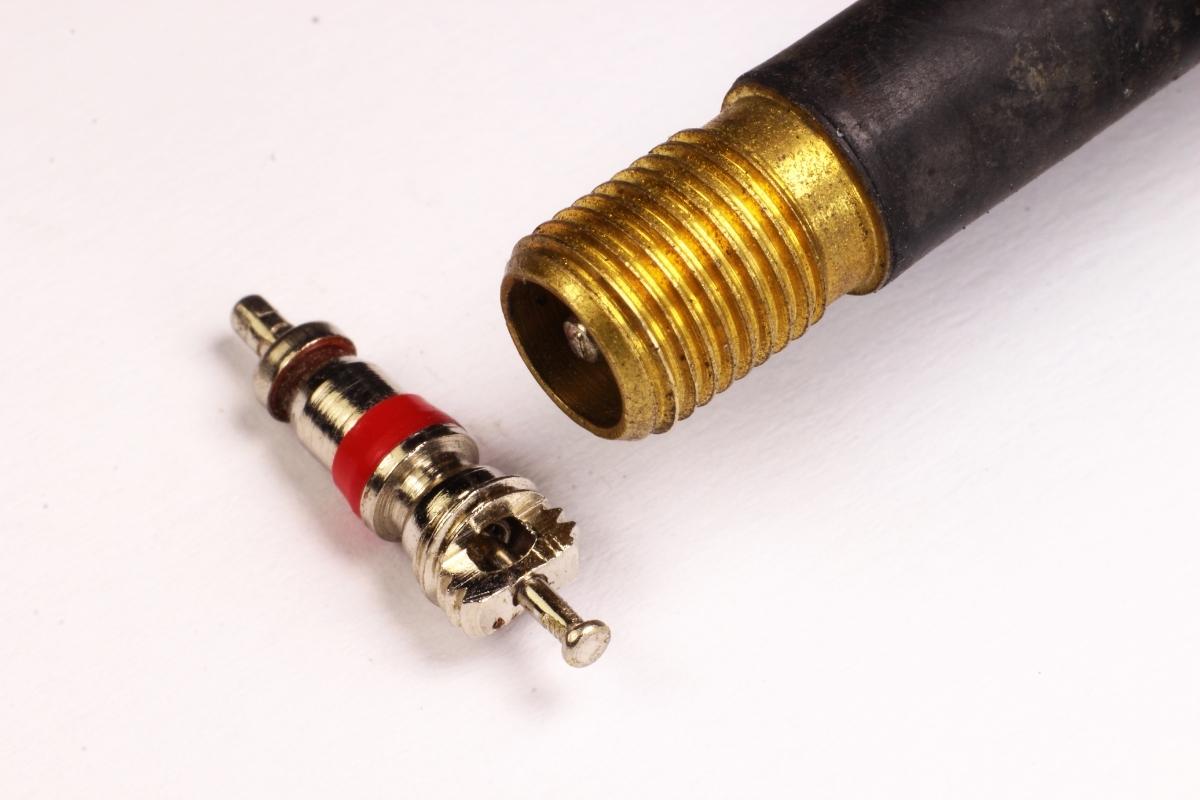
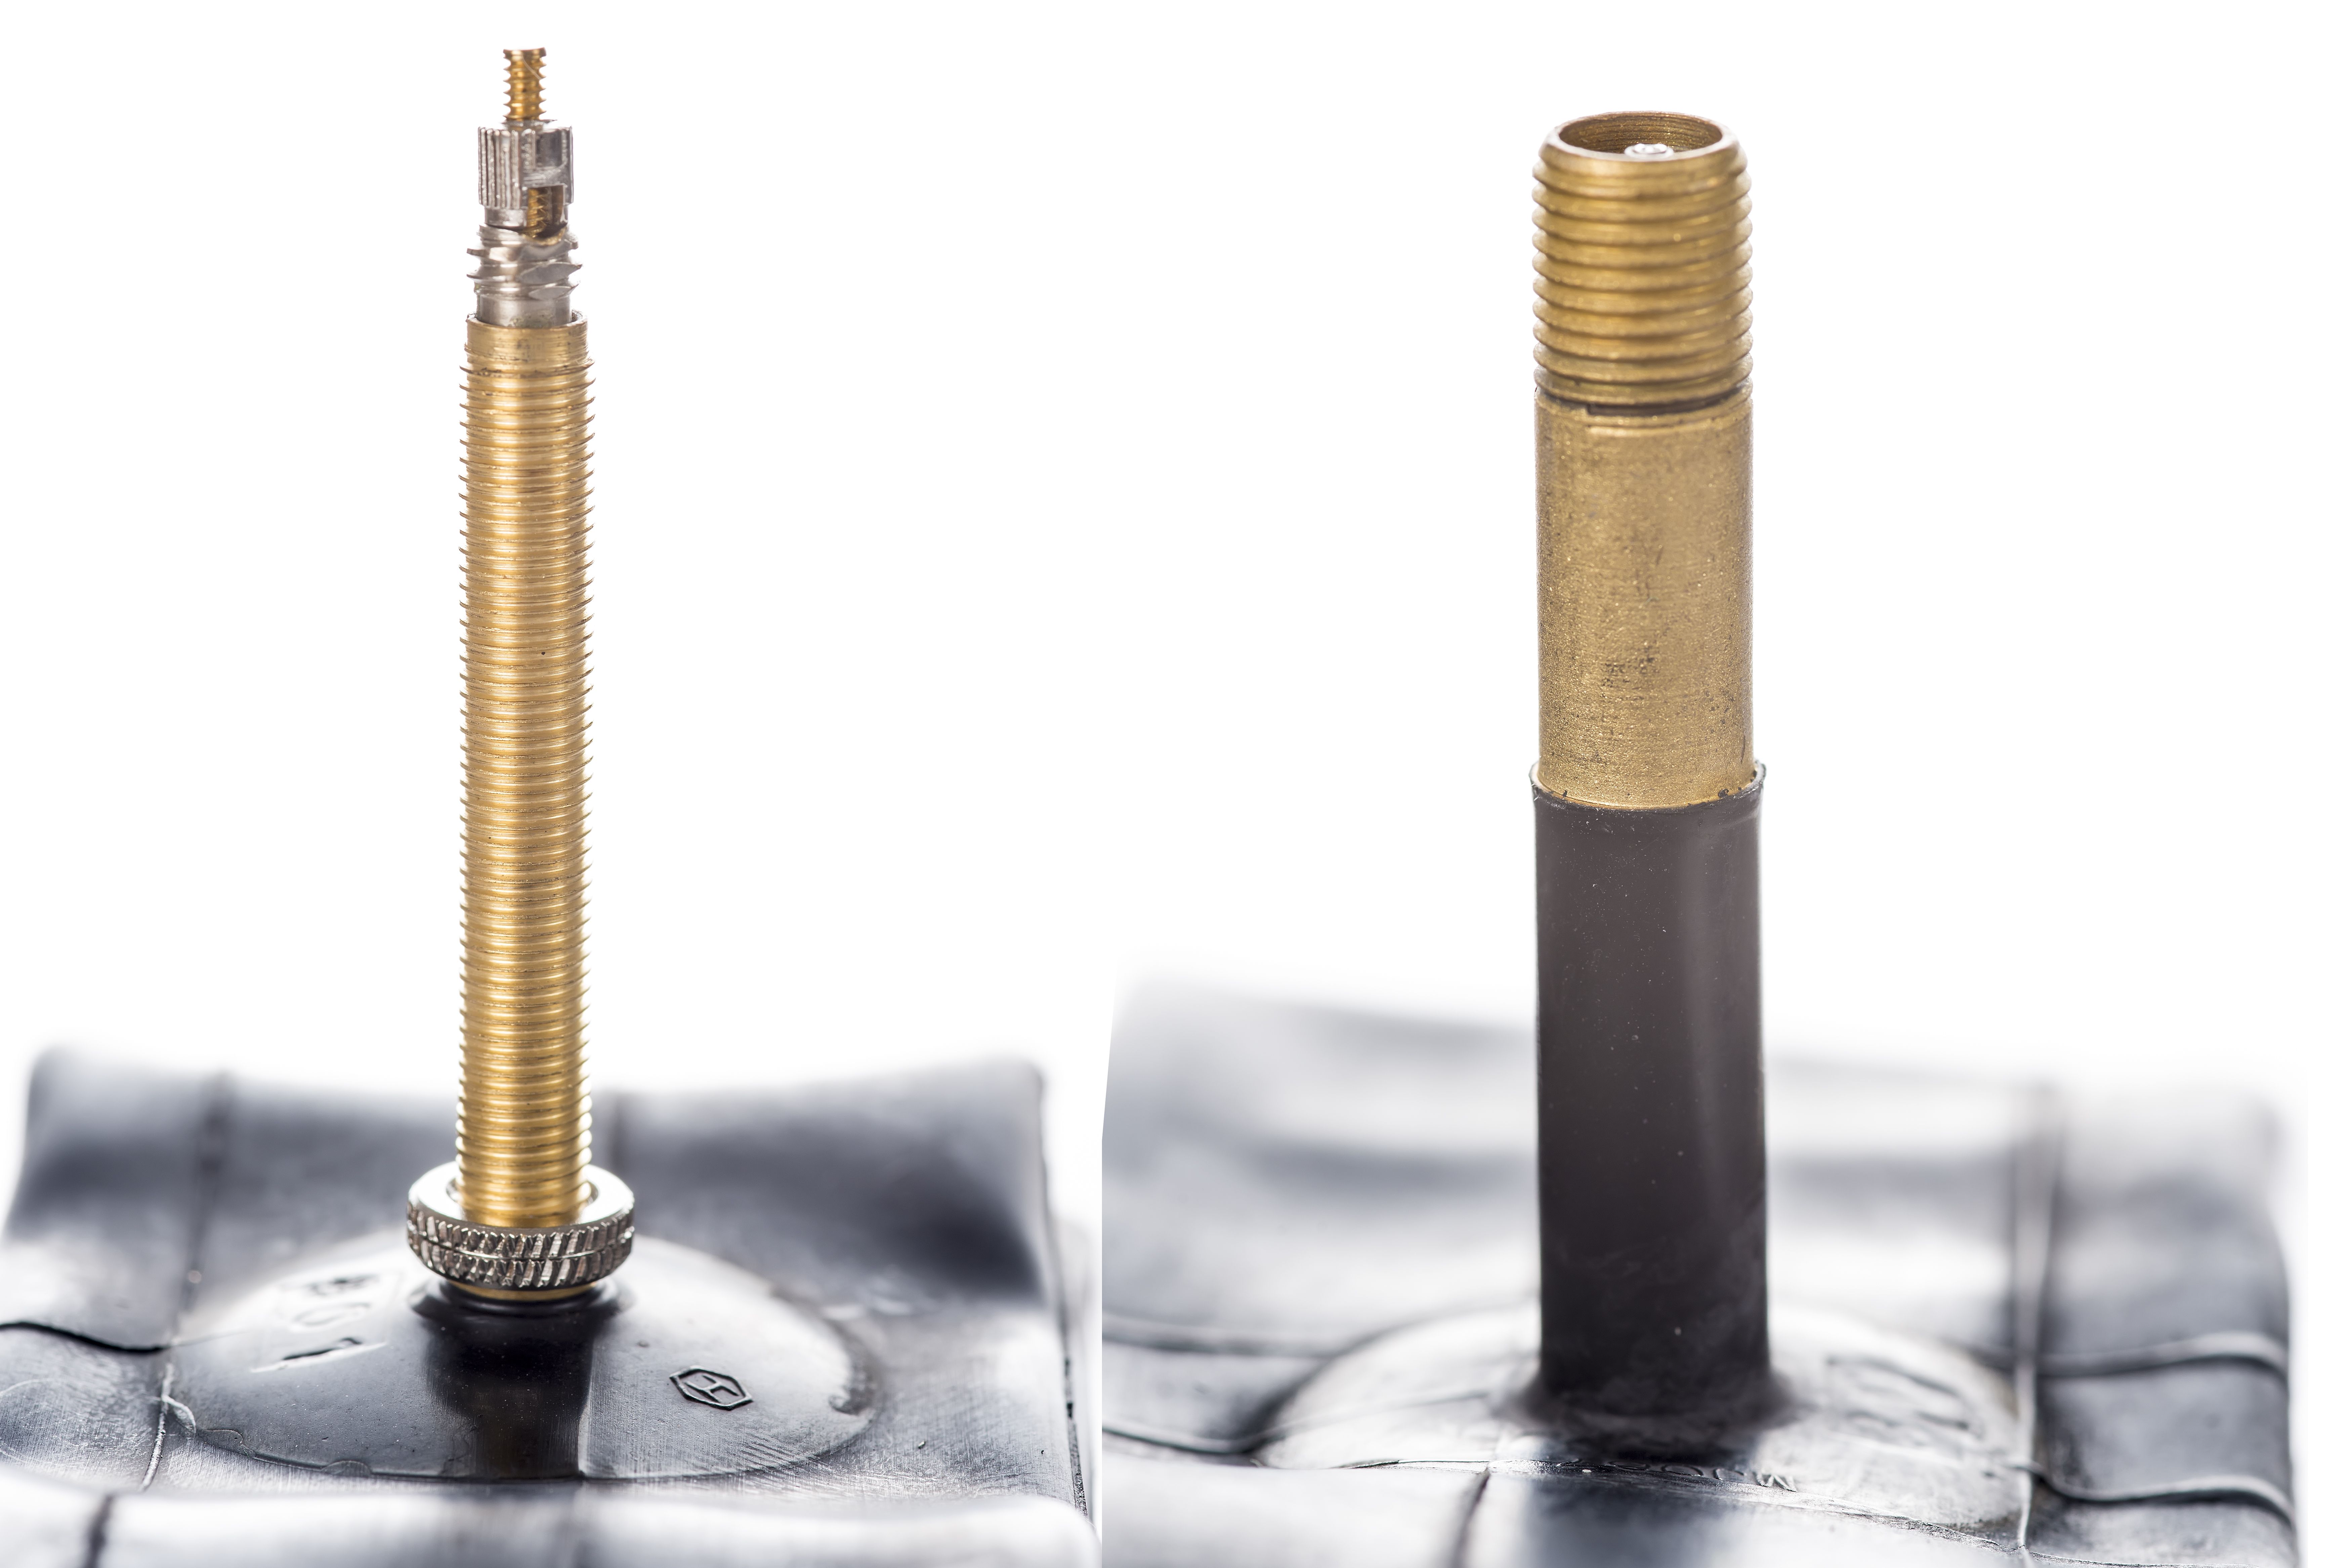
- The Valve Body: This is the main, typically cylindrical, metal housing. It's usually made of brass or plated steel. You'll find it threaded, allowing it to be screwed into a fitting or directly onto the component it's serving (like a tire rim).
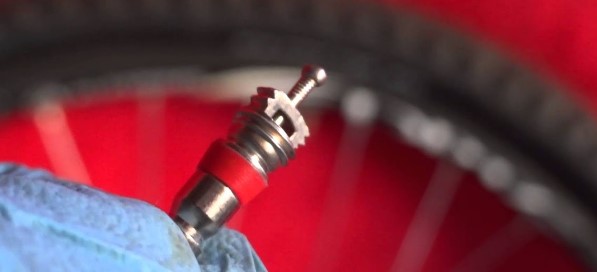
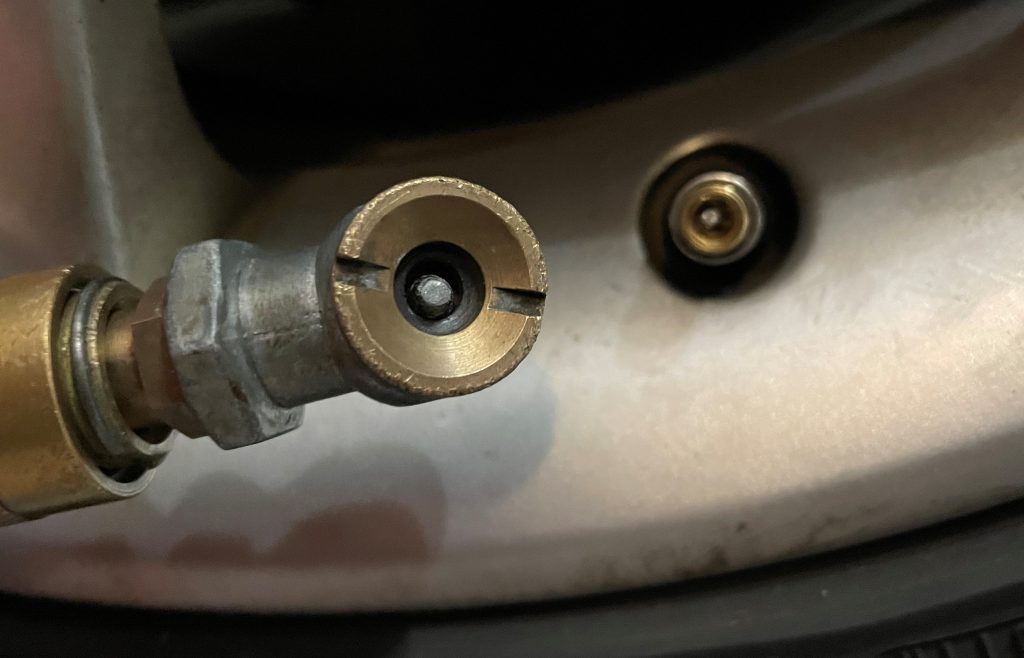
- The Valve Core: This is the heart of the Schrader valve. It's a spring-loaded poppet valve that sits inside the valve body. It's the part that actually seals the pressure. You'll see a small pin in the center of the valve core. Pressing this pin opens the valve, allowing air or refrigerant to flow.
- The Valve Cap: This is a small, often plastic, cap that screws onto the valve body. Its primary purpose is to protect the valve core from dirt, debris, and moisture. It also provides a secondary seal to prevent minor leaks. Never underestimate the importance of the valve cap!
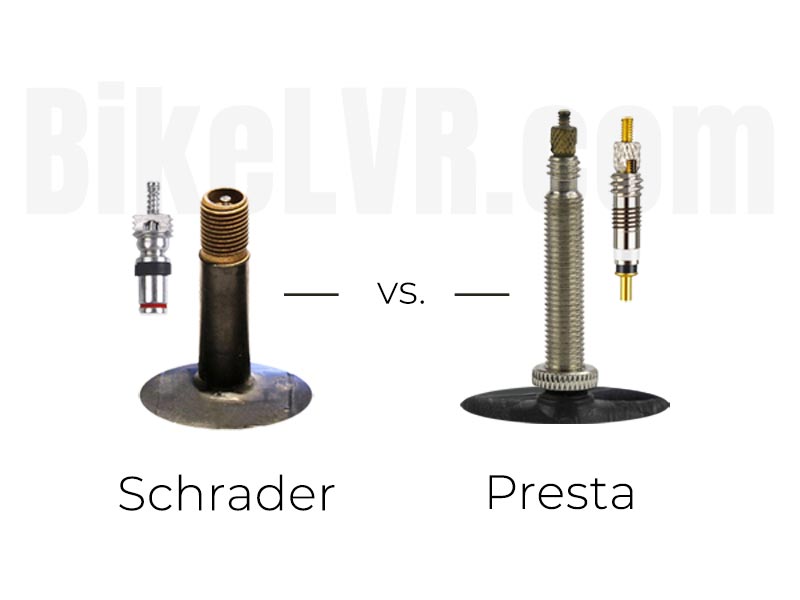
So, to summarize, look for a small, threaded metal stem with a central pin, usually protected by a cap. It might seem insignificant, but it plays a crucial role.
Where to Find Them
Here are some common locations where you'll find Schrader valves:
- Tire Valves: This is the most common place. Every tire on your car, bike, or even some garden equipment will have one.
- Air Conditioning Systems: You'll find them on the refrigerant lines of your car's A/C system, as well as on home A/C units (though accessing these may require professional knowledge).
- Refrigeration Systems: Similar to A/C systems, refrigerators and freezers often use Schrader valves for servicing.
- Fuel Systems: Some fuel rails and fuel pressure regulators utilize Schrader valves for testing fuel pressure.
Diagnosing a Leaky Schrader Valve
Now that you know what a Schrader valve looks like, let's figure out if it's the cause of your problem. Here are a few telltale signs:
- Slow Pressure Loss: This is the most common symptom. If your tires consistently lose pressure over time, or your A/C isn't as cold as it used to be, a leaky Schrader valve might be the culprit.
- Hissing Sound: Sometimes, you can hear a faint hissing sound coming from the valve, especially when you're close to it.
- Bubble Test: This is a simple and effective way to check for leaks. Mix some soapy water (dish soap works well) and apply it to the Schrader valve. If you see bubbles forming, you've found your leak!
Performing the Bubble Test: A Step-by-Step Guide
- Prepare the Soapy Water: Mix a small amount of dish soap with water in a spray bottle or a small container.
- Apply the Solution: Generously apply the soapy water to the Schrader valve, focusing on the area around the valve core and where the valve body meets the component it's attached to.
- Observe: Watch carefully for any bubbles forming. Even small bubbles indicate a leak.
- Repeat: If you don't see bubbles immediately, try gently wiggling the valve core with a Schrader valve tool (more on that later) to see if it encourages a leak.
Simple DIY Fixes
If you've confirmed a leaky Schrader valve, here are a few simple fixes you can try before calling a professional:
1. Tightening the Valve Core
Sometimes, the valve core simply needs to be tightened. This is where a Schrader valve tool comes in handy. This inexpensive tool is designed to insert into the valve stem and either tighten or remove the valve core.
Steps:
- Remove the Valve Cap: Unscrew the valve cap.
- Insert the Schrader Valve Tool: Insert the appropriate end of the Schrader valve tool into the valve stem, engaging with the valve core.
- Tighten Gently: Turn the tool clockwise gently. Over-tightening can damage the valve core. A slight snugging is usually sufficient.
- Re-test: Apply soapy water again to check for leaks.
- Replace the Valve Cap: Screw the valve cap back on.
2. Cleaning the Valve
Dirt and debris can sometimes interfere with the valve core's sealing ability. Cleaning the valve might resolve the issue.
Steps:
- Deflate (if applicable): If you're working on a tire, deflate it completely before removing the valve core. For A/C systems, *do not* attempt to deflate the system yourself. This requires specialized equipment and knowledge.
- Remove the Valve Core: Use the Schrader valve tool to carefully remove the valve core.
- Clean the Valve Core: Use a clean cloth or brush to remove any visible dirt or debris from the valve core. You can also use a small amount of WD-40 or contact cleaner.
- Clean the Valve Body: Use a cotton swab or a clean cloth to clean the inside of the valve body.
- Reinstall the Valve Core: Carefully reinstall the valve core using the Schrader valve tool. Tighten gently.
- Inflate (if applicable): If you deflated a tire, inflate it to the correct pressure.
- Re-test: Apply soapy water again to check for leaks.
- Replace the Valve Cap: Screw the valve cap back on.
3. Replacing the Valve Cap
As mentioned earlier, the valve cap provides a secondary seal. A damaged or missing valve cap can contribute to leaks. Replacing the valve cap is a simple and cheap fix!
Steps:
- Obtain a New Valve Cap: Purchase a new valve cap that is compatible with your Schrader valve (most are standard sizes).
- Install the New Valve Cap: Screw the new valve cap onto the valve stem, ensuring it's snug but not over-tightened.
- Re-test: Apply soapy water again to check for leaks. This fix is most effective when the core has been cleaned and tightened as well.
When to Call a Professional
While these DIY fixes can often resolve minor leaks, there are situations where you should definitely call a professional:
- Persistent Leaks: If you've tried tightening, cleaning, and replacing the valve cap, and the leak persists, it's likely that the valve core itself is damaged or the valve body is corroded.
- Damaged Valve Body: If the valve body is cracked, bent, or severely corroded, it needs to be replaced.
- A/C or Refrigeration Systems: Never attempt to repair or replace Schrader valves in A/C or refrigeration systems yourself unless you have the proper training and equipment. These systems contain pressurized refrigerant, which can be dangerous to handle. Improper handling can also release harmful refrigerants into the atmosphere.
- Fuel Systems: Similarly, fuel systems are highly flammable. Any repairs to fuel system components, including Schrader valves, should be performed by a qualified mechanic.
- Uncertainty: If you're unsure about any aspect of the repair process, or if you're uncomfortable working on the system, it's always best to err on the side of caution and call a professional.
Choosing a Replacement Valve Core (If Needed)
If you determine that the valve core itself needs replacing (and you're comfortable doing so – remember the precautions above!), here are a few things to consider:
- Type of Valve Core: There are different types of valve cores, designed for different applications and pressure ranges. Make sure you choose a valve core that is compatible with your system. For example, A/C systems may require a different type of valve core than tires.
- Material: Valve cores are typically made of brass or plated steel. Brass valve cores are more resistant to corrosion, while steel valve cores are stronger.
- Quality: Choose a reputable brand of valve cores to ensure quality and reliability.
You can find replacement valve cores at most auto parts stores, hardware stores, and online retailers.
Final Thoughts
Troubleshooting a leaky Schrader valve can seem daunting at first, but with a little knowledge and the right tools, it's often a simple DIY fix. By understanding what a Schrader valve looks like, how to diagnose leaks, and when to seek professional help, you can save yourself time and money. Remember to prioritize safety and always err on the side of caution. Empower yourself with knowledge, but never underestimate the importance of professional expertise when dealing with complex or potentially dangerous systems. Good luck!