What Does Ac Coil Look Like

Imagine this: It’s the peak of summer, and your air conditioner suddenly stops blowing cold air. Instead, you're met with a lukewarm breeze – a homeowner's nightmare! Before you resign yourself to a sweltering night or call a professional right away, let's explore a structured troubleshooting process. This guide focuses on helping you understand the possible causes, particularly concerning your AC coil, and some basic steps you can safely take.
Understanding the AC Coil's Role
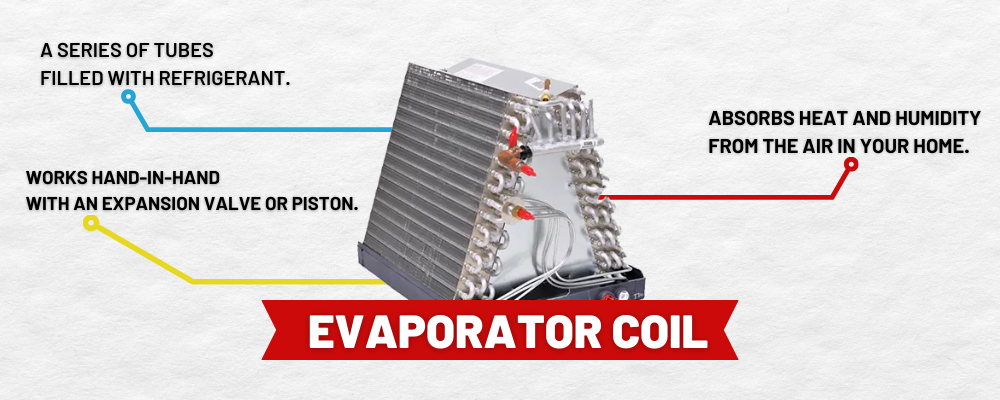
The AC coil, or evaporator coil, is a critical component of your air conditioning system. Its primary function is to absorb heat from the air blowing across it, thereby cooling the air before it's circulated throughout your home. Refrigerant inside the coil undergoes a phase change, absorbing the heat in the process. If the coil isn't working correctly, your AC won't cool effectively, or at all.
What Does an AC Coil Look Like?
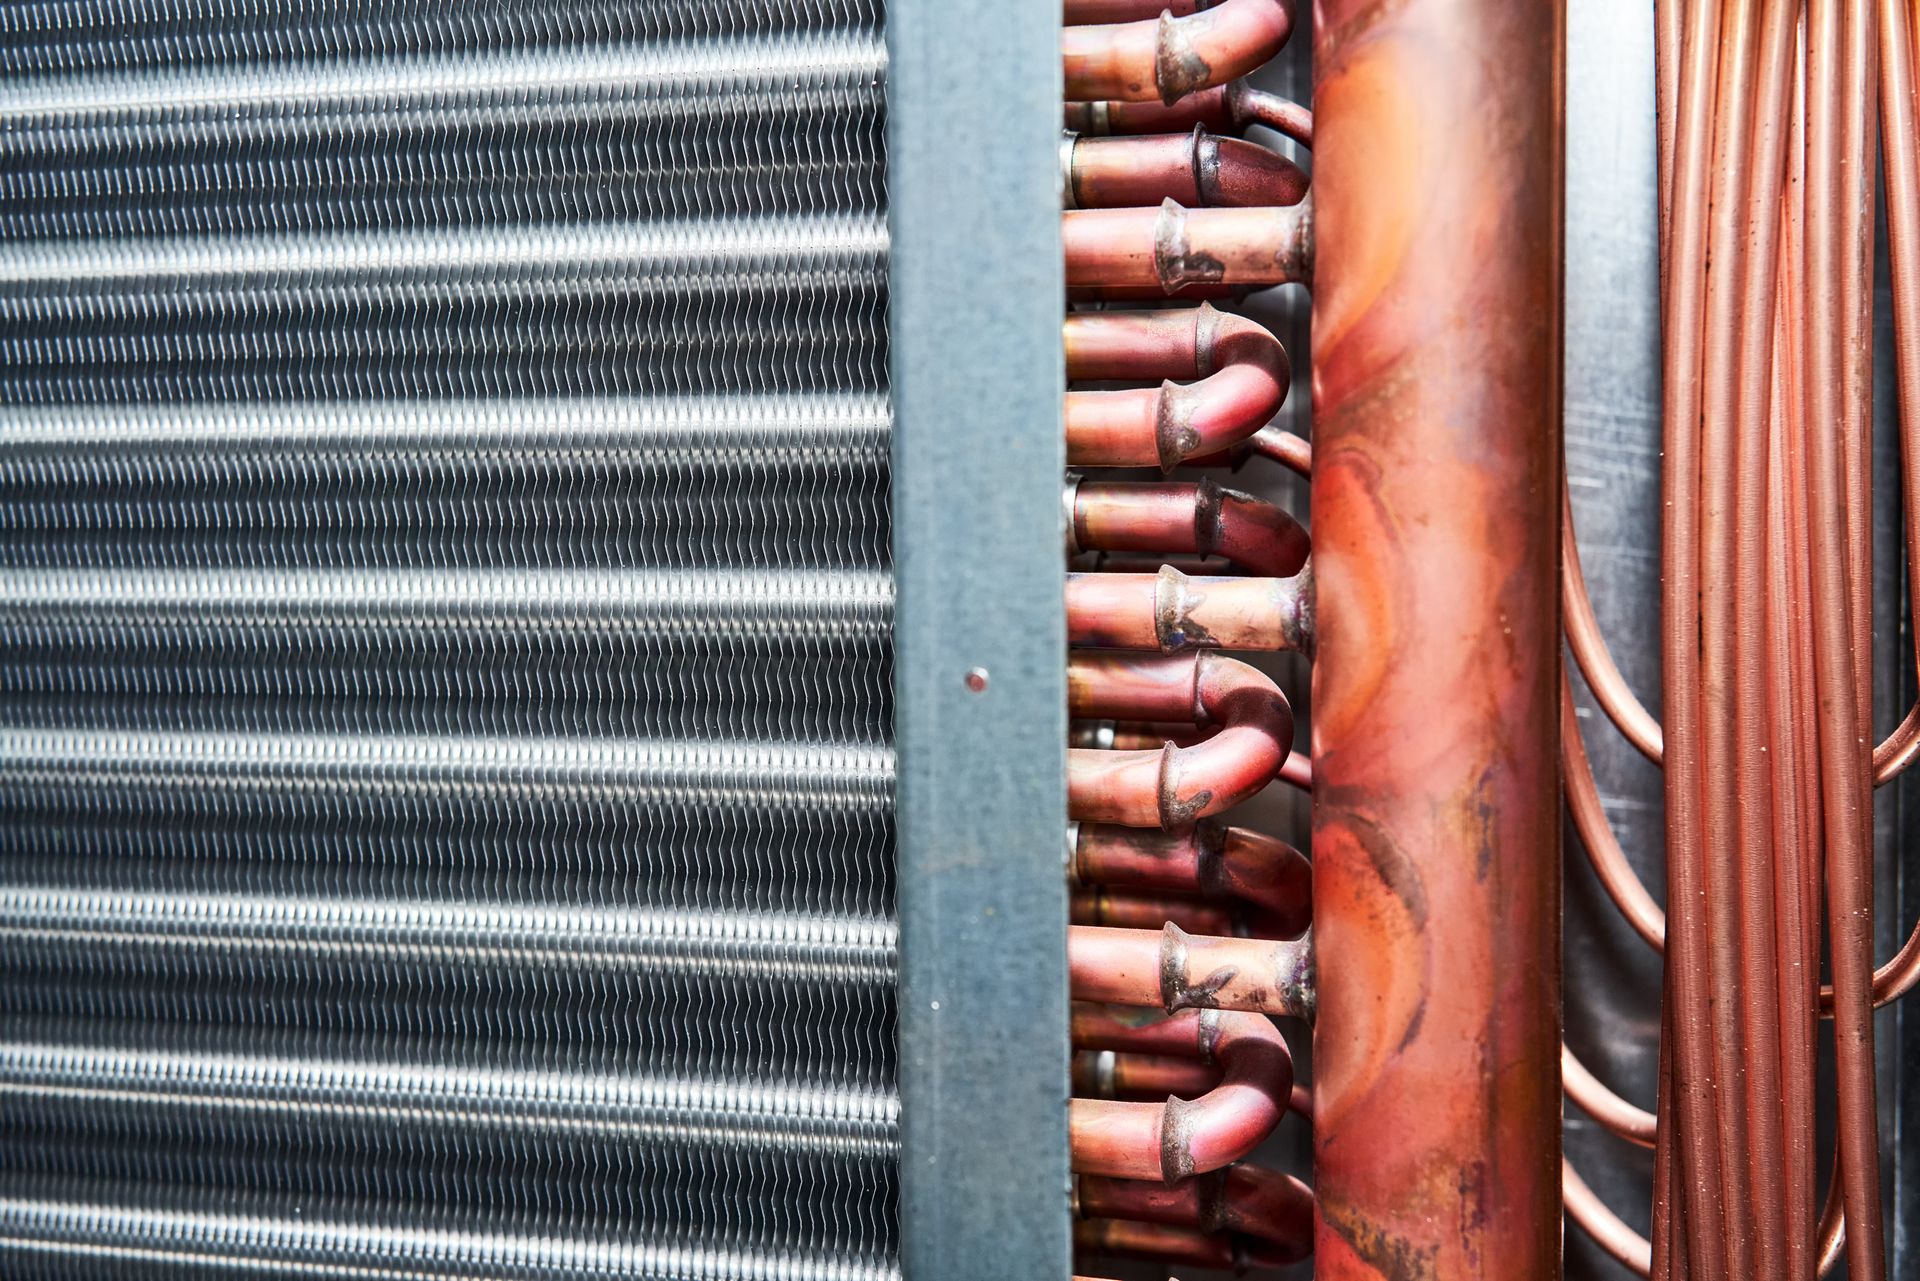
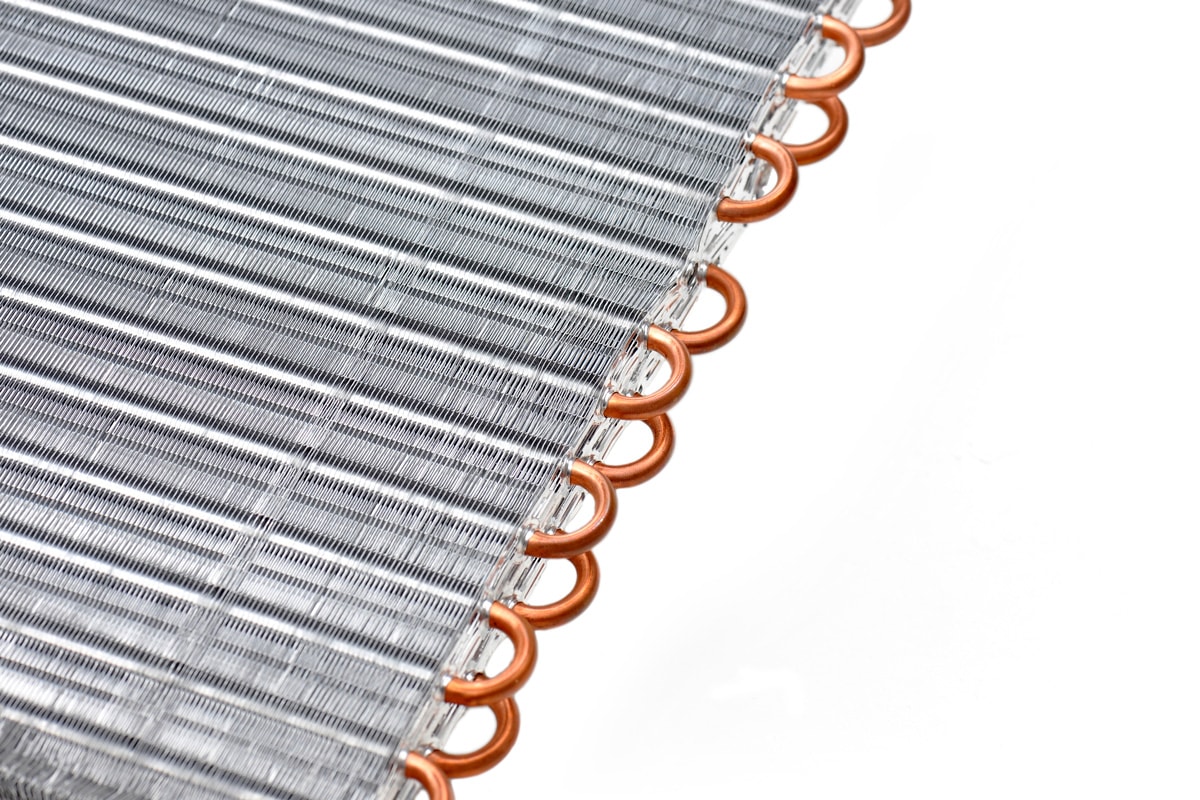
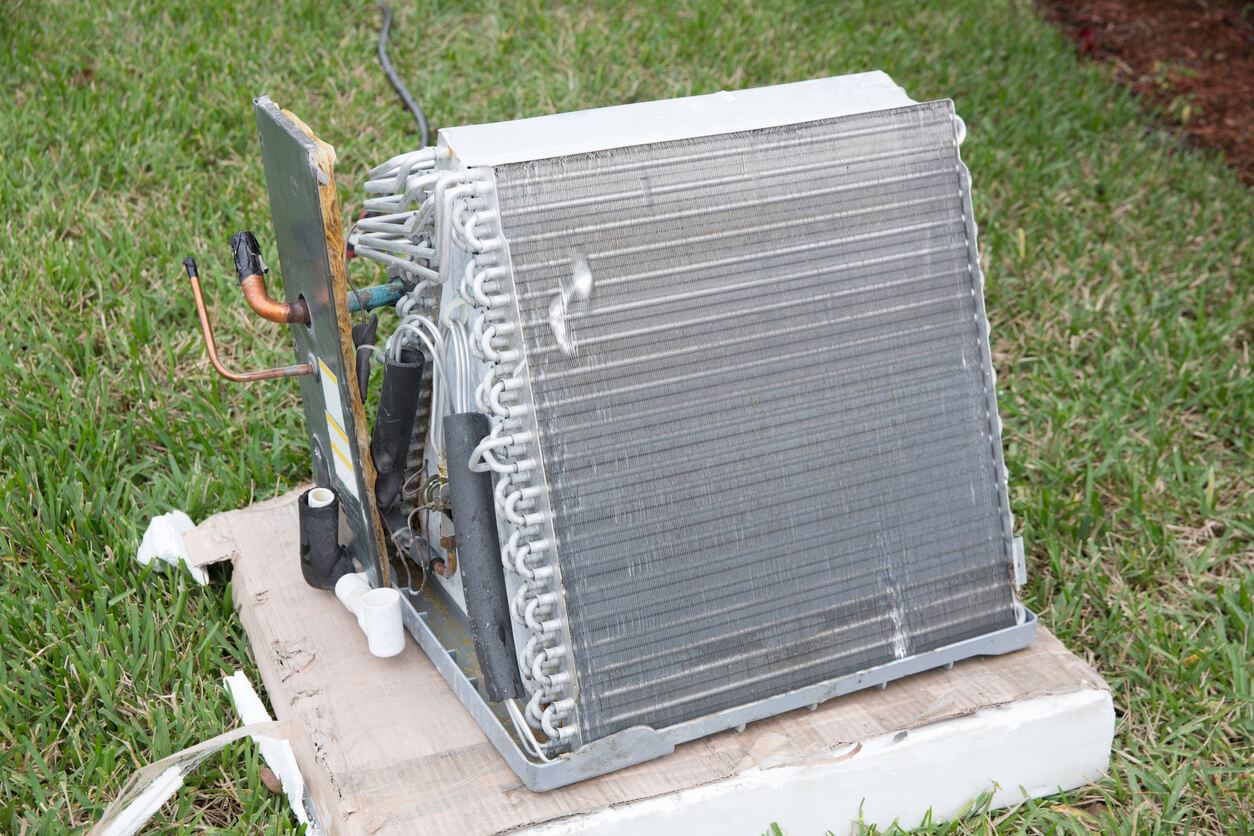
The evaporator coil is typically located inside your indoor air handler unit (furnace or blower). It’s usually made of copper or aluminum tubing arranged in a series of fins. These fins increase the surface area, maximizing heat transfer. Here's a breakdown of what to look for:
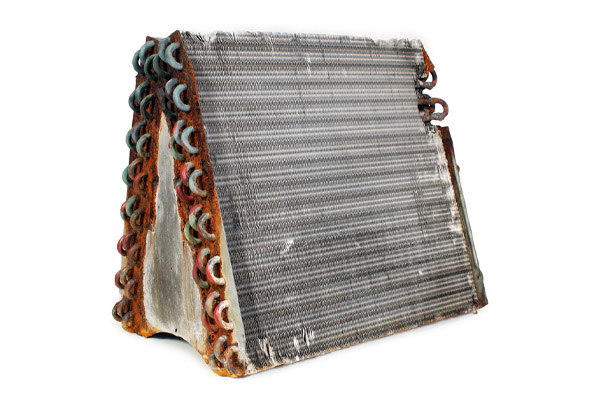
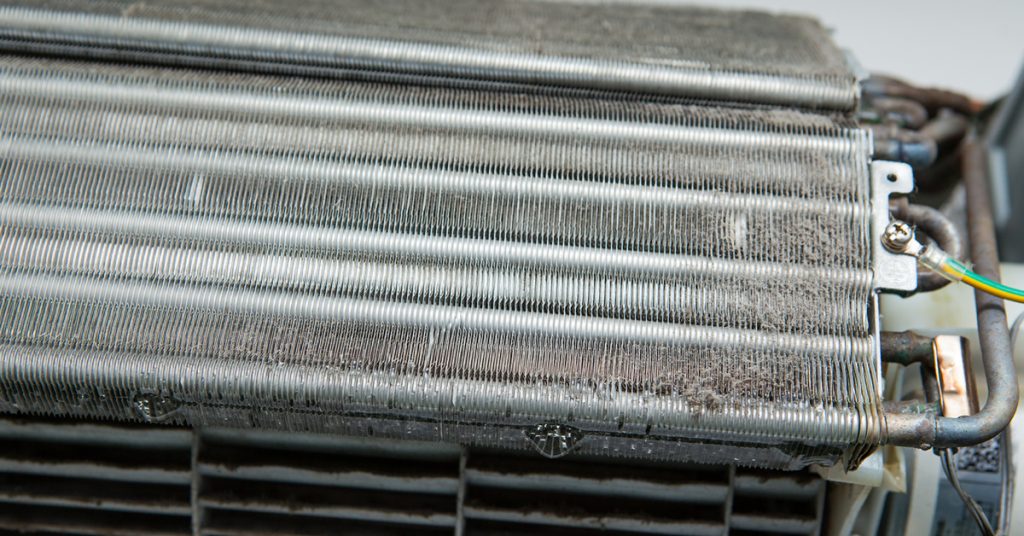
- Appearance: A clean AC coil will be bright and metallic in color. Dirty coils will appear dusty, grimy, or even moldy.
- Location: It's typically found inside the indoor unit, often behind an access panel. Consult your air handler's manual for the exact location.
- Shape: It's usually rectangular or A-shaped to maximize surface area within the air handler unit.
Troubleshooting Your AC: A Step-by-Step Guide
Step 1: Check the Power Supply
This might seem obvious, but it’s often overlooked. Start with the basics:
- Thermostat: Ensure the thermostat is set to "Cool" and the temperature is set lower than the current room temperature. Check the batteries if it's battery-powered. Sometimes a simple battery replacement can solve the issue.
- Circuit Breaker: Go to your electrical panel and check the circuit breaker for the AC unit. If it's tripped (in the "off" or middle position), reset it by flipping it completely off and then back on. If it trips again immediately, do not keep resetting it. This indicates a more serious electrical problem that requires a professional electrician.
- Disconnect Switch: Most AC units have an outdoor disconnect switch near the condenser unit. Make sure this switch is in the "on" position.
Step 2: Inspect the Outdoor Condenser Unit
The outdoor condenser unit is responsible for releasing the heat absorbed by the evaporator coil. Problems here can also impact cooling performance.
- Obstructions: Check for any obstructions around the unit, such as plants, leaves, or debris. Clear away anything that could be blocking airflow. Aim for at least 2-3 feet of clearance around the unit.
- Fan: Ensure the fan blades are not damaged and can spin freely. If the fan isn't running when the AC is on, this is a sign of a more serious problem (potentially a capacitor or motor issue) and requires professional attention.
Step 3: Check the Air Filter
A dirty air filter is one of the most common causes of AC problems. A clogged filter restricts airflow, which can cause the evaporator coil to freeze up. This is because the reduced airflow doesn't allow the coil to absorb heat efficiently, leading to a temperature drop below freezing.
- Location: The air filter is typically located in the indoor air handler unit or in a wall or ceiling vent.
- Inspection: Remove the filter and hold it up to the light. If you can barely see through it, it's time to replace it.
- Replacement: Replace the filter with a new one of the correct size and type. Consult your air handler's manual for the recommended filter type.
Step 4: Inspect the Evaporator Coil (Proceed with Caution!)
Warning: Before inspecting the evaporator coil, turn off the power to the air handler at the circuit breaker to prevent electrical shock. Also, be aware that coils may have sharp edges.
- Access: Locate the access panel to the evaporator coil inside the air handler unit. Use a screwdriver to remove the panel.
- Visual Inspection:
- Dirt and Debris: Look for excessive dirt, dust, or debris on the coil. A dirty coil reduces its ability to transfer heat.
- Ice Buildup: Check for ice buildup on the coil. This is a sign of restricted airflow (usually due to a dirty filter) or a refrigerant leak (requires a professional).
- Damage: Look for any physical damage to the coil, such as bent fins or leaks.
Step 5: Cleaning the Evaporator Coil (DIY with Limitations)
If the coil is dirty but not frozen or damaged, you can attempt to clean it yourself. However, proceed with caution and understand your limitations.
- Tools: You'll need a fin comb (to straighten bent fins), a soft brush, and a coil cleaner specifically designed for AC units. Do not use household cleaners, as they can damage the coil.
- Cleaning Process:
- Straighten Fins: Use the fin comb to gently straighten any bent fins.
- Brush Away Loose Debris: Use the soft brush to remove any loose dust or debris.
- Apply Coil Cleaner: Follow the instructions on the coil cleaner. Typically, you'll spray the cleaner onto the coil and let it sit for the recommended time before rinsing it off with water (if required by the cleaner).
Step 6: Thawing a Frozen Evaporator Coil
If you found ice buildup on the evaporator coil, it needs to be thawed before the AC can function properly. There are two ways to do this:
- Turn Off the AC: Turn off the AC at the thermostat and leave the fan running (set the thermostat to "Fan On"). This will circulate air over the coil and help it thaw. This can take several hours.
- Hair Dryer (Use with Extreme Caution): If you want to speed up the thawing process, you can use a hair dryer on a low setting. Never hold the hair dryer too close to the coil, and never use a high heat setting. Keep the hair dryer moving to avoid overheating any one spot. This method is risky and should only be attempted if you're comfortable and careful.
Step 7: Restart the AC After Thawing
Once the coil is completely thawed, you can restart the AC. Ensure the air filter is clean before restarting. Monitor the AC's performance to see if the problem is resolved. If the coil freezes up again quickly, this indicates a more serious issue that requires professional attention (such as a refrigerant leak or a problem with the airflow).
When to Call a Professional
While these DIY steps can address some common AC problems, there are situations where it's essential to call a qualified HVAC technician:
- Refrigerant Leaks: Refrigerant leaks require specialized equipment and training to repair. Handling refrigerant is also regulated, and untrained individuals can face legal penalties. Never attempt to handle refrigerant yourself.
- Electrical Issues: If you suspect an electrical problem, such as a tripped circuit breaker that keeps tripping, do not attempt to fix it yourself. Electrical work is dangerous and should only be performed by a licensed electrician.
- Compressor Problems: The compressor is the heart of the AC system. If you suspect a problem with the compressor (e.g., unusual noises, not starting), call a professional. Compressor repairs are complex and expensive.
- Complex Repairs: If you've tried the basic troubleshooting steps and the AC still isn't working properly, it's time to call a professional. They have the expertise and equipment to diagnose and repair more complex problems.
- Frozen Coil Recurring: If you have a coil that freezes repeatedly it means that you have low refrigerant which requires professional intervention.
Safety First!
Safety is paramount when working with any appliance, especially one involving electricity. Always remember these safety precautions:
- Turn Off the Power: Always turn off the power to the AC unit at the circuit breaker before performing any maintenance or repairs.
- Avoid Water and Electricity: Never work with electrical components when they are wet.
- Wear Protective Gear: Wear gloves to protect your hands from sharp edges and chemicals.
- When in Doubt, Call a Pro: If you're unsure about any step in the troubleshooting process, stop and call a qualified HVAC technician. It's better to be safe than sorry.
Preventative Maintenance
The best way to avoid AC problems is to perform regular preventative maintenance:
- Change Air Filters Regularly: Replace your air filter every 1-3 months, depending on the type of filter and the air quality in your home.
- Clean the Outdoor Condenser Unit: Regularly clean the outdoor condenser unit to remove any debris that could be blocking airflow.
- Schedule Professional Maintenance: Schedule a professional AC tune-up at least once a year. A technician can inspect the system, clean the coils, and identify any potential problems before they become major issues.
By following these troubleshooting steps and practicing preventative maintenance, you can keep your AC running efficiently and avoid costly repairs. Remember to prioritize safety and call a professional when needed. With a little knowledge and effort, you can keep your home cool and comfortable all summer long!