What Does Low Flame Sensor Signal Mean
It’s a cold winter night, and suddenly, your home starts feeling a bit… chilly. Or perhaps it’s the peak of summer, and your air conditioner is blowing lukewarm air. One common culprit behind these uncomfortable scenarios is a problem with your furnace or AC unit's flame sensor. A low flame sensor signal can cause your system to shut down unexpectedly, leaving you shivering or sweating.
But don't panic! Many flame sensor issues can be diagnosed and even resolved with a few simple steps. This article will guide you through a methodical troubleshooting process, helping you determine if you can tackle the problem yourself or if it's time to call in a professional.
Understanding the Flame Sensor
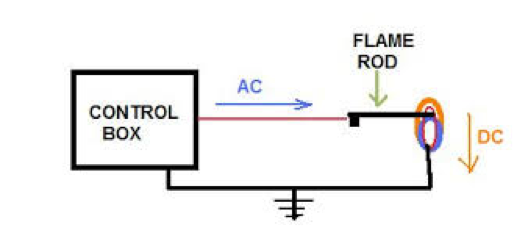
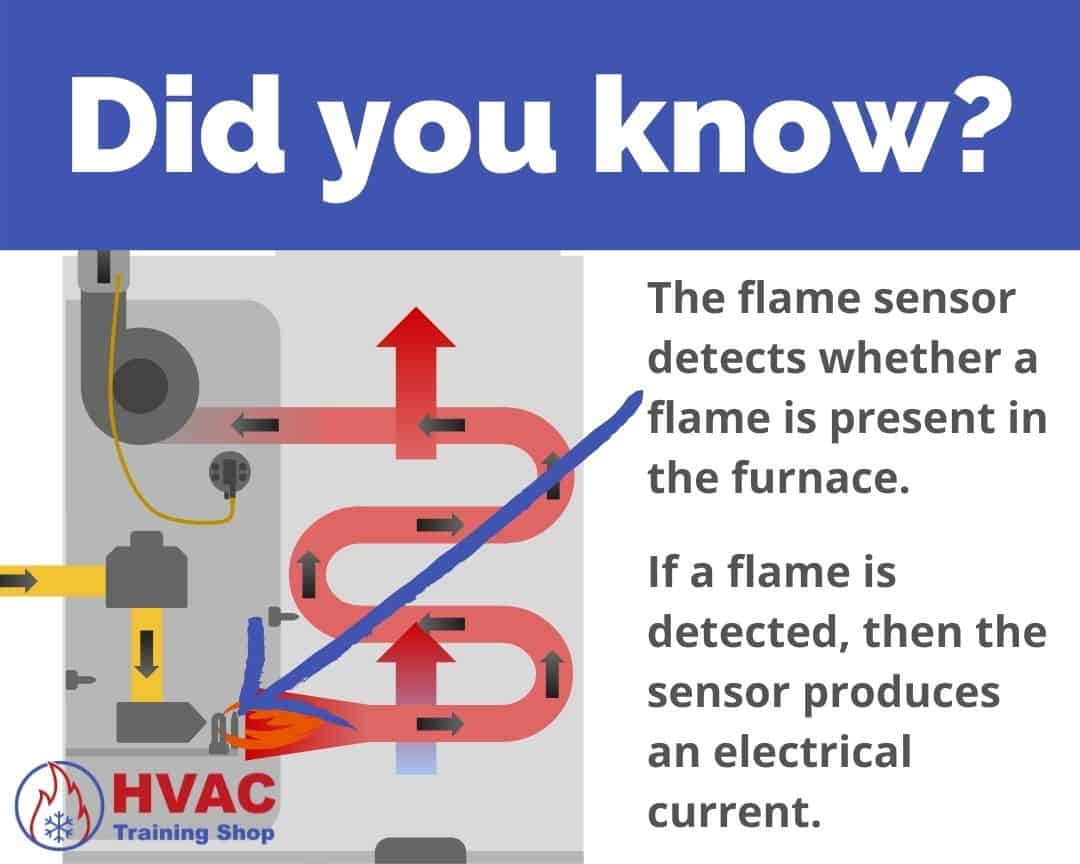
Before we dive into troubleshooting, let's understand what a flame sensor actually does. It's a crucial safety component in your furnace. Its primary job is to detect the presence of a flame after the gas valve opens. If the flame sensor doesn't detect a flame within a specific timeframe (usually a few seconds), it signals the control board to shut off the gas supply. This prevents unburned gas from accumulating and creating a potentially dangerous situation.
Think of it as a vigilant guardian, ensuring your furnace operates safely and efficiently.
Diagnosing a Low Flame Sensor Signal
The most common symptom of a low flame sensor signal is the furnace starting up normally, then shutting down after a few seconds or minutes. You might hear the blower motor running, but no heat is being produced. Or, in the case of an AC unit with a furnace component for heating, the system simply won't initiate the heating cycle.
Here's a step-by-step guide to diagnosing the problem:
Step 1: Safety First!
Before you begin any troubleshooting, turn off the power to your furnace or AC unit. Locate the circuit breaker that controls the unit and switch it to the "off" position. This is a critical safety precaution to prevent electrical shock.
Step 2: Listen and Observe
Turn the thermostat up a few degrees to call for heat (or down for cooling if troubleshooting an AC unit's heating component). Now, carefully listen to what happens when the system attempts to start:
- Does the inducer motor (a small fan that vents exhaust gases) start?
- Do you hear the igniter clicking or glowing?
- Do you hear the gas valve open?
- Does the burner ignite, and if so, for how long?
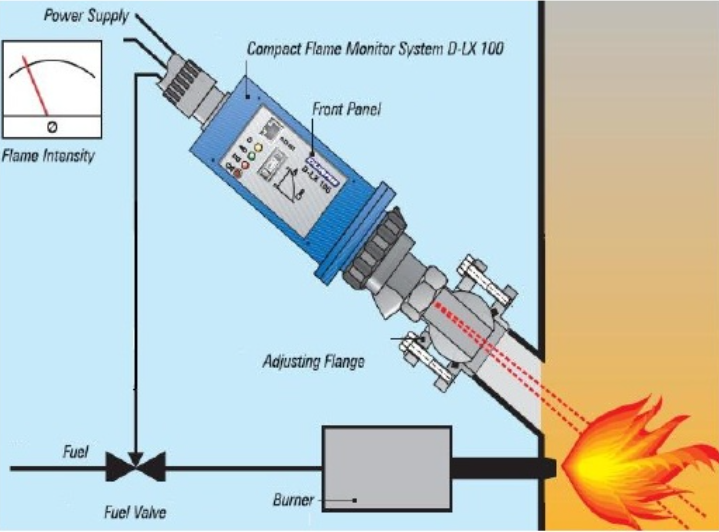
Carefully observe the burner. Does the flame look strong and blue, or weak and yellow? Does it flicker or dance erratically?
Without Tools: This step requires no tools, just your senses of hearing and sight. Document everything you observe; it will be invaluable in pinpointing the problem.
Step 3: Check the Obvious
Sometimes the simplest solutions are the best. Here are a few easy things to check before moving on to more complex diagnostics:
- Thermostat Settings: Ensure your thermostat is set to "heat" (or "cool" if applicable) and the temperature is set higher (or lower) than the current room temperature. Make sure the batteries in your thermostat are fresh.
- Air Filter: A clogged air filter restricts airflow, which can indirectly affect the flame sensor. Replace a dirty air filter with a new one. A clean air filter is crucial for efficient operation.
- Gas Supply: Make sure your gas supply is turned on. Check the gas valve near the furnace and ensure it's in the "on" position. Also, check if other gas appliances (like your stove) are working.
- Pilot Light (Older Furnaces): If you have an older furnace with a pilot light, make sure it's lit. If not, follow the manufacturer's instructions to relight it.
Without Tools: These checks require no tools and can often resolve simple issues.
Step 4: Inspect the Flame Sensor (Visual Inspection)
Now it's time to take a closer look at the flame sensor itself. Remember, the power is still OFF!
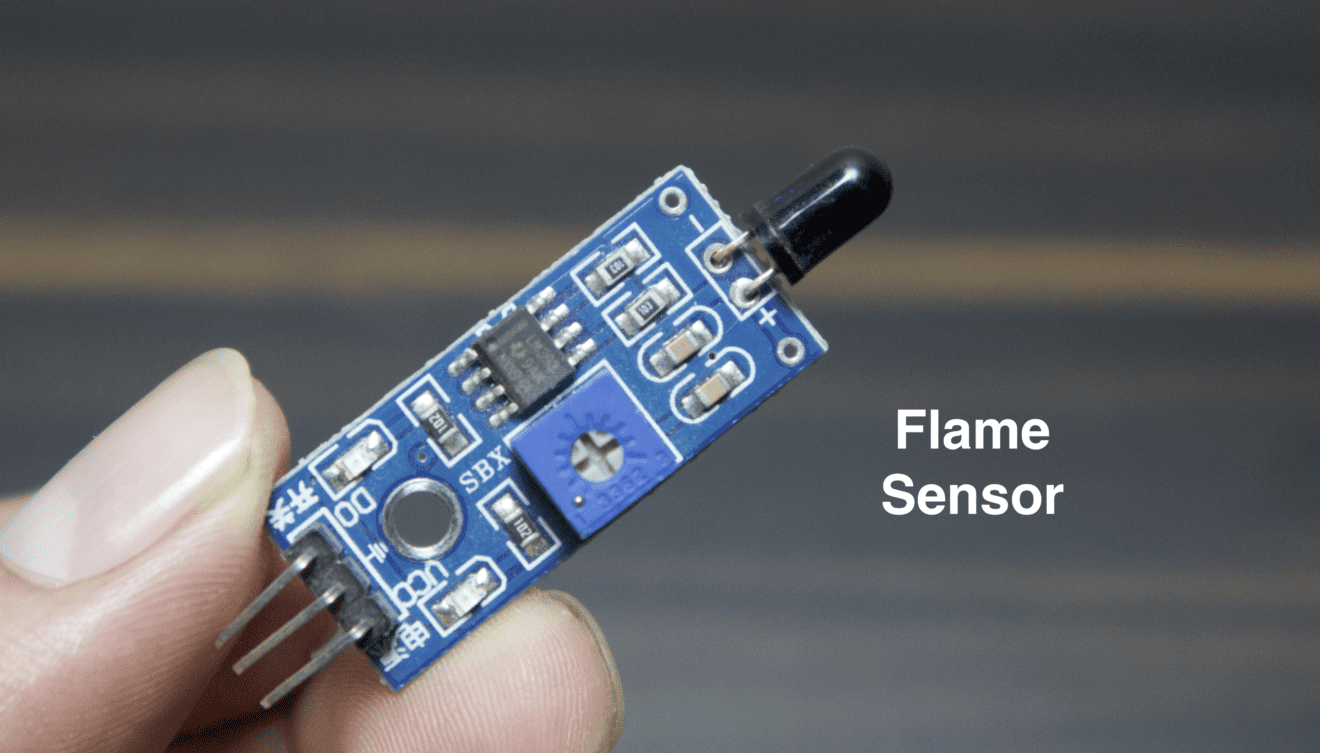
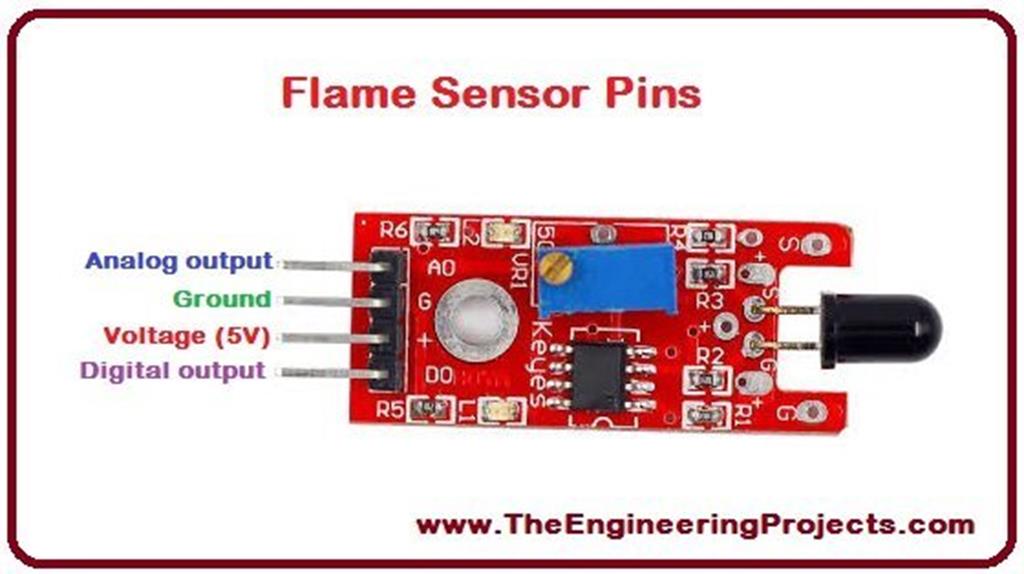
- Locate the Flame Sensor: The flame sensor is typically a thin, metallic rod located near the burner. It's usually positioned so that it's directly in the path of the flame.
- Visual Inspection: Carefully examine the flame sensor. Look for any signs of:
- Carbon Buildup: This is the most common problem. Carbon deposits can insulate the sensor and prevent it from detecting the flame properly.
- Corrosion: Look for rust or corrosion on the sensor.
- Cracks or Damage: Check for any physical damage to the sensor.
- Loose Wiring: Make sure the wire connected to the flame sensor is securely attached.
Without Tools: This step primarily involves a visual inspection, but you might need a flashlight to get a good look.
Step 5: Cleaning the Flame Sensor (DIY Action)
If you find carbon buildup on the flame sensor, you can try cleaning it. This is often the solution to a low flame sensor signal problem.
- Gather Supplies: You'll need:
- A piece of fine-grit sandpaper or steel wool (220 grit or higher is ideal)
- A clean, dry cloth
- Gently Clean the Sensor: Use the sandpaper or steel wool to gently scrub the carbon deposits off the flame sensor. Be careful not to damage the sensor. The goal is to remove the buildup, not to sand the sensor down to bare metal.
- Wipe Clean: Wipe the sensor clean with the dry cloth to remove any remaining debris.
- Reinstall the Sensor: Carefully reinstall the flame sensor in its original position, ensuring the wire is securely attached.
Basic Equipment Needed: Fine-grit sandpaper or steel wool, clean cloth.
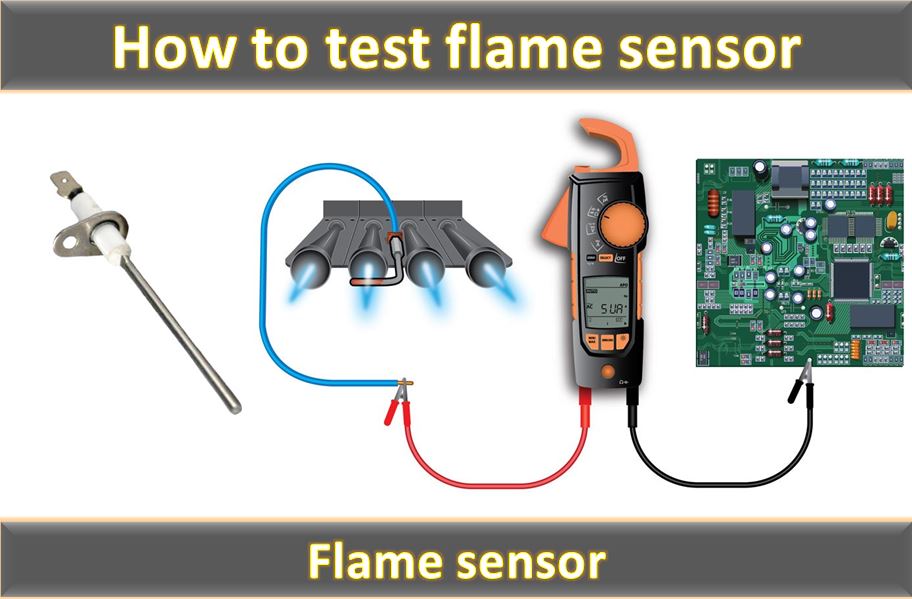
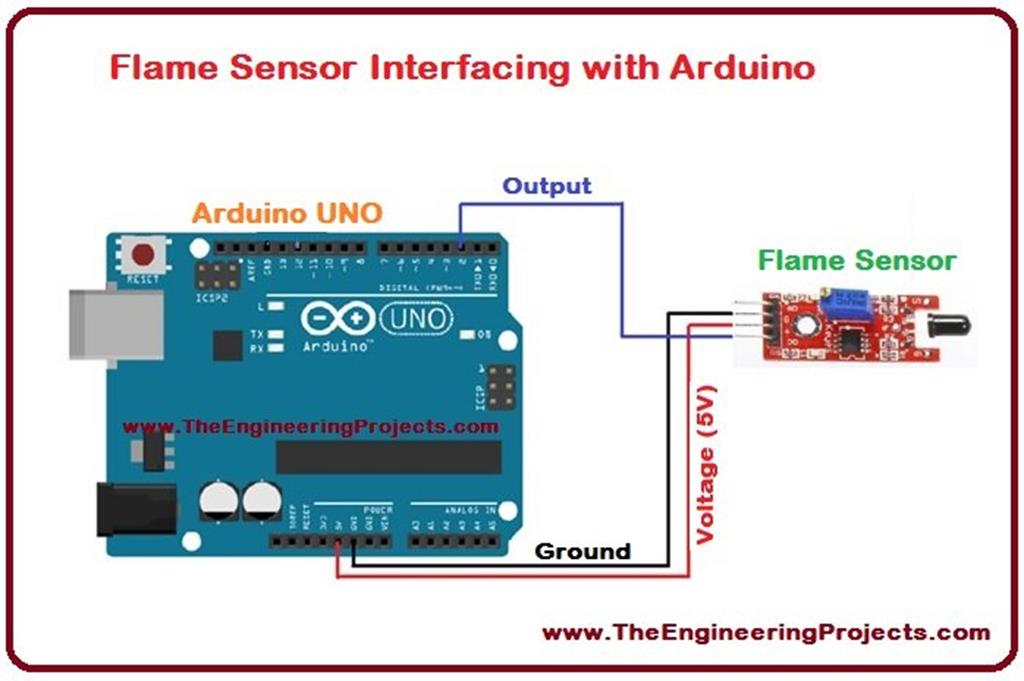
Step 6: Testing the Flame Sensor (Requires a Multimeter)
If cleaning the flame sensor doesn't solve the problem, the next step is to test its functionality using a multimeter. This requires a basic understanding of electrical testing.
- Set Up the Multimeter: Set your multimeter to measure DC microamps (µA). The specific setting may vary depending on your multimeter model, so consult your multimeter's manual.
- Connect the Multimeter:
- Turn the Power Back On: Carefully turn the power back on to the furnace at the circuit breaker.
- Connect to Flame Sensor Wire: Disconnect the wire from the flame sensor. Connect one lead of the multimeter to the wire you disconnected from the flame sensor and the other lead to the flame sensor terminal itself. You are now reading the current flow through the flame sensor circuit.
- Call for Heat: Turn up the thermostat to call for heat.
- Observe the Reading:
- Normal Reading: A healthy flame sensor should produce a reading of at least 1-5 microamps (µA) DC when the flame is present. The exact value will vary depending on the furnace model. Refer to your furnace's manual for the specific recommended range.
- Low or No Reading: If the reading is significantly below the recommended range or zero, the flame sensor is likely faulty and needs to be replaced. A reading that fluctuates wildly can also indicate a problem.
- Turn the Power Off: After testing, immediately turn the power back off to the furnace at the circuit breaker before reconnecting the wire to the flame sensor.
Basic Equipment Needed: Multimeter.
Step 7: Inspecting the Ground Connection
The flame sensor relies on a good ground connection to the furnace chassis to complete the electrical circuit. A poor or corroded ground can prevent the sensor from working properly. Locate the ground wire attached to the furnace and ensure it is clean and securely fastened. If there's corrosion, clean it off with a wire brush and tighten the connection.
Basic Equipment Needed: Screwdriver, wire brush (optional).
Step 8: Checking the Wiring and Connections
Inspect all the wiring and connections related to the flame sensor. Look for any signs of damage, loose connections, or corrosion. Ensure that all wires are securely connected to their respective terminals. Use a wire brush to clean any corroded terminals.
Basic Equipment Needed: Screwdriver, wire brush (optional).
When to Call a Professional
While many flame sensor issues can be resolved with the steps outlined above, there are situations where it's best to call a qualified HVAC technician.
- You're Uncomfortable Working with Electricity or Gas: If you're not comfortable working with electricity or gas appliances, don't hesitate to call a professional. Your safety is paramount.
- You're Not Sure What You're Doing: If you're unsure about any of the steps outlined above, it's best to err on the side of caution and seek professional help.
- You Suspect a Gas Leak: If you smell gas, immediately turn off the gas supply to your furnace and evacuate your home. Call your gas company or the fire department from a safe location.
- The Problem Persists After Cleaning and Testing: If you've cleaned the flame sensor, tested it with a multimeter, and checked the wiring, but the problem persists, there may be a more complex issue with your furnace, such as a faulty control board or gas valve.
- The Furnace is Old or Has a History of Problems: If your furnace is old or has a history of frequent repairs, it may be time to consider replacing it.
Specifically, if the multimeter test shows a low voltage coming to the flame sensor, but the flame sensor itself tests OK, this implies a problem with the control board. Replacing a control board is almost always best left to a professional.
Replacing the Flame Sensor (DIY with Caution)
If the multimeter test confirms that the flame sensor itself is faulty, you can replace it yourself. However, exercise caution and follow these steps carefully:
- Purchase a Replacement Flame Sensor: Make sure you purchase a replacement flame sensor that is compatible with your furnace model. You can usually find this information in your furnace's manual or by contacting the manufacturer.
- Turn Off the Power: As always, turn off the power to your furnace at the circuit breaker.
- Remove the Old Flame Sensor: Disconnect the wire from the old flame sensor and carefully remove it from its mounting bracket.
- Install the New Flame Sensor: Install the new flame sensor in the same position as the old one, ensuring it is securely mounted.
- Connect the Wire: Connect the wire to the new flame sensor.
- Turn On the Power: Turn the power back on to your furnace at the circuit breaker.
- Test the Furnace: Turn up the thermostat to call for heat and observe the furnace's operation. If it starts and runs normally, you've successfully replaced the flame sensor.
Basic Equipment Needed: Screwdriver, replacement flame sensor.
Important Note: Replacing the flame sensor is a relatively straightforward DIY task, but it's crucial to ensure you purchase the correct replacement part and follow the installation instructions carefully. If you're uncomfortable with this process, it's always best to call a professional.
Preventative Maintenance
The best way to avoid flame sensor problems is to perform regular preventative maintenance on your furnace. This includes:
- Replacing the Air Filter Regularly: A clean air filter ensures proper airflow, which is essential for efficient furnace operation.
- Annual Furnace Inspection: Have your furnace inspected annually by a qualified HVAC technician. They can identify and address potential problems before they become major issues.
- Cleaning the Burner Assembly: Periodically clean the burner assembly to remove any dirt or debris that could interfere with the flame. This is often part of a standard furnace maintenance service.
By following these simple tips, you can help keep your furnace running smoothly and efficiently for years to come.
Conclusion
A low flame sensor signal can be a frustrating issue, but with a systematic approach and a little bit of knowledge, you can often diagnose and resolve the problem yourself. Remember to prioritize safety at all times, and don't hesitate to call a professional if you're uncomfortable or unsure about any of the steps involved. By understanding how the flame sensor works and performing regular maintenance, you can help ensure that your furnace operates safely and reliably, keeping your home warm and comfortable throughout the winter (or your AC unit ready to call upon the furnace if a auxiliary heat source is needed). With a little effort and attention, you can keep your heating system in top shape and avoid those unexpected cold snaps!