What Is Considered High Humidity Weather
.jpg?width=3508&name=Humidity level chart (1).jpg)
High humidity weather can wreak havoc on our homes, leading to discomfort, mold growth, and even appliance malfunctions. One common casualty of humid conditions is the air conditioner. Let's explore what constitutes high humidity and how to troubleshoot a malfunctioning AC unit, focusing on safe, DIY-friendly fixes while knowing when to call in the professionals.
Understanding High Humidity
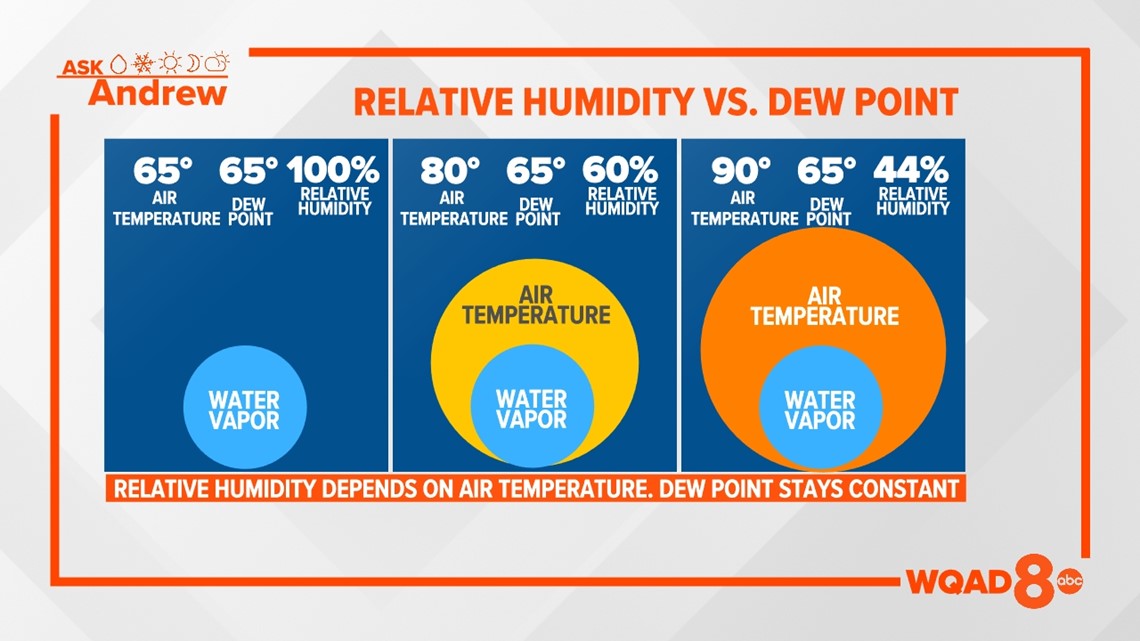
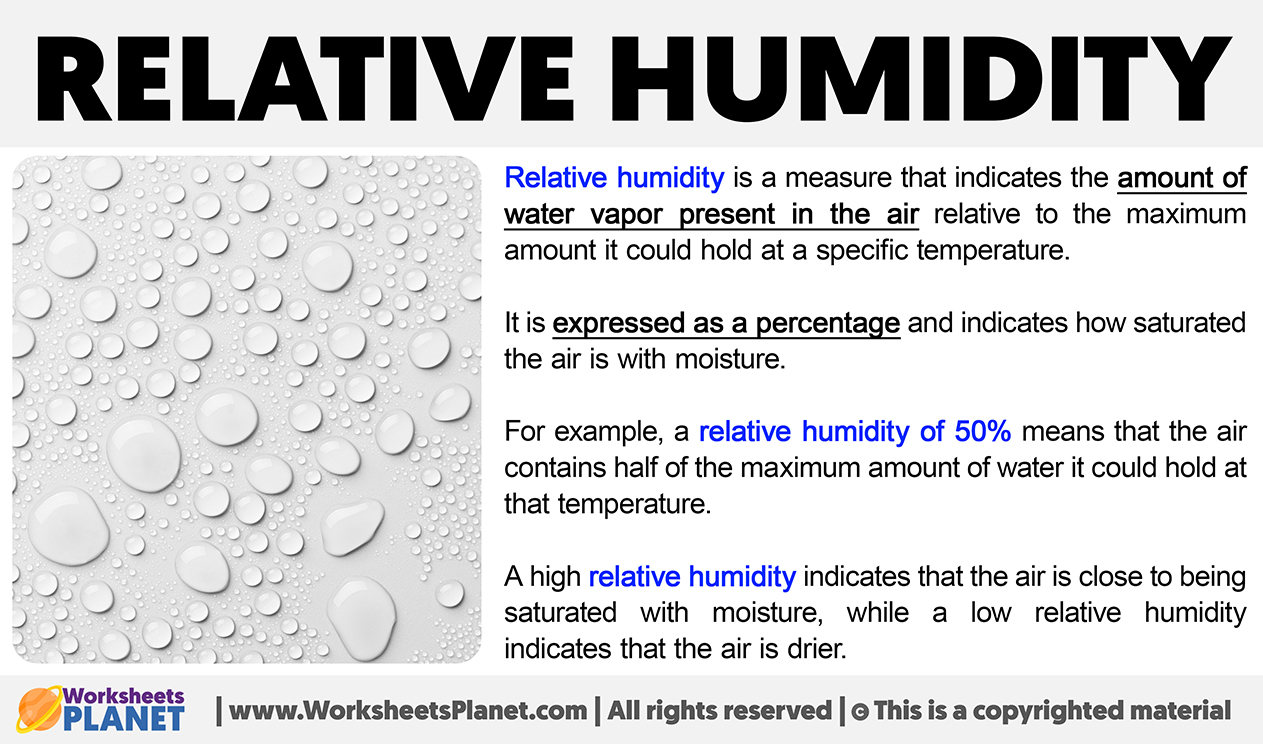
So, what exactly is considered "high humidity"? Humidity refers to the amount of moisture in the air. It's typically measured as relative humidity, which is the percentage of moisture in the air compared to the maximum amount the air could hold at that temperature. The higher the percentage, the more humid it feels.
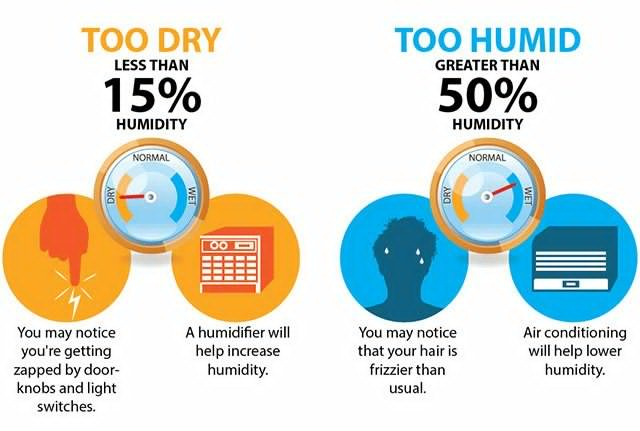
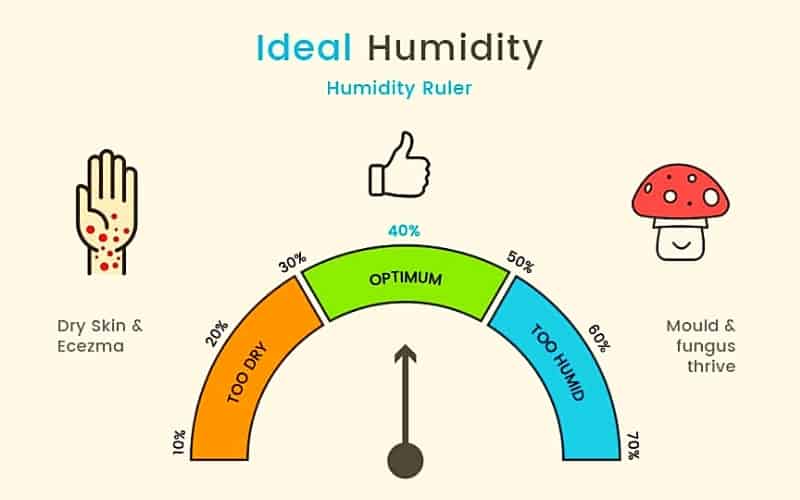
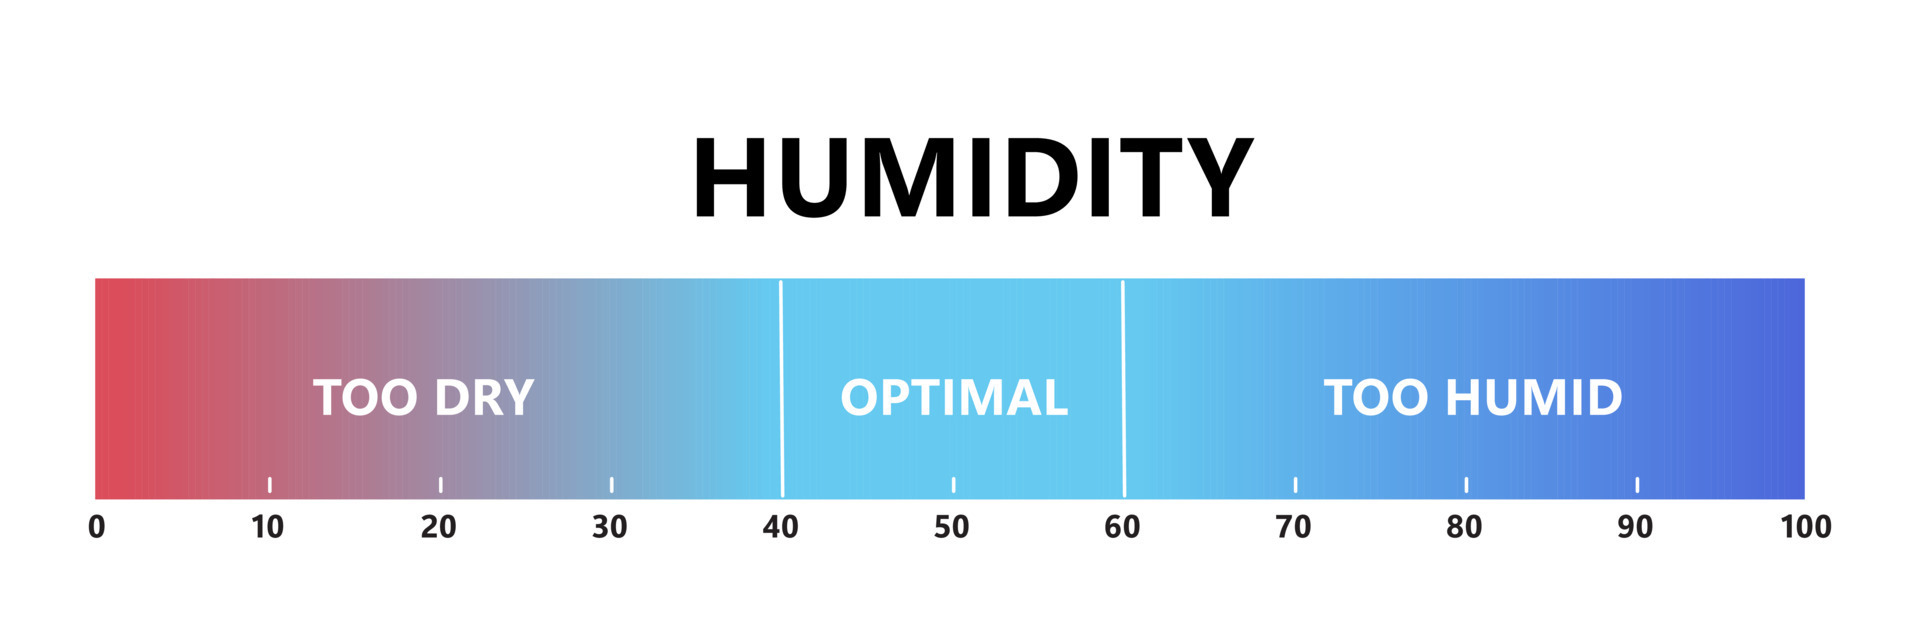
Generally, relative humidity above 60% is considered high. At 70% or higher, the air feels noticeably sticky and uncomfortable. Health experts often recommend maintaining indoor humidity between 30% and 50% for optimal comfort and health. High humidity can lead to several problems:
- Mold and mildew growth: These thrive in damp environments.
- Musty odors: A telltale sign of excess moisture.
- Increased allergy symptoms: Mold and dust mites flourish in humid conditions.
- Condensation on windows and walls: Indicating high indoor humidity levels.
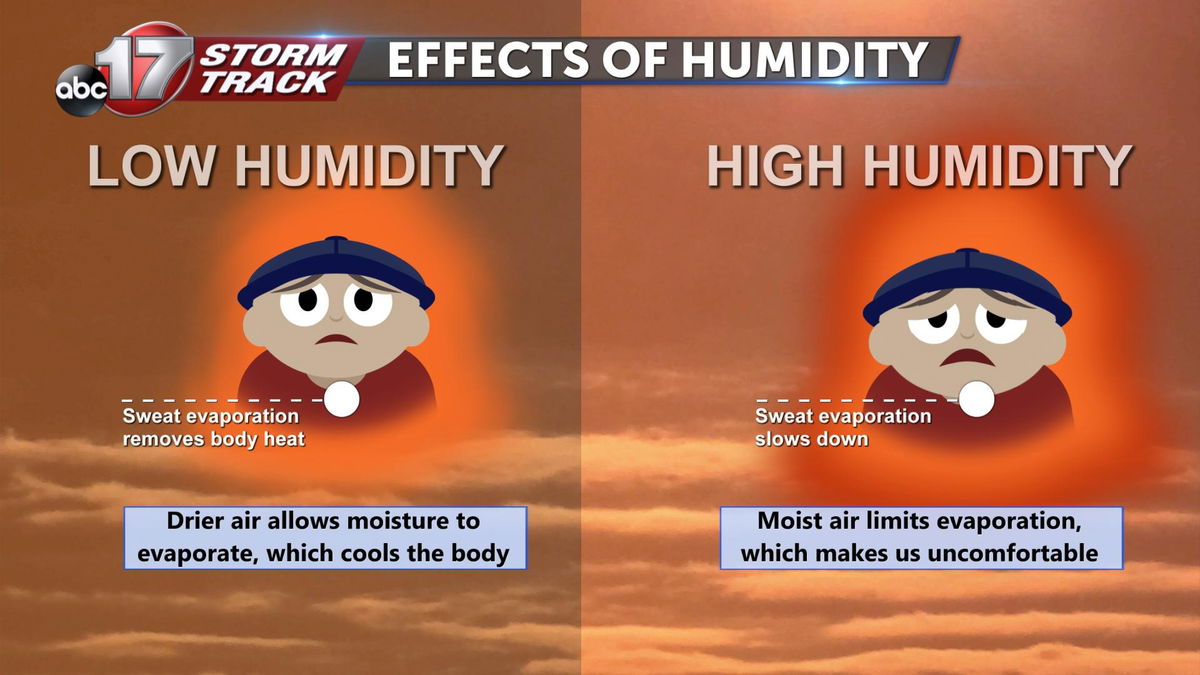
- Discomfort: Making it harder for your body to cool down.
Troubleshooting a Malfunctioning AC: A Step-by-Step Guide
If your AC isn't cooling properly during periods of high humidity, don't despair! Many issues can be resolved with a few simple steps. Let's start with the basics and work our way through potential problems.
Step 1: Checking the Power Supply
This might seem obvious, but it's the most common oversight. Before you dive into more complex troubleshooting, make sure the AC unit is actually receiving power.
- Verify the Circuit Breaker: Locate the circuit breaker panel for your AC unit (usually labeled). Ensure the breaker is in the "ON" position. If it's tripped (in the "OFF" or middle position), flip it all the way to the "OFF" position and then back to the "ON" position. If it trips again immediately, do not continue resetting it. This indicates a more serious electrical problem that requires a qualified electrician.
- Check the Power Cord: Inspect the power cord for any visible damage, such as fraying or cuts. If you see any damage, do not attempt to repair it yourself. Replace the cord or, ideally, consult an electrician.
- Test the Outlet: Plug a different appliance into the same outlet to ensure the outlet is working correctly. If the other appliance doesn't work, the outlet itself might be the problem. Contact an electrician to repair or replace the outlet.
Safety First! Always turn off the circuit breaker before inspecting any electrical components.
Step 2: Examining the Thermostat Settings
A simple thermostat setting error can easily lead to the perception of AC malfunction. Take a moment to verify the thermostat is correctly configured.
- Mode Selection: Ensure the thermostat is set to "Cool" or "AC" mode. Sometimes, it can accidentally be set to "Heat" or "Fan Only."
- Temperature Setting: Make sure the desired temperature is set lower than the current room temperature. If the thermostat is set to a higher temperature than the room, the AC won't turn on.
- Fan Setting: Experiment with the fan setting. Setting the fan to "Auto" allows the AC to cycle the fan on and off with the cooling cycle. Setting it to "On" keeps the fan running continuously, which can sometimes make the cooling feel less effective, especially in humid conditions, as it recirculates air.
- Programmable Thermostats: Review the programming schedule. Ensure there are no programmed setbacks preventing the AC from cooling during the times you need it most.
- Thermostat Batteries: If your thermostat is battery-powered, replace the batteries. Low batteries can cause inaccurate temperature readings and prevent the AC from functioning correctly.
Step 3: Cleaning or Replacing the Air Filter
A dirty air filter is one of the most common causes of AC problems, especially in humid weather. A clogged filter restricts airflow, making the AC work harder and less efficiently.
- Locate the Air Filter: The air filter is usually located in the indoor unit of your AC system, often behind a removable panel. Consult your AC unit's manual for the exact location.
- Inspect the Filter: Remove the filter and hold it up to the light. If you can't see much light passing through it, it's dirty and needs to be cleaned or replaced.
- Cleaning a Reusable Filter: If you have a reusable filter, wash it with mild soap and water. Rinse it thoroughly and allow it to dry completely before reinstalling it.
- Replacing a Disposable Filter: If you have a disposable filter, purchase a new one of the correct size and MERV (Minimum Efficiency Reporting Value) rating. The MERV rating indicates the filter's ability to capture particles. A higher MERV rating filters out more particles but can also restrict airflow, so choose a rating recommended by your AC manufacturer.
- Regular Maintenance: Clean or replace the air filter every 1-3 months, or more frequently if you have pets or allergies.
Step 4: Clearing Obstructions Around the Outdoor Unit
The outdoor unit of your AC needs proper airflow to function efficiently. Obstructions can significantly reduce its performance, especially in humid conditions when it's already working harder.
- Remove Debris: Clear away any leaves, grass clippings, weeds, or other debris that may be blocking the airflow around the unit.
- Trim Vegetation: Trim back any bushes, shrubs, or trees that are growing too close to the unit. Aim for at least 2-3 feet of clearance on all sides.
- Ensure Proper Ventilation: Make sure the unit isn't enclosed in a small, poorly ventilated space.
Safety First! Turn off the AC unit at the breaker before working around the outdoor unit.
Step 5: Cleaning the Condenser Coils (If Accessible and Safe)
The condenser coils are located in the outdoor unit and help dissipate heat. Over time, they can become covered in dirt and debris, reducing their efficiency. This step requires caution and should only be attempted if you are comfortable working with basic tools and can access the coils safely. If the coils are heavily damaged or inaccessible, call a professional.
- Turn Off the Power: Disconnect the power to the AC unit at the breaker.
- Remove the Access Panel: Locate the access panel on the outdoor unit and remove it. You may need a screwdriver.
- Inspect the Coils: Examine the coils for dirt, debris, and bent fins.
- Clean the Coils: Use a garden hose with a gentle spray nozzle to rinse the coils from the inside out. Avoid using high pressure, as this can damage the fins. You can also use a commercially available coil cleaner specifically designed for AC units. Follow the manufacturer's instructions carefully.
- Straighten Bent Fins (Optional): If you notice any bent fins, you can gently straighten them using a fin comb, which is a specialized tool designed for this purpose. Be very careful not to damage the fins further.
- Reassemble the Unit: Replace the access panel and restore power to the AC unit.
Important Note: Cleaning the condenser coils involves working with electrical components. If you are not comfortable with this task, it's best to leave it to a professional.
When to Call a Professional
While the above steps can resolve many common AC problems, some issues require the expertise of a qualified HVAC technician. It's crucial to recognize when a repair is beyond your DIY capabilities. Call a professional if you experience any of the following:
- Refrigerant Leaks: Refrigerant is a chemical that cools the air, but it is toxic and handled by professionals. If you suspect a refrigerant leak (e.g., hissing sound, ice buildup on the coils), do not attempt to fix it yourself.
- Electrical Problems: If you experience repeated circuit breaker trips, burning smells, or other electrical issues, do not attempt to diagnose or repair the problem yourself.
- Compressor Issues: The compressor is the heart of the AC system. If it's making strange noises or not running at all, it likely needs to be replaced, which is a complex and expensive repair.
- Frozen Coils: While a dirty air filter can cause frozen coils, other underlying issues, such as a refrigerant leak or a malfunctioning blower motor, may be the culprit.
- Lack of Cooling After Troubleshooting: If you've tried all the DIY steps and your AC is still not cooling properly, there may be a more complex problem requiring professional diagnosis and repair.
- Working with Gas Lines: If your AC unit uses gas, do not attempt to fix it yourself. Gas line repairs can be very dangerous and should only be performed by a qualified technician.
Remember: Attempting repairs that are beyond your skill level can be dangerous and could potentially damage your AC unit further. It's always better to err on the side of caution and call a professional when in doubt. They have the knowledge, experience, and tools to diagnose and repair complex AC problems safely and effectively.
Preventive Measures for High Humidity
Beyond addressing AC issues, consider steps to mitigate the effects of high humidity throughout your home. Prevention is always better than cure!
- Use Dehumidifiers: Dehumidifiers remove excess moisture from the air, helping to lower humidity levels, especially in basements or other damp areas.
- Improve Ventilation: Ensure adequate ventilation in bathrooms and kitchens by using exhaust fans when showering or cooking.
- Seal Air Leaks: Seal any cracks or gaps around windows and doors to prevent humid air from entering your home.
- Proper Insulation: Make sure your home is properly insulated to reduce condensation and maintain a consistent temperature.
- Monitor Humidity Levels: Use a hygrometer to monitor the humidity levels in your home and adjust your strategies accordingly.
By understanding what constitutes high humidity, implementing these troubleshooting steps, and taking preventative measures, you can maintain a comfortable and healthy home environment, even during the muggiest weather. Remember to prioritize safety and call a professional when needed. With a little knowledge and effort, you can keep your AC running smoothly and enjoy a cool, comfortable home all summer long!