What Is The Airflow Direction On A Furnace

One of the most common and frustrating issues homeowners face, especially as seasons change, is uneven heating or cooling. You might notice some rooms are significantly warmer or colder than others. While several factors can contribute, one crucial aspect that's often overlooked is the airflow direction of your furnace. Understanding and verifying this direction is fundamental for optimal HVAC performance.
Understanding Airflow: The Foundation of Furnace Function
Your furnace isn't just about heating or cooling air; it's about circulating that air throughout your home. Correct airflow is essential for efficient and effective temperature regulation. Think of it as the circulatory system of your house, delivering conditioned air to every room.
Incorrect airflow direction can lead to a host of problems, including:
- Uneven heating/cooling: Some rooms get too much, others not enough.
- Increased energy bills: Your system works harder to compensate for inefficiency.
- System damage: Overheating or strain on components can shorten your furnace's lifespan.
- Poor air quality: Inadequate filtration leads to more dust and allergens circulating.
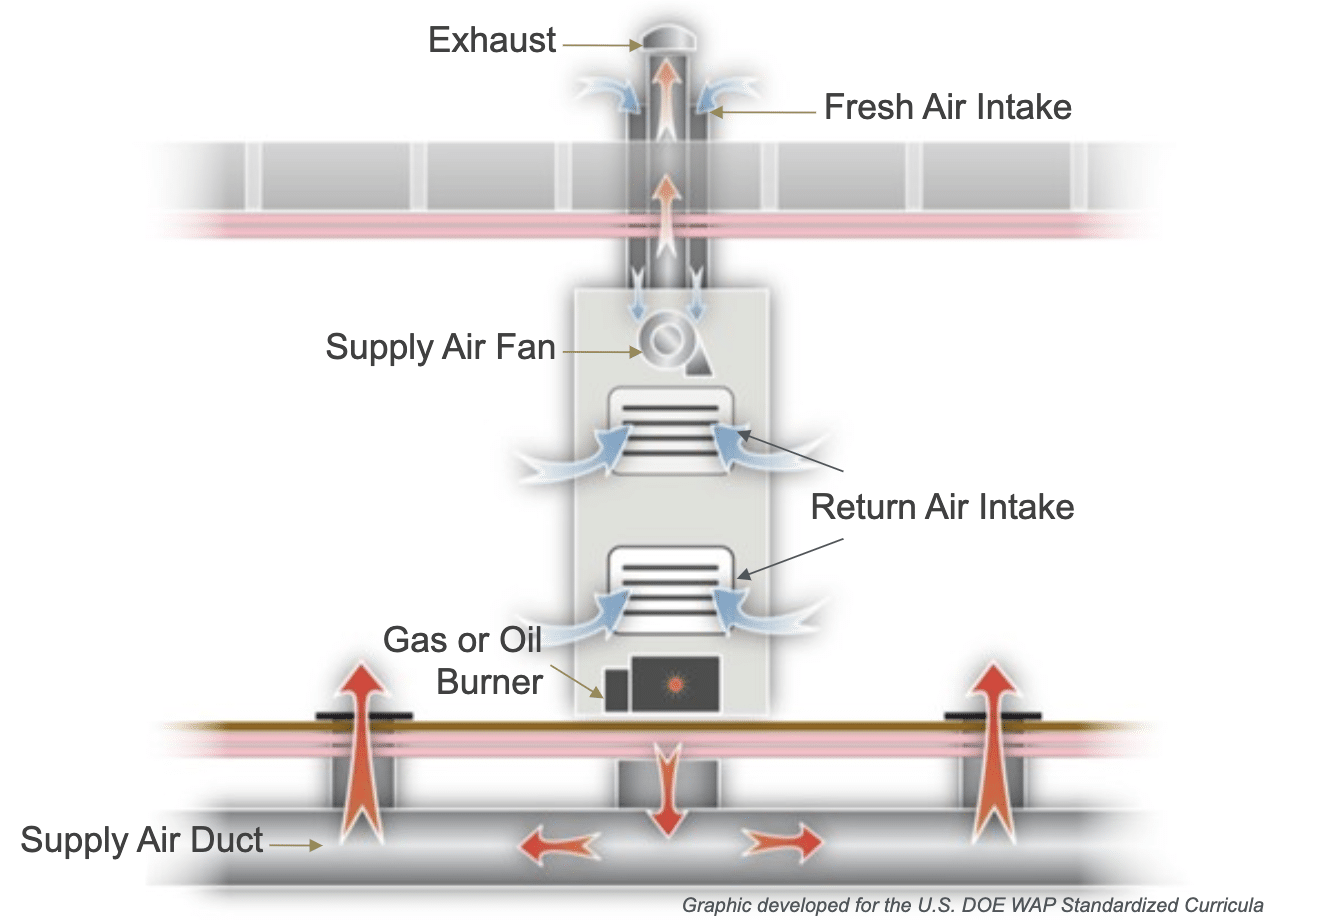
Before we dive into troubleshooting, let's define what we mean by "airflow direction." The typical furnace setup involves air being drawn into the furnace through the return vents, passing through the filter, being heated (or cooled), and then being pushed out through the supply vents. Correct airflow means the air is consistently moving in this direction.
Step-by-Step Troubleshooting Guide
Ready to tackle this issue? Follow these steps to diagnose and potentially fix your furnace airflow problems. Always prioritize safety by turning off the power to your furnace at the breaker box before performing any maintenance.
Step 1: Visual Inspection of Your Furnace
Begin with a thorough visual inspection. Locate your furnace (usually in the basement, attic, or a utility closet). Look for the following:
- Air Filter Access Panel: This is where the air filter is located. Take note of its position and how it opens.
- Blower Motor Compartment: This houses the fan that circulates the air.
- Ductwork Connections: Examine the points where the ducts connect to the furnace. Look for any obvious leaks or disconnections.
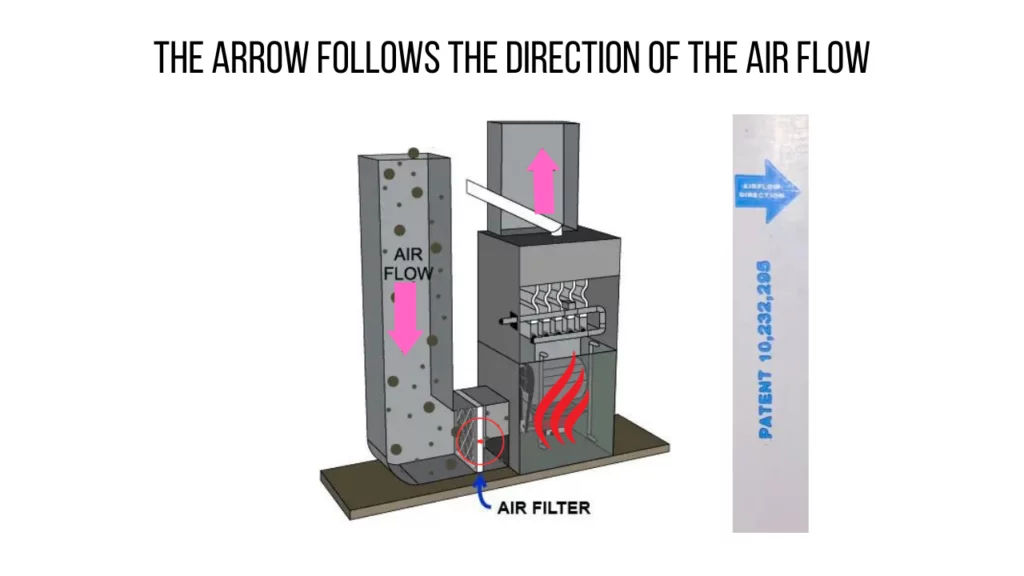
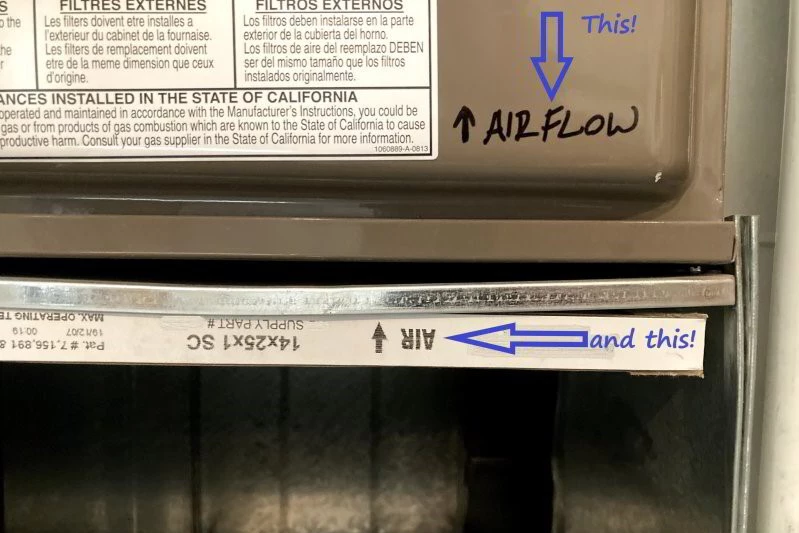
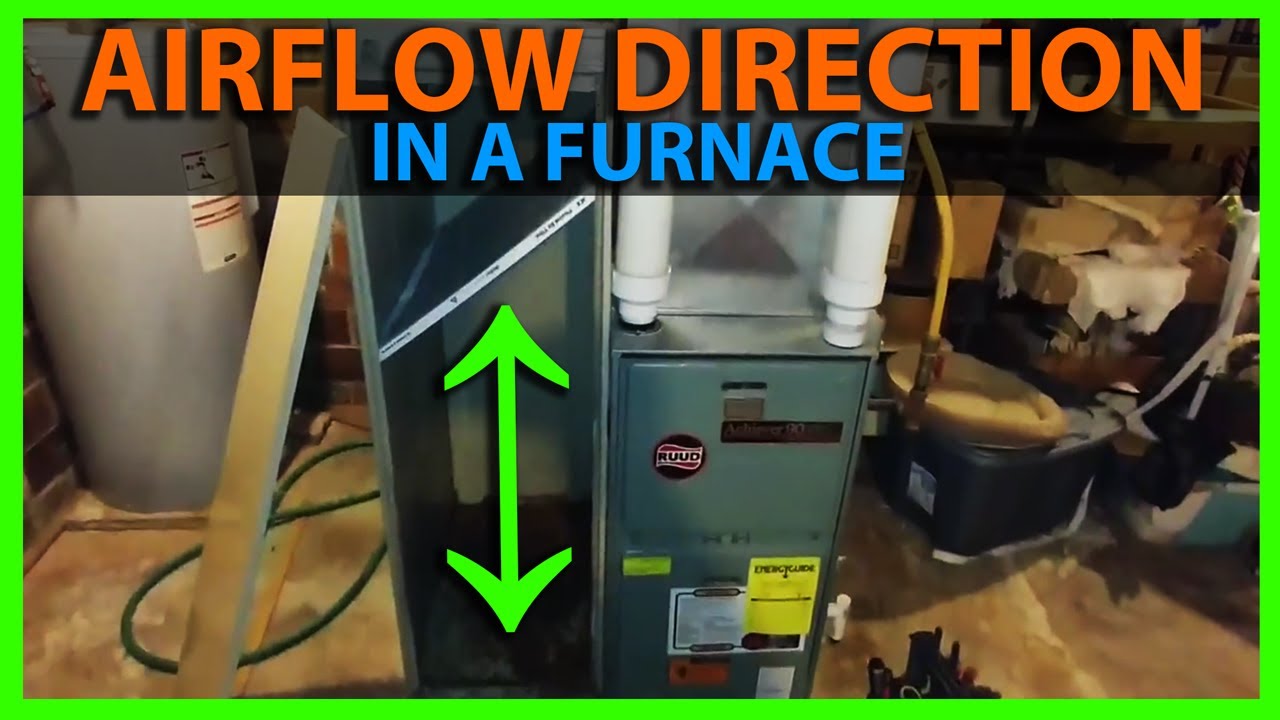
Pay close attention to any arrows or markings on the furnace itself. Manufacturers often include arrows indicating the intended airflow direction. These are invaluable clues.
Step 2: Inspecting and Replacing Your Air Filter
A clogged air filter is the #1 cause of airflow problems in most furnaces. It restricts airflow, forcing your system to work harder and potentially damaging components.
- Locate the air filter access panel. It's usually a small door or panel near the blower motor.
- Remove the old filter. Note the direction it was installed (there's usually an arrow on the filter itself indicating the airflow direction).
- Inspect the filter. Is it visibly dirty, clogged with dust, or matted? If so, it needs replacing.
- Replace the filter with a new one of the correct size and MERV rating. Ensure the arrow on the new filter points in the correct airflow direction (towards the furnace).
How often should you replace your air filter? Generally, every 1-3 months is recommended, but this depends on factors like the number of occupants, pets, and air quality in your area. Check your filter monthly and replace it as needed.
Step 3: Checking Airflow at the Vents
Now, let's check the airflow at your supply and return vents. You'll need a small piece of tissue paper or a lightweight plastic bag.
- Turn on your furnace. Set the thermostat to either heating or cooling mode, depending on the season.
- Test the supply vents. Hold the tissue paper near a supply vent (the vents that blow air into the room). The paper should be gently blown away from the vent, indicating airflow out.
- Test the return vents. Hold the tissue paper near a return vent (the vents that draw air back into the system). The paper should be gently pulled towards the vent, indicating airflow in.
What if there's no airflow, weak airflow, or airflow in the wrong direction? This could indicate several issues, including:
- Blocked vents: Furniture or rugs obstructing the vents.
- Closed vents: Vents that have been accidentally closed.
- Ductwork problems: Leaks, disconnections, or collapsed ducts.
- Blower motor issues: A malfunctioning or weak blower motor.
Step 4: Inspecting the Blower Motor
The blower motor is the heart of your furnace's airflow system. A failing blower motor can significantly reduce airflow or even stop it altogether.
- Turn off the power to your furnace at the breaker box. Safety first!
- Locate the blower motor compartment. Refer to your furnace's manual or look for a section with a visible fan inside.
- Remove the access panel. You may need a screwdriver.
- Visually inspect the blower motor. Look for any obvious signs of damage, such as loose wires, burnt components, or excessive dust buildup.
- Check the blower wheel. Try to gently spin the blower wheel by hand. It should spin freely without any resistance or unusual noises.
Important Note: Working with electrical components can be dangerous. If you're not comfortable performing these inspections, contact a qualified HVAC technician.
Step 5: Addressing Common DIY Fixes
Based on your observations, here are some simple DIY fixes you can try:
- Remove obstructions from vents. Clear any furniture, rugs, or other items blocking the supply or return vents.
- Open closed vents. Ensure all vents are fully open to allow for proper airflow.
- Seal minor ductwork leaks. Use aluminum foil tape to seal any small leaks you find in the ductwork.
- Clean the blower motor (carefully). Use a soft brush or vacuum cleaner with a brush attachment to remove dust buildup from the blower motor and surrounding area. Be extremely careful not to damage any components.
When to Call a Professional
While many airflow problems can be resolved with simple DIY fixes, there are situations where professional help is essential. Do not attempt to fix these issues yourself if you lack experience with HVAC systems.
Call a qualified HVAC technician if you encounter any of the following:
- Electrical problems: Sparks, burning smells, or any other signs of electrical malfunction.
- Gas leaks: If you smell gas, immediately evacuate your home and call your gas company and the fire department.
- Major ductwork damage: Collapsed ducts, significant leaks, or disconnected ductwork.
- Blower motor failure: If the blower motor is not running, making unusual noises, or showing signs of damage.
- Refrigerant leaks: If your system uses refrigerant and you suspect a leak, do not attempt to handle it yourself. Refrigerant is harmful and requires specialized equipment to handle safely.
- Persistent airflow problems: If you've tried the DIY fixes and the airflow issues persist, there may be a more complex underlying problem requiring professional diagnosis and repair.
- You're uncomfortable working with your furnace: If you're not confident in your ability to safely troubleshoot and fix the problem, it's always best to err on the side of caution and call a professional.
Preventative Maintenance: Keeping Your Airflow Optimal
The best way to avoid airflow problems is to implement a proactive preventative maintenance plan. Here are some key steps:
- Regularly replace your air filter. As mentioned earlier, this is the most important step.
- Schedule annual furnace maintenance. A professional HVAC technician can inspect and clean your furnace, identify potential problems early on, and ensure it's running efficiently.
- Keep vents clear of obstructions. Make sure furniture and rugs aren't blocking airflow.
- Consider duct cleaning. Over time, dust and debris can accumulate in your ductwork, restricting airflow. Professional duct cleaning can help improve air quality and system efficiency.
Conclusion: Empowering You to Breathe Easier
Understanding your furnace's airflow direction is a crucial step in maintaining a comfortable and efficient home. By following this troubleshooting guide, you can diagnose and potentially fix common airflow problems, saving you money and ensuring your system runs smoothly. Remember to prioritize safety and never hesitate to call a professional when needed. With a little knowledge and effort, you can take control of your home's climate and breathe easier knowing your HVAC system is working at its best.