What Is The Pressure In A Propane Tank
Is your home feeling chilly despite the furnace running, or is your stove refusing to ignite? A common culprit, especially if you rely on propane for heating or cooking, could be an issue with your propane tank's pressure. Understanding what the pressure should be and how to troubleshoot potential problems is key to maintaining a comfortable and safe home.
Understanding Propane Tank Pressure
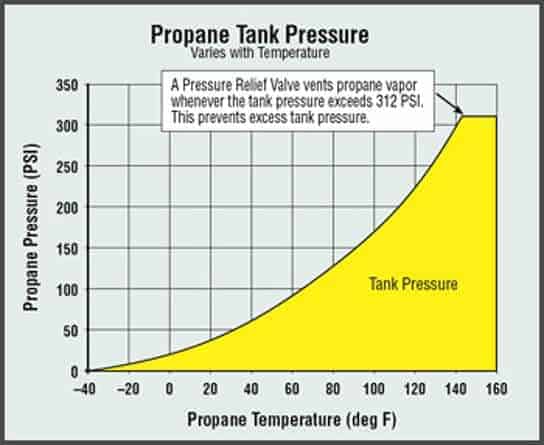
Propane tank pressure isn't a fixed number. It varies depending on the temperature of the propane inside the tank. The warmer the propane, the higher the pressure, and vice versa. This is because propane, in its liquid form, vaporizes more readily at higher temperatures, creating more gas and therefore, more pressure.
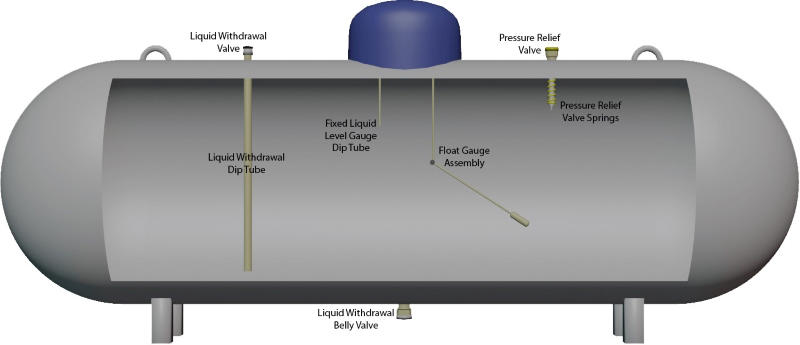
Ideal pressure for a propane tank is generally considered to be in the range of 100-200 PSI (pounds per square inch) at typical ambient temperatures (around 70°F). However, this can fluctuate significantly. A tank at near-freezing temperatures might only have around 30-40 PSI, while one baking in the sun could reach over 200 PSI.
It's important to note that these pressure readings are relevant after the propane regulator. The regulator's job is to reduce the high pressure inside the tank to a lower, more manageable pressure (usually around 11 inches of water column, or 0.4 PSI) that appliances can safely use. The following troubleshooting steps are primarily concerned with issues *before* the regulator.
Troubleshooting Low Propane Tank Pressure: A Step-by-Step Guide
If you suspect your propane appliances aren't working correctly due to low pressure, follow these steps to diagnose the problem. Safety is paramount when dealing with propane, so always exercise caution and follow these guidelines:
* No Smoking or Open Flames: Never smoke or use open flames near a propane tank. * Ventilation: Ensure the area around the tank is well-ventilated. * Smell of Gas: If you smell propane, immediately evacuate the area and call your propane supplier or the fire department.Step 1: The Obvious – Check the Propane Level
This might seem basic, but it's often overlooked. Is there enough propane in the tank? A nearly empty tank will struggle to maintain adequate pressure, especially in colder weather. Many tanks have a gauge that shows the fill level. If yours doesn't, you can often tell by gently tapping on the side of the tank. A hollow sound indicates an empty or near-empty section.
DIY Check (No Tools Required): Visually inspect the gauge. If no gauge is present, tap on the tank and listen for the sound difference between the empty space and filled space.
Action: If the tank is low, order a refill from your propane supplier immediately. Often, a simple refill will solve the issue.
Step 2: Inspect the Tank and Regulator for Damage
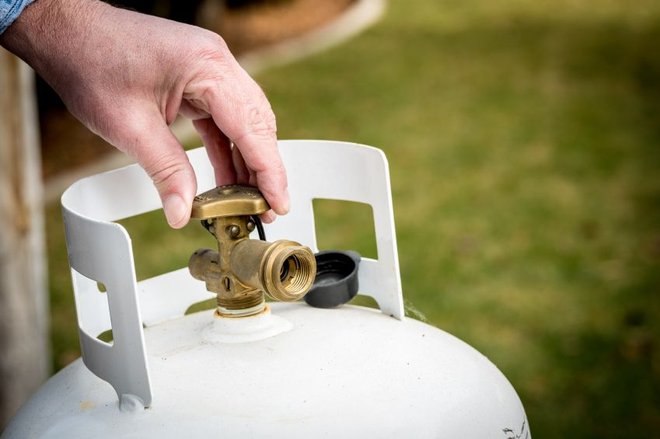
Carefully examine the tank itself for any signs of rust, dents, or other physical damage. Pay close attention to the regulator (the device connected to the tank that reduces the pressure). Look for cracks, leaks, or corrosion.
DIY Check (No Tools Required): Visually inspect the tank and regulator for any obvious signs of damage.
DIY Check (Requires Soapy Water): Mix a solution of soapy water (dish soap works well). Spray or brush the soapy water onto the regulator connections and the tank valve. If you see bubbles forming, this indicates a propane leak. Even small leaks can significantly reduce tank pressure and pose a safety hazard.
Action: If you find any signs of damage or a leak, DO NOT attempt to repair it yourself. Immediately contact your propane supplier for assistance. Leaks are serious and should only be handled by qualified professionals.
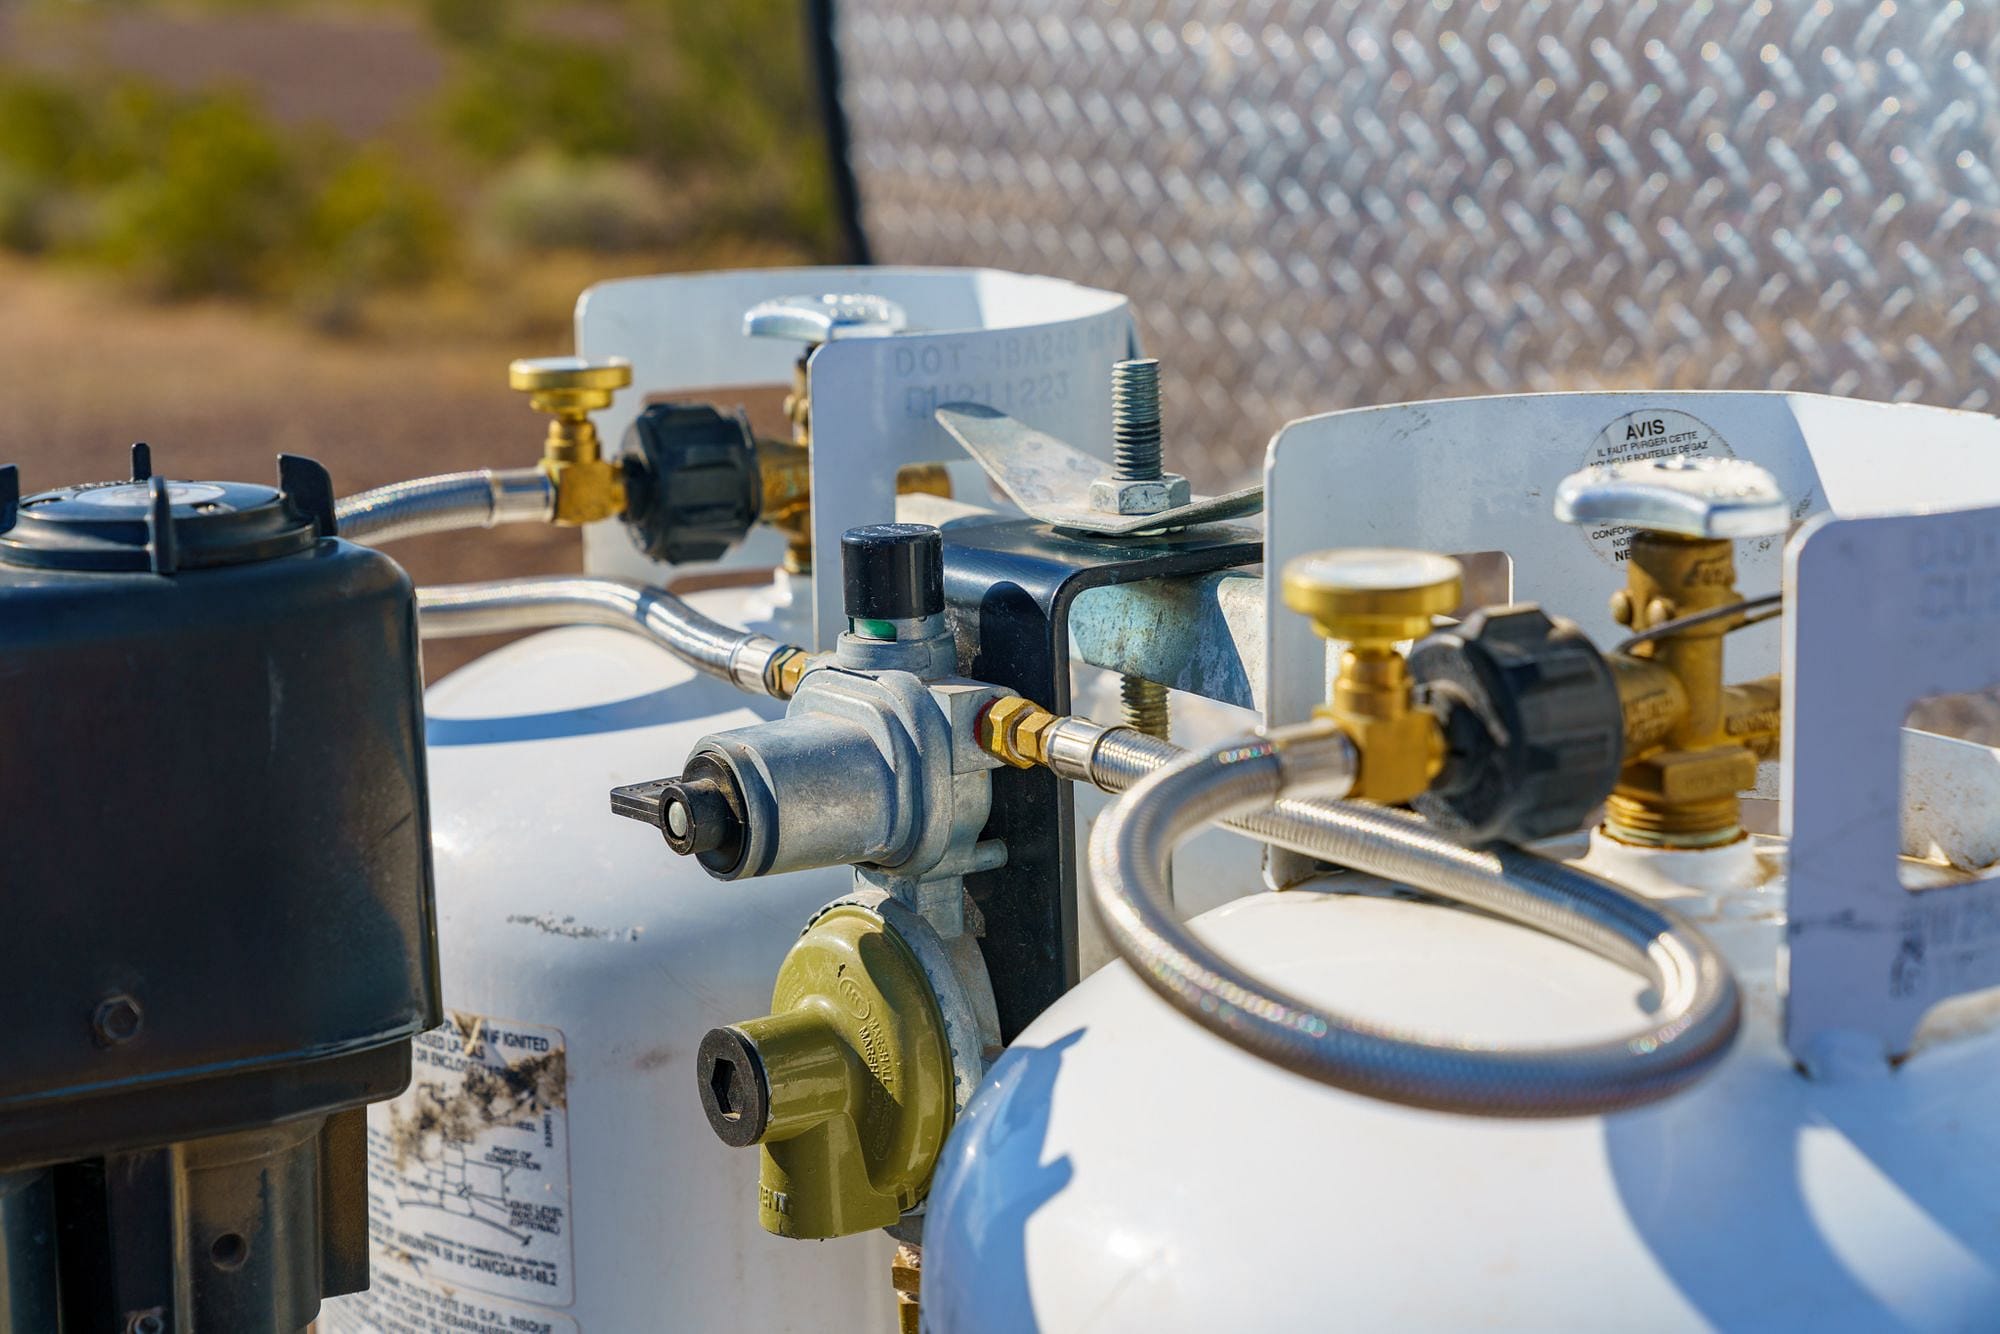
Step 3: Check for Blocked or Kinked Lines
The propane line running from the tank to your house or appliances could be blocked or kinked, restricting the flow of propane and leading to low pressure. Carefully inspect the entire length of the line for any bends or obstructions.
DIY Check (No Tools Required): Visually inspect the propane line for any kinks, bends, or obstructions.
Action: If you find a kink or bend, carefully try to straighten it out. Be gentle, as forcing the line could damage it. If the line is severely damaged or you're unable to straighten it, contact a professional for replacement.
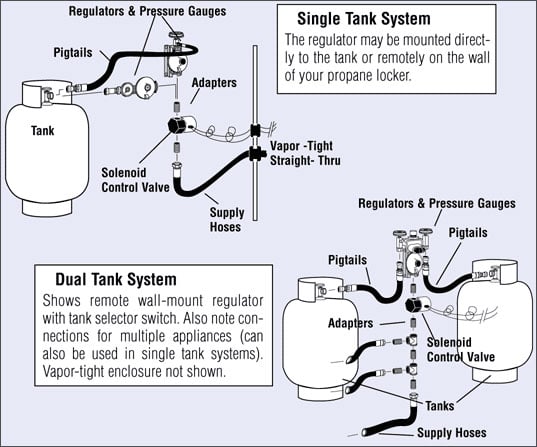
Step 4: Regulator Issues (Advanced - Proceed with Caution)
The regulator is a critical component in maintaining proper propane pressure. A malfunctioning regulator can either restrict the flow of propane (resulting in low pressure) or allow too much propane to flow (a dangerous situation). However, regulator issues are complex and often require specialized knowledge to diagnose and repair. Consider this section only if you are experienced with propane systems.
DIY Check (Requires Manometer - Use with Extreme Caution): To accurately measure the output pressure of the regulator, you'll need a manometer. This is a specialized gauge that measures low pressures (usually in inches of water column). Connect the manometer to the test port on your propane system (usually located near the regulator or at an appliance connection). Turn on an appliance that uses propane (like a stove burner) and observe the pressure reading on the manometer. It should be within the range specified by the manufacturer (typically 10-12 inches of water column). If the pressure is significantly outside this range, the regulator may be faulty.
Action: *If you are not comfortable working with propane systems or do not have a manometer, DO NOT attempt to adjust or repair the regulator yourself. Contact a qualified HVAC technician or propane supplier.* Regulators are delicate and attempting to adjust them without proper knowledge can be extremely dangerous.
DIY Action (If comfortable and knowledgeable): Some regulators have an adjustable screw or knob. If you suspect the regulator is set too low, you can *carefully* try to adjust it to increase the output pressure. Make *small* adjustments and monitor the pressure with a manometer. Always refer to the manufacturer's instructions for your specific regulator model. However, replacing a regulator should always be done by a professional.
Step 5: Temperature Considerations
As mentioned earlier, temperature plays a significant role in propane tank pressure. If it's extremely cold outside, the propane in the tank may not vaporize quickly enough to meet the demand of your appliances.
DIY Check (No Tools Required): Note the ambient temperature. If it is significantly below freezing, the propane may have difficulty vaporizing fast enough.
Action: * Increase Tank Exposure to Sunlight: If possible, position the tank in a location where it can receive direct sunlight. * Use a Tank Warmer (With Caution): There are specialized electric tank warmers available that can help maintain the propane temperature. *Only use tank warmers that are specifically designed for propane tanks and follow the manufacturer's instructions carefully.* Never use makeshift heating devices like heat lamps or space heaters, as these can be extremely dangerous. * Delay High Demand: If possible, avoid using multiple propane appliances simultaneously during extremely cold weather. Spreading out the demand can help the tank maintain adequate pressure. * Consider Tank Size: In extremely cold climates, you might need a larger propane tank to ensure an adequate supply of propane vapor.
When to Call a Professional
While some troubleshooting steps can be safely performed by homeowners, certain situations require the expertise of a qualified HVAC technician or propane supplier. Do not hesitate to call a professional if:
* You smell propane gas. * You suspect a leak in the tank or regulator. * You are uncomfortable working with propane systems. * You are unable to diagnose the problem yourself. * You need to replace a regulator. * You suspect a problem with the propane line inside your home. * You are experiencing persistent low pressure issues despite taking the above steps. * The propane tank is damaged or corroded. * You are not sure if what you are doing is safe.Attempting to fix complex propane system problems without proper training and equipment can be dangerous and could lead to serious accidents. It's always better to err on the side of caution and call a professional for assistance.
Maintaining a Healthy Propane System
Preventative maintenance is key to ensuring a reliable propane supply and avoiding costly repairs. Here are some tips for maintaining your propane system:
* Regular Inspections: Have your propane system inspected by a qualified technician at least once a year. * Tank Level Monitoring: Regularly check the propane level in your tank and schedule refills before it gets too low. * Clearance Around the Tank: Keep the area around the tank clear of debris and vegetation. * Protect from Damage: Protect the tank from physical damage, such as being hit by vehicles or lawnmowers. * Professional Repairs: Always have repairs and maintenance performed by qualified professionals.By understanding the basics of propane tank pressure and following these troubleshooting steps, you can keep your propane system running smoothly and ensure a safe and comfortable home. Remember, safety should always be your top priority when dealing with propane.