What Is Vrf System In Hvac
Variable Refrigerant Flow (VRF) systems are becoming increasingly popular in homes due to their energy efficiency and ability to provide customized heating and cooling to different zones. However, like any HVAC system, VRF systems can sometimes experience problems. One common issue homeowners face is uneven heating or cooling throughout the house. You might find one room is perfectly comfortable while another is noticeably too hot or too cold. This can be frustrating and uncomfortable, but often the cause is something you can troubleshoot yourself before calling a professional.
Diagnosing Uneven Heating or Cooling in Your VRF System
Before panicking, let's systematically diagnose the problem. This step-by-step guide will help you identify the most likely cause and potentially fix it yourself. Remember to always prioritize your safety and turn off the system at the breaker if you're unsure about anything.
Step 1: Check the Thermostat Settings
This might sound obvious, but it's the most common culprit! Ensure that the thermostat is set to the correct mode (heating or cooling) and temperature. Also, verify that the thermostat isn't in "fan only" mode, which would circulate air without actually heating or cooling it. Check the individual thermostats for each zone. A single incorrectly set thermostat can cause problems.
DIY Fix: Correct the thermostat settings to the desired mode and temperature for each zone. Wait a few hours to see if the system adjusts accordingly.
Step 2: Inspect Air Filters
Dirty air filters restrict airflow, which can significantly impact the performance of your VRF system. Restricted airflow reduces the amount of conditioned air reaching certain zones, leading to uneven temperatures. This is a simple and often overlooked cause of heating and cooling problems.
DIY Fix: Locate the air filters in your VRF system. These are typically found near the indoor units (fan coil units) or in a central air handler if your system has one. Remove the filters and inspect them. If they are dirty, either clean them (if they are washable) or replace them with new filters of the correct size and type. Consult your system's manual for the recommended filter type and replacement schedule.
Step 3: Examine Air Vents and Registers
Make sure that all air vents and registers are open and unobstructed in the affected zones. Furniture, rugs, or even curtains can block airflow, preventing conditioned air from reaching the room effectively. Closed or partially closed vents can also redirect airflow unevenly.
DIY Fix: Walk through each room and ensure that all vents and registers are fully open and free from obstructions. Clear any furniture or other items that might be blocking airflow. You can also try adjusting the direction of the vents to better distribute air within the room.
Step 4: Check for Air Leaks
Air leaks around windows, doors, and other openings can allow conditioned air to escape, making it difficult to maintain a consistent temperature in the room. Drafts can also create localized cold or hot spots.
DIY Fix: Inspect windows and doors for gaps or cracks. Use weather stripping or caulk to seal any leaks you find. You can also check around electrical outlets and light fixtures for air leaks and seal them with caulk or foam sealant. For larger gaps, consider using expanding foam insulation. * How to check: On a windy day, hold a lit candle or incense stick near windows, doors, and other potential leak points. If the flame flickers or the smoke moves erratically, it indicates an air leak.
Step 5: Inspect the Outdoor Unit (Condenser)
While less common, problems with the outdoor unit can affect the entire system's performance. Check the unit for obstructions like leaves, branches, or snow that might be restricting airflow. Also, listen for any unusual noises, such as banging, grinding, or hissing sounds.
DIY Fix: Carefully remove any debris that is blocking the outdoor unit. Make sure that the area around the unit is clear and that there is adequate space for airflow. Do not attempt to open or repair the outdoor unit yourself. This contains high-voltage components and refrigerant, which can be dangerous. If you hear unusual noises or suspect a mechanical problem, contact a qualified HVAC technician immediately.
Step 6: Check the Refrigerant Lines
Carefully inspect the refrigerant lines running between the indoor and outdoor units. Look for any signs of damage, such as dents, kinks, or leaks. Leaks are often indicated by oily residue or frost accumulation on the lines.
DIY Fix: Unfortunately, there isn't a DIY fix for refrigerant line problems. Refrigerant handling requires specialized equipment and training due to environmental regulations and safety concerns. If you suspect a refrigerant leak or damage to the lines, contact a qualified HVAC technician immediately.
When to Call a Professional
While many simple problems can be resolved with the steps outlined above, there are certain situations where you should always call a qualified HVAC technician specializing in VRF systems. This will not only save you time and money, but could also prevent potential damages.
- Refrigerant Leaks: As mentioned earlier, refrigerant handling is a specialized task. If you suspect a leak, it's crucial to call a professional to diagnose and repair the leak and recharge the system with refrigerant.
- Compressor Problems: The compressor is the heart of the VRF system. If you hear unusual noises coming from the outdoor unit, it could indicate a problem with the compressor. Repairing or replacing a compressor is a complex and expensive job that requires specialized knowledge and equipment.
- Electrical Issues: VRF systems are complex electrical systems. If you suspect an electrical problem, such as a tripped breaker or a burning smell, immediately turn off the system at the breaker and call a qualified electrician or HVAC technician. Do not attempt to diagnose or repair electrical problems yourself.
- Control System Malfunctions: VRF systems rely on sophisticated electronic control systems to regulate temperature and airflow. If the control system is malfunctioning, it can lead to a variety of problems, including uneven heating or cooling, system shutdowns, and error codes. Diagnosing and repairing control system problems requires specialized training and diagnostic tools.
- Zoning Issues Persist: If you've tried all the DIY fixes and the problem persists, it could indicate a more complex issue with the zoning system, such as a faulty zone damper or a problem with the control board. A qualified HVAC technician can diagnose and repair these issues.
- Any Issue You're Unsure About: When in doubt, it's always best to err on the side of caution and call a professional. Tampering with a VRF system without the proper knowledge and training can lead to further damage and costly repairs.
Preventative Maintenance for Your VRF System
The best way to avoid problems with your VRF system is to perform regular preventative maintenance. This includes:
- Changing or cleaning air filters regularly (at least every 1-3 months).
- Inspecting and cleaning the outdoor unit annually.
- Scheduling annual professional maintenance with a qualified HVAC technician.
A professional maintenance visit typically includes:
- Inspecting and cleaning the indoor and outdoor coils.
- Checking refrigerant levels.
- Inspecting electrical connections.
- Testing the system's performance.
- Calibrating the thermostats
By following these preventative maintenance steps, you can help ensure that your VRF system operates efficiently and reliably for years to come.
Understanding VRF Systems
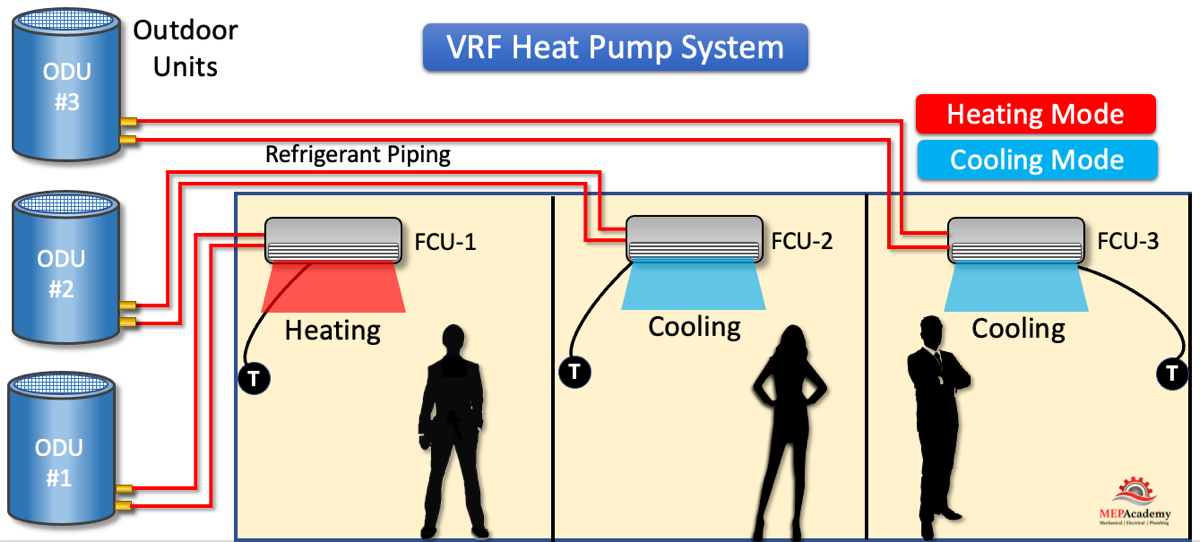
VRF systems work by circulating refrigerant to multiple indoor units, allowing each unit to provide customized heating or cooling to its designated zone. This makes them more energy-efficient than traditional HVAC systems, which often heat or cool the entire house even when only a few rooms are occupied. Understanding how your VRF system works can help you better troubleshoot problems and maintain it properly.
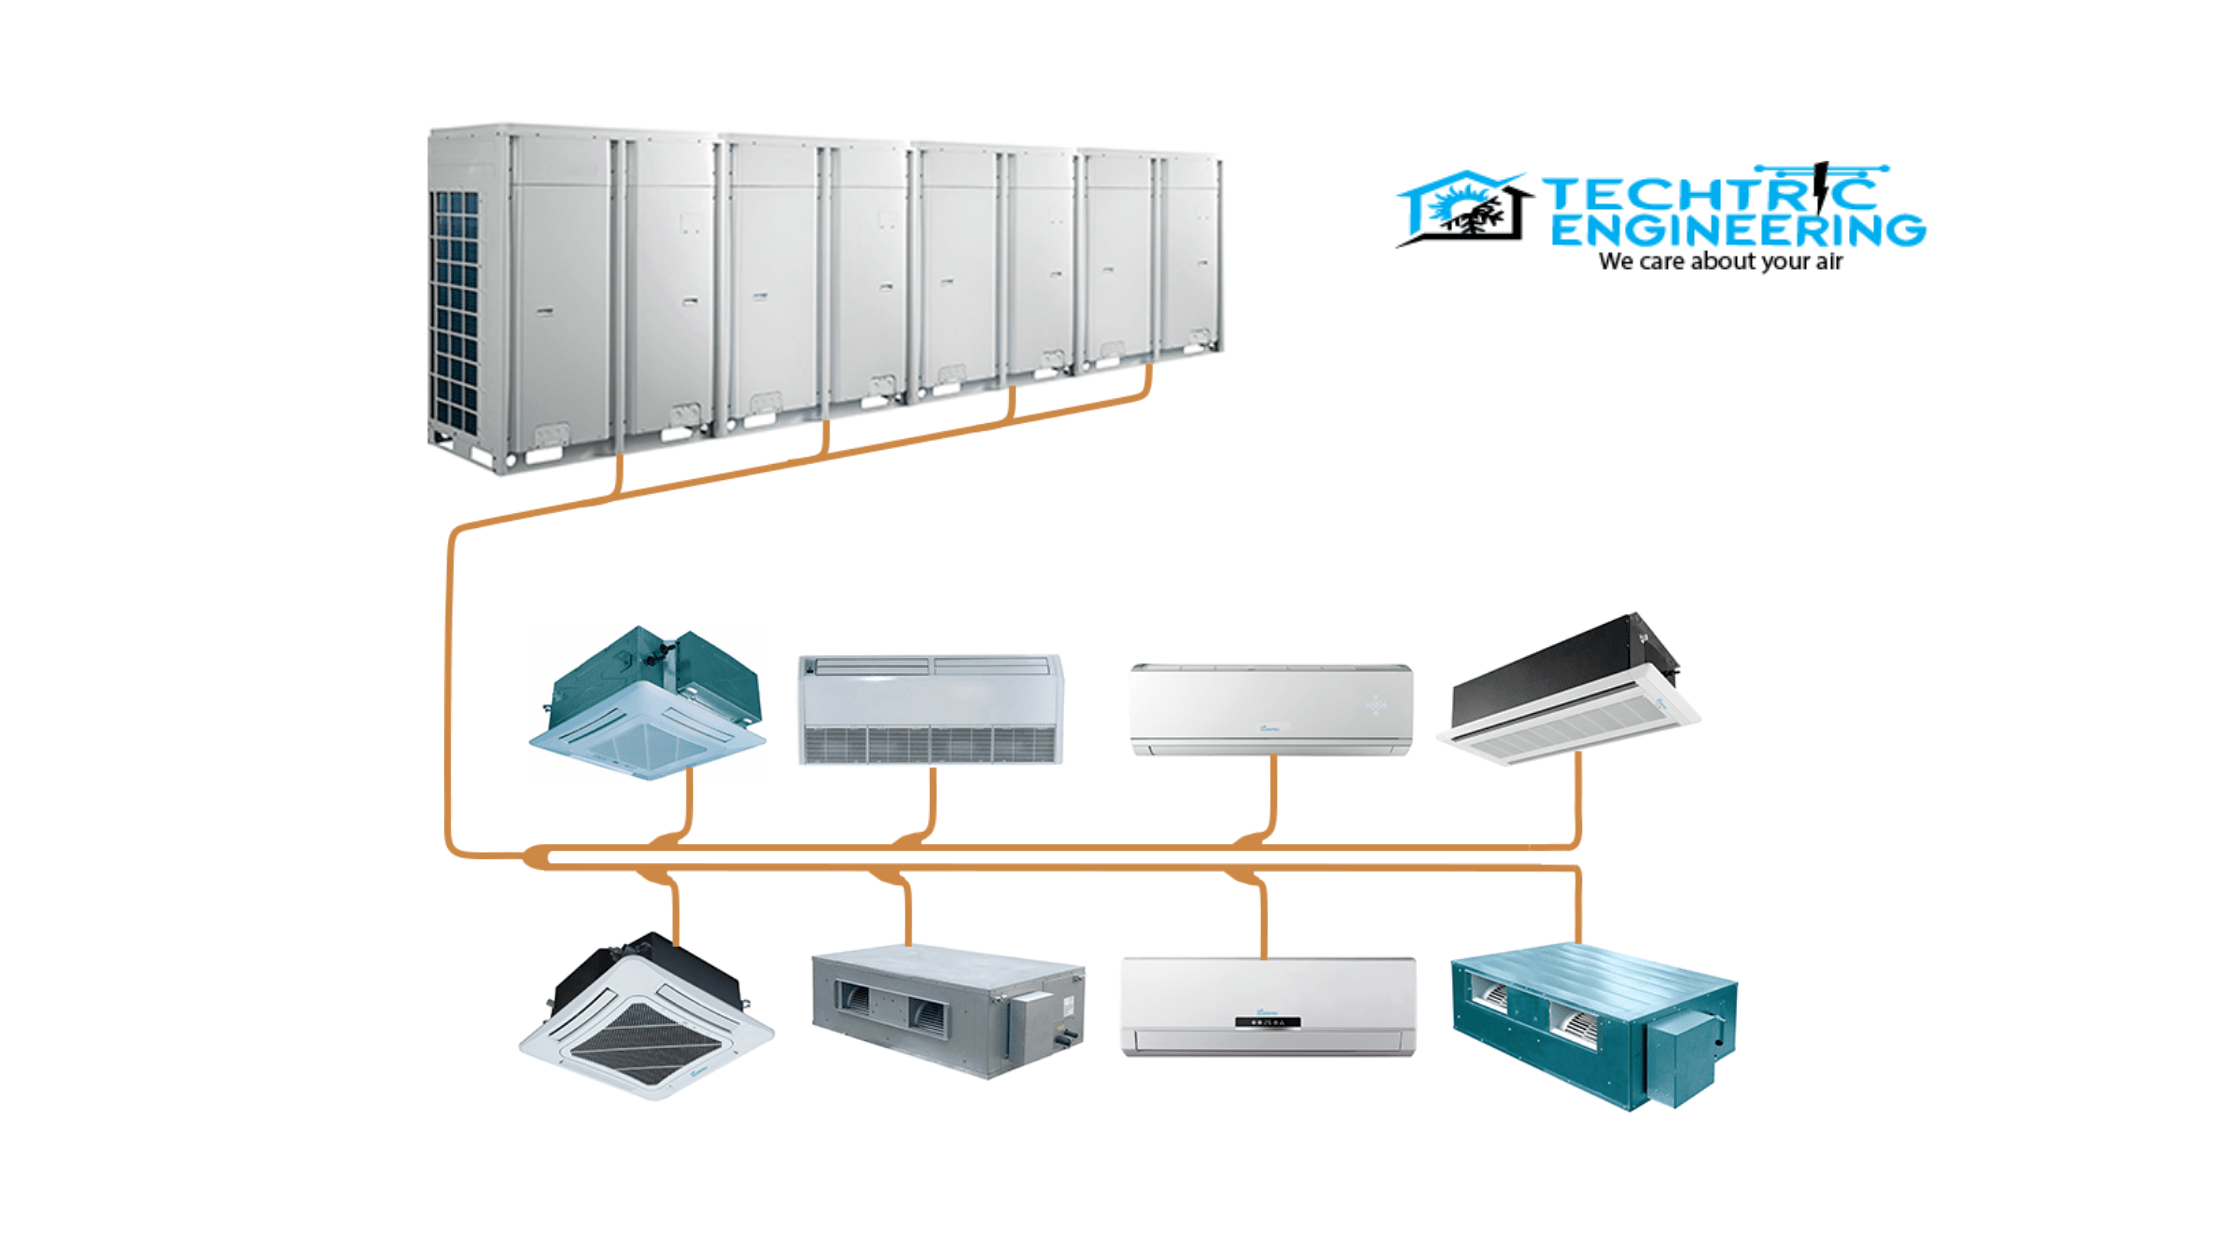
Key Components of a VRF System:
- Outdoor Unit (Condenser): This unit contains the compressor and condenser coil, which rejects heat from the refrigerant in cooling mode and absorbs heat in heating mode.
- Indoor Units (Fan Coil Units): These units are located in each zone and contain the evaporator coil (in cooling mode) or condenser coil (in heating mode), as well as a fan that circulates air over the coil.
- Refrigerant Lines: These lines connect the indoor and outdoor units and carry refrigerant between them.
- Control System: This system manages the flow of refrigerant to each indoor unit based on the thermostat settings in each zone.
By taking a proactive approach to troubleshooting and maintenance, you can keep your VRF system running smoothly and efficiently, ensuring a comfortable and energy-saving home environment.