What Should Inside Humidity Be In Winter
One of the most common winter woes homeowners face isn't necessarily a broken furnace, but rather the uncomfortable and sometimes damaging effects of improper indoor humidity. We're talking about that frustrating cycle of chapped lips, dry skin, static shocks, and even condensation on your windows. This isn't just uncomfortable; it can also damage your home.
Before you resign yourself to another season of discomfort, let's break down how to diagnose and address your winter humidity issues. We'll provide a methodical approach, including simple DIY fixes and guidance on when to call in the pros.
Diagnosing Your Winter Humidity Problem
The first step is identifying whether you actually have a humidity problem. Here's how to approach the diagnosis systematically:
Step 1: Observe the Symptoms
Take a walk through your home and look for visual clues and be aware of how you feel. Here are some telltale signs of overly dry or overly humid conditions:
Signs of Low Humidity:
- Dry Skin and Hair: Feeling itchy, flaky skin, or having brittle hair that's prone to static.
- Static Electricity: Experiencing frequent static shocks when touching metal objects or clothing.
- Cracked Wood: Noticing cracks in wooden furniture, floors, or trim.
- Aggravated Allergies or Asthma: Dry air can irritate nasal passages and worsen respiratory conditions.
Signs of High Humidity:
- Condensation on Windows: Water droplets forming on the inside of your windows, especially in corners.
- Mold or Mildew Growth: Visible mold or mildew on walls, ceilings, or in bathrooms.
- Musty Odors: A persistent musty smell, especially in damp areas like basements.
Checking Without Tools: All of these observations can be made without needing any tools. Simply use your eyes and nose!
Step 2: Measure Your Indoor Humidity
Visual cues are helpful, but the most reliable way to determine your indoor humidity is by using a hygrometer. A hygrometer is a device that measures relative humidity.
Where to Get a Hygrometer: Hygrometers are readily available at most hardware stores, home improvement centers, and online retailers. They range in price from inexpensive digital models to more sophisticated versions. Even some smart thermostats now incorporate hygrometer functions.
How to Use a Hygrometer: Place the hygrometer in a central location in your home, away from direct sunlight or drafts. Give it a few hours to stabilize and provide an accurate reading.
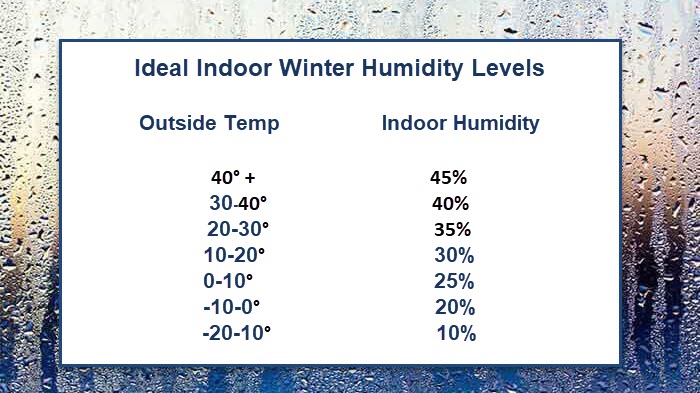
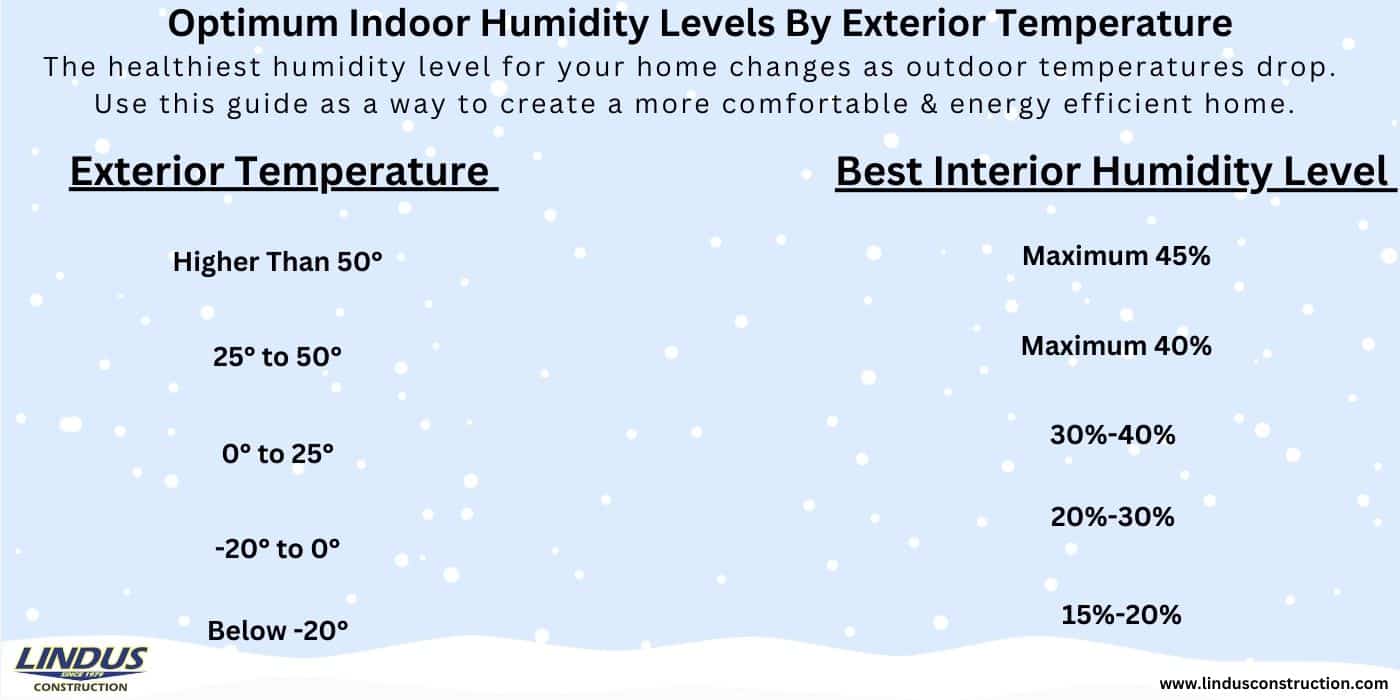
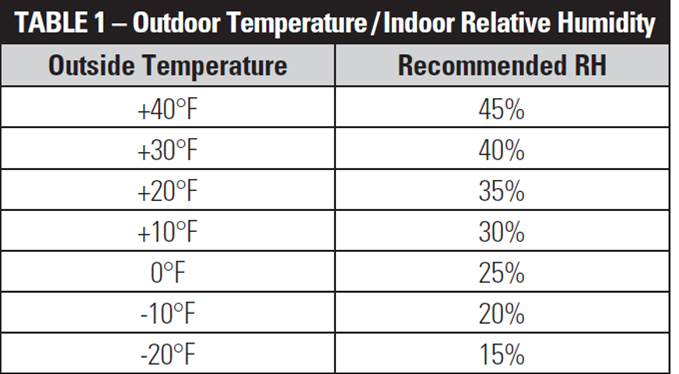
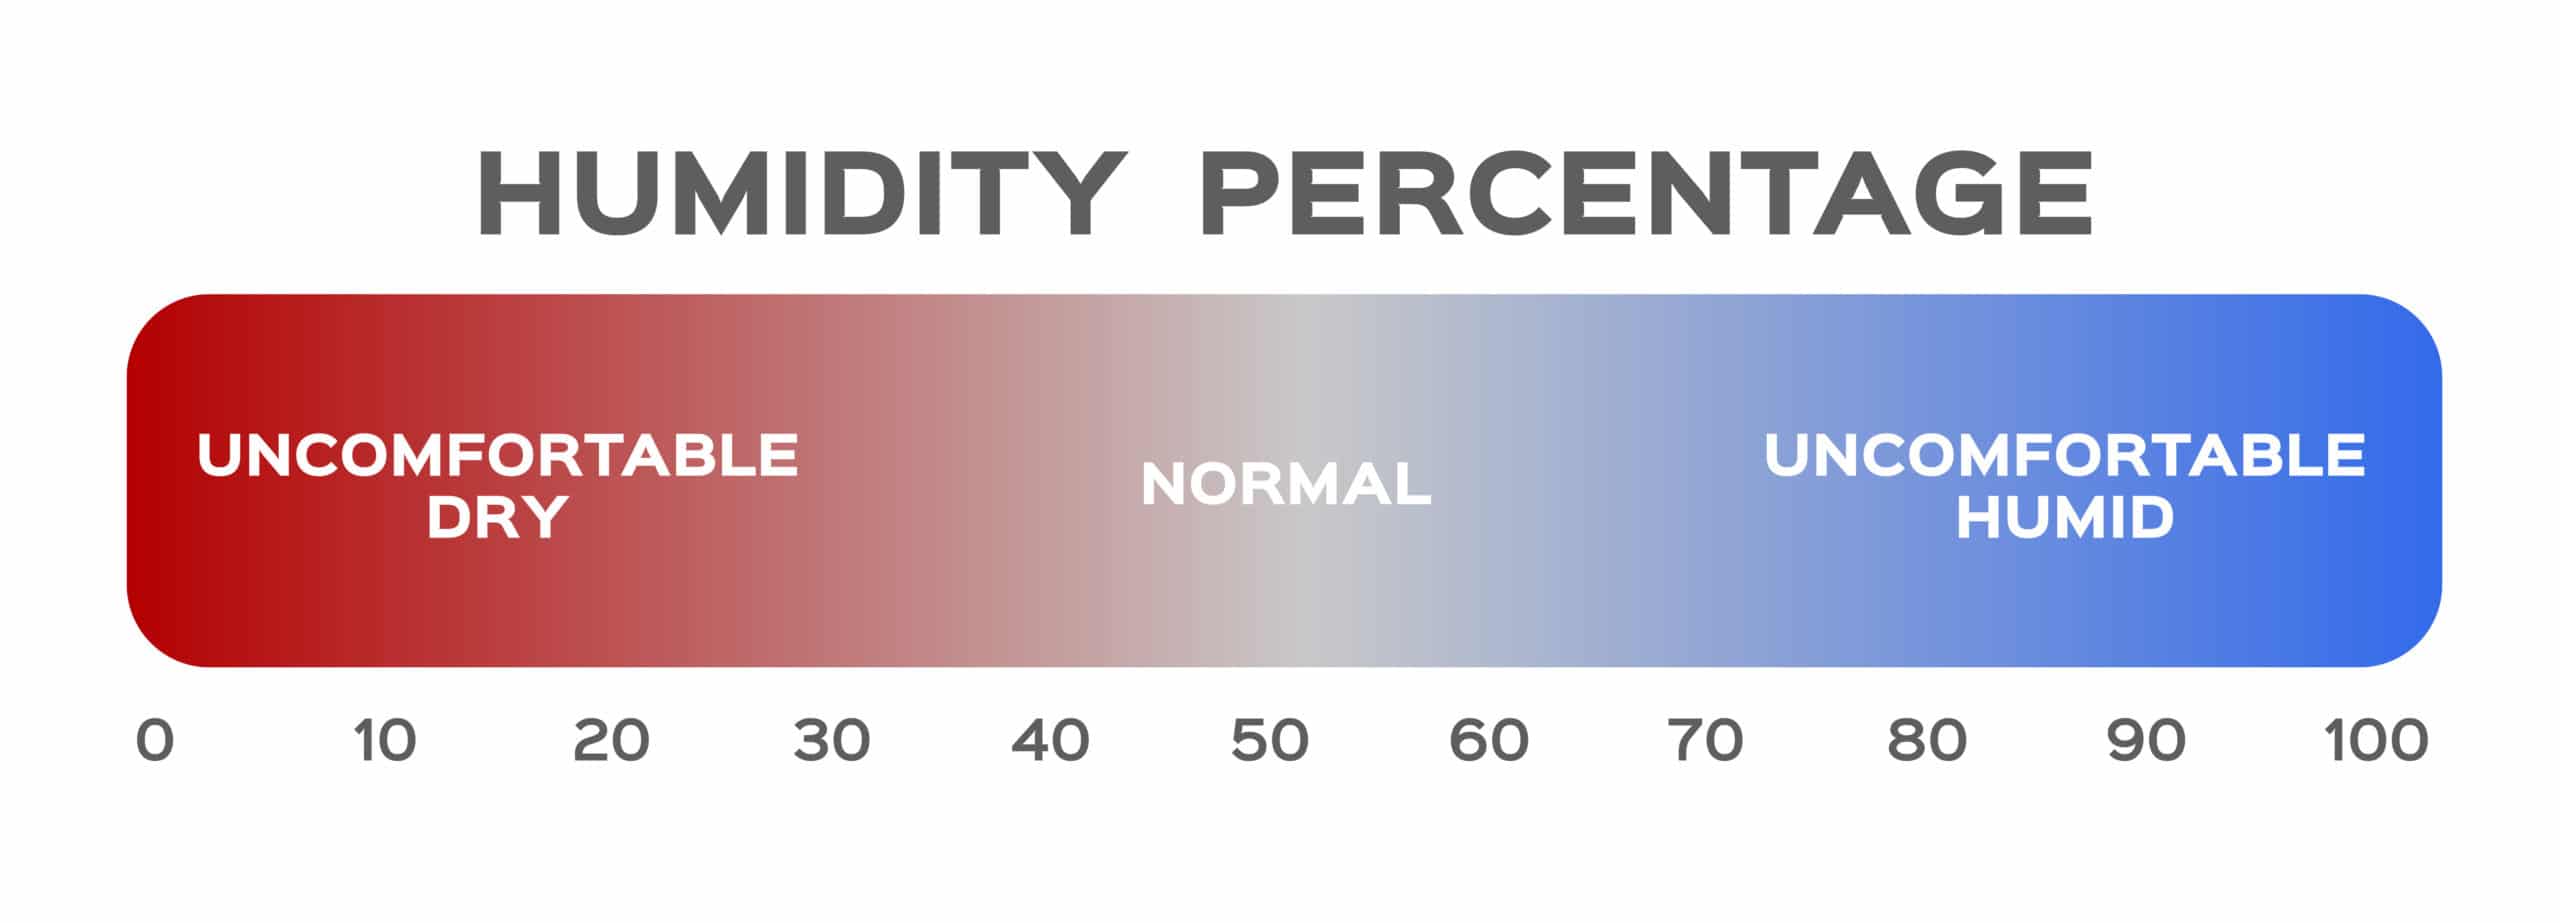
Ideal Winter Humidity Levels: In the winter, the ideal indoor humidity level is between 30% and 50%. Aiming for the higher end of this range (40-50%) is often more comfortable.
What the Readings Mean:
- Below 30%: Your air is too dry.
- Above 50%: Your air is too humid.
Checking With Basic Equipment: You only need a hygrometer to measure the humidity. No special skills are required, simply placement and reading.
Step 3: Identify Potential Causes
Once you know your humidity levels, it's time to investigate the possible causes. Here's a breakdown of common culprits for low and high humidity during winter:
Causes of Low Humidity:
- Heating Systems: Forced-air heating systems (furnaces) naturally dry out the air as they heat it. The hotter the air, the more moisture it can hold, leading to a relative decrease in humidity.
- Air Leaks: Drafty windows, doors, and poorly insulated areas allow dry outdoor air to infiltrate your home, further lowering humidity levels.
- Lack of Humidification: If your home doesn't have a humidifier (whole-house or portable), it's likely to become very dry during the heating season.
Causes of High Humidity:
- Poor Ventilation: Lack of proper ventilation traps moisture inside, leading to increased humidity levels. This is especially common in kitchens, bathrooms, and laundry rooms.
- Cooking and Showering: These activities release significant amounts of moisture into the air.
- Leaks: Undetected leaks in plumbing can introduce excess moisture.
- Indoor Plants: While beneficial, a large number of indoor plants can contribute to increased humidity.
- Basement Moisture: Damp basements are a common source of excess humidity in homes.
DIY Solutions for Winter Humidity Problems
Now that you've diagnosed the issue and identified potential causes, let's explore some DIY solutions you can try:
Addressing Low Humidity
1. Use a Humidifier:
This is the most direct and effective way to combat low humidity. There are two main types:
- Portable Humidifiers: These are great for humidifying individual rooms. Choose the right size for the space you're trying to humidify. Be sure to clean them regularly to prevent mold growth.
- Whole-House Humidifiers: These are integrated into your HVAC system and humidify the entire home. While more expensive to install, they offer consistent humidity levels throughout the house. This option usually requires professional installation.
2. Seal Air Leaks:
Reducing drafts will prevent dry outdoor air from entering your home.
- Caulk and Weatherstrip: Seal gaps around windows and doors with caulk and weatherstripping. This is a relatively inexpensive and easy DIY project.
- Seal Outlets and Switch Plates: Use foam gaskets behind outlet and switch plates on exterior walls to prevent air leaks.
- Add Insulation: Insulating your attic, walls, and floors will help reduce heat loss and drafts. This can be a larger project but offers significant energy savings and improved comfort.
3. Adjust Your Thermostat:
While you don't want to freeze, lowering your thermostat a few degrees can help reduce the drying effect of your heating system. Even small reductions can help.
4. Increase Indoor Plants (With Caution):
While too many can increase humidity too much, adding a few indoor plants can help add moisture to the air through transpiration. Choose plants that are known to be effective at humidifying, such as snake plants, spider plants, and peace lilies.
Addressing High Humidity
1. Improve Ventilation:
Proper ventilation is crucial for removing excess moisture.
- Use Exhaust Fans: Run exhaust fans in bathrooms and kitchens while showering or cooking to vent moisture outside. Make sure the fans are actually venting to the outside, not just into the attic.
- Open Windows (Briefly): On drier days, open windows for a short period to allow fresh air to circulate and remove excess moisture.
2. Control Moisture Sources:
Identify and address sources of excess moisture.
- Cover Pots When Cooking: Covering pots while cooking reduces the amount of moisture released into the air.
- Take Shorter Showers: Reduce the length and temperature of showers to minimize moisture.
- Dry Clothes Outdoors: If possible, dry clothes outdoors instead of using a clothes dryer, which can release a lot of moisture into the air.
- Check for Leaks: Inspect plumbing fixtures and pipes for any leaks and repair them promptly.
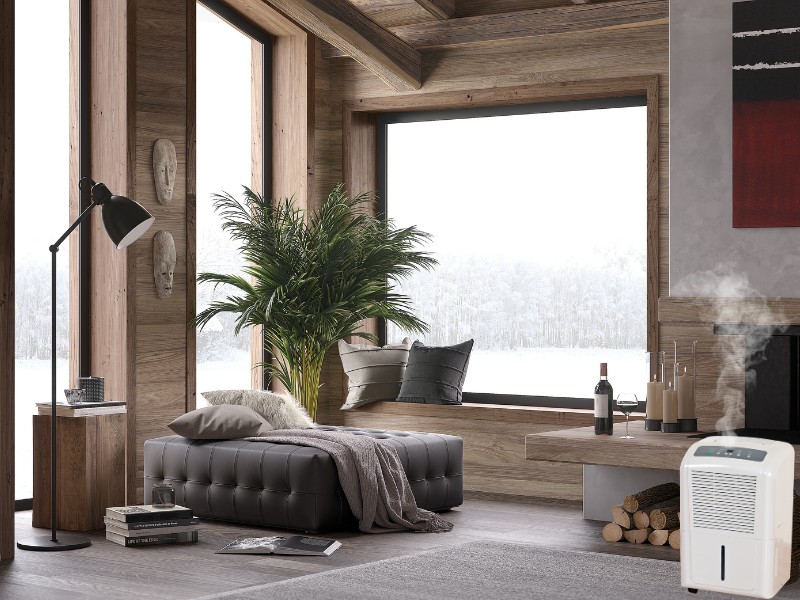
3. Use a Dehumidifier:
A dehumidifier removes excess moisture from the air.
- Choose the Right Size: Select a dehumidifier with the appropriate capacity for the size of the space you're trying to dehumidify.
- Empty Regularly: Empty the dehumidifier's water reservoir regularly to ensure it operates efficiently.
4. Improve Air Circulation:
Stagnant air can trap moisture, so improving air circulation can help reduce humidity levels.
- Use Fans: Use ceiling fans or portable fans to circulate air throughout your home.
- Ensure Air Vents are Open: Make sure that air vents are not blocked by furniture or other obstructions.
When to Call a Professional
While many humidity issues can be resolved with DIY solutions, some situations require professional assistance. Here are some signs that it's time to call an HVAC technician:
- Persistent High Humidity: If you've tried the DIY solutions above and your humidity levels remain consistently high, there may be a more serious underlying issue, such as a hidden leak or a problem with your HVAC system.
- Mold or Mildew Growth: If you notice mold or mildew growth, it's important to address it promptly. A professional can identify the source of the moisture and provide effective mold remediation services.
- HVAC System Issues: If you suspect that your HVAC system is contributing to your humidity problems (e.g., a malfunctioning humidifier or dehumidifier), it's best to have it inspected by a qualified technician.
- Complex Repairs: Any repairs to your HVAC system should be performed by a licensed professional. Attempting to repair these systems yourself can be dangerous and may void your warranty.
- Suspect Issues: If you suspect a plumbing leak is the root cause, contacting a plumber is the best course of action.
Things that require professional attention and/or tools: Issues with the HVAC system itself (furnace, AC, whole-house humidifier/dehumidifier), diagnosing and repairing plumbing leaks behind walls, large-scale mold remediation.
Staying Comfortable All Winter Long
Maintaining the right indoor humidity during winter is crucial for your comfort and the health of your home. By following these steps, you can diagnose your humidity problems, implement DIY solutions, and know when to seek professional help. With a little effort, you can create a comfortable and healthy indoor environment all winter long.
Remember, paying attention to the signs, using a hygrometer for accurate readings, and implementing appropriate solutions will help you avoid the discomfort and potential damage caused by improper humidity levels. Stay proactive, and enjoy a comfortable and healthy winter season!