Where Does The Thermocouple Go
Understanding where to place a thermocouple is crucial for accurate temperature readings. Whether you're monitoring the temperature of a furnace, a kiln, a food processing system, or even a science experiment, proper thermocouple placement directly impacts the reliability of your data and the effectiveness of your control systems. This guide will provide you with a comprehensive understanding of thermocouple placement considerations.
What is a Thermocouple? A Quick Refresher
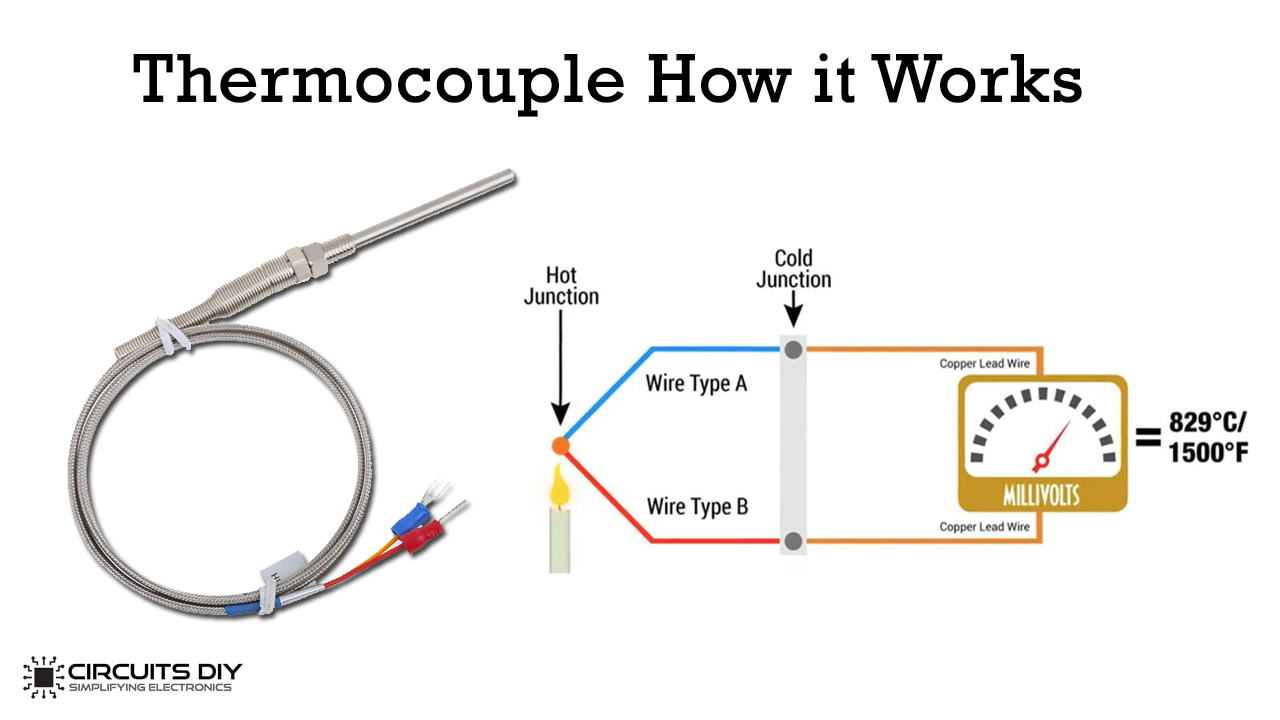
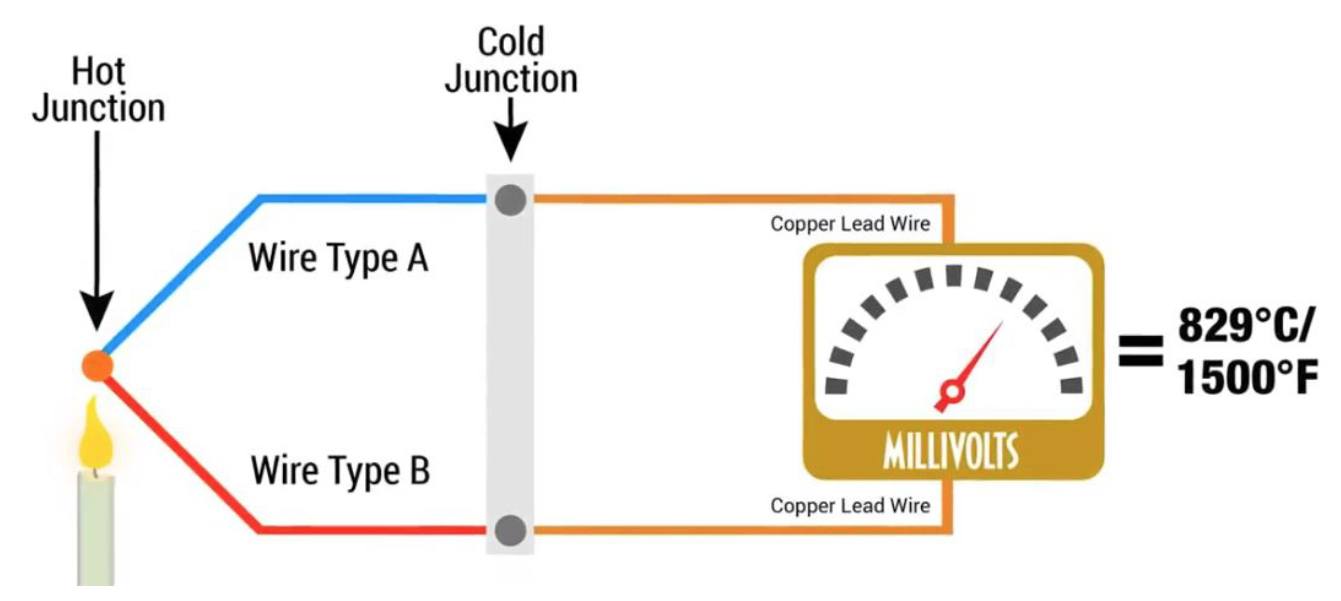
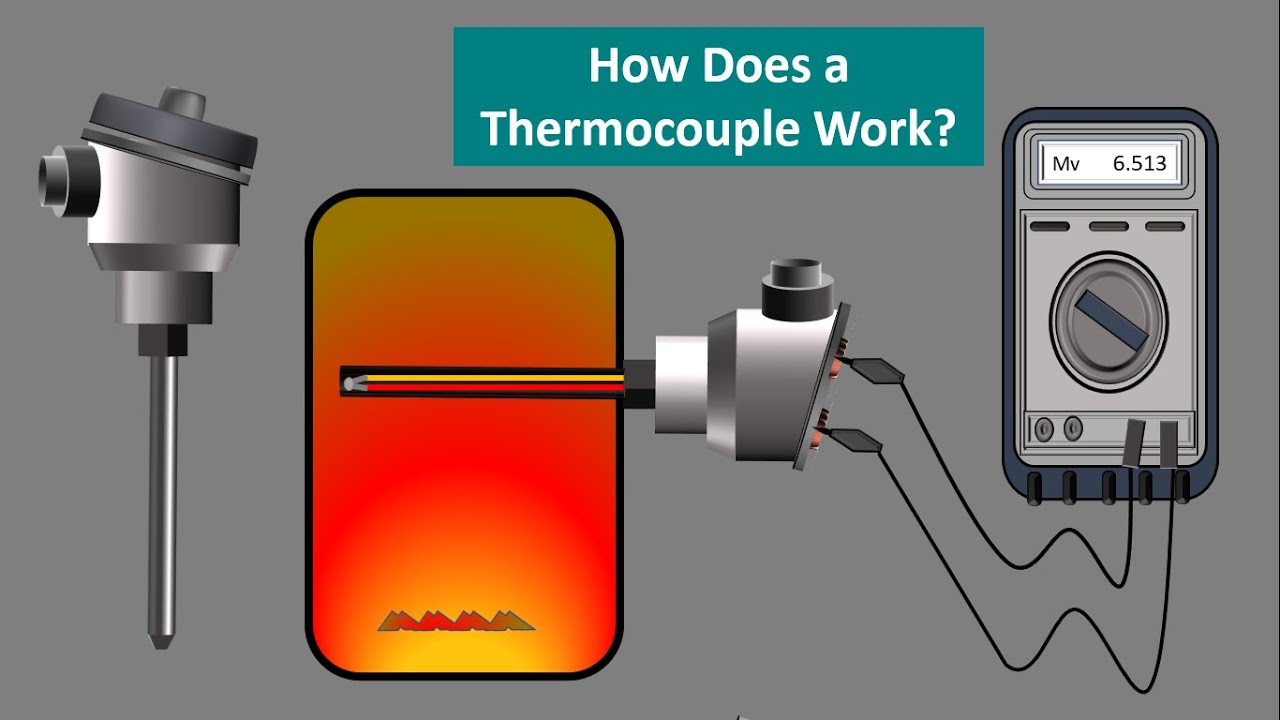
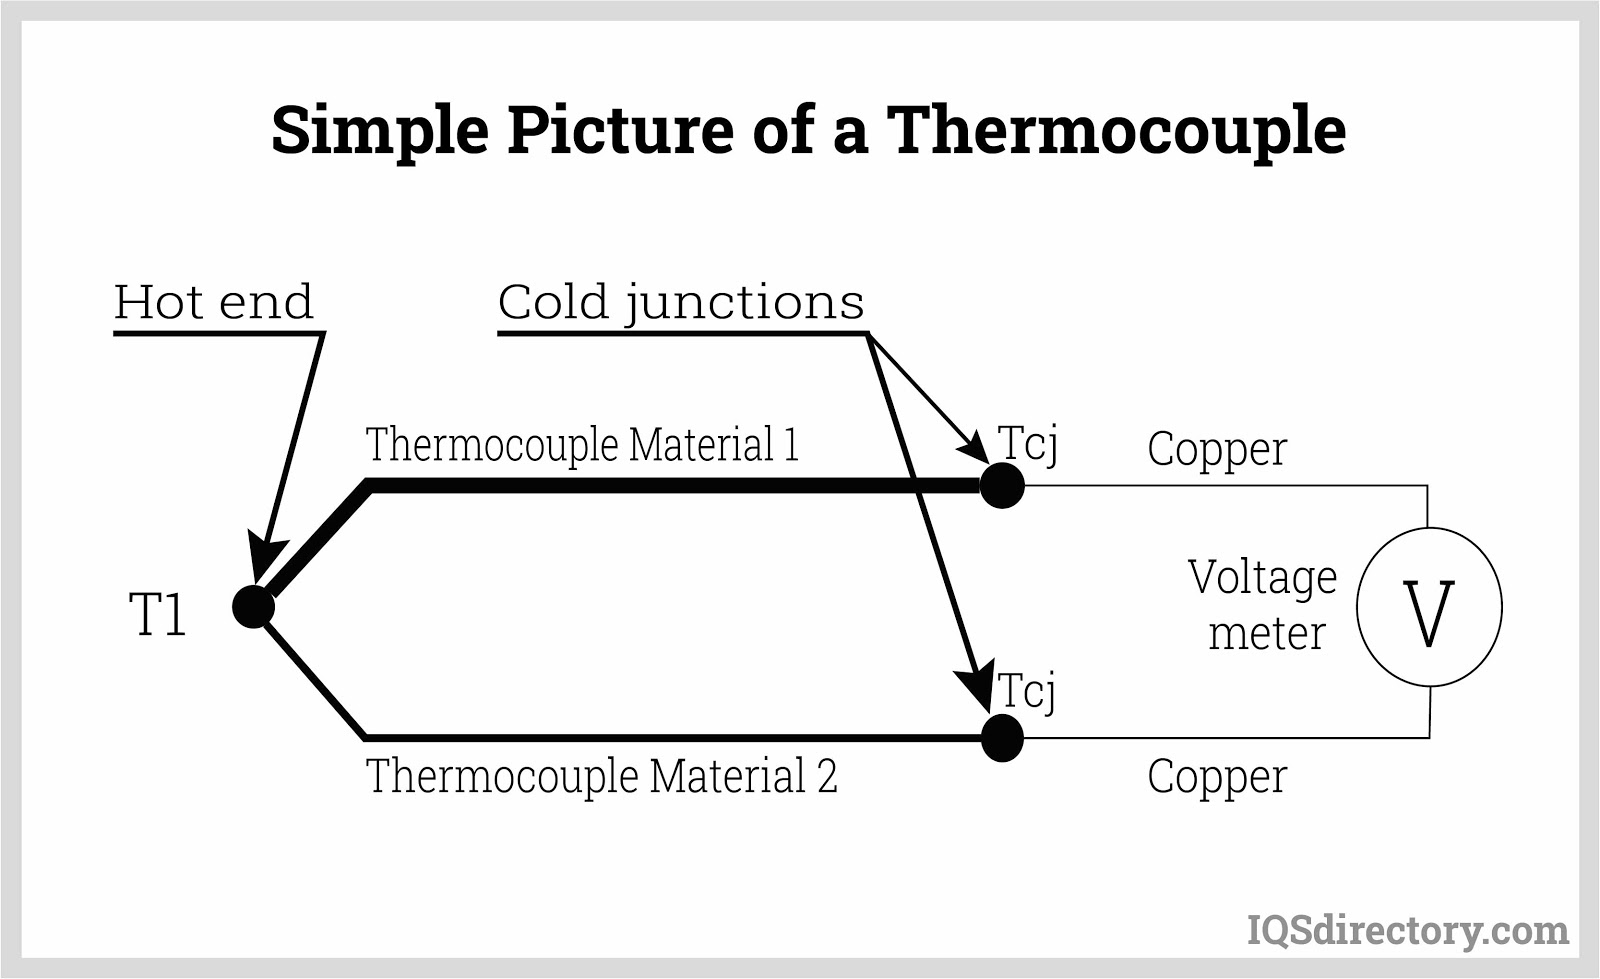
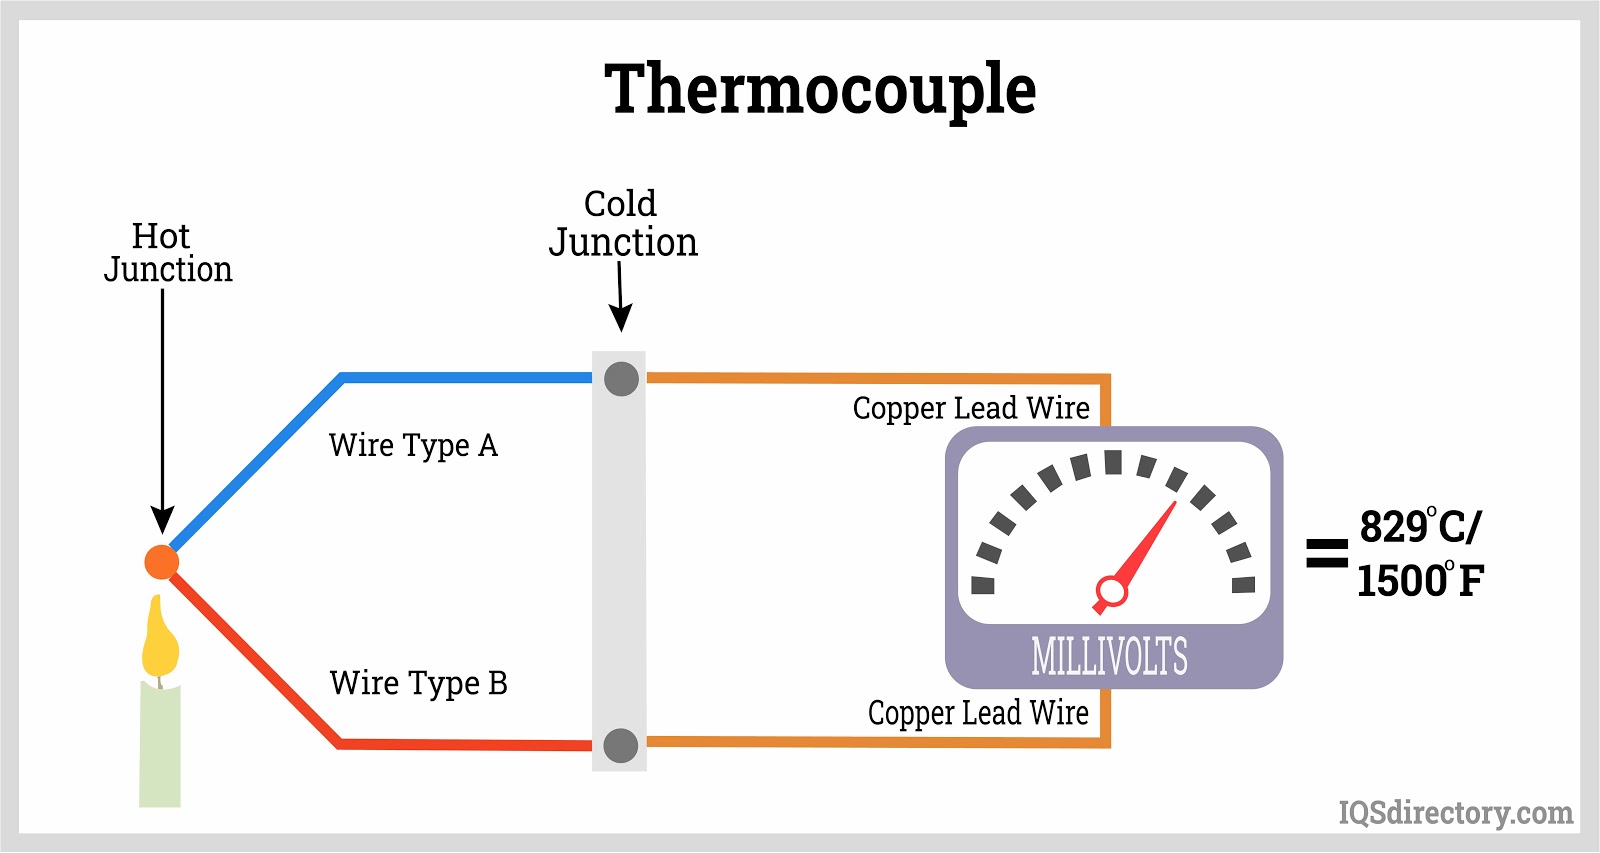
Before diving into placement, let's briefly recap what a thermocouple is. A thermocouple is a temperature sensor that works based on the Seebeck effect. This effect states that when two different metals are joined together, a voltage is produced that is proportional to the temperature difference between the junction and the measuring point. This voltage can then be translated into a temperature reading.
Think of it like this: imagine two different types of wires as two different kinds of pipes. When they connect, and heat is applied, something similar to water flows through them, with the amount of flow directly related to the heat. A device measures this "flow" (voltage) and tells you the temperature.
Key Considerations for Thermocouple Placement
Several factors influence the ideal location for a thermocouple. These include the environment being measured, the type of thermocouple, and the desired accuracy. Let's break down these considerations:
1. Understanding the Environment
The environment where you're placing the thermocouple is perhaps the most crucial factor. Ask yourself these questions:
- What is the temperature range? Thermocouples have different operating temperature ranges. Ensure your thermocouple is rated for the expected temperature.
- Is the environment corrosive? Certain environments contain corrosive gases or liquids that can damage the thermocouple. Choose a thermocouple with appropriate protection, like a sheath made of stainless steel or Inconel.
- Is there vibration or mechanical stress? Excessive vibration can damage the thermocouple wires or connections. Secure the thermocouple properly to minimize movement.
- Is there electromagnetic interference (EMI)? EMI can affect the thermocouple signal, leading to inaccurate readings. Use shielded thermocouple wire and ground the system properly.
- Is the environment wet or humid? Moisture can cause corrosion and affect the thermocouple's performance. Use a waterproof or sealed thermocouple if necessary.
For example, a thermocouple placed in a molten metal bath requires a robust, high-temperature sheath to withstand the extreme heat and corrosive environment. In contrast, a thermocouple used for measuring air temperature indoors doesn't need such heavy-duty protection.
2. Immersion Depth: The 'Sweet Spot' for Accuracy
Immersion depth refers to how far the thermocouple needs to be inserted into the medium being measured. This is critical for accurate readings. The goal is to minimize heat conduction along the thermocouple wire away from the junction, which can cause the sensor to read lower than the actual temperature.
The general rule of thumb is that the thermocouple should be immersed at least 10 times the diameter of the protective sheath. This is often called the "10D rule". For example, if the sheath is 1/4 inch in diameter, the thermocouple should be immersed at least 2.5 inches. This ensures that the junction is in direct contact with the medium and the heat loss along the wire is negligible.
Think of it like sticking a thermometer into a hot cup of coffee. If you only dip the tip in, the thermometer might not accurately read the coffee's temperature because it's also influenced by the cooler air around it. You need to submerge it far enough to ensure the reading reflects the coffee's temperature, not a mix of the coffee and the environment.
3. Thermal Contact: Ensuring a Good Connection
Good thermal contact between the thermocouple junction and the medium is paramount. Air gaps or poor contact can act as insulators, hindering heat transfer and resulting in inaccurate readings. This is particularly important when measuring the temperature of solids.
Here are some ways to improve thermal contact:
- Use a thermal paste: Apply a thin layer of thermal paste between the thermocouple and the surface being measured. Thermal paste fills in microscopic air gaps, improving heat transfer. This is especially useful when measuring the temperature of heatsinks or electronic components.
- Ensure proper mounting: Use appropriate mounting hardware to securely attach the thermocouple to the surface. This prevents movement and ensures consistent contact.
- Consider the surface finish: A rough or uneven surface can create air gaps. Smoothing the surface can improve thermal contact.
Imagine trying to measure the temperature of an engine block. If the thermocouple is loosely attached, with air gaps between it and the engine, it won't accurately reflect the engine's temperature. Tightening the connection and using thermal paste will greatly improve accuracy.
4. Avoiding Heat Sinks and Sources
Be mindful of nearby heat sinks and heat sources that could affect the thermocouple reading. A heat sink is anything that draws heat away from the junction, while a heat source adds heat. These can skew your measurements.
For example, if you're measuring the temperature of a pipe, avoid placing the thermocouple near a flange or valve, as these can act as heat sinks. Similarly, avoid placing the thermocouple near a heater or other heat source, as this could artificially inflate the reading.
5. Wiring and Connections: Preventing Interference
The wiring and connections of the thermocouple are just as important as its placement. Poor wiring can introduce noise and errors into the signal.
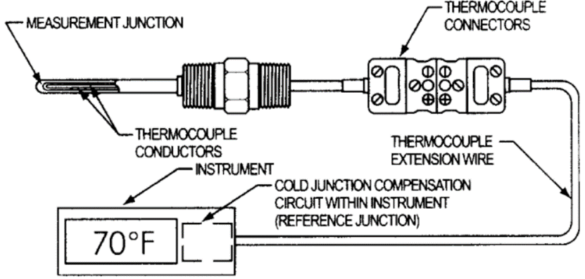
- Use proper thermocouple extension wire: Always use thermocouple extension wire that is specifically designed for the type of thermocouple being used. This wire has the same thermoelectric properties as the thermocouple wire and minimizes errors.
- Avoid splices: Minimize the number of splices in the thermocouple circuit. Splices can introduce resistance and affect the signal. If splices are necessary, use proper thermocouple connectors.
- Shield the wiring: Use shielded thermocouple wire to protect the signal from electromagnetic interference (EMI). Ground the shield properly.
- Keep wiring away from noise sources: Run thermocouple wiring away from power lines, motors, and other sources of electrical noise.
6. Considering the Type of Thermocouple
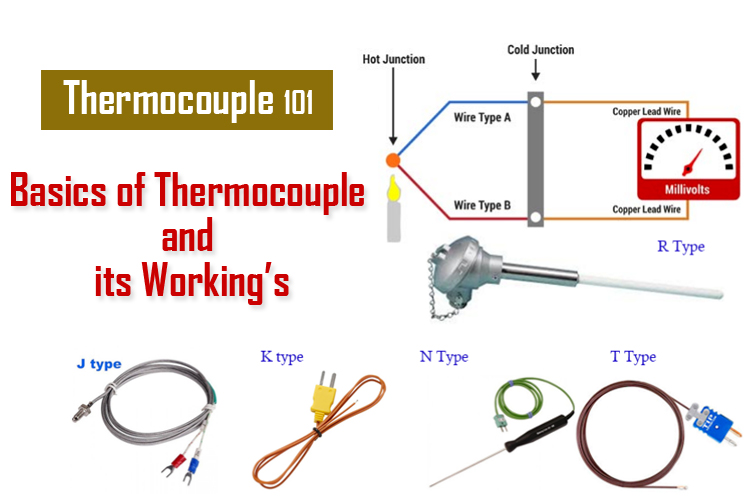
Different thermocouple types (K, J, T, E, etc.) have different characteristics, including temperature range, accuracy, and suitability for different environments. Choose the appropriate thermocouple type for your application.
For example, a Type K thermocouple is a general-purpose thermocouple that is suitable for a wide range of temperatures. A Type J thermocouple is similar to Type K but has a slightly narrower temperature range. A Type T thermocouple is well-suited for low-temperature applications. A Type S or Type R thermocouple are used for very high temperature measurements.
Specific Applications: Where to Put the Thermocouple
Let's look at some specific applications and general recommendations for thermocouple placement:
- Furnaces and Ovens: Place the thermocouple in the area where you need to measure the temperature. Avoid placing it too close to the heating elements or walls, as these areas may have different temperatures than the overall chamber. For a well-mixed temperature, locate it in the center of the chamber, if possible.
- HVAC Systems: For measuring air temperature in ducts, immerse the thermocouple in the center of the duct. For measuring the temperature of refrigerant lines, ensure good thermal contact between the thermocouple and the pipe, using thermal paste and insulation.
- Food Processing: Place the thermocouple in the center of the food product being cooked or stored. Be sure to use a food-grade thermocouple that is safe for contact with food. Follow food safety regulations when placing the thermocouple.
- Engines: For measuring exhaust gas temperature (EGT), place the thermocouple in the exhaust stream as close to the exhaust manifold as possible. Ensure the thermocouple is rated for the high temperatures and vibrations of the exhaust system.
- Plastics Manufacturing: When using thermocouples to monitor the temperature of the material as it passes through a nozzle, consider using a melt bolt thermocouple. It's designed to screw directly into the barrel wall of a plastic extruder, where the tip is exposed to the flow of the molten plastic material.
Troubleshooting Common Thermocouple Problems
Even with proper placement, thermocouples can sometimes exhibit problems. Here are a few common issues and how to troubleshoot them:
- Inaccurate Readings: Check the thermocouple wiring for loose connections or damage. Ensure the thermocouple is properly immersed and has good thermal contact. Calibrate the thermocouple to ensure it is accurate.
- Erratic Readings: Look for sources of electromagnetic interference (EMI) near the thermocouple wiring. Use shielded wiring and ground the system properly.
- No Readings: Check the thermocouple wiring for breaks or short circuits. Test the thermocouple with a multimeter to verify its functionality. Check the measuring instrument to ensure it is properly configured.
Conclusion: Precision Through Placement
Proper thermocouple placement is essential for accurate and reliable temperature measurements. By considering the environment, immersion depth, thermal contact, potential sources of interference, and the type of thermocouple being used, you can optimize your measurements and ensure the effectiveness of your temperature control systems. Remember the "10D" rule, use thermal paste when needed, and keep your wiring clean and shielded. With careful attention to these details, you can confidently measure temperatures in a wide range of applications.