Where Is The Furnace Filter Located

Imagine waking up on a chilly morning, only to find your house is colder than it should be. Your furnace, usually a reliable source of warmth, seems to have given up the ghost. Before calling a professional, there are a few basic troubleshooting steps you can take. A common culprit behind furnace failures is a dirty or clogged air filter. This article will guide you through locating your furnace filter and performing some simple checks that might get your heat back on.
Safety First!
Before you begin any troubleshooting, it's crucial to prioritize your safety. Always:
- Turn off the power to the furnace at the circuit breaker. This eliminates the risk of electric shock.
- Be aware of gas lines. If you smell gas, do not attempt any repairs. Immediately leave your home and call your gas company or 911 from a safe location.
- Wear appropriate safety gear. This might include gloves and eye protection, especially when dealing with dusty or dirty components.
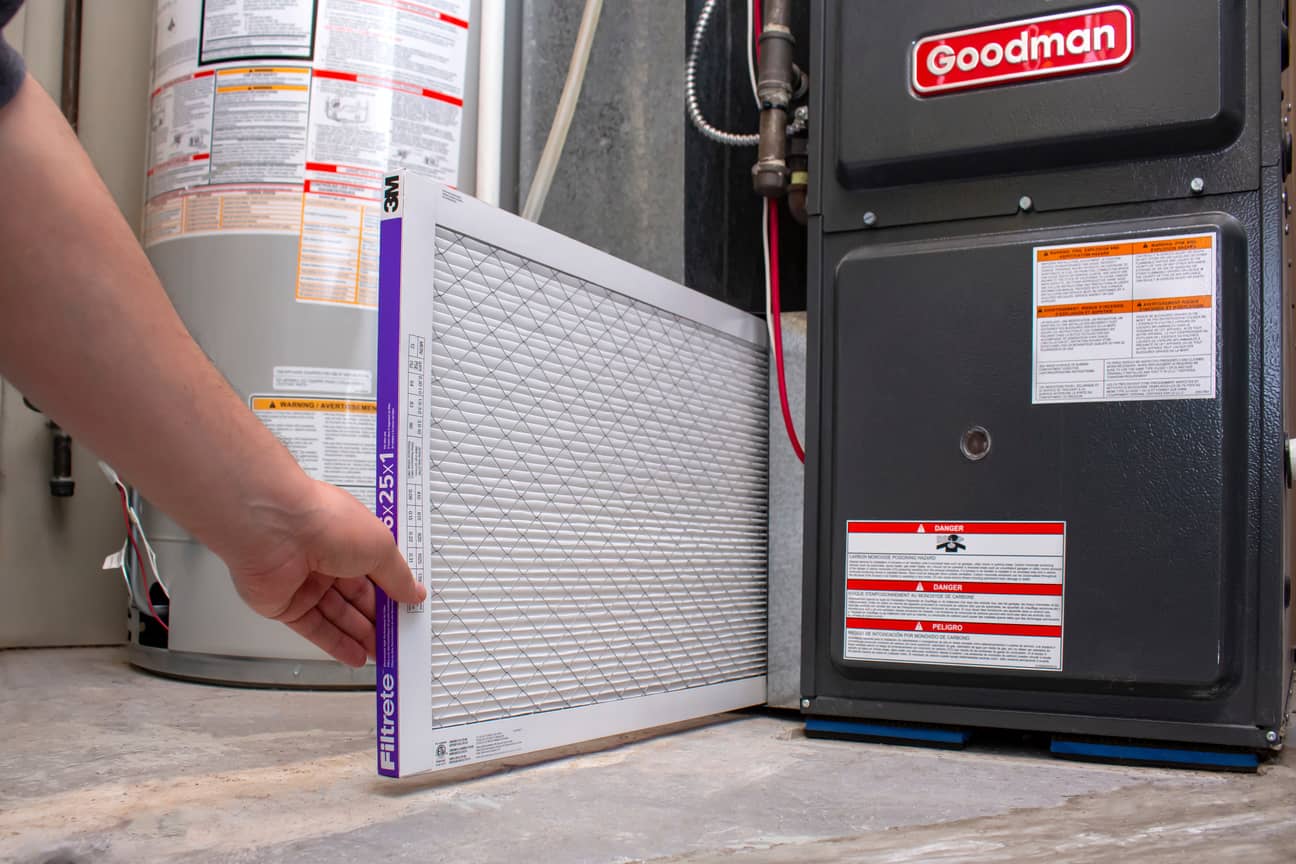
Step 1: Locating Your Furnace Filter
Finding the furnace filter is the most important first step. Its location can vary depending on the type of furnace and your home's setup. Here's a breakdown of the most common locations:
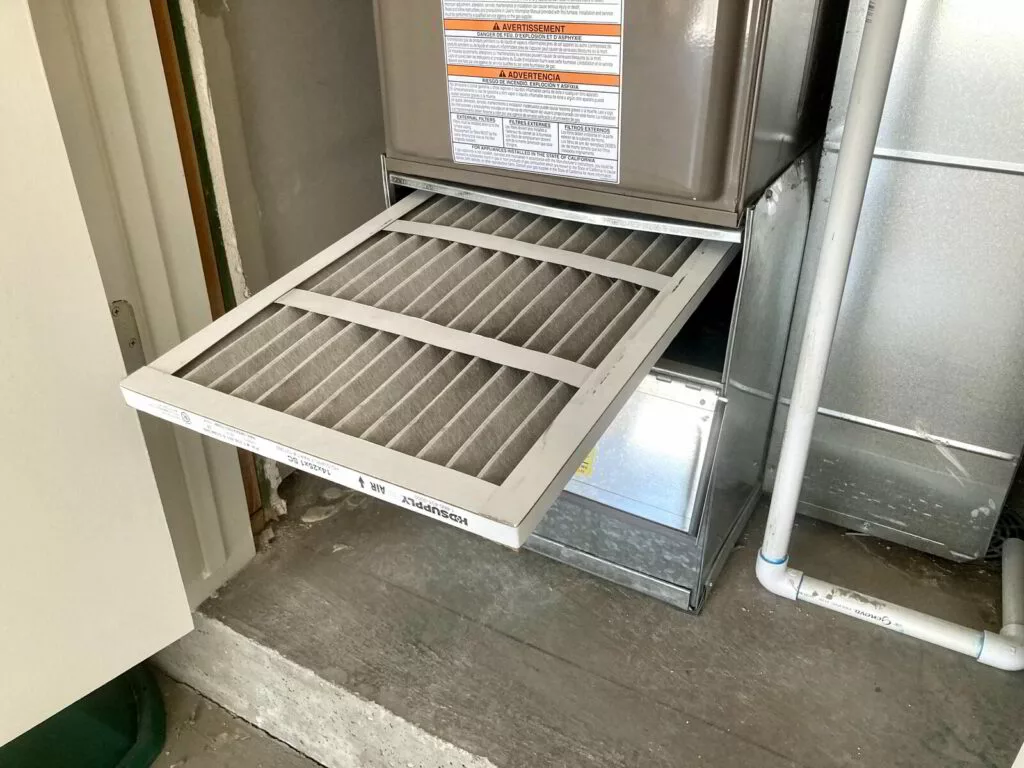
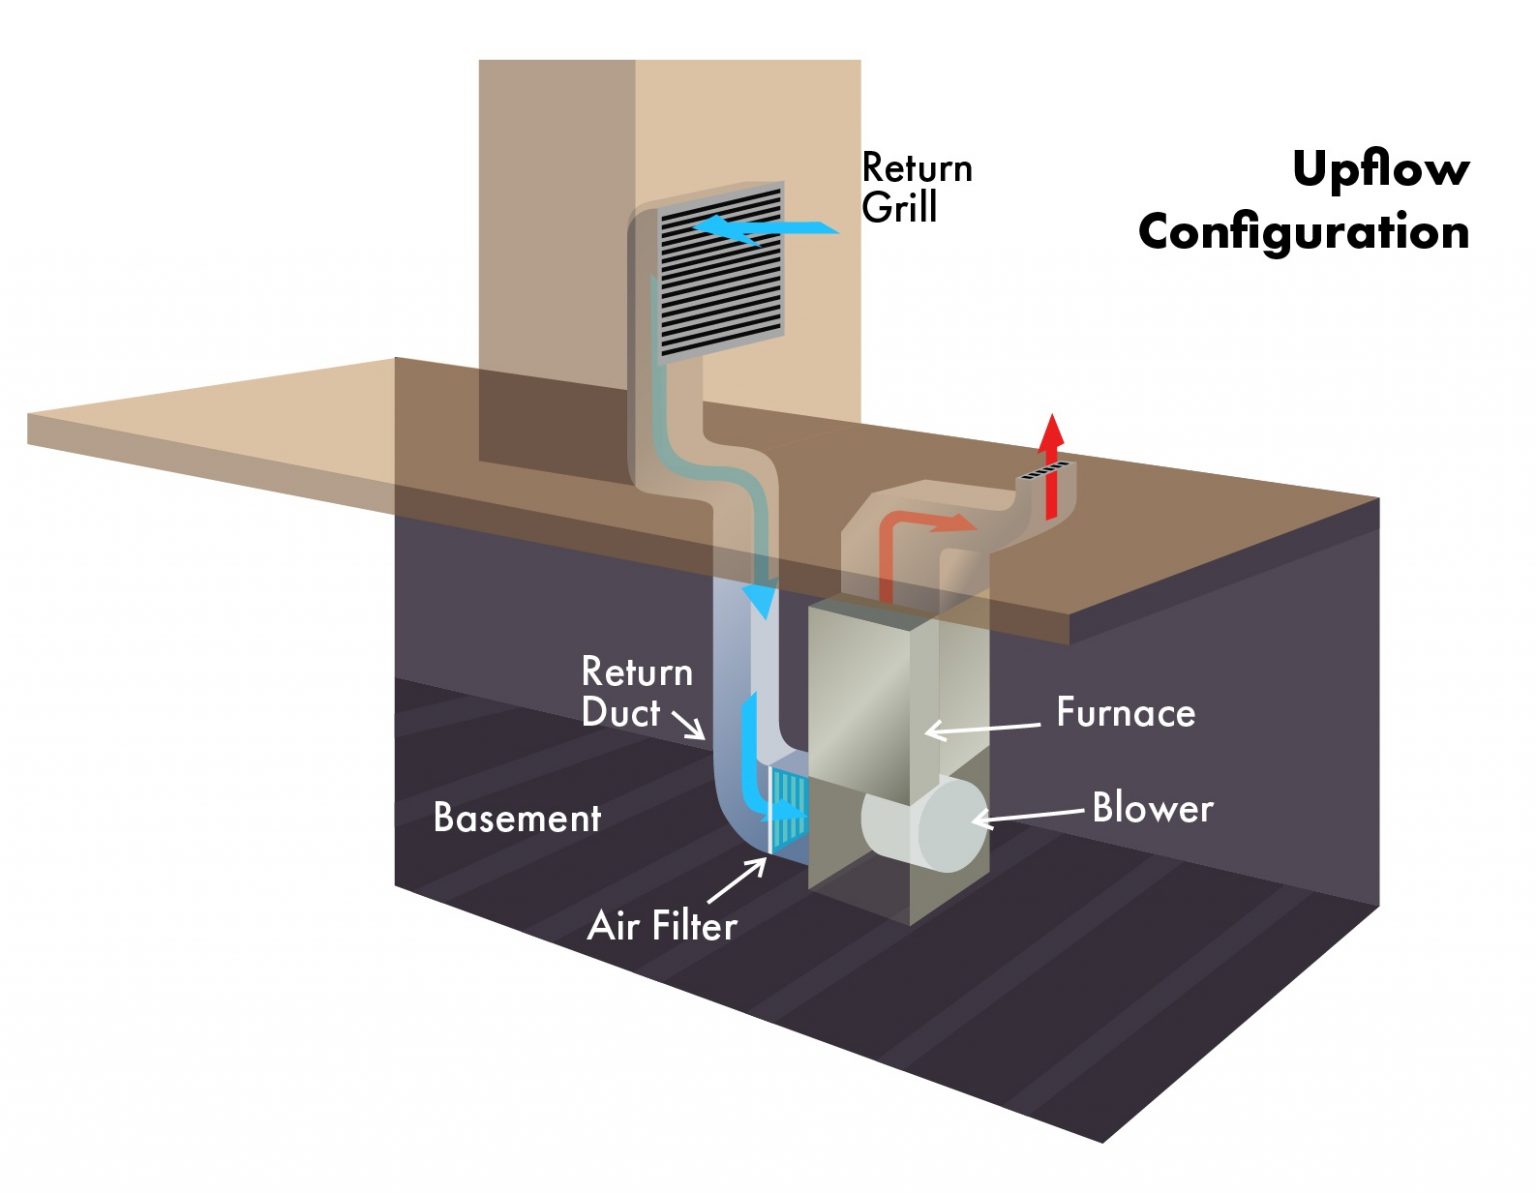
A. Inside the Furnace Unit Itself
This is probably the most frequent location.
- Look for a slot or door: The filter is usually located in a slot or behind a small door on the side or bottom of the furnace unit. This door is often held in place by clips, screws, or a simple latch.
- Check the airflow direction: The filter should have an arrow indicating the direction of airflow. This arrow should point towards the furnace.
- Horizontal vs. Vertical Furnaces: Whether your furnace is installed horizontally (often in attics or crawl spaces) or vertically (typically in basements or utility closets), the filter location will usually be along the side where air is drawn into the unit.
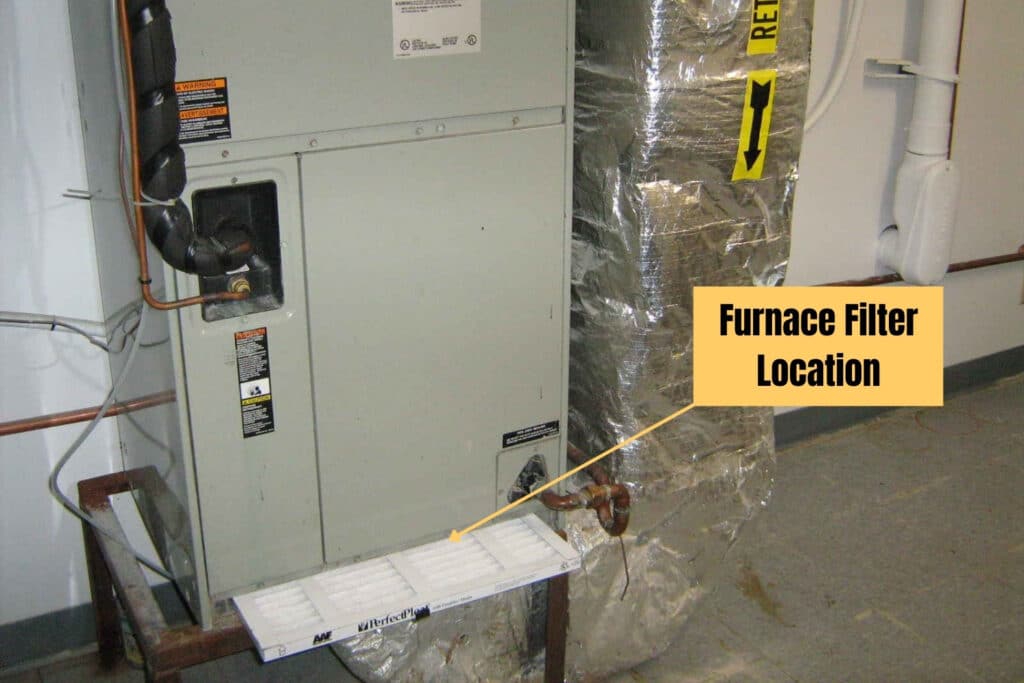
B. In a Return Air Vent
Some homes have a larger return air vent (the vent that pulls air *into* the furnace) that houses the filter.
- Identify return air vents: These are usually larger than supply vents (the vents that blow heated air into the room) and don't have adjustable louvers. You can usually feel a slight suction when the furnace is running.
- Check for a filter slot: The vent cover might have a slot or a hinged door for accessing the filter. You may need a screwdriver to remove the vent cover.
C. Behind the Blower Motor (Less Common)
In some older or less common furnace designs, the filter might be positioned behind the blower motor.
- Accessing the blower motor: This usually involves removing a larger access panel on the furnace. This is a more involved process and should only be attempted if you're comfortable with basic mechanical tasks.
- Identifying the filter: The filter will be positioned between the blower motor and the intake air source.
Tip: If you're having trouble finding the filter, consult your furnace's owner's manual. The manual will provide specific instructions and diagrams for your model. If you don't have the manual, you can often find it online by searching for the furnace's model number.
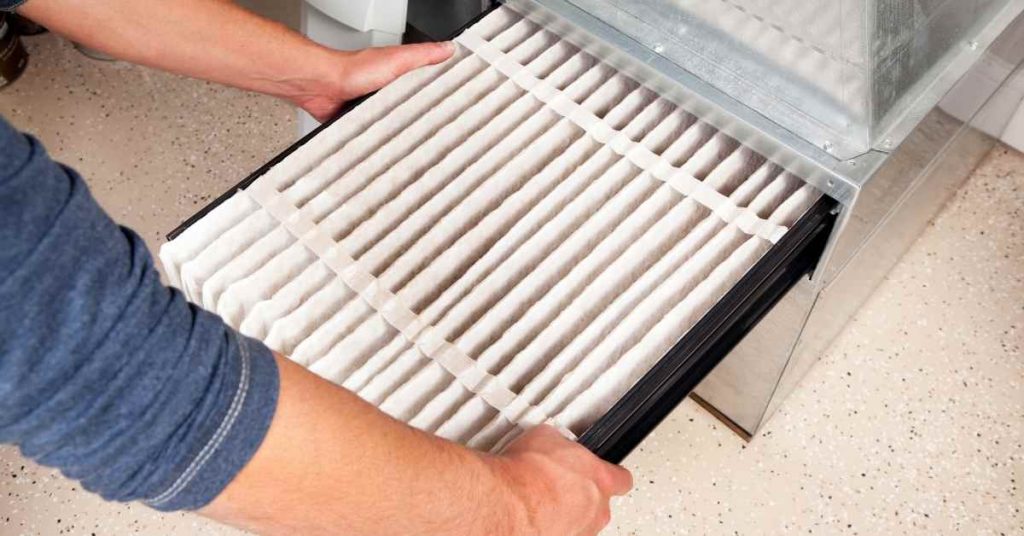
Step 2: Inspecting the Filter
Once you've located the filter, carefully remove it and examine its condition. A clean filter will be relatively light in color and free of significant dust and debris. A dirty filter will be dark gray or black, clogged with dust, pet dander, and other particles.
- Hold the filter up to the light: If you can't see light clearly through the filter, it's likely clogged and needs to be replaced.
- Note the filter size: Before discarding the old filter, note its dimensions (length, width, and thickness). This information is usually printed on the filter's frame. You'll need this information to purchase a replacement filter.
- Filter type: Note the type of filter (e.g., fiberglass, pleated). Consider upgrading to a higher MERV rating (Minimum Efficiency Reporting Value) filter for better air filtration, but check your furnace's manual to ensure it's compatible. High-MERV filters can restrict airflow, potentially causing your furnace to work harder and overheat.
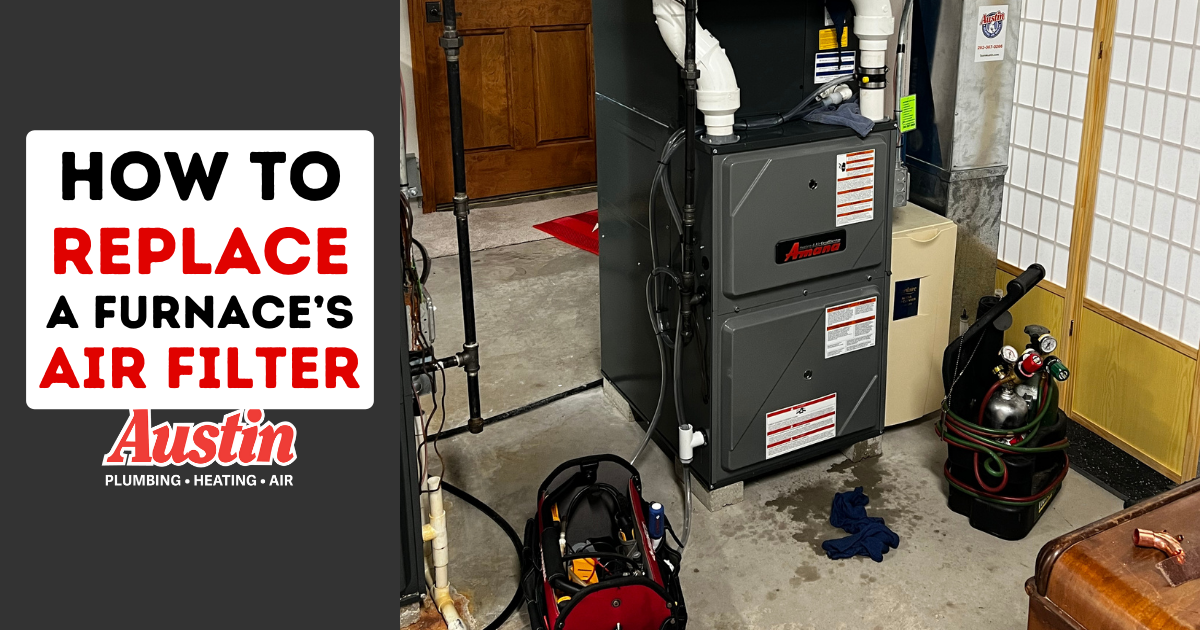
Step 3: Replacing the Filter
Replacing the filter is a simple task that can significantly improve your furnace's performance.
- Purchase a replacement filter: Make sure the replacement filter is the correct size and type for your furnace. You can find filters at most hardware stores, home improvement centers, and online retailers.
- Install the new filter: Insert the new filter into the slot or housing, making sure the airflow arrow on the filter points in the correct direction (toward the furnace).
- Secure the access panel: Replace the access panel or vent cover and secure it with clips, screws, or latches.
Step 4: Checking the Power Supply
Even with a clean filter, your furnace might not be working if it's not receiving power.
- Check the circuit breaker: Go to your electrical panel and check the circuit breaker that controls the furnace. If the breaker is tripped (in the "off" or middle position), reset it by flipping it all the way to the "off" position and then back to the "on" position.
- Check the furnace switch: Most furnaces have a separate on/off switch located near the unit. Make sure this switch is in the "on" position. It often looks like a standard light switch.
Step 5: Inspecting the Thermostat
The thermostat controls your furnace, so it's essential to ensure it's set correctly.
- Check the thermostat settings: Make sure the thermostat is set to "heat" mode and that the temperature is set higher than the current room temperature.
- Check the batteries: If your thermostat is battery-powered, make sure the batteries are fresh. Low batteries can cause the thermostat to malfunction.
- Ensure the thermostat is clean: Dust accumulation inside the thermostat can interfere with its sensors. Gently clean the inside of the thermostat with a soft brush or cloth.
Step 6: Checking the Pilot Light (For Older Furnaces)
If you have an older furnace with a pilot light, make sure the pilot light is lit. Newer furnaces have electronic ignition systems and don't have a pilot light.
- Locate the pilot light assembly: This is usually located near the bottom of the furnace, behind an access panel.
- Follow the lighting instructions: Most furnaces have instructions printed on a label near the pilot light assembly. Follow these instructions carefully to light the pilot light.
- If the pilot light won't stay lit: This could indicate a problem with the gas supply or the thermocouple (a safety device that senses the pilot light). Do not attempt to fix this yourself. Call a qualified HVAC technician.
When to Call a Professional
While these basic troubleshooting steps can resolve many common furnace problems, some issues require the expertise of a qualified HVAC technician. Do not attempt to repair the following issues yourself:
- Gas leaks: If you smell gas, immediately evacuate your home and call your gas company or 911.
- Carbon monoxide leaks: Install carbon monoxide detectors throughout your home. If the alarm sounds, evacuate immediately and call 911.
- Electrical problems: If you suspect an electrical problem with your furnace (e.g., burning smells, sparking), do not attempt any repairs. Call a qualified electrician or HVAC technician.
- Complex mechanical issues: If you suspect a problem with the blower motor, heat exchanger, or other major furnace components, do not attempt to repair it yourself. These repairs require specialized knowledge and tools.
- Pilot light won't stay lit: If the pilot light refuses to stay lit after several attempts, it could indicate a faulty thermocouple or a more serious gas supply problem.
Preventative Maintenance
Regular preventative maintenance can help prevent furnace problems and extend its lifespan.
- Change the air filter regularly: Change the filter every 1-3 months, depending on the type of filter and the amount of dust and debris in your home. Homes with pets or allergy sufferers may need to change the filter more frequently.
- Schedule annual furnace maintenance: Have a qualified HVAC technician inspect and tune up your furnace annually. This will help identify potential problems early and ensure that your furnace is operating efficiently.
- Keep the area around the furnace clear: Make sure there is no clutter around the furnace that could obstruct airflow or create a fire hazard.
Conclusion
Troubleshooting a furnace problem can seem daunting, but by following these steps, you can often identify and resolve simple issues yourself. Locating and replacing the air filter is a crucial first step. Remember to prioritize safety and never attempt repairs that you're not comfortable with. When in doubt, call a qualified HVAC technician to ensure the job is done safely and correctly. By taking a proactive approach to furnace maintenance, you can keep your home warm and comfortable throughout the winter months.