Where Is The Heat Exchanger On A Furnace
A chilly house on a winter's day can be a homeowner's nightmare. Often, the culprit isn't the furnace itself, but a problem lurking within its core component: the heat exchanger. This article will guide you through understanding, locating, and troubleshooting potential issues with your furnace's heat exchanger.
Understanding the Heat Exchanger
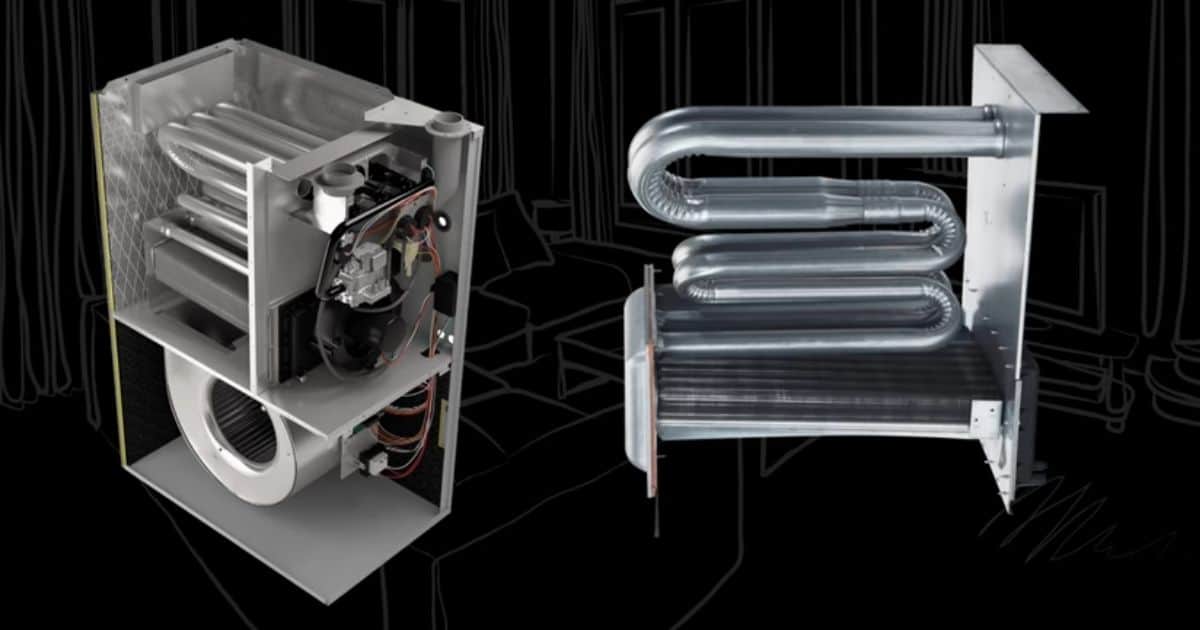
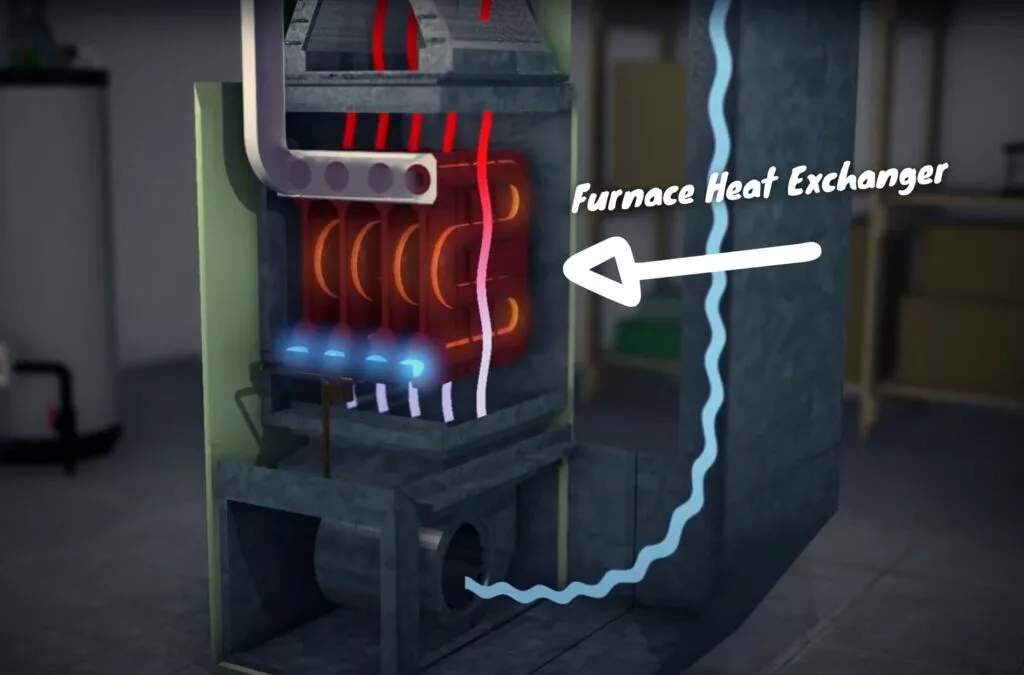
The heat exchanger is the most crucial part of your furnace. Its primary function is to transfer heat from the burning fuel (natural gas, propane, or oil) to the air that's circulated throughout your home. Think of it as the furnace's lungs, breathing in combustion gases and exhaling warm, clean air.
Here's how it works:
- Combustion: Fuel is burned inside the combustion chamber.
- Heat Transfer: The hot combustion gases travel through the heat exchanger.
- Air Circulation: The blower fan forces air around the outside of the heat exchanger. This air heats up without mixing with the dangerous combustion gases.
- Warm Air Distribution: The heated air is then distributed through your home's ductwork.
- Exhaust: The cooled combustion gases are safely vented outside through the flue.
The Common Problem: A Cracked Heat Exchanger
The most common problem with a heat exchanger is cracking. Over time, the metal of the heat exchanger can weaken due to repeated heating and cooling cycles. This can lead to cracks, which can allow dangerous combustion gases, primarily carbon monoxide (CO), to leak into your home's airflow.
Carbon monoxide is odorless, colorless, and deadly. It's imperative to take any potential heat exchanger issue seriously.
Where is the Heat Exchanger Located?
Finding the heat exchanger isn't always straightforward, as furnace designs vary. However, here's a general guide:
Step 1: Locate Your Furnace. This is usually in the basement, attic, crawlspace, or a utility closet.
Step 2: Identify the Furnace Type. Furnaces are typically categorized as:
- Upflow: Air enters at the bottom and exits at the top.
- Downflow (Counterflow): Air enters at the top and exits at the bottom.
- Horizontal: Air flows horizontally through the furnace.
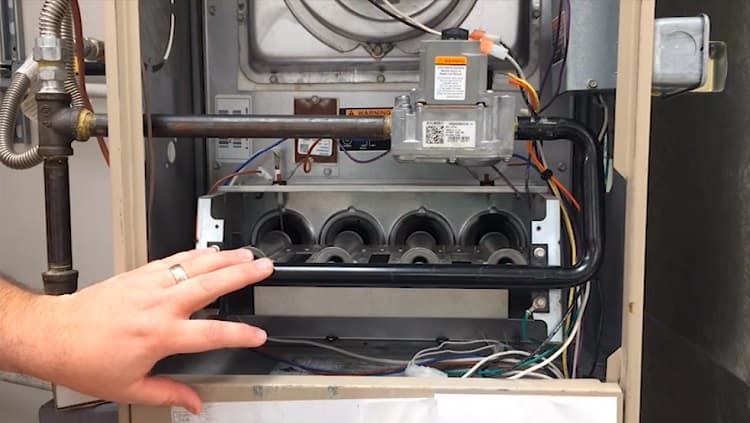
Step 3: Access the Blower Compartment. This is usually located at the bottom of an upflow furnace, the top of a downflow furnace, or on one side of a horizontal furnace. You'll likely need to remove an access panel secured by screws or latches. Always turn off the power to the furnace at the breaker before removing any panels.
Step 4: Locate the Heat Exchanger. The heat exchanger is typically situated above the burners in an upflow or horizontal furnace, and below the burners in a downflow furnace. It's a series of metal tubes or chambers that the hot combustion gases pass through.
Important Note: It may be necessary to remove the blower motor assembly to gain a clear view of the heat exchanger. This can be a complex procedure, and if you're not comfortable, it's best to call a professional.
Diagnosing a Potential Problem: A Step-by-Step Guide
Safety First! Before you start, turn off the power to the furnace at the breaker. And be aware that if you suspect a carbon monoxide leak, immediately evacuate the house and call your local fire department or gas company.
Here's a step-by-step guide to help you diagnose a potential heat exchanger problem:
Step 1: Visual Inspection (With Furnace Off):
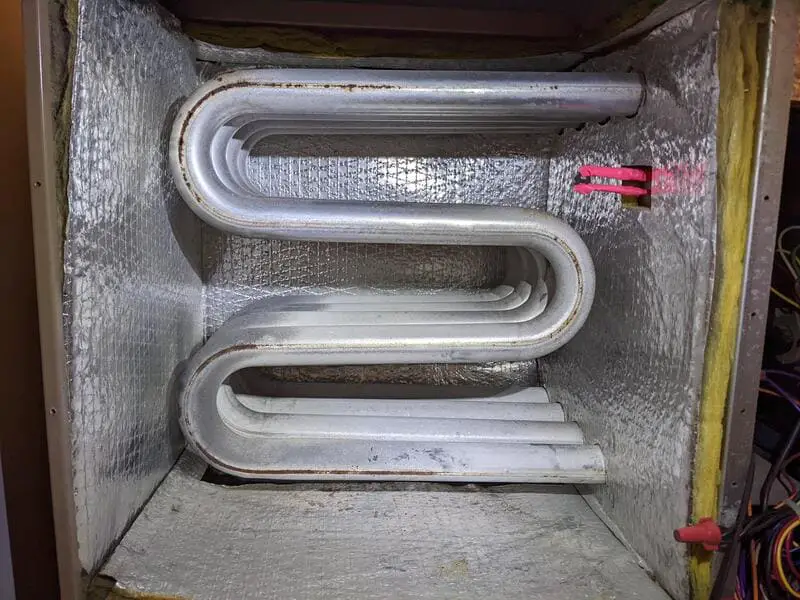
- Look for Rust and Corrosion: Excessive rust or corrosion on or around the heat exchanger can be a sign of moisture buildup, which can weaken the metal and lead to cracks.
- Check for Soot: Excessive soot buildup can indicate incomplete combustion, which can put stress on the heat exchanger.
- Inspect for Visible Cracks: Carefully examine the heat exchanger for any visible cracks, holes, or warping. Use a flashlight to get a better view. This may be difficult, as cracks can be very small.
- Pay Attention to Seams: Focus on the seams where the different sections of the heat exchanger are joined together. These are often weak points.
Step 2: Sniff Test (With Furnace Off):
- Smell for Unusual Odors: A strong, unusual odor, especially one that smells like exhaust fumes, could indicate a leak. Do not run the furnace if you suspect a leak.
Step 3: Flame Observation (With Furnace On): Only attempt this step if you are comfortable working around a live flame and understand the risks involved. If not, skip to Step 4.
- Turn on the Furnace: Restore power to the furnace and turn up the thermostat to initiate a heating cycle.
- Observe the Flames: Watch the flames in the burner compartment. They should be a steady blue color. Flickering yellow or orange flames can indicate incomplete combustion, which can stress the heat exchanger.
- Look for Flame Disturbance: Watch for the flames being pulled towards the heat exchanger when the blower fan kicks on. This can indicate a crack drawing in air. This is a critical sign of a potential problem.
Step 4: Carbon Monoxide Detector Test:
- Use a CO Detector: Place a carbon monoxide detector near the furnace while it's running. If the detector alarms, immediately evacuate the house and call your local fire department or gas company. This test can be unreliable depending on the quality of the detector. It is not a substitute for professional inspection.
Simple, Safe DIY Fixes (Limited Scope)
Important: DIY fixes for heat exchangers are extremely limited and generally not recommended. Any repair to the heat exchanger itself should be performed by a qualified HVAC technician. The following suggestions address potential contributing factors to heat exchanger stress, not the exchanger itself.
1. Replace Air Filter:
- A dirty air filter restricts airflow, which can cause the furnace to overheat and put stress on the heat exchanger. Replace your air filter regularly (typically every 1-3 months).
2. Clean Burners (If Accessible and Comfortable):
- If you're comfortable and the burners are easily accessible, you can gently clean them with a wire brush to remove any debris that may be interfering with proper combustion. Always turn off the gas supply to the furnace before cleaning the burners.
3. Check Flue Pipe:
- Ensure the flue pipe (the pipe that vents exhaust gases outside) is clear of any obstructions. A blocked flue pipe can cause combustion gases to back up into the furnace, putting stress on the heat exchanger.
These DIY fixes are preventative measures. They won't repair a cracked heat exchanger.
When to Call a Professional: The Critical Point
Any suspicion of a cracked heat exchanger requires immediate professional attention. Do not attempt to repair a heat exchanger yourself.
Here are the key scenarios where you must call a qualified HVAC technician:
- Visible Cracks or Holes: If you see any cracks, holes, or warping in the heat exchanger.
- Flickering or Disturbed Flames: If the flames in the burner compartment are flickering, yellow/orange, or being pulled towards the heat exchanger when the blower fan kicks on.
- Unusual Odors: If you smell any unusual odors, especially exhaust fumes.
- Carbon Monoxide Detection: If your carbon monoxide detector alarms.
- Excessive Rust or Corrosion: If you see excessive rust or corrosion on the heat exchanger.
- Uncertainty: If you're unsure about anything, it's always best to err on the side of caution and call a professional.
A qualified HVAC technician has the tools and expertise to properly inspect the heat exchanger, including using specialized equipment like combustion analyzers and fiber optic cameras. They can also perform necessary repairs or recommend a furnace replacement if needed.
Professional Inspection and Repair
A professional HVAC technician will typically perform the following:
- Combustion Analysis: This involves measuring the levels of various gases in the exhaust to assess the efficiency and safety of the furnace.
- Visual Inspection with Specialized Tools: They may use a fiber optic camera to get a close-up view of the inside of the heat exchanger, allowing them to detect even small cracks.
- Pressure Test: In some cases, they may perform a pressure test to check for leaks in the heat exchanger.
- Repair or Replacement Recommendation: Based on their findings, they will recommend either repairing the heat exchanger (if possible) or replacing the entire furnace.
Repairing a heat exchanger is often not a viable option, especially for older furnaces. Replacement is often the more cost-effective and safer solution.
Prevention and Maintenance
While you can't completely prevent heat exchanger issues, you can take steps to prolong its life:
- Regular Maintenance: Schedule annual furnace maintenance with a qualified HVAC technician.
- Replace Air Filter Regularly: Keep your air filter clean to ensure proper airflow.
- Proper Ventilation: Ensure proper ventilation around the furnace to prevent overheating.
- Address Issues Promptly: If you notice any signs of trouble, such as unusual noises or odors, address them promptly.
By understanding the role of the heat exchanger, knowing where to find it, and being aware of the potential problems, you can take proactive steps to ensure the safety and efficiency of your furnace. Remember, your family's safety is paramount. When in doubt, always call a qualified HVAC technician.