Which Direction Does A Filter Drier Go

Filter driers are essential components in your HVAC system, protecting it from moisture and contaminants that can cause serious damage. Getting the installation right, especially the direction, is crucial for proper function. Incorrect installation can lead to reduced efficiency, system failure, and costly repairs. This guide explains how to determine the correct direction for your filter drier, troubleshoot common issues, and know when to call a professional.
Understanding the Filter Drier
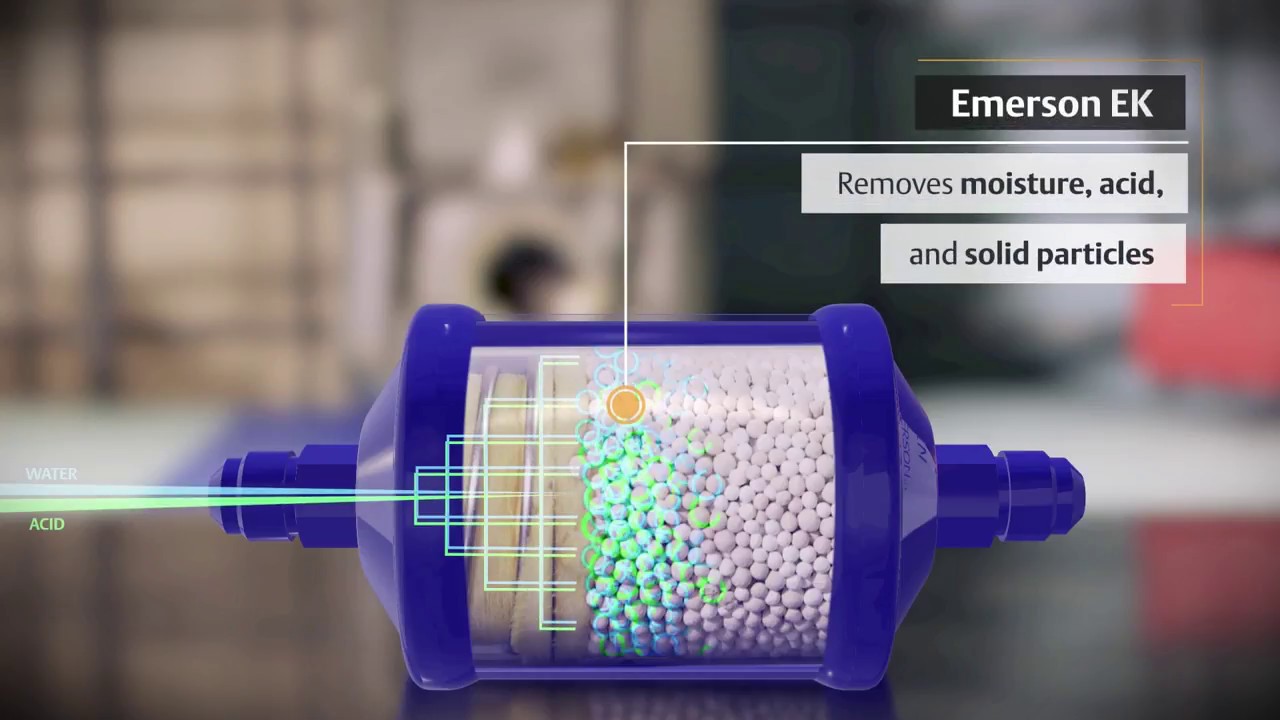
A filter drier is a cylindrical device installed in the refrigerant line of your air conditioner or heat pump. Its main job is to remove moisture and solid contaminants from the refrigerant. These contaminants can lead to:
- Clogged expansion valves: Reducing cooling capacity.
- Compressor damage: The heart of your system.
- Acid formation: Corroding internal components.
- Ice formation: Blocking refrigerant flow.
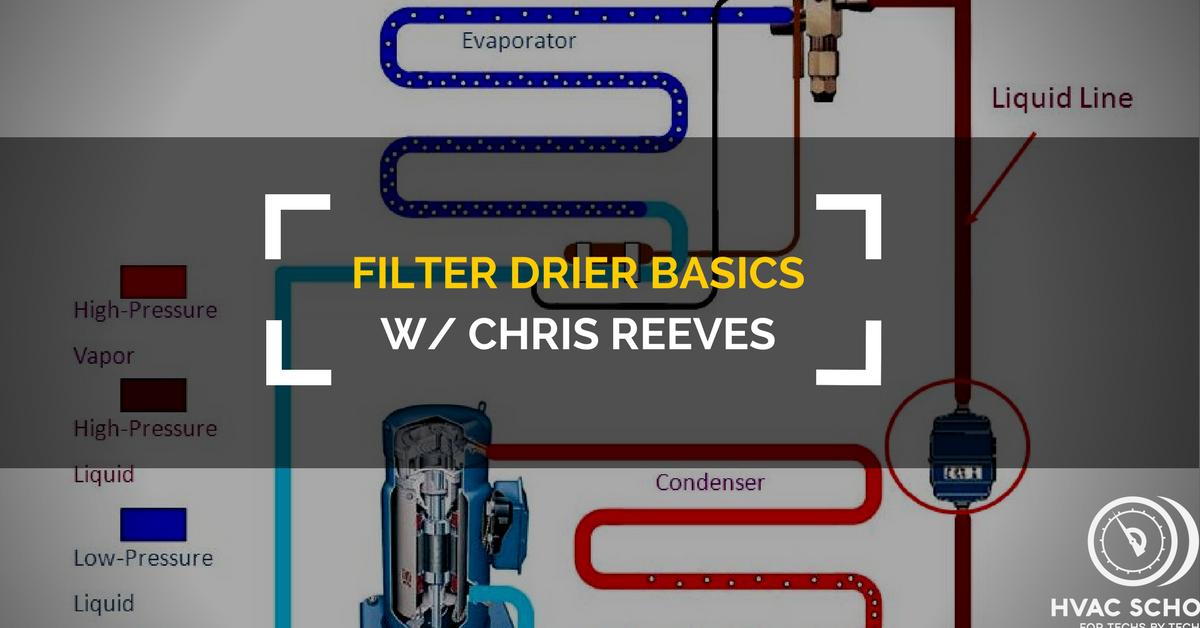
A filter drier contains a desiccant, a material that absorbs moisture, and a fine mesh filter to trap particles. It's typically located in the liquid line, between the condenser and the metering device (expansion valve or orifice tube).
Determining the Correct Flow Direction
The direction of refrigerant flow through the filter drier is critical. Installing it backward will render it ineffective and can even damage your system.
Identifying Directional Arrows
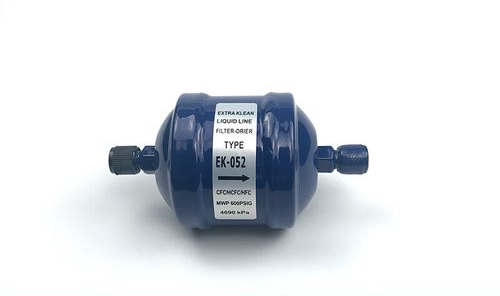
Most filter driers have directional arrows clearly marked on the body. The arrow indicates the intended direction of refrigerant flow. The refrigerant should enter the filter drier at the arrow's base and exit at the arrow's head.
Important Note: Always double-check the arrows, even on new units. Manufacturing errors are rare but possible.
No Arrows? Identifying by Design
If your filter drier lacks directional arrows (typically older models or some universal replacements), you can usually determine the direction based on its physical design.
- Slightly Larger End: Some filter driers have a slightly larger diameter on the inlet side. This is designed to allow for easier refrigerant entry and initial filtration.
- Internal Screen Placement: In some designs, the filter screen is closer to one end than the other. The side with the screen closest to the end is typically the inlet. *This method requires careful visual inspection, and shouldn't be attempted unless you're comfortable.*
Caution: If you are unsure, it's always best to consult the manufacturer's documentation or contact an HVAC professional.
Following the Refrigerant Flow
The most reliable way to determine the correct direction is to trace the refrigerant flow in your system. Remember, the filter drier is typically located in the liquid line, *between the condenser and the metering device.*
- Locate the Condenser: This is the outdoor unit of your AC system.
- Find the Liquid Line: This is the smaller of the two copper lines connecting the outdoor and indoor units.
- Trace the Line: Follow the liquid line from the condenser to the filter drier. The end of the filter drier closest to the condenser is the inlet. The outlet will connect to the metering device, which is usually near the evaporator coil inside the air handler.
Step-by-Step Installation Guide
Safety First: Before you begin any HVAC work, disconnect the power to the unit at the breaker box. Wear safety glasses and gloves. Refrigerant is harmful, and exposure can cause frostbite. If you are not comfortable working with refrigerant, call a qualified HVAC technician.
Tools and Materials Needed:
- New Filter Drier
- Tubing Cutter
- Brazing Torch and Accessories (oxygen/acetylene or propane)
- Nitrogen Tank and Regulator
- Brazing Rod (suitable for copper)
- Wet Rags
- Safety Glasses
- Gloves
- Leak Detector
- Recover Refrigerant: This step *must* be performed by a licensed technician. It is illegal and dangerous to release refrigerant into the atmosphere.
- Cut the Existing Line: Using a tubing cutter, carefully cut the liquid line where the old filter drier was located (or where the new one will be installed).
- Clean the Tubing: Thoroughly clean the ends of the copper tubing with emery cloth or a wire brush to remove any oxidation or debris.
- Position the Filter Drier: Ensure the filter drier is oriented correctly, with the directional arrows pointing in the direction of refrigerant flow.
- Brazing:
- Purge the system with nitrogen to prevent oxidation inside the tubing during brazing. Maintain a low flow of nitrogen throughout the brazing process.
- Apply flux to the joints.
- Heat the tubing and the filter drier fitting evenly.
- Apply brazing rod to the heated joint until it flows smoothly around the connection.
- Remove the heat and allow the joint to cool naturally. Use wet rags to cool the surrounding area and prevent overheating.
- Leak Test: Once the joints have cooled, use a leak detector to check for any leaks around the brazed connections. If leaks are detected, reheat the joint and apply more brazing rod.
- Evacuate the System: This step *must* be performed by a licensed technician. It involves using a vacuum pump to remove any air and moisture from the system.
- Recharge the System: This step *must* be performed by a licensed technician. The system must be recharged with the correct amount of refrigerant, according to the manufacturer's specifications.
- Test the System: After recharging, run the system and monitor its performance to ensure it is cooling properly.
Troubleshooting Common Issues
Even with proper installation, problems can sometimes arise. Here are some common issues and how to address them:
- Restricted Flow: A clogged filter drier can restrict refrigerant flow, leading to reduced cooling capacity. This is often indicated by a significant temperature difference across the filter drier. *Call a professional to diagnose and replace the filter drier.*
- Moisture in the System: If the filter drier becomes saturated with moisture, it will no longer be effective. Symptoms include ice formation on the refrigerant lines and inefficient cooling. *Call a professional to diagnose and address the moisture source. Replacing the filter drier is usually necessary.*
- Leaks: Leaks around the filter drier connections can lead to refrigerant loss and system failure. *Call a professional to repair the leak and recharge the system.*
When to Call a Professional
While some aspects of HVAC maintenance can be tackled by DIY enthusiasts, working with refrigerant and brazing requires specialized skills and equipment. It's essential to know when to call a professional.
Call a qualified HVAC technician if:
- You are not comfortable working with refrigerant or using a brazing torch.
- You suspect a refrigerant leak.
- You need to recover or recharge refrigerant.
- You are unsure about the correct direction of the filter drier.
- You encounter complex issues that require specialized diagnostic tools.
- You need to evacuate the system.
Cost Considerations
The cost of replacing a filter drier can vary depending on several factors, including the type of filter drier, the labor costs in your area, and whether any other repairs are needed.
Estimated Costs:
- Filter Drier: $20 - $100 (depending on size and brand)
- Labor: $100 - $300 (depending on the complexity of the job)
- Refrigerant Recharge: $50 - $200 (depending on the amount of refrigerant needed)
Total Estimated Cost: $170 - $600
These are just estimates, and it's always best to get a quote from a licensed HVAC technician.
Preventative Maintenance
Regular maintenance can help prevent problems and extend the life of your HVAC system. Here are some tips:
- Change Air Filters Regularly: Dirty air filters restrict airflow and put a strain on the system.
- Schedule Annual Maintenance: A professional HVAC technician can inspect your system, clean the coils, check the refrigerant levels, and identify any potential problems before they become major issues.
- Keep the Outdoor Unit Clean: Remove any debris, such as leaves and branches, from around the outdoor unit.
Conclusion
Understanding the correct direction of a filter drier is crucial for the proper functioning and longevity of your HVAC system. While DIY installation is possible for experienced individuals, working with refrigerant and brazing can be dangerous and requires specialized skills. When in doubt, always call a qualified HVAC technician. Regular maintenance and prompt attention to any issues can help keep your system running efficiently and prevent costly repairs. By following these guidelines, you can ensure your HVAC system provides reliable cooling and heating for years to come.