Which Side Of The Sink Is Hot

Determining which side of your sink provides hot water might seem simple, but understanding the underlying principles can be surprisingly helpful. This guide will walk you through the standard conventions, potential variations, and troubleshooting tips to ensure you always get the water temperature you expect.
The Conventional Setup: Left is Hot
In most installations across North America, and in many other parts of the world, the standard plumbing convention dictates that the left side of the faucet handle corresponds to hot water, and the right side corresponds to cold water. This standardization aims to create a universally understood system, minimizing the risk of accidental scalding, especially for children or individuals with impaired cognitive function.
Think of it like driving: consistently placing the gas pedal on the right allows drivers to operate any vehicle with minimal re-learning. The same principle applies to faucets.
Why This Convention Exists
The left-is-hot convention isn't arbitrary; it's rooted in practicality and safety considerations. Imagine a scenario where someone instinctively reaches for water. The slightly longer travel distance to the left (for right-handed individuals, who are the majority) offers a split-second buffer, reducing the likelihood of immediately accessing scalding hot water. This minimal delay can make a significant difference in preventing burns.
Furthermore, adhering to this standard simplifies plumbing installation and maintenance. Plumbers can confidently connect hot and cold water lines knowing that the faucet configuration will likely follow the established convention.
How to Confirm the Standard Setup
If you're unsure about your sink's setup, there are several ways to confirm the hot water side:
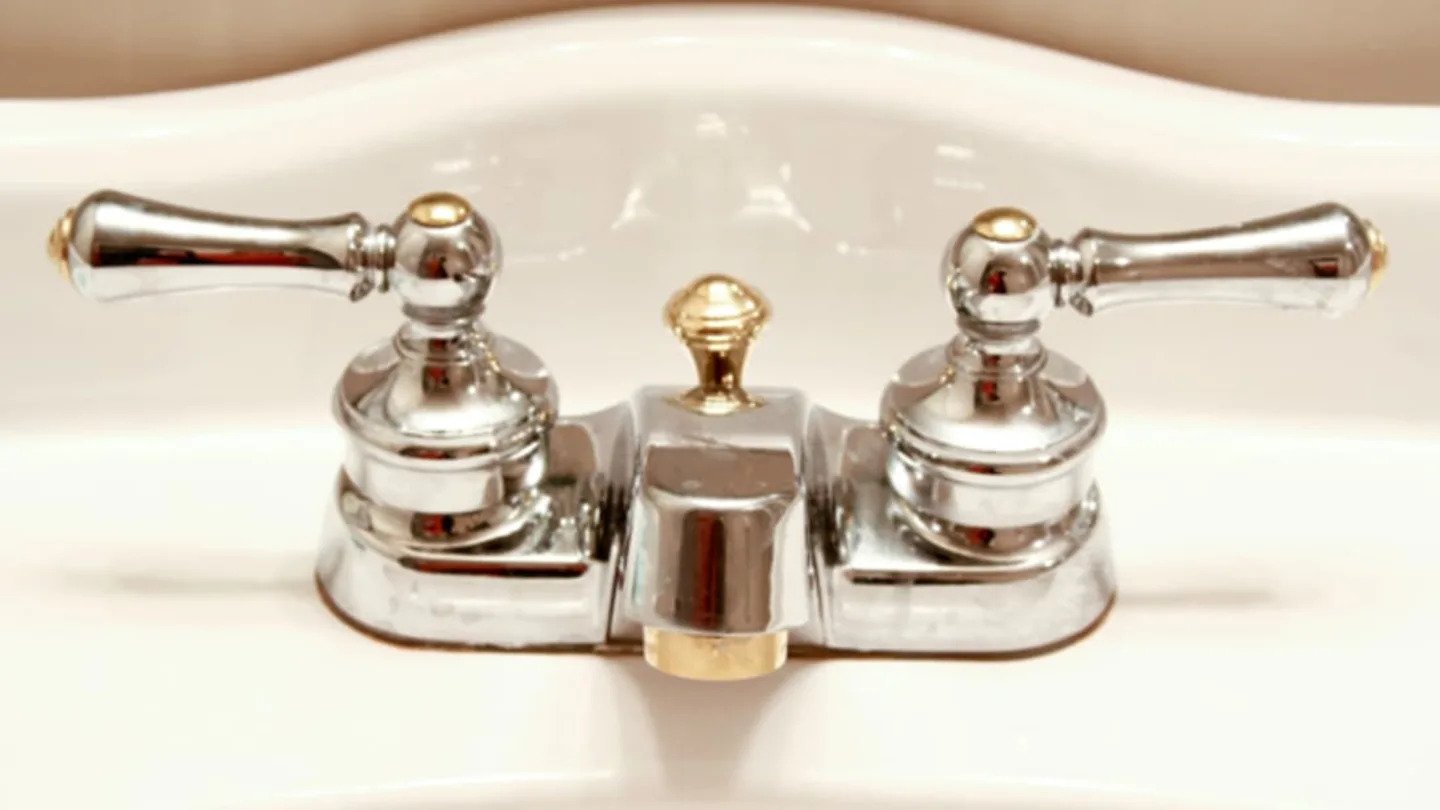
- Look for Markings: Many faucets have visual cues. Red markings typically indicate hot water, while blue markings denote cold water. These markings might be on the handles themselves, the faucet base, or even the escutcheon (the decorative plate covering the faucet connections).
- The Touch Test: Carefully turn on each handle, one at a time, and allow the water to run for a few seconds. Feel the temperature of the water. This is the most direct way to determine which side dispenses hot water. Be cautious not to burn yourself, especially if the water heater is set to a high temperature. Start with a very small stream of water.
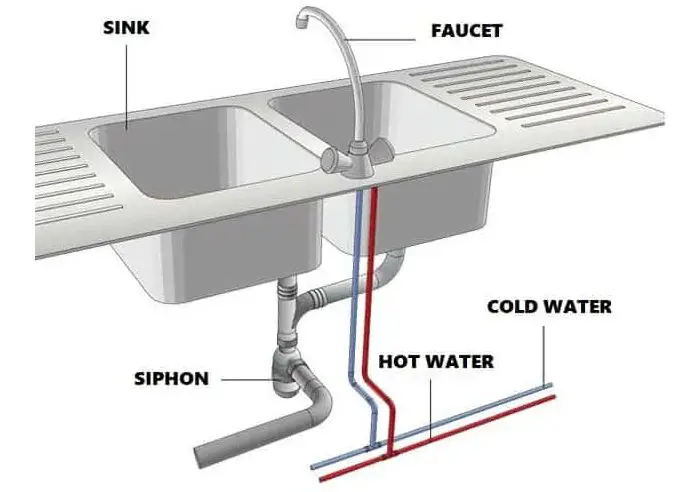
- Check the Plumbing Under the Sink: While potentially requiring some contortion, inspecting the pipes under the sink can provide clues. Typically, the hot water supply line will be connected to the left side of the faucet. However, this method requires some plumbing knowledge and may not always be conclusive if the connections are obscured.
When the Convention Doesn't Apply: Potential Exceptions
While the left-is-hot convention is widely adopted, there are situations where it might not hold true. Being aware of these exceptions is crucial to avoid unexpected temperature surprises.
Older Homes and DIY Plumbing
In older homes, particularly those with original plumbing, the faucet connections might predate the standardization. Similarly, amateur or DIY plumbing installations might deviate from the convention due to oversight, lack of knowledge, or simply personal preference. Incorrectly installed connections are more common than one might think!
Single-Handle Faucets
Single-handle faucets present a slightly different scenario. These faucets typically control both the water flow and the temperature with a single lever. Moving the lever to the left usually increases the hot water mix, while moving it to the right increases the cold water mix. The position of the lever when turned off, however, might not definitively indicate which direction will initially produce hot water. Again, markings or a quick temperature check are recommended.
Commercial and Public Restrooms
While less common, some commercial or public restrooms may not strictly adhere to the standard convention. This might be due to variations in plumbing codes or simply different installation practices. Always test the water temperature before extensive use.
European Plumbing
While increasingly aligning with international standards, some European countries historically had different plumbing conventions. While less prevalent in new installations, older homes or specific regions might still exhibit variations.
Troubleshooting and Correction
If you discover that your sink's faucet is plumbed backward (i.e., the right side dispenses hot water), there are a few options to address the issue.
Reversing the Plumbing Connections
The most straightforward solution is to reverse the hot and cold water connections under the sink. This involves carefully shutting off the water supply to the sink (both hot and cold), disconnecting the existing supply lines from the faucet, and then reconnecting them in the opposite configuration. This is best left to a qualified plumber unless you have experience with plumbing repairs. Incorrectly tightening connections can lead to leaks and water damage.
Replacing the Faucet Cartridge (for Some Models)
Some faucets, particularly single-handle models, use cartridges that control the water flow and temperature mixing. In some cases, it might be possible to rotate or replace the cartridge to correct the hot/cold orientation. Consult the faucet's manual or a plumbing professional to determine if this is a viable option for your specific model.
Adding Warning Labels
If physically correcting the plumbing is not feasible (e.g., due to complex plumbing configurations or budget constraints), a simple but effective solution is to add clear and prominent warning labels indicating which side dispenses hot water. This can help prevent accidental scalding, especially for visitors or individuals unfamiliar with the setup. Use durable, waterproof labels that are easily visible.
Safety Considerations: Preventing Scalding
Regardless of the faucet configuration, prioritizing safety is paramount. Scalding water can cause serious burns, especially to young children and elderly individuals.
Lowering the Water Heater Temperature
The most effective way to prevent scalding is to lower the temperature setting on your water heater. A temperature of 120°F (49°C) is generally considered safe and sufficient for most household needs. This temperature significantly reduces the risk of scalding while still providing adequately hot water.
Installing Anti-Scald Valves
Anti-scald valves are devices that automatically limit the maximum temperature of the water flowing from a faucet or shower. These valves rapidly adjust the mix of hot and cold water to maintain a safe temperature, even if there are fluctuations in water pressure or temperature. Installing anti-scald valves is highly recommended, particularly in homes with young children or elderly residents.
Supervising Children
Always supervise young children when they are using the sink, especially when accessing hot water. Teach them about the potential dangers of hot water and how to test the water temperature before using it.
In Conclusion
While the left side of the sink is generally associated with hot water, it's crucial to verify the actual configuration of your faucet and take necessary precautions to prevent scalding. By understanding the conventions, exceptions, and troubleshooting techniques outlined in this guide, you can ensure a safe and comfortable experience every time you use your sink.
Remember, when in doubt, consult a qualified plumbing professional. They can accurately diagnose any plumbing issues and provide expert solutions to ensure your plumbing system is functioning safely and efficiently.


:max_bytes(150000):strip_icc()/the-purpose-of-a-sink-overflow-2718785-hero-d054f7583bc74306947811c78855ab20.jpg)
