Which Way Does Air Flow On Furnace

Understanding the correct airflow direction in your furnace is crucial for efficient heating and preventing costly repairs. Incorrect airflow can lead to overheating, reduced efficiency, and even damage to furnace components. This guide will walk you through identifying the correct airflow direction and troubleshooting common issues.
Understanding Furnace Airflow Basics
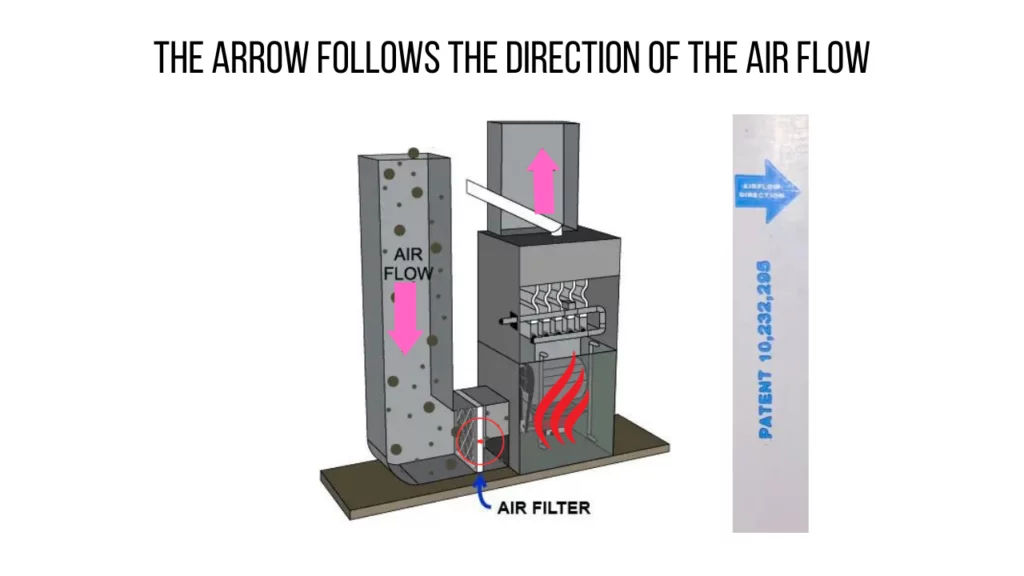
Furnaces typically draw in cool air from your home, heat it using a gas burner or electric heating elements, and then distribute the warmed air through your ductwork. This process relies on proper airflow. The direction of this airflow is almost always upward through the furnace, but there are a few exceptions.
Identifying Airflow Direction
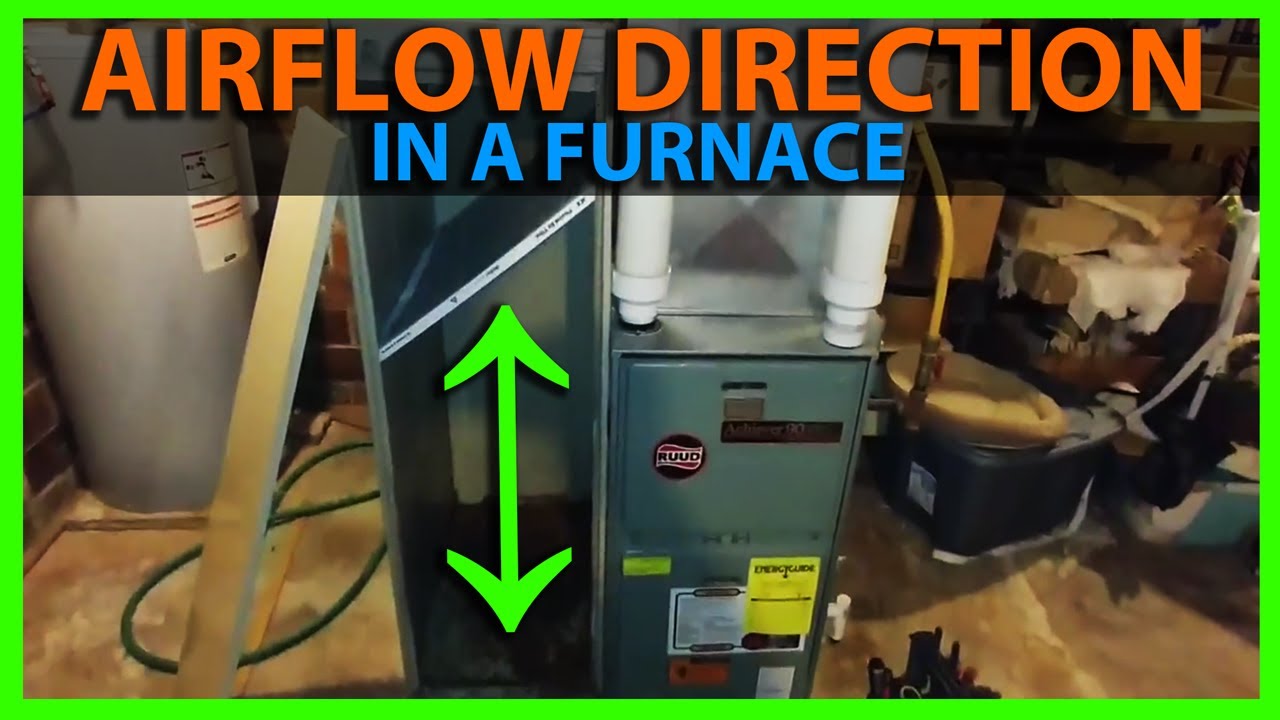
The most reliable way to determine the correct airflow direction is to check the furnace's label. Look for an arrow indicating the intended direction. This label is usually found on the furnace casing near the blower motor compartment. If there's no visible arrow, check the manufacturer's documentation or search online using your furnace model number.
Upflow vs. Downflow Furnaces
Upflow furnaces are the most common type. They draw in cool air from the bottom and expel warm air from the top. Downflow furnaces, on the other hand, draw in cool air from the top and release warm air from the bottom. Horizontal furnaces, as the name suggests, move air horizontally. Identifying your furnace type is the first step in diagnosing airflow problems.
Why Correct Airflow Matters
Improper airflow can lead to several problems:
- Overheating: Insufficient airflow prevents the heat exchanger from cooling properly, leading to overheating and potential damage.
- Reduced Efficiency: Your furnace has to work harder to heat your home, increasing energy consumption and utility bills.
- Short Cycling: The furnace turns on and off frequently, which strains components and reduces lifespan.
- Frozen Evaporator Coil (if you have an AC unit installed): In cooling mode, restricted airflow can cause the evaporator coil to freeze up, hindering cooling performance.
- Component Failure: Overheating can damage the blower motor, heat exchanger, and other essential parts.
Troubleshooting Airflow Problems: A DIY Approach
Before diving into any troubleshooting, always turn off the power to your furnace at the breaker box. Safety first!
1. Check the Air Filter
A dirty air filter is the most common cause of restricted airflow. A clogged filter restricts the amount of air that can pass through, forcing your furnace to work harder. Replace your air filter every 1-3 months, or more frequently if you have pets or allergies.
Tools Needed:
- New air filter (correct size for your furnace)
- Screwdriver (if needed to access the filter)
Steps:
- Locate the air filter slot on your furnace.
- Remove the old filter.
- Note the direction of the airflow arrow on the old filter.
- Insert the new filter, matching the airflow arrow.
- Replace the access panel.
2. Inspect Air Vents and Registers
Ensure that all air vents and registers in your home are open and unobstructed. Furniture, rugs, and curtains can block airflow.
Steps:
- Walk through each room and check every vent.
- Remove any obstructions blocking the vents.
- Ensure that the vent dampers are open.
3. Check the Blower Motor
The blower motor is responsible for circulating air through your furnace. If it's not running properly, airflow will be reduced. Listen for unusual noises like squealing or grinding. If you suspect a blower motor problem, it's best to call a professional, but you can perform a visual inspection.
Safety Warning: Working with electrical components can be dangerous. If you are not comfortable working with electricity, contact a qualified HVAC technician.
Tools Needed:
- Screwdriver
- Multimeter (for testing voltage – only if you are comfortable and know how to use it safely)
Steps:
- Turn off the power to the furnace.
- Locate the blower motor compartment.
- Remove the access panel.
- Visually inspect the blower motor for damage or debris.
- Check the blower wheel for obstructions.
- (Optional - only if qualified) Use a multimeter to check the voltage to the blower motor.
4. Inspect Ductwork for Leaks
Leaky ductwork can significantly reduce airflow. Seal any visible leaks with duct tape or mastic sealant.
Tools Needed:
- Duct tape or mastic sealant
- Brush (for applying mastic sealant)
Steps:
- Visually inspect your ductwork for leaks.
- Clean the area around the leak.
- Apply duct tape or mastic sealant to seal the leak.
When to Call a Professional
While some airflow problems can be resolved with DIY solutions, others require the expertise of a qualified HVAC technician. Call a professional if you experience any of the following:
- The furnace is making loud or unusual noises.
- You suspect a problem with the heat exchanger.
- You are uncomfortable working with electrical components.
- The furnace is not heating your home properly after trying the DIY solutions.
- You notice a burning smell coming from the furnace.
- The furnace is short cycling frequently.
Estimating Repair Costs
HVAC repair costs vary depending on the problem and your location. Here are some rough estimates:
- Air filter replacement: $10 - $30
- Blower motor replacement: $300 - $800
- Heat exchanger replacement: $800 - $2000
- Ductwork repair: $200 - $1000
These are just estimates. Always get quotes from multiple HVAC contractors before proceeding with any repairs. Factors affecting costs include the complexity of the repair, the brand and model of your furnace, and local labor rates. Requesting a detailed breakdown of the repair, including parts and labor costs, is advisable.
Preventative Maintenance
Regular preventative maintenance can help prevent airflow problems and extend the lifespan of your furnace. Schedule an annual furnace inspection and cleaning with a qualified HVAC technician. Preventative maintenance typically includes:
- Inspecting and cleaning the burner assembly.
- Checking the heat exchanger for cracks or leaks.
- Inspecting and lubricating the blower motor.
- Testing the safety controls.
- Checking the gas pressure.
- Inspecting the ductwork.
By understanding the correct airflow direction of your furnace and performing regular maintenance, you can keep your home warm and comfortable throughout the winter and avoid costly repairs. Remember to always prioritize safety and call a professional when needed. The brand name Carrier and other major manufacturers provide extensive documentation and support on their websites, a valuable resource for homeowners.
Also, keep in mind that HVAC systems can be complex. If you're unsure about any step, it's always best to err on the side of caution and consult with a qualified professional.