Which Way Is Airflow On Ac Filter
Understanding AC Filter Airflow: A Homeowner's Guide
One of the simplest, yet most crucial, aspects of maintaining a healthy and efficient HVAC system is understanding the proper airflow direction when installing your AC filter. Getting it wrong can lead to decreased efficiency, increased energy bills, and even damage to your equipment. This guide will walk you through everything you need to know to ensure your AC filter is installed correctly, covering common mistakes and troubleshooting tips.
Why Airflow Direction Matters
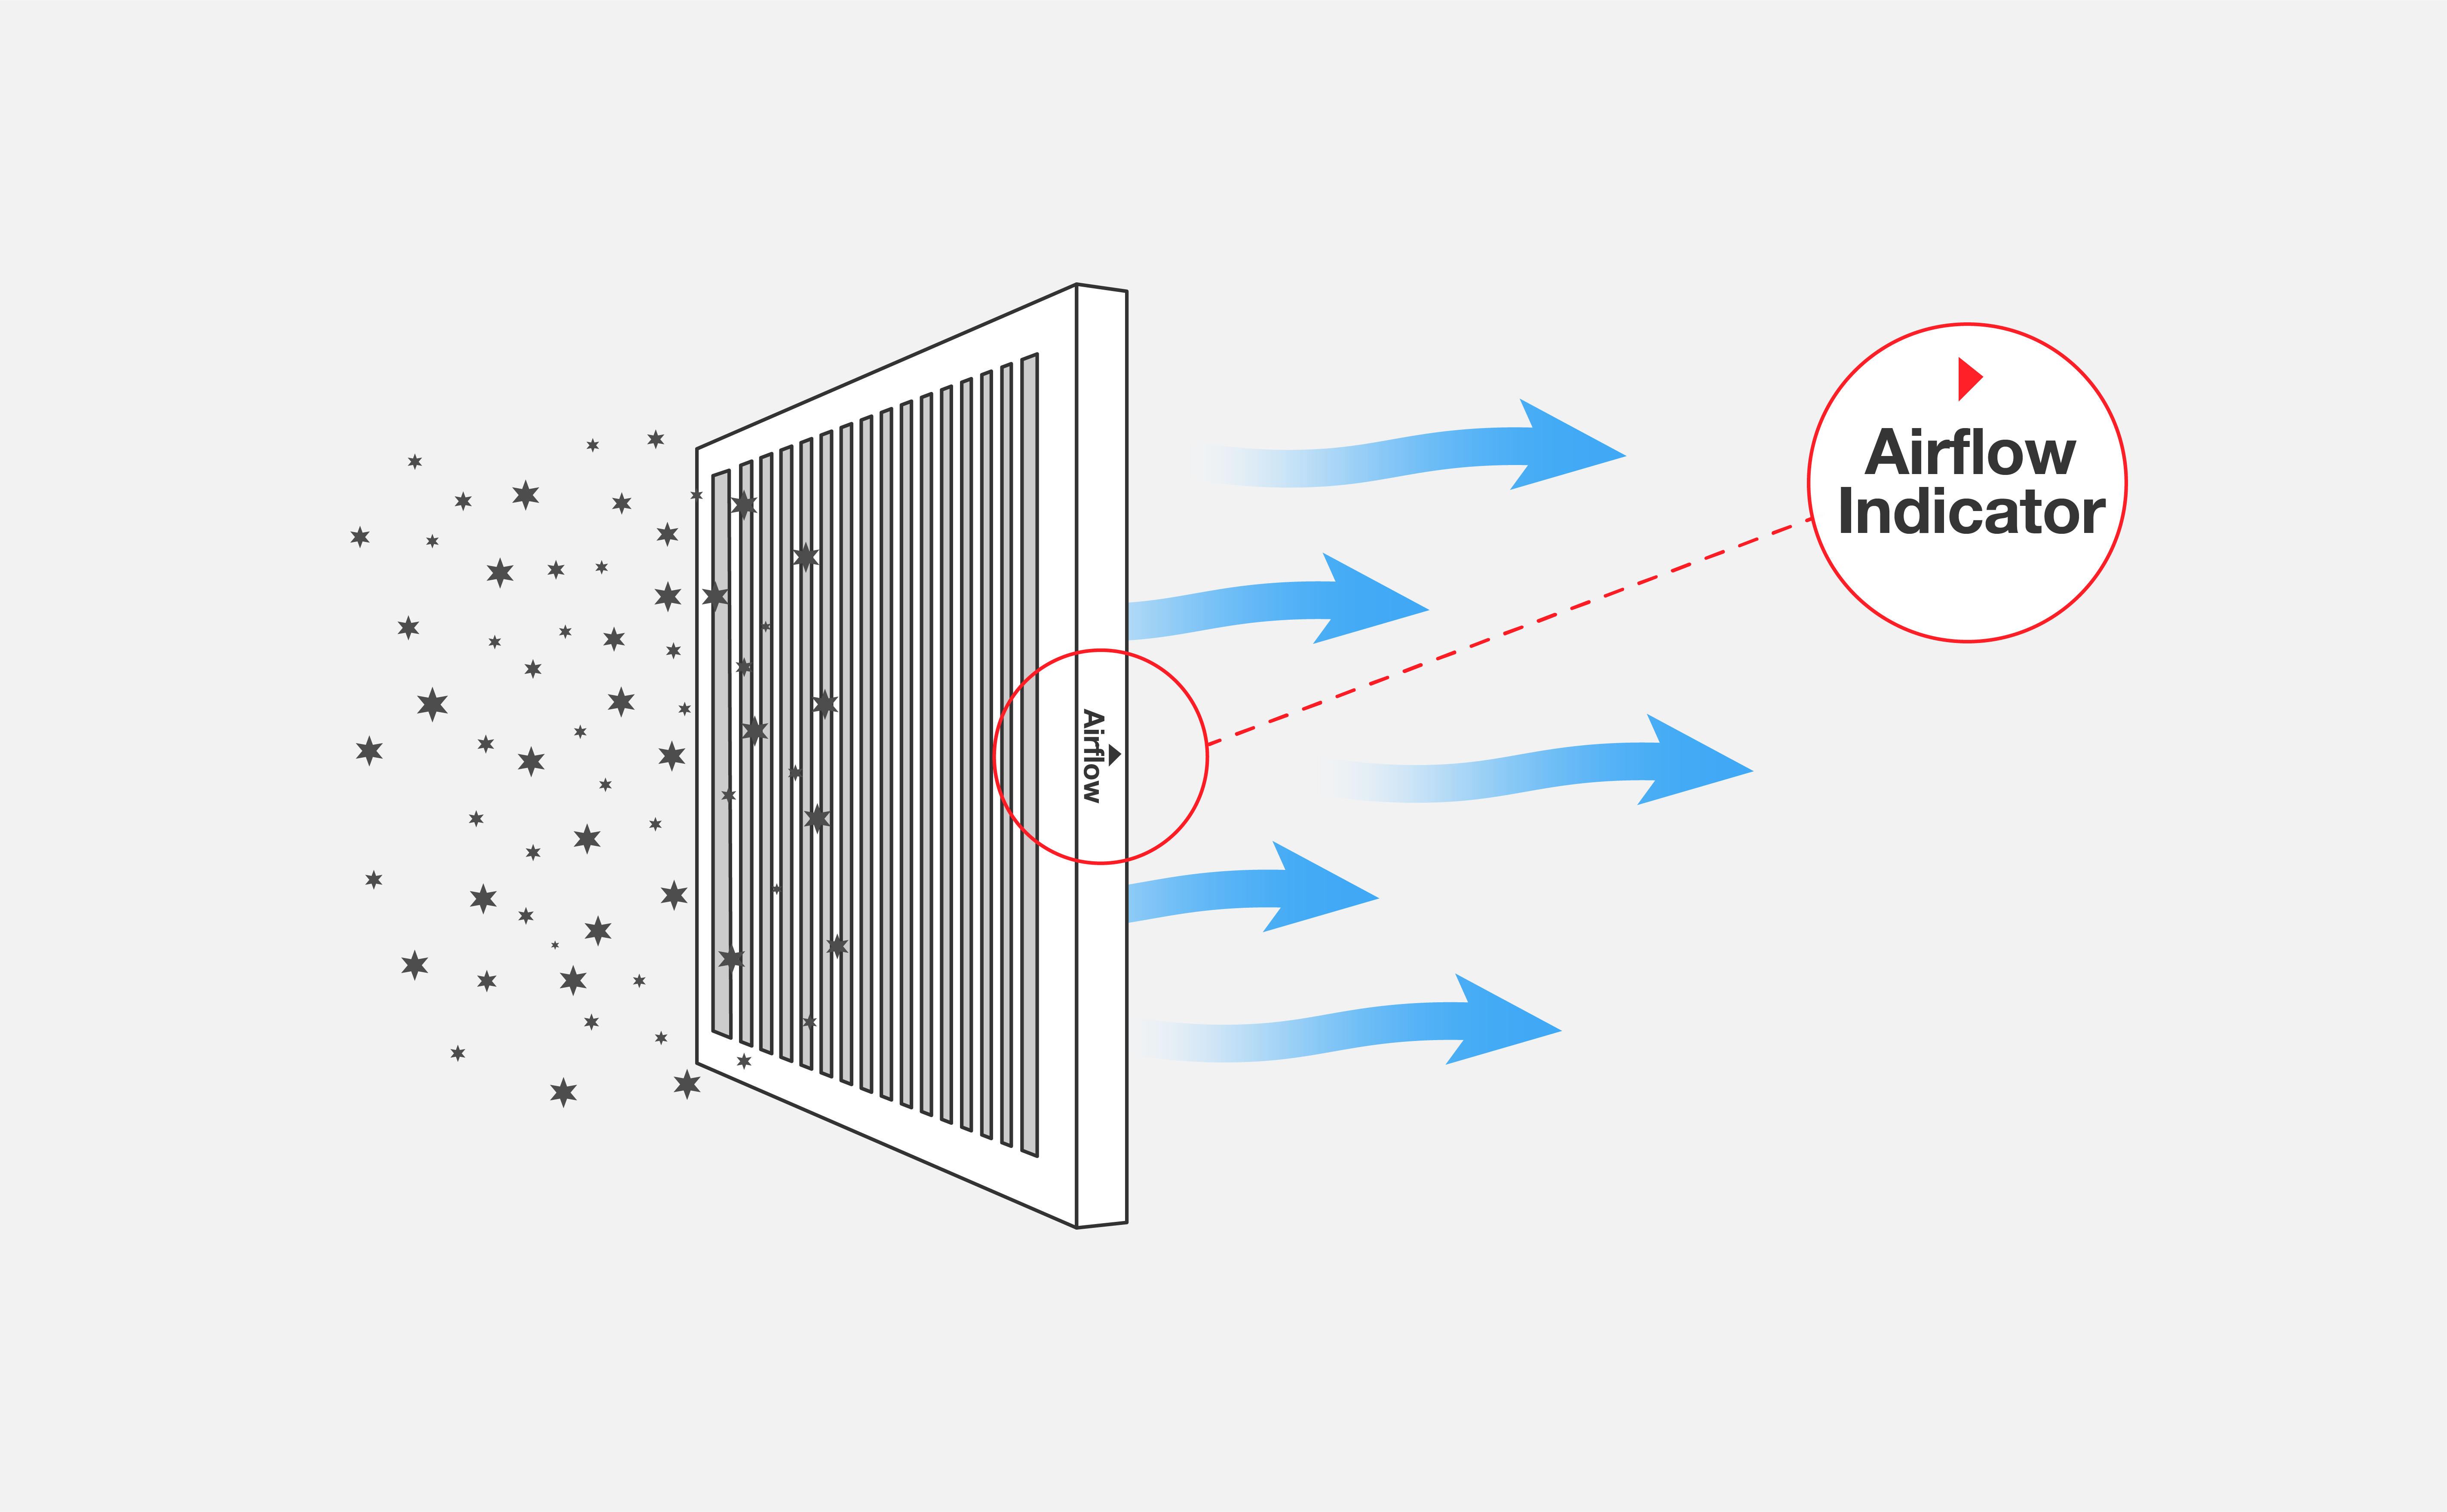
AC filters are designed to trap dust, pollen, pet dander, and other airborne particles before they enter your HVAC system. This protects the sensitive components inside, such as the evaporator coil and blower motor, from becoming clogged and overworked. When the filter is installed backward, it can severely limit airflow, causing your system to work harder and potentially overheat. Furthermore, particles might bypass the filter altogether, negating its protective function.
Identifying Airflow Direction
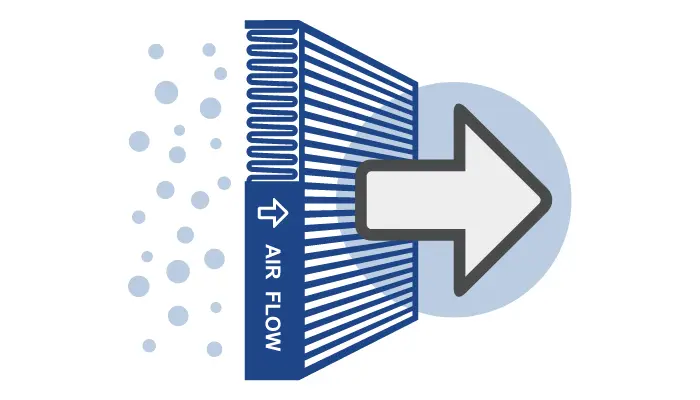
The good news is that determining the correct airflow direction is usually straightforward. Most AC filters have a clearly marked arrow indicating the intended path of the air. Let's break down how to find and interpret this arrow.
Locating the Airflow Arrow
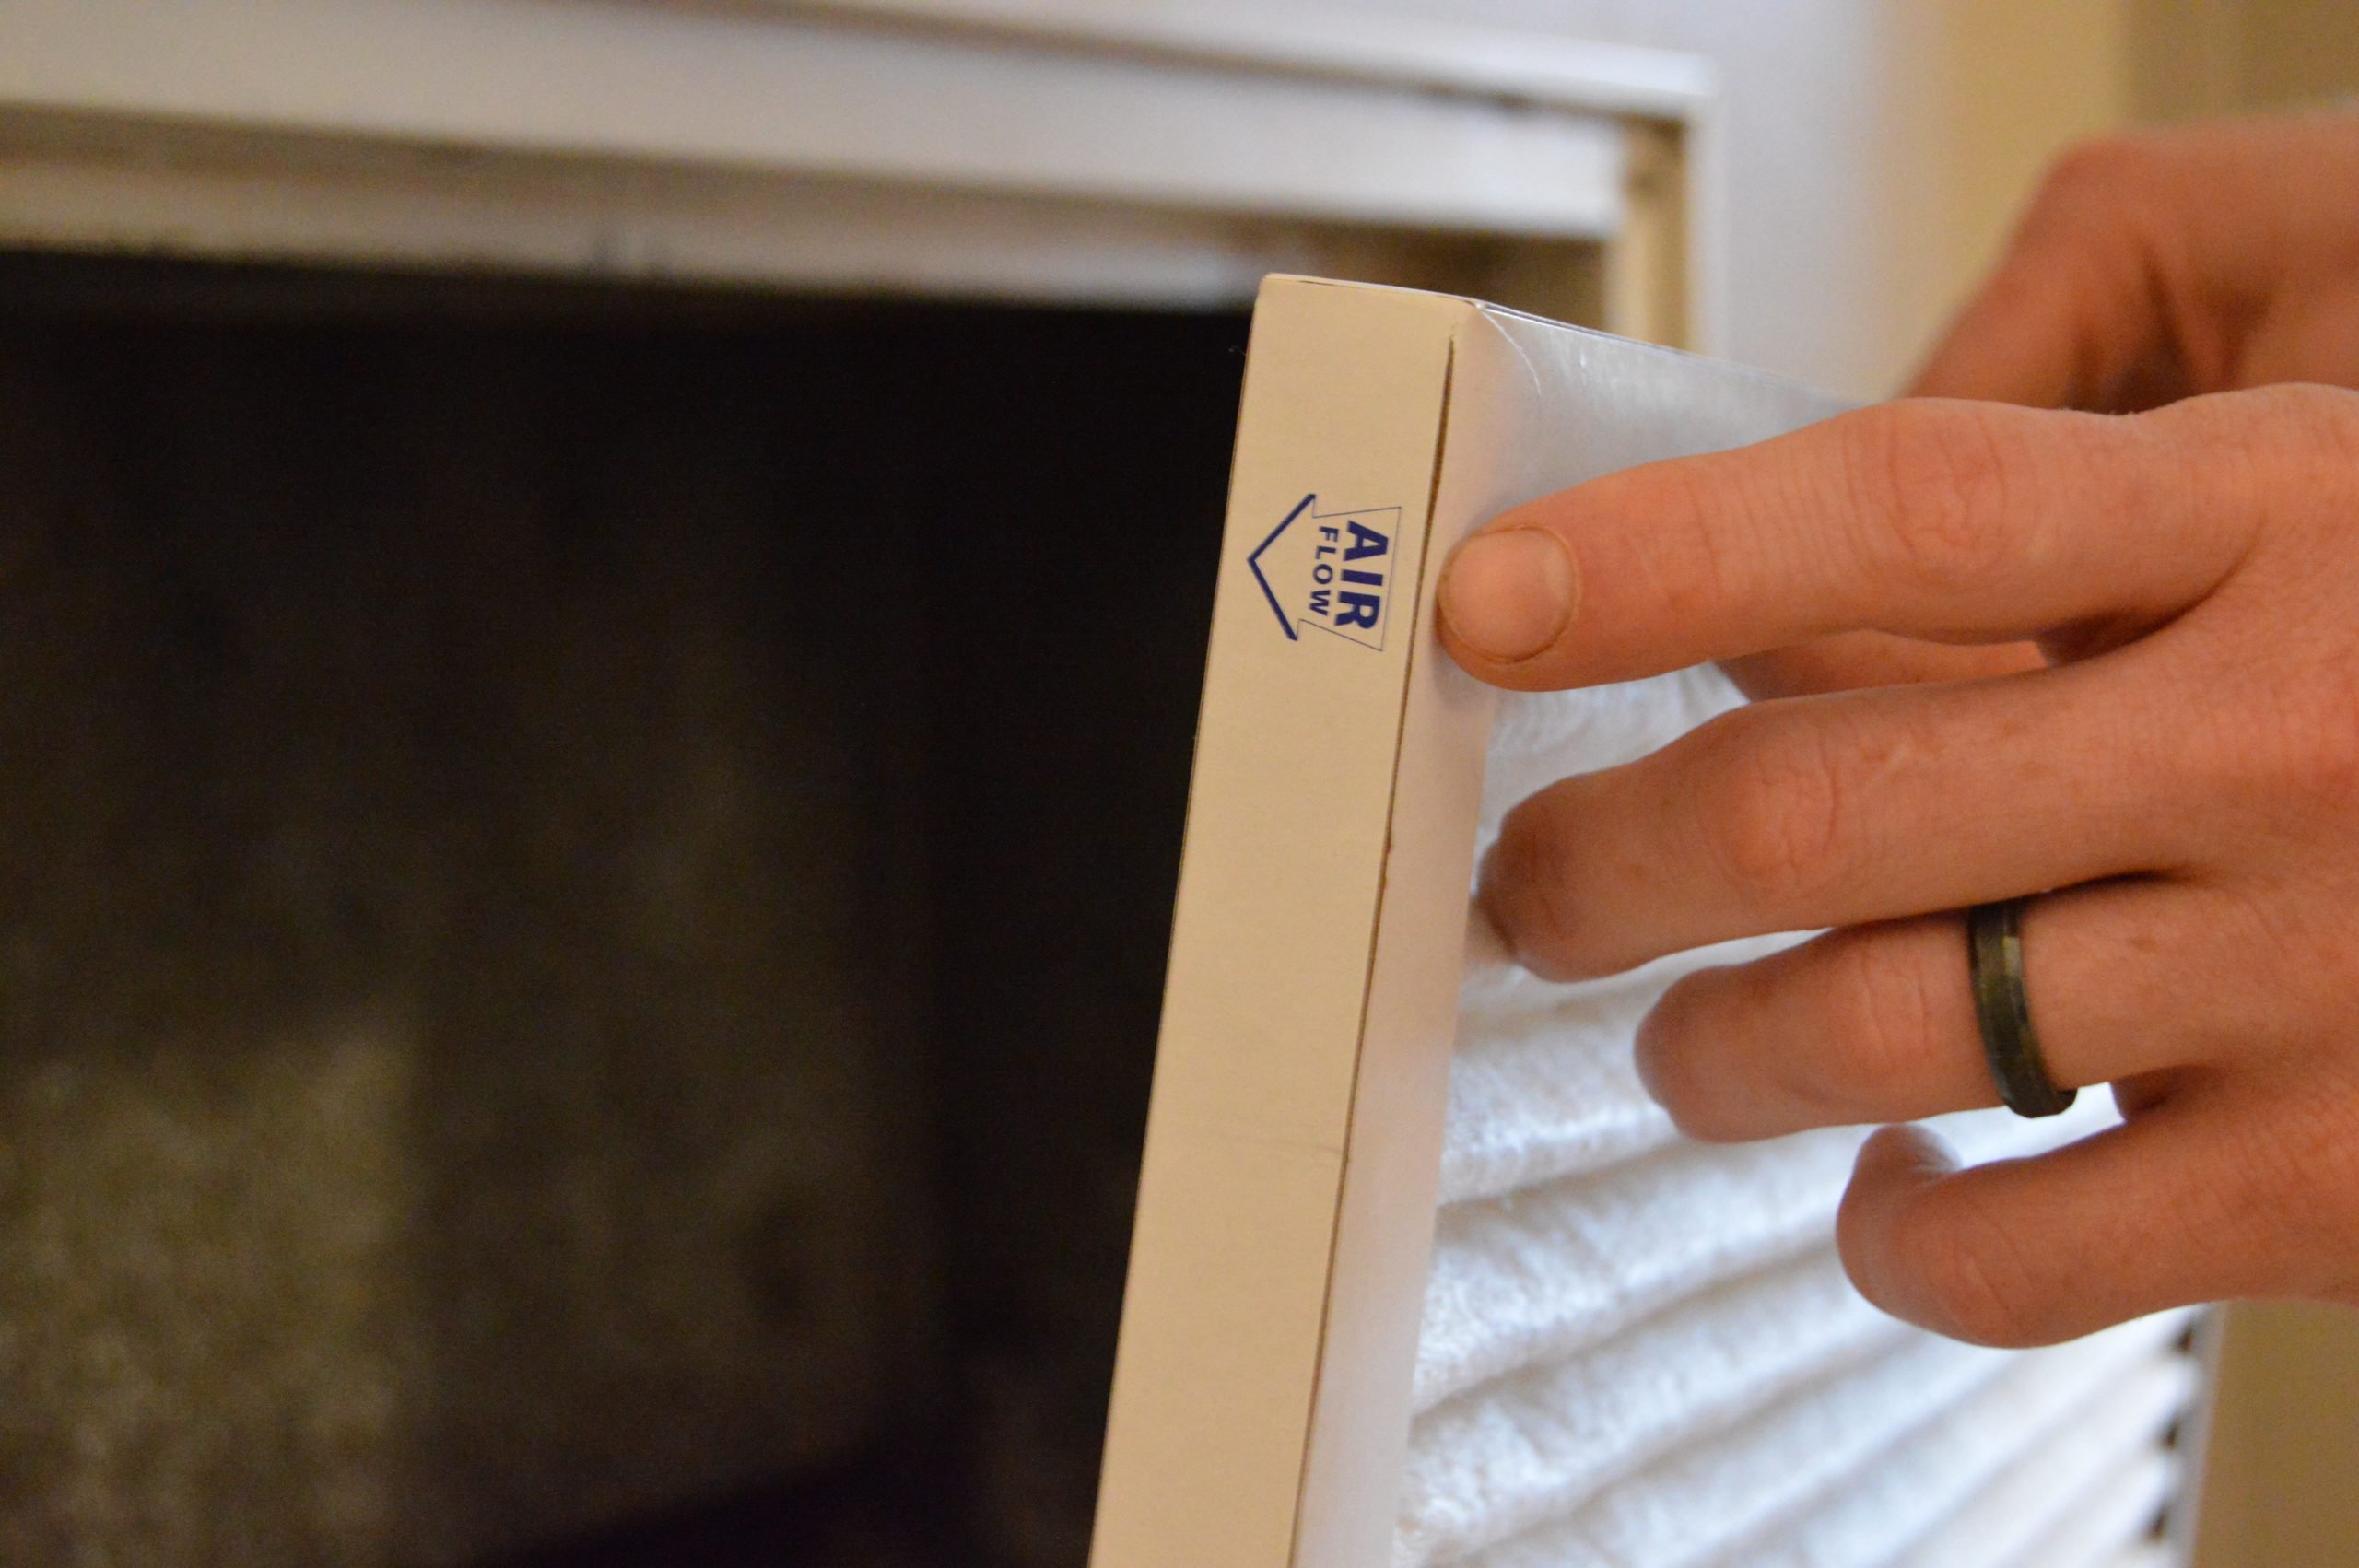
Look closely at the frame of your AC filter. You should see an arrow, often printed in black or blue. This arrow isn't just a decorative element; it's a critical indicator of the correct installation direction.
Interpreting the Arrow: Which Way Does It Point?
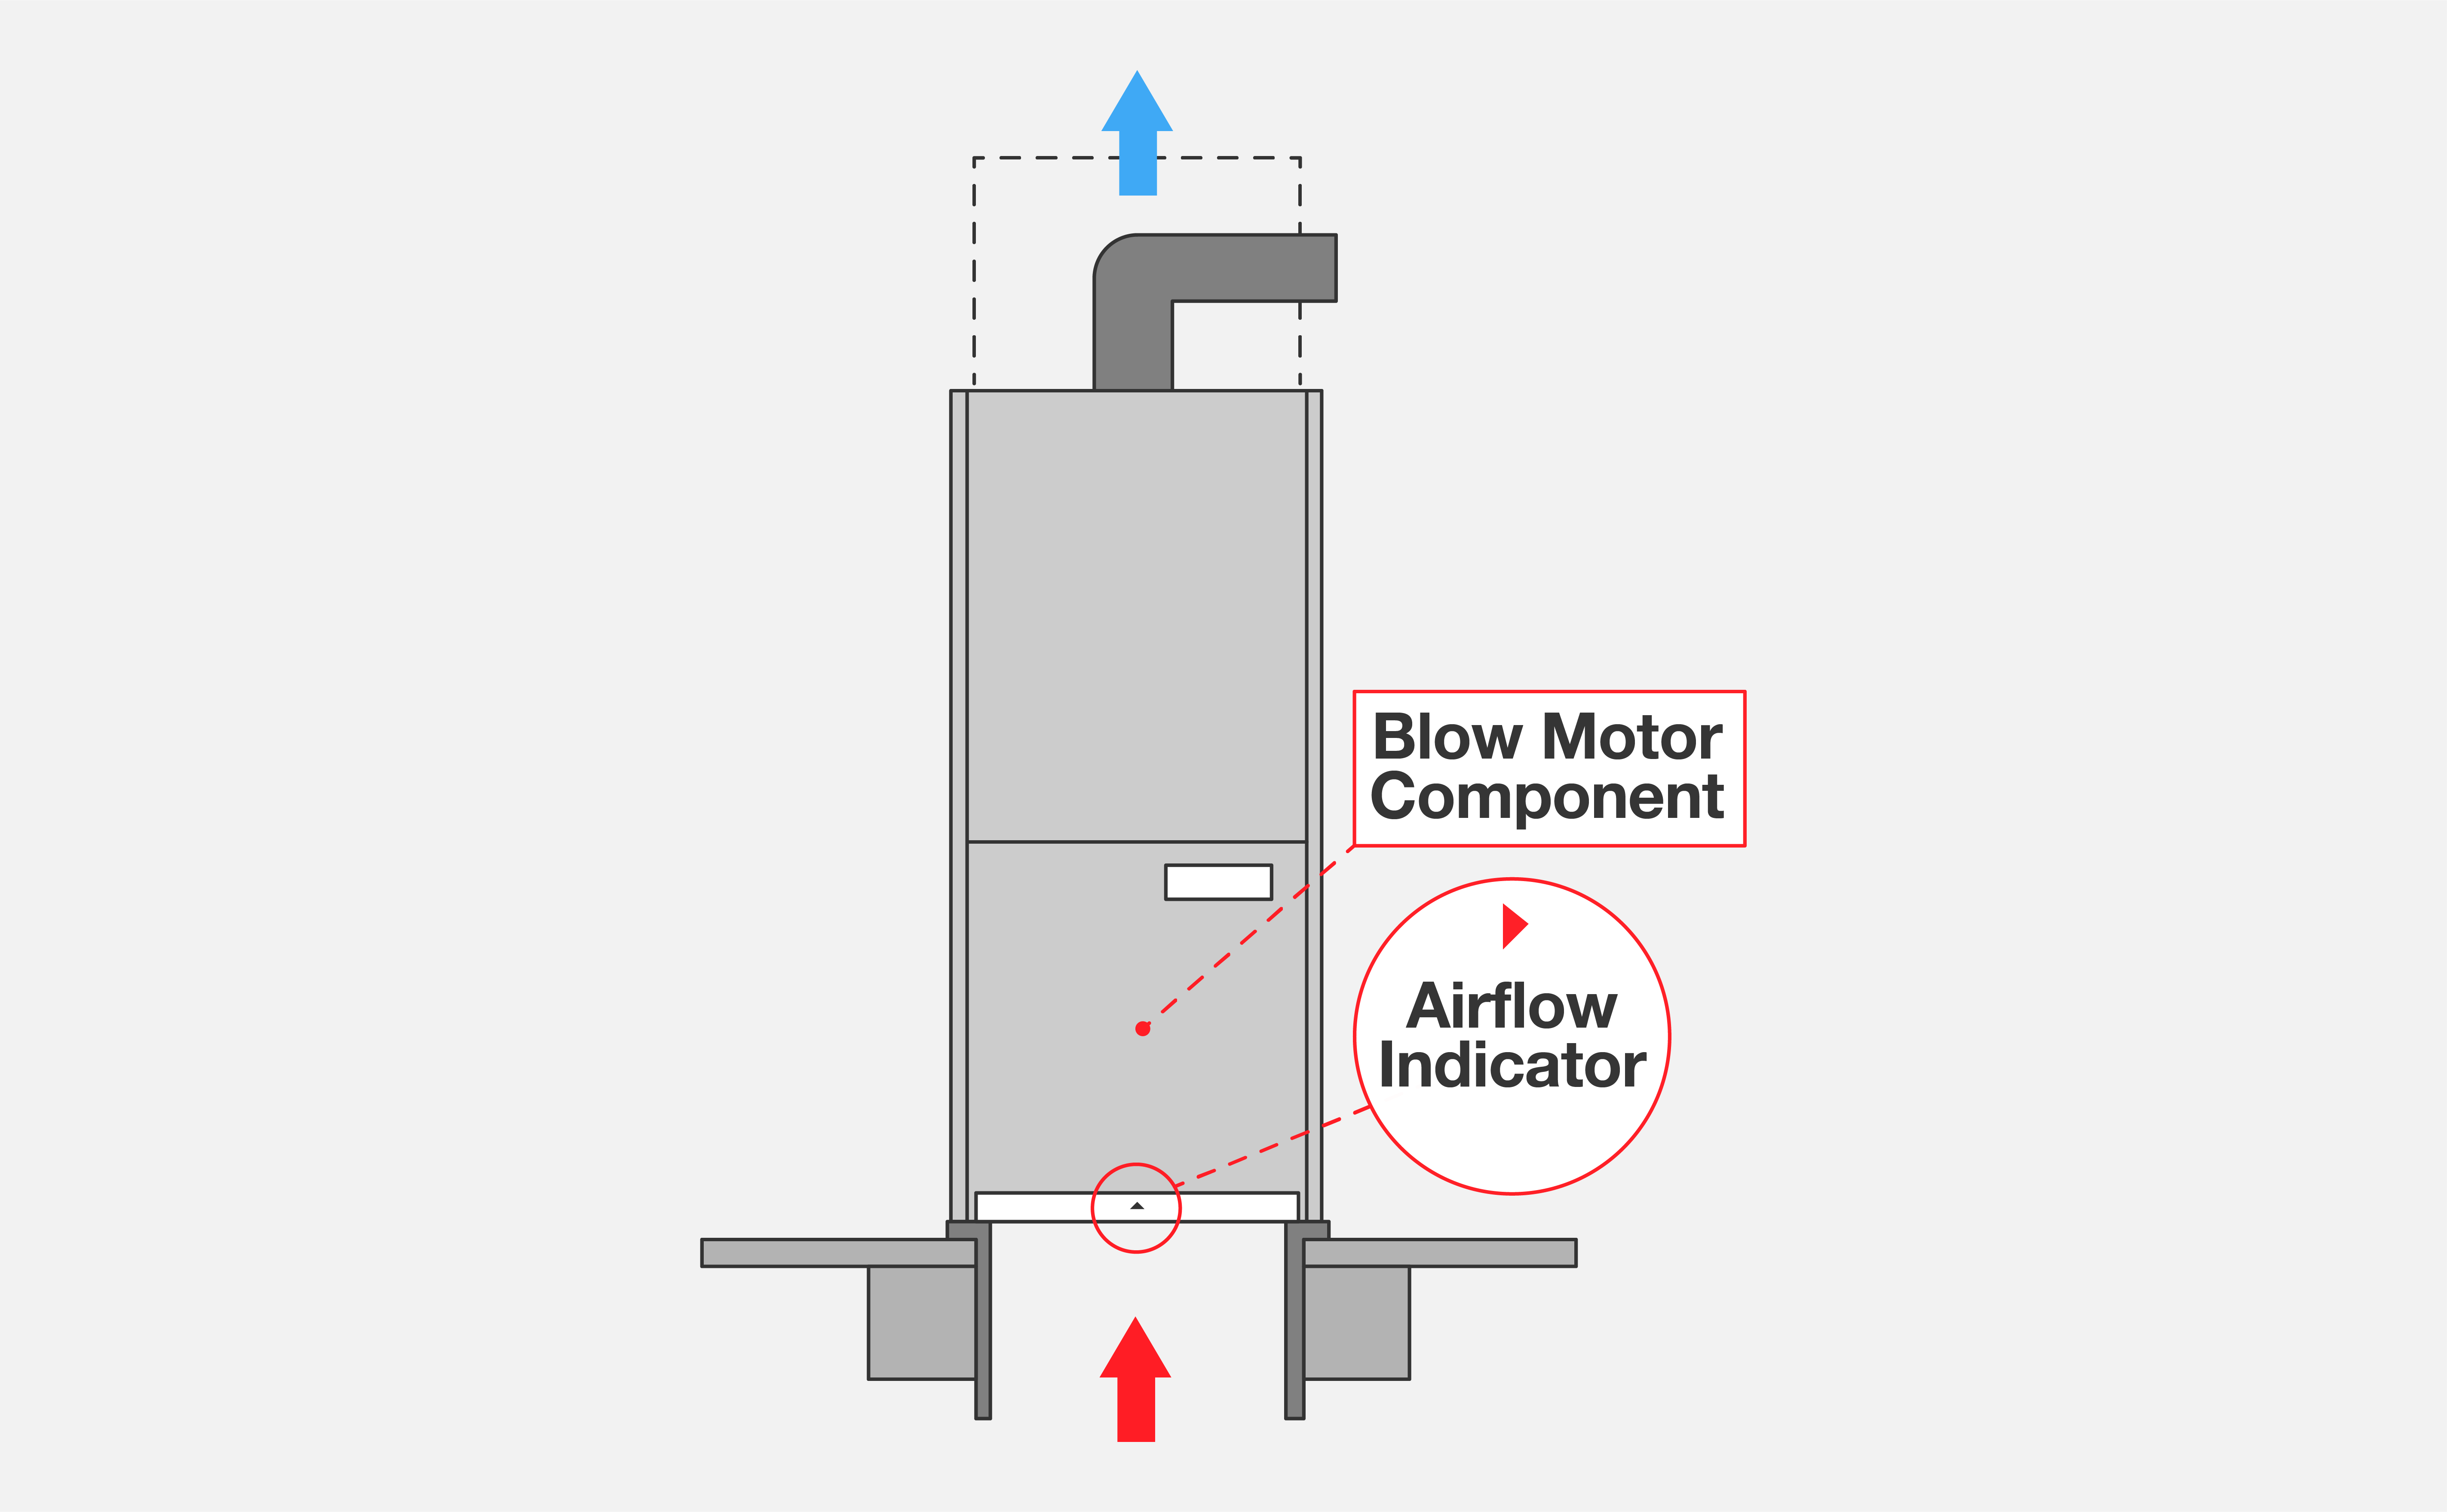
The arrow on your AC filter should always point in the direction of the airflow. This means it should point towards the furnace or air handler, which is the unit that houses the blower motor. Imagine the air being sucked into the system; the arrow shows the path it takes through the filter.
Step-by-Step Filter Installation
Now that you understand the importance of airflow and how to identify the correct direction, let's walk through the installation process.
Tools and Materials
- New AC filter (ensure it's the correct size for your unit)
- Screwdriver (if necessary to open the filter compartment)
- Gloves (optional, to keep your hands clean)
- Flashlight (to better see inside the filter compartment)
Installation Steps
- Turn off the HVAC System: This is crucial for your safety. Locate the circuit breaker that controls your HVAC system and turn it off.
- Locate the Filter Compartment: This is typically located either in the return air duct where it connects to the furnace/air handler or directly inside the furnace/air handler itself.
- Remove the Old Filter: Carefully slide out the old filter. Note the direction of the arrow on the old filter before discarding it. This can serve as a reference point.
- Inspect the Filter Compartment: Check for any debris or dust accumulation. Wipe down the compartment with a damp cloth if necessary.
- Insert the New Filter: Align the arrow on the new filter with the direction of airflow, pointing towards the furnace/air handler.
- Secure the Filter: Slide the filter fully into the compartment. Ensure it fits snugly and is properly seated.
- Close the Filter Compartment: Reattach any access panels or doors and secure them with screws if necessary.
- Turn the HVAC System Back On: Return to the circuit breaker and turn the power back on.
Common Mistakes and Troubleshooting
Even with clear instructions, mistakes can happen. Here are some common issues and how to address them.
Incorrect Arrow Direction
This is the most frequent mistake. Double-check that the arrow is pointing towards the furnace/air handler. If you're unsure, consult the unit's manual or contact an HVAC professional.
Wrong Filter Size
Using the wrong size filter can lead to air leaks and reduced efficiency. Always use the filter size specified in your HVAC system's manual or measure the old filter before purchasing a replacement.
Filter Not Seated Properly
If the filter isn't fully seated, air can bypass it. Make sure the filter is snug within the compartment.
Clogged Filter
A severely clogged filter restricts airflow and forces your system to work harder. Replace your filter regularly – typically every 1-3 months, depending on usage and air quality.
When to Call a Professional
While changing your AC filter is a simple task, some HVAC issues require professional attention. Here are some situations where it's best to call an HVAC technician.
Unusual Noises
If you hear strange noises coming from your HVAC system, such as banging, rattling, or squealing, it could indicate a serious problem.
Decreased Cooling or Heating
If your system isn't cooling or heating your home effectively, despite having a clean filter, there may be other underlying issues, such as a refrigerant leak or a malfunctioning compressor.
Frozen Evaporator Coil
A frozen evaporator coil can be caused by restricted airflow or a refrigerant leak. This requires professional diagnosis and repair.
Electrical Issues
Never attempt to repair electrical components yourself. Contact a qualified electrician or HVAC technician for any electrical issues.
Understanding MERV Ratings
MERV stands for Minimum Efficiency Reporting Value. It's a rating system that indicates how effectively a filter captures airborne particles. Higher MERV ratings mean the filter captures smaller particles.
Choosing the Right MERV Rating
While a higher MERV rating might seem like the best option, it's important to consider your HVAC system's capabilities. Filters with very high MERV ratings can restrict airflow, especially in older or less powerful systems. Consult your system's manual or an HVAC professional to determine the appropriate MERV rating for your unit.
Common MERV Rating Ranges
- MERV 1-4: Basic filters that capture large particles like dust and pollen.
- MERV 5-8: Good for general residential use, capturing more fine particles like pet dander and mold spores.
- MERV 9-12: Better for individuals with allergies or respiratory sensitivities, capturing even smaller particles like bacteria and smoke.
- MERV 13-16: Typically used in hospitals and clean rooms, capturing very small particles like viruses.
The Importance of Regular Filter Changes
Changing your AC filter regularly is one of the most important things you can do to maintain a healthy and efficient HVAC system. A clean filter ensures proper airflow, protects your equipment, and improves indoor air quality.
Benefits of Regular Filter Changes
- Improved Airflow: A clean filter allows for optimal airflow, reducing strain on your HVAC system.
- Increased Energy Efficiency: When your system doesn't have to work as hard, it consumes less energy, saving you money on your utility bills.
- Better Indoor Air Quality: A clean filter traps more airborne particles, improving the air quality in your home.
- Extended Equipment Lifespan: By protecting your system from dust and debris, regular filter changes can help extend its lifespan.
How Often to Change Your Filter
The frequency of filter changes depends on several factors, including:
- The type of filter you use
- The air quality in your area
- Whether you have pets
- The frequency of HVAC system use
As a general guideline, it's recommended to change your filter every 1-3 months. However, if you have pets or live in a dusty area, you may need to change it more frequently. Inspect your filter monthly and replace it when it appears dirty.
Cost of AC Filter Replacement
The cost of replacing an AC filter is relatively low, making it a cost-effective way to maintain your HVAC system. The cost of the filter itself typically ranges from $5 to $30, depending on the MERV rating and size. If you hire a professional to change the filter, you can expect to pay an additional $50 to $100 for labor.
While it may be tempting to skip filter changes to save money, the long-term costs of neglecting this task can be significant. Reduced energy efficiency, equipment damage, and poor indoor air quality can all lead to higher expenses down the road.
Conclusion
Understanding and properly installing your AC filter is a simple yet vital aspect of HVAC maintenance. By following the guidelines outlined in this article, you can ensure optimal airflow, protect your equipment, and improve the air quality in your home. Remember to always check the airflow arrow, use the correct filter size, and change your filter regularly. And when in doubt, don't hesitate to contact a qualified HVAC professional for assistance.