Why Is The Ac Fan Outside Not Turning On

Summer is here, and that means one thing for many homeowners: relying on their air conditioning system to stay cool and comfortable. One of the most frustrating experiences is when your AC system seems to be struggling, and upon investigation, you discover the outdoor fan isn't spinning. This is a common issue, and before calling a professional, there are several troubleshooting steps you can take to identify and potentially fix the problem yourself.
Understanding Your AC System: The Outdoor Fan's Role
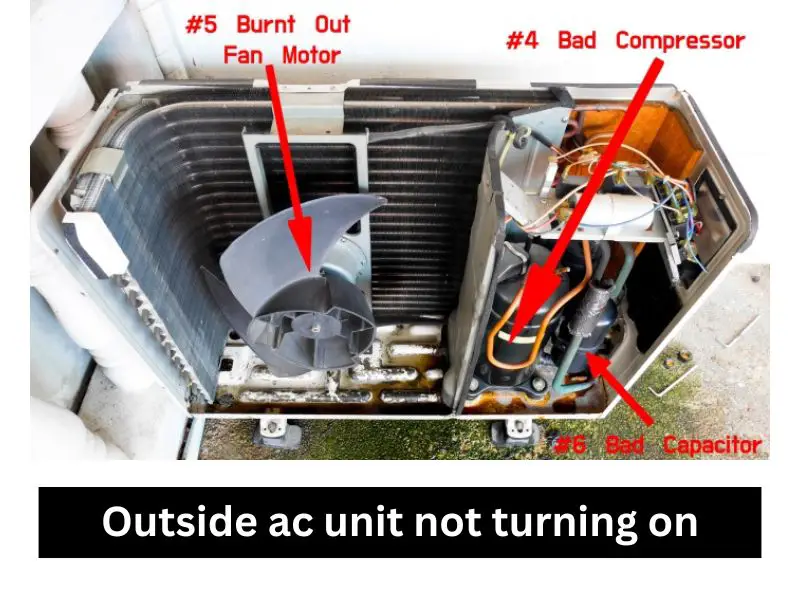
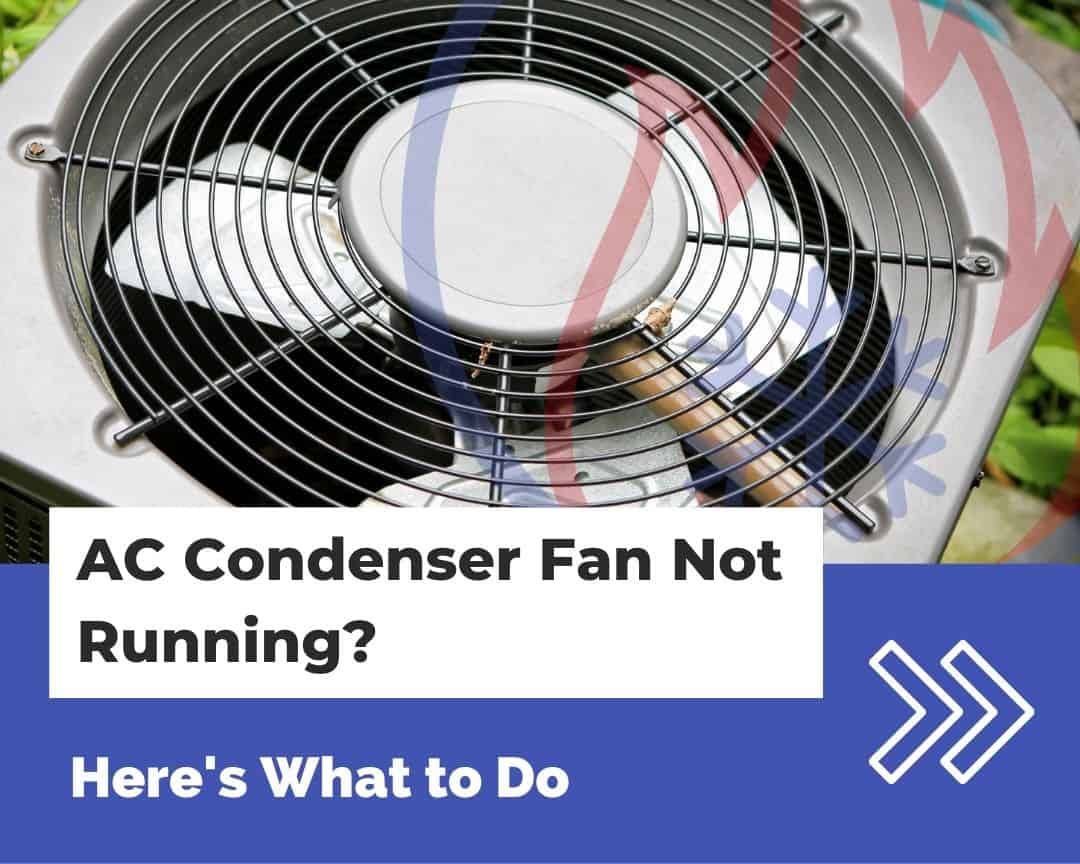
The outdoor unit of your air conditioner houses the compressor and the condenser coil. The fan's job is to dissipate the heat absorbed from inside your home. Without a functioning fan, the refrigerant can't effectively cool down, leading to poor cooling performance, increased energy consumption, and potentially damaging your compressor.
Safety First! Before You Start
Before you even think about troubleshooting, safety is paramount. Always follow these precautions:
- Turn off the power: Locate the outdoor AC unit's disconnect switch (usually a gray metal box near the unit) and flip it to the "off" position. This cuts power to the unit. If you can't find a disconnect switch, turn off the breaker in your main electrical panel that supplies power to the AC unit.
- Wait a few minutes: After turning off the power, wait at least five minutes to allow any residual electricity to dissipate.
- Wear appropriate footwear: Wear closed-toe shoes to protect your feet.
- Don't work in wet conditions: Avoid troubleshooting in the rain or when the unit is wet.
Troubleshooting: A Step-by-Step Guide
Step 1: Check the Power Supply
The most basic, yet often overlooked, step is ensuring the unit is receiving power.
- Verify the disconnect switch: Double-check that the disconnect switch is indeed in the "off" position before starting, and then confirm that it was fully in the "on" position before you switched it off. Sometimes, these switches can be a bit finicky.
- Check the breaker: Go to your electrical panel and verify that the breaker for the AC unit hasn't tripped. If it has, reset it. If the breaker trips again immediately, do not keep resetting it. This indicates a more serious electrical problem that requires professional attention.
- Inspect the wiring (visual check only): Give a quick visual inspection to the wires leading to the disconnect switch and the AC unit. Look for any obvious signs of damage, such as frayed wires, burn marks, or loose connections. Do not attempt to repair any damaged wiring yourself if you are not a qualified electrician.
Step 2: Examine the Fan Blades
A physical obstruction can prevent the fan from turning.
- Look for obstructions: Carefully inspect the fan blades for any debris that might be blocking them. This could include leaves, twigs, small animals, or even overgrown vegetation. Use a gloved hand or a tool to remove any obstructions.
- Check for bent blades: Bent fan blades can also prevent the fan from spinning freely. If you notice any bent blades, try to gently straighten them. However, be careful not to break them, as they can be brittle. If the blades are severely bent, it's best to replace them.
Step 3: Inspect the Capacitor
The capacitor is a cylindrical component that helps start and run the fan motor. A faulty capacitor is a common cause of fan motor failure.
Warning: Capacitors store electricity and can deliver a dangerous shock even after the power is turned off. Discharge the capacitor before handling it. This is best left to a professional.
For visual inspection only (power OFF and preferably discharged by a professional):
- Locate the capacitor: The capacitor is usually located inside the control panel of the outdoor unit. You may need to remove a panel to access it.
- Check for bulging or leaking: Look for any signs of damage to the capacitor, such as bulging, leaking, or corrosion. If you see any of these signs, the capacitor is likely faulty and needs to be replaced.
- Listen for a buzzing sound: A failing capacitor can sometimes emit a buzzing sound.
Replacing a capacitor involves working with electricity and requires specialized tools and knowledge. If you are not comfortable working with electricity, it's best to call a qualified HVAC technician.
Step 4: Test the Fan Motor (If you are experienced and comfortable with electrical testing)
Warning: This step involves using a multimeter and working with electricity. If you are not comfortable with this, skip this step and call a professional.
- Check for continuity: Using a multimeter, you can test the fan motor windings for continuity. If there is no continuity, the motor is likely burnt out and needs to be replaced.
- Test the voltage: With the power ON (carefully and respecting safety protocols), you can also test the voltage going to the fan motor. If there is no voltage, the problem may be with the control board or another component in the system.
Replacing a fan motor requires specific tools and knowledge. It's often best to leave this repair to a professional.
Step 5: Check the Contactor
The contactor is an electrical switch that controls power to the fan motor and compressor. It's signaled to close by the thermostat when cooling is needed.
- Locate the Contactor: This is usually found inside the control panel of the outdoor unit, near the capacitor and other electrical components.
- Visual Inspection (power OFF): With the power off, examine the contactor for any signs of burning, pitting, or corrosion on the contacts.
- Testing (power OFF, advanced): A multimeter can be used to test the continuity across the contactor's terminals when it's supposed to be closed (simulating a call for cooling). Lack of continuity indicates a problem.
Contactor replacement involves electrical work. If you're not confident, call a professional.
Step 6: Reset the System (After Addressing the Issue)
After you've addressed the potential issue, it's time to reset the system.
- Turn the power back on: Flip the disconnect switch back to the "on" position or reset the breaker in your electrical panel.
- Monitor the fan: Observe the fan to see if it starts spinning. It may take a few moments for the system to cycle on.
- Test the cooling: Go inside and check if the air coming from your vents is cold.
When to Call a Professional
While many of these troubleshooting steps are relatively simple, some issues require the expertise of a qualified HVAC technician. Do not attempt repairs that you are not comfortable with. Call a professional if:
- You are not comfortable working with electricity.
- The breaker trips repeatedly.
- You suspect a refrigerant leak.
- The capacitor is damaged.
- The fan motor needs to be replaced.
- You are unsure about any of the troubleshooting steps.
- The problem persists after trying the above steps.
Preventative Maintenance
The best way to avoid AC problems is to perform regular preventative maintenance.
- Clean the outdoor unit: Regularly clean the outdoor unit by removing any debris from around the unit and rinsing the coils with a garden hose.
- Change the air filter: Replace your air filter regularly (every 1-3 months) to ensure proper airflow.
- Schedule annual maintenance: Have your AC system professionally inspected and serviced at least once a year.
Tools You Might Need
Depending on the troubleshooting steps you attempt, you may need the following tools:
- Screwdrivers (Phillips and flathead)
- Gloves
- Wrench set
- Multimeter (for advanced testing)
- Voltage tester
- Shop vacuum or brush
Understanding Repair Costs
Being aware of potential repair costs can help you budget and decide whether DIY or a professional is the best course. These are rough estimates:
- Capacitor Replacement: $100-$300 (professional)
- Fan Motor Replacement: $200-$600 (professional)
- Contactor Replacement: $150-$400 (professional)
- Complete System Tune-Up: $100-$250 (professional)
Final Thoughts
A non-functioning AC outdoor fan can be a frustrating issue, but by following these troubleshooting steps, you may be able to identify and resolve the problem yourself. Remember to prioritize safety and call a professional when needed. With a little knowledge and effort, you can keep your AC system running smoothly and stay cool all summer long.


