Why Is The Filter Drier Important

Imagine this: You're enjoying a hot summer day, relying on your air conditioner to keep your home cool and comfortable. Suddenly, the cool air stops. The AC unit is running, but it's blowing warm air, or perhaps not blowing air at all. You're left sweating and frustrated. While many factors can cause this, a often-overlooked component, the filter drier, might be the culprit.
The Unsung Hero: Understanding the Filter Drier
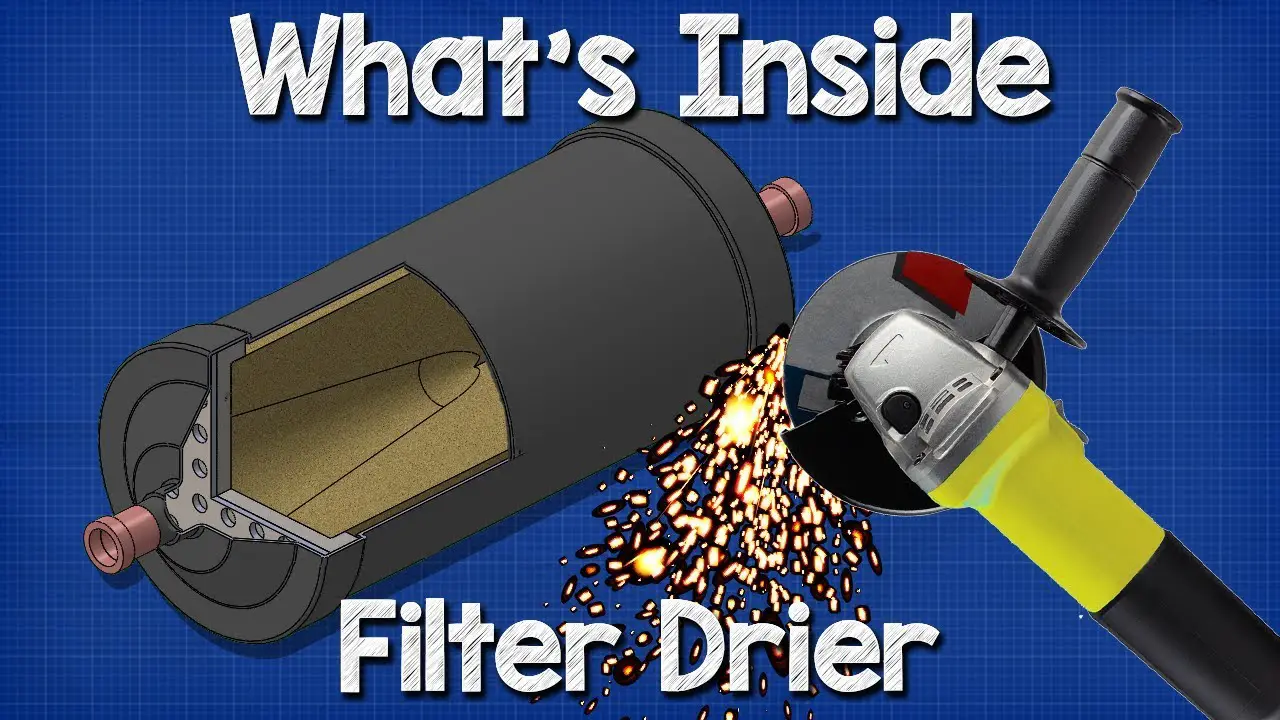
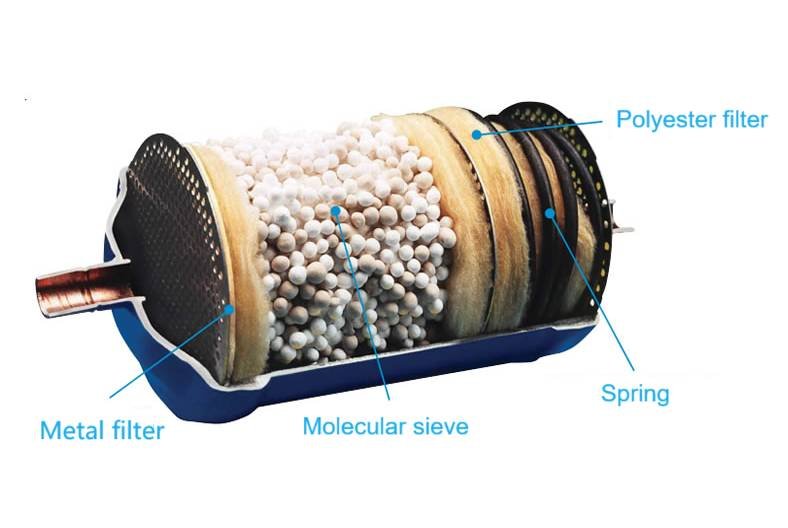
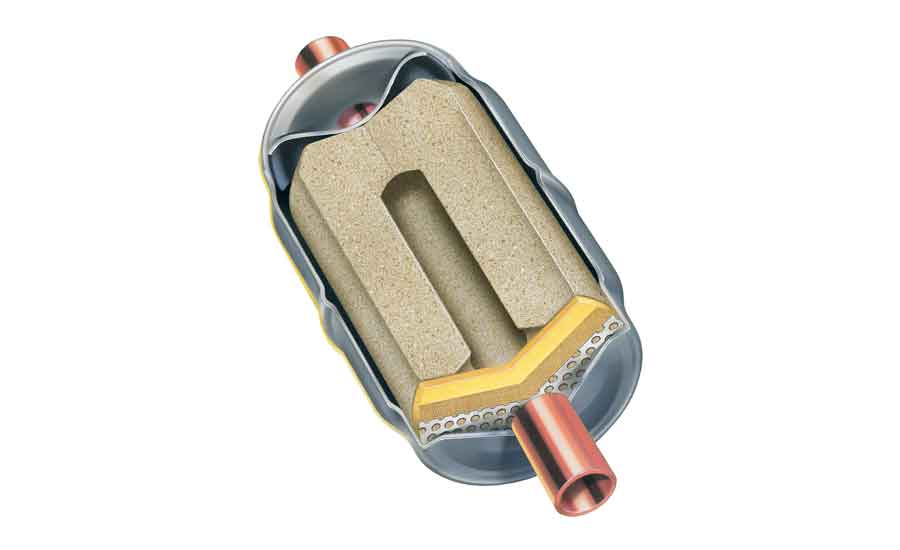
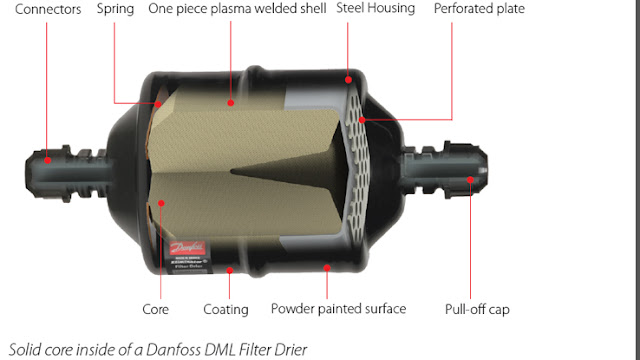
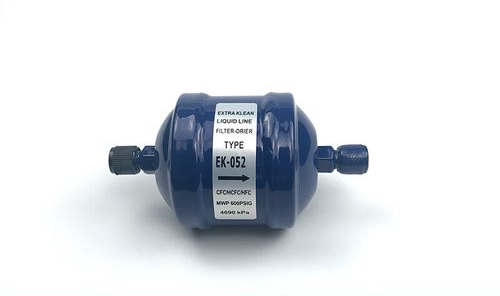
The filter drier is a small but crucial component in your air conditioning or refrigeration system. Think of it as the kidneys of your cooling system. Its primary functions are to remove moisture and contaminants from the refrigerant circulating within the system. Why is this so important? Let's break it down:
- Moisture Removal: Refrigerant and moisture don't play well together. Moisture can lead to the formation of acids and sludge within the system. These acids corrode internal components, while the sludge clogs narrow passages, hindering refrigerant flow.
- Contaminant Filtration: During the manufacturing, installation, or operation of a cooling system, various contaminants like metal shavings, scale, and debris can enter the refrigerant lines. The filter drier traps these particles, preventing them from damaging the compressor and other sensitive parts.
- Acid Removal: Some filter driers are designed with an acid-absorbing desiccant, providing an extra layer of protection against corrosion and system failure.
A malfunctioning or clogged filter drier can severely impact the performance and longevity of your AC system. It can lead to reduced cooling efficiency, increased energy consumption, compressor damage, and ultimately, system failure. Therefore, understanding its importance and knowing how to identify potential issues is key to maintaining a healthy and efficient cooling system.
Troubleshooting Your AC: A Step-by-Step Guide
Before diving into troubleshooting, always prioritize safety. Turn off the power to your AC unit at the circuit breaker before performing any inspections or repairs. If you're uncomfortable working with electrical components, or if you suspect a refrigerant leak, call a qualified HVAC technician.
Step 1: Initial Assessment – Is the AC Receiving Power?
This might seem obvious, but it's the first place to start. Simple things are often overlooked!
- Check the Circuit Breaker: Locate the circuit breaker for your AC unit in your electrical panel. Make sure it hasn't tripped. If it has, reset it. If it trips again immediately, there's likely a more serious electrical problem that requires professional attention. Do not repeatedly reset a tripping breaker.
- Check the Power Switch: Some AC units have a dedicated power switch located near the outdoor unit. Ensure it's in the "on" position.
- Inspect the Wiring: Visually inspect the wiring connected to the AC unit for any signs of damage, such as frayed wires, loose connections, or burnt insulation. If you see any damage, do not attempt to repair it yourself. Call a qualified electrician or HVAC technician.
Step 2: Thermostat Check-Up
A simple setting error can mimic a major problem.
- Verify the Settings: Make sure your thermostat is set to "cool" mode and that the temperature is set lower than the current room temperature.
- Check the Batteries: If your thermostat is battery-powered, replace the batteries to ensure it's functioning correctly.
- Test the Fan Setting: Set the fan to "on" instead of "auto." If the fan runs continuously, but the compressor doesn't engage, it could indicate a problem with the compressor or other components.
Step 3: Inspect the Air Filter
A clogged air filter is a very common cause of AC problems and can indirectly affect the filter drier's performance by overworking the system.
- Locate the Air Filter: The air filter is typically located in the return air vent or inside the indoor air handler unit.
- Check for Dirt and Debris: Remove the air filter and inspect it for dirt, dust, and debris. A dirty air filter restricts airflow, forcing the AC unit to work harder and potentially causing it to overheat.
- Clean or Replace the Filter: If the air filter is disposable, replace it with a new one of the same size and type. If it's a reusable filter, clean it thoroughly with water and mild detergent, allow it to dry completely, and then reinstall it.
- Regular Maintenance: Replace or clean your air filter every one to three months, or more frequently if you have pets or allergies.
Step 4: Investigating the Filter Drier
Now, let's focus on the filter drier. Remember, this is where things can get tricky. Do not attempt any repairs involving refrigerant lines unless you are a qualified HVAC technician. Refrigerant is a hazardous substance, and improper handling can be dangerous and illegal.
- Location: The filter drier is typically located in the liquid line, which is the smaller of the two copper lines connecting the outdoor condenser unit to the indoor evaporator unit. It's usually a cylindrical component.
- Visual Inspection: Look for any signs of damage to the filter drier, such as dents, corrosion, or leaks. If you see any signs of damage, do not attempt to repair it. Call a qualified HVAC technician.
- Temperature Difference Test (Advanced - Proceed with Caution): With the AC running, carefully feel the filter drier. Use an infrared thermometer if you have one. The temperature on the inlet side (where the refrigerant enters) should be noticeably warmer than the outlet side (where the refrigerant exits). A significant temperature difference indicates a potential blockage within the filter drier. If you're uncomfortable with this test, or if you detect a large temperature difference, contact a professional. Also, be extremely careful not to touch any moving parts of the AC unit.
- Frost or Ice: If you see frost or ice forming on the filter drier, it could indicate a restriction or a moisture issue within the system. This is another sign that you should contact a professional.
Important Note: Replacing a filter drier requires specialized tools and knowledge, including refrigerant recovery equipment, a vacuum pump, and brazing equipment. It also involves handling refrigerant, which is regulated by law. This task is best left to a qualified HVAC technician.
Step 5: Condenser Coil Inspection
The condenser coil, located in the outdoor unit, releases heat from the refrigerant. If it's blocked by dirt and debris, the AC unit won't cool effectively, putting extra strain on all components, including the filter drier.
- Turn Off the Power: Always turn off the power to the AC unit at the circuit breaker before cleaning the condenser coil.
- Remove Debris: Use a soft brush or a fin comb to remove any loose dirt, leaves, or debris from the condenser fins. Be careful not to bend or damage the fins.
- Clean with a Hose: Gently spray the condenser coil with a garden hose, starting from the inside and working your way out. Avoid using high-pressure sprayers, as they can damage the fins.
- Straighten Bent Fins: If you notice any bent fins, use a fin comb to gently straighten them. This will improve airflow through the coil.
Step 6: Evaporator Coil Inspection (Requires Caution)
The evaporator coil, located in the indoor air handler unit, absorbs heat from the air. A dirty evaporator coil can also reduce cooling efficiency. Accessing and cleaning the evaporator coil can be more challenging and may require removing panels from the air handler. If you're uncomfortable with this task, or if you're unsure how to access the evaporator coil, contact a professional.
- Turn Off the Power: Always turn off the power to the air handler before inspecting or cleaning the evaporator coil.
- Access the Coil: Remove the access panel to the evaporator coil. This may require unscrewing several screws. Be careful not to damage any wiring or other components.
- Visual Inspection: Inspect the evaporator coil for dirt, dust, and mold.
- Cleaning (Requires Special Products): Use a specialized coil cleaner designed for evaporator coils. Do not use household cleaners, as they can damage the coil. Follow the manufacturer's instructions carefully. In some cases, it's best to hire a professional to clean the evaporator coil, especially if it's heavily soiled or moldy.
When to Call a Professional
While some AC troubleshooting steps are within the capabilities of a handy homeowner, certain repairs require the expertise of a qualified HVAC technician. You should call a professional if:
- You suspect a refrigerant leak.
- You need to replace the filter drier.
- The compressor is not running.
- The AC unit is making strange noises.
- You're uncomfortable working with electrical components or refrigerant lines.
- You've tried the basic troubleshooting steps and the AC unit is still not working.
- You observe ice formation on the indoor evaporator coil.
- You find signs of oil around fittings or connections. This usually indicates a refrigerant leak.
Attempting to repair complex AC problems without the proper training and equipment can be dangerous and can potentially damage the system further. A qualified HVAC technician has the knowledge, tools, and experience to diagnose and repair AC problems safely and effectively.
Preventative Maintenance: Keeping Your AC Running Smoothly
The best way to avoid AC problems is to perform regular preventative maintenance. Here are some tips:
- Replace or clean your air filter regularly (every 1-3 months).
- Clean the condenser coil annually.
- Schedule a professional AC tune-up annually. A tune-up typically includes inspecting and cleaning the coils, checking refrigerant levels, inspecting electrical connections, and lubricating moving parts.
- Keep the area around the outdoor unit clear of vegetation and debris.
- Consider installing a surge protector to protect your AC unit from power surges.
By taking these simple steps, you can extend the life of your AC unit, improve its efficiency, and reduce the risk of costly repairs.
While the filter drier may be a small component, it plays a vital role in the overall health and performance of your air conditioning system. Understanding its function and knowing when to seek professional help can save you time, money, and frustration in the long run. Remember, safety first – when in doubt, call a pro!