Williams Direct Vent Wall Furnace Installation Instructions

Williams Direct Vent Wall Furnaces offer a reliable and efficient heating solution for homes and commercial spaces. Known for their compact design and ability to vent directly through an exterior wall, these furnaces are a popular choice for supplemental heating, room additions, and areas where traditional ductwork is impractical. This guide provides a comprehensive overview of the installation process, covering essential steps for homeowners, HVAC technicians, and facility managers alike.
Understanding Williams Direct Vent Wall Furnaces
Before diving into the installation, it's crucial to understand the key features and benefits of Williams Direct Vent Wall Furnaces. Unlike conventional furnaces that rely on chimneys or flues for exhaust, direct vent models utilize a sealed combustion system. This means they draw combustion air from outside and expel exhaust gases directly outdoors through a concentric vent pipe. This design offers several advantages:
- Improved Safety: Sealed combustion minimizes the risk of carbon monoxide poisoning, as there's no backdrafting of exhaust gases into the living space.
- Increased Efficiency: By drawing combustion air from outside, direct vent furnaces avoid using heated indoor air, leading to higher energy efficiency. Many models boast AFUE (Annual Fuel Utilization Efficiency) ratings of 80% or higher.
- Flexible Installation: The direct vent design allows for installation on exterior walls, eliminating the need for chimneys or extensive ductwork. This makes them ideal for retrofitting existing structures or adding heat to specific rooms.
- Space Saving: Their compact design makes them suitable for smaller spaces where a traditional furnace would be too large.
Pre-Installation Checklist
Proper planning is essential for a successful installation. Before you begin, ensure you have the following:
- Correct Furnace Model: Verify that the furnace model is appropriately sized for the space you intend to heat. Use a heat loss calculation (often performed by an HVAC professional) to determine the required BTU (British Thermal Unit) output.
- Vent Kit: Ensure you have the correct direct vent kit that is compatible with your furnace model. These kits typically include the concentric vent pipe, wall thimble, and termination cap. Using non-approved vent kits can be dangerous and will void the warranty.
- Gas Supply: Confirm that you have an adequate gas supply (natural gas or propane) at the installation location. Check the gas pressure to ensure it meets the furnace's requirements. A licensed gas fitter must handle all gas line connections.
- Electrical Supply: Most Williams Direct Vent Wall Furnaces require a 120V electrical supply for the control system and fan. Ensure you have a properly grounded outlet nearby.
- Permits and Codes: Check local building codes and regulations regarding furnace installations. Obtain any necessary permits before proceeding. Ignoring local codes can result in fines and require costly rework.
- Tools and Materials: Gather all necessary tools, including a drill, level, pipe wrench, screwdriver set, measuring tape, safety glasses, and gloves.
- Manufacturer's Installation Manual: This is the most important resource. Read it thoroughly before beginning any work. The manual provides specific instructions and safety precautions for your particular furnace model.
Step-by-Step Installation Guide
Disclaimer: This guide provides general information only. Always refer to the manufacturer's installation manual for specific instructions and safety precautions. Improper installation can be dangerous and may void the warranty. It is strongly recommended that a qualified HVAC technician perform the installation.
1. Choosing the Installation Location
Select an exterior wall location that meets the following criteria:
- Provides adequate clearance from combustible materials. Refer to the manufacturer's specifications for minimum clearances.
- Allows for proper venting. Ensure the vent termination cap will be at least 12 inches above the ground or snow line and away from any obstructions, such as overhangs or shrubs.
- Is accessible for maintenance and service.
- Complies with all local building codes.
2. Preparing the Wall Opening
Using the dimensions provided in the installation manual, carefully cut a hole through the exterior wall for the vent pipe. Ensure the hole is properly sized to accommodate the wall thimble, which provides a fire-resistant barrier between the vent pipe and the combustible wall materials. The wall thimble is essential for safe operation.
3. Installing the Vent System
Insert the vent pipe through the wall thimble and connect it to the furnace's vent connection. Securely fasten all connections using screws or clamps, as specified by the manufacturer. On the exterior side, attach the termination cap to the vent pipe. Ensure the cap is properly sealed to prevent water and debris from entering the vent system.
4. Mounting the Furnace
Attach the furnace to the wall using the mounting brackets and hardware provided. Ensure the furnace is level and securely fastened. Use shims if necessary to achieve a level installation. A properly mounted furnace operates more efficiently and reduces the risk of vibration and noise.
5. Connecting the Gas Supply
This step should only be performed by a licensed gas fitter. Connect the gas supply line to the furnace's gas valve, using the appropriate fittings and sealant. Check for gas leaks using a soap and water solution. Never use an open flame to test for gas leaks.
6. Wiring the Electrical Supply
Connect the electrical supply to the furnace's control panel, following the wiring diagram provided in the installation manual. Ensure the furnace is properly grounded. Never work with electrical wiring unless you are qualified to do so.
7. Testing and Start-Up
Once all connections are complete, carefully follow the start-up procedure outlined in the installation manual. Check for proper operation of the furnace, including the ignition sequence, burner flame, and fan operation. Verify that the exhaust gases are venting properly to the outside.
Maintenance and Troubleshooting
Regular maintenance is essential for ensuring the long-term performance and safety of your Williams Direct Vent Wall Furnace. Some common maintenance tasks include:
- Annual Inspection: Have a qualified HVAC technician inspect the furnace annually, checking for any signs of wear or damage.
- Vent System Cleaning: Inspect and clean the vent system regularly to remove any debris or obstructions.
- Burner Cleaning: Clean the burner annually to ensure proper combustion.
- Filter Replacement: Replace the air filter regularly (if applicable) to maintain proper airflow.
If you encounter any problems with your furnace, consult the troubleshooting section of the installation manual. Common issues include:
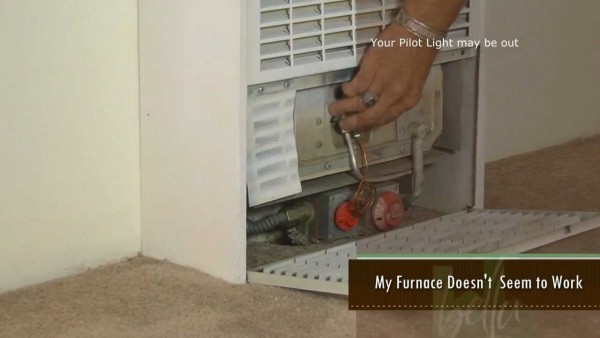
- Furnace Not Igniting: Check the gas supply, ignition system, and flame sensor.
- Furnace Cycling On and Off: Check the thermostat settings, air filter, and venting system.
- Unusual Noises: Inspect the fan, burner, and venting system for any loose or damaged parts.
Cost, Efficiency, and Lifespan
The cost of a Williams Direct Vent Wall Furnace can vary depending on the size, features, and installation complexity. Expect to pay between $500 and $1500 for the furnace itself, plus installation costs. The AFUE rating, typically between 80% and 90%, indicates the furnace's energy efficiency. Higher AFUE ratings translate to lower energy bills. With proper maintenance, a Williams Direct Vent Wall Furnace can last 15-20 years.
Conclusion
Williams Direct Vent Wall Furnaces offer a versatile and efficient heating solution for a variety of applications. By following these installation instructions and performing regular maintenance, you can ensure the safe and reliable operation of your furnace for years to come. Remember to always consult the manufacturer's installation manual and engage a qualified HVAC technician for any complex or potentially hazardous tasks. Whether you're a homeowner looking for supplemental heat, an HVAC technician performing an installation, or a facility manager maintaining a large building, understanding the nuances of direct vent wall furnace installation is crucial for a successful and long-lasting heating solution.